Regular readers of aussieskier.com will know that over the last couple of years I’ve been doing more and more skiing in the backcountry. Rather than offering this from an expert’s perspective, which it most certainly isn’t, I’m writing a series of posts which are an account of my own personal transition to skiing in the BC. The aim of this series is to give never-evers an insight into the basics if they are considering a transition of their own.
Part 1 of this post focused on the motivation behind becoming a backcountry skier, this part will focus on the safety aspects of skiing beyond the ropes as this is the least exciting therefore the most neglected aspect of a budding backcountry skier’s education. Part 3 goes onto to look at equipment that can aide your adventures out into the deep.
Safety
I apologise in advance for the preachy tone of this article, but it never ceases to amaze me just how clueless Australians are when it comes to this topic, and just how aggro they become when confronted with it. Don’t believe me? Head to the Peak at Niseko.
My intention in this segment on Safety is not to educate on the specifics of avalanche safety, as I am vastly unqualified to do this, but to emphasise that no matter how experienced a resort skier may be, they need to swallow their ego, remove their hubris and educate & equip themselves appropriately to ski out of bounds.
Alpine/resort skiers, particularly those who ski regularly in North America & Japan are coddled and clueless when it comes to safety.
How do I know this? Because it accurately describes me a few years ago.
On my trip to Europe in 2009/10, other skiers in our guided group did not believe that it was possible to become an accomplished off-piste skier with such little knowledge of snow safety. Given I had worked in the US for 9 full winters and also holidayed there for another couple of months of skiing, I could ski just about anything places like Jackson Hole and Snowbird could throw at me. I skied hundreds of days of powder, but due to the fact that it was all inside the ropes I was under the protection of the various Ski Patrols and skiing in areas that they had assessed, bombed and deemed safe for skiing by skiers with no need for avalanche knowledge or safety equipment.

However once you pass outside the ropes, or venture off the pistes in Europe, you are 100% on your own and responsible for your own safety.
If there is no ski patrol or avalanche control, avalanches can occur on any slope over 30degrees of steepness – unfortunately for skiers 30degrees is equivalent to a mild black run, and the angles we like to ski on most are the ones where avalanches are most frequent.
Avalanche deaths have occurred just beyond the ropes and in sight of lifts – one such example is in 2005 when I was skiing with a friend at The Canyons Resort in Utah – at the top of the 9990 lift is a BC gate and an inviting open bowl with fresh powder. My friend suggested that we ski there, despite us having no avalanche equipment and the danger being particularly high. I disagreed, and the next day there was an enormous avalanche in that area that killed a snowboarder. The most tragic element of this story is that this person did own the right gear – it was in his car.
Avalanche Education:
Beginning an education in avalanche safety is a two pronged approach: First, acquiring the knowledge required to understand why and how and where avalanches occur, and how to move in the mountains in a safe manner. Second is acquiring the basic safety equipment and being trained in its use.
The starting point for an education can be as simple as attending a free (or very cheap) avalanche awareness seminar – these are often held in resort bars and ski shops – I have been to such seminars in Salt Lake City, Val d’Isere and Chamonix. In addition there are some great written resources on the topic such as Bruce Tremper’s book ‘Staying Alive in Avalanche Terrain‘. And if you decide to formalise your education you can attend a course such as the 2 day Canadian AST Level 1 I participated in at Mt Hotham in August last year.

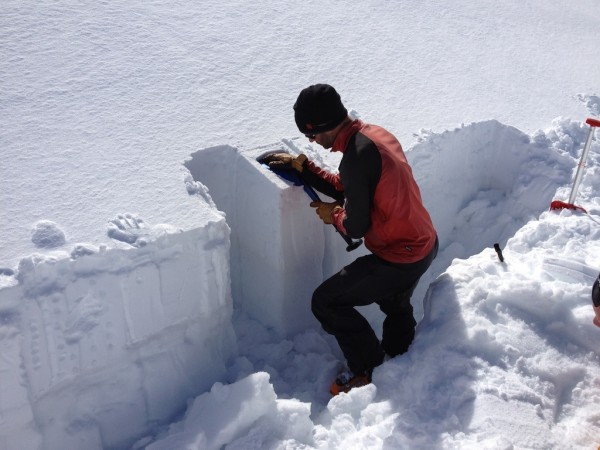
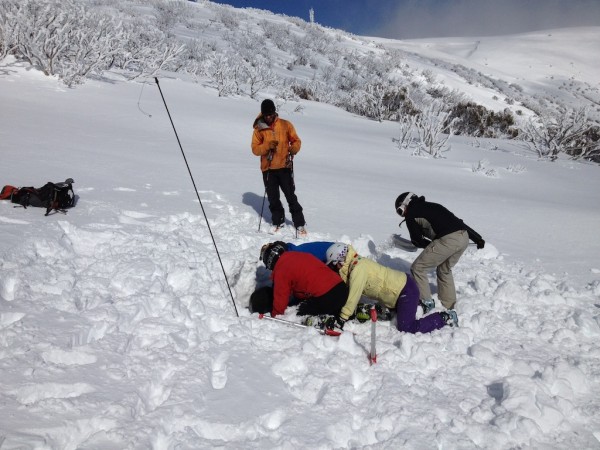
A formalised curriculum will give you the basics you need in order to understand the formation of avalanches, the terrain and weather cues that tend to trigger them, how to evaluate the conditions, how to read and understand an avalanche report, and more recently how ‘human factors’ and group dynamics can lead to otherwise educated people into making bad decisions. They also tend to include a day in the field practicing rescues and moving around in uncontrolled terrain.
If you aren’t confident with your safety skills and still wish to ski/ride off piste then your best option is to engage the services of a professional, qualified guide.
Equipment:
The fundamental safety equipment required is a Beacon, Shovel and Probe. All of these are available on the aussieskier.com Gear Store
Beacon – An avalanche beacon (or transceiver) is a device that you wear around your upper body, inside your clothes strapped on your base/thermal layer but on under all other layers. When in ‘transmit’ mode it continuously sends out a signal on the 457Khz band, which is able to be detected by other beacons in case you are trapped in an avalanche. Put your beacon on, and turn it on when you are getting dressed at home, and don’t take it off or turn it off until you are at the safety of the carpark or bar. AAA batteries are cheap, don’t turn it off at lunch to save power, accidents have happened this way.
The best beacons are by far ‘Digital, 3 Antenna beacons’ such as the Pieps DSP Sport , BCA Tracker 2 or Tracker 3, Mammut Barryvox, Barryvox S and Ortovox S1. 2 Antenna or Analog beacons are still adequate but the raw speed in which a novice user can search with a 3 Antenna beacon is excellent.
Shovel – Shovel characteristics are important, and become quite apparent when participating in a simulated (or actual) rescue. Simply put, when you’re trying to dig out someone from under a couple of metres of snow you need a tool, not a toy. Don’t bother with plastic blades, these are for building jumps not digging out your mate. The pressure and friction of an avalanche compresses snow into concrete and a metal bladed shovel is necessary to chop this compacted material into blocks and remove it. Shovels with D-grip handles are also more efficient, and you should also look at the ease of assembly especially while under pressure when the clock is ticking. Shovel size is important – too small and you will never get through the volume of snow required, but too large means heavier loads which leads to inefficient technique – this is a personal preference based on your strength etc. We have two shovels available for sale, the G3 AviTECH is more suitable for a larger male with its generous blade and D-Grip, and the G3 SpadeTECH which is a more compact model suitable for females/teens
Probe – an avalanche probe looks like a collapsible tent-pole and is used to pinpoint a buried person in the snowpack after a transceiver search – this reduces the time and effort required to dig out. A good probe is at least 240cm long up to 320cm, typically made of aluminium or carbon, and in ideal cases has a fast internal draw wire and lock to assemble the pole in a rush. While unassembled probes can lead to Mr Bean-esque fumbling, given that skiing is often on a slope the best way to counter this is to toss the sections to your downhill side, pull on the wire and lock in to place. It’s also important to keep your probe in its protective case inside your pack when it’s not in use as any little dings on the end of the sections can prevent its assembly, rendering it useless. We stock the G3 SpeedTECH 320cm Probe and the Black Diamond Quickdraw Probe in two sizes, 240cm and 280cm.
Rather than fishing around different combinations of Beacon, Shovel and Probe, many companies offer a combination package. This gives you all three essentials often at a discounted price. The Pieps DPS Sport Set is an example we carry.
However – these three items are completely useless unless you are trained in their usage and practice regularly. Formal training is available from Avalanche Course providers and is included in courses such as the AST Level 1.

Avalanche Airbags: While the Beacon/Shovel/Probe trinity are the absolute fundamental pieces of equipment, airbag packs are fast becoming a device recognised to mitigate avalanche burials. There are a number of models on the market from different manufacturers but they all have the same fundamentals of a trigger, a canister of compressed gas and an inflatable bag that expands to lower your overall density to either bring you to the top of an avalanche, or nearer the top allowing for easier rescue.
There is still some controversy about airbags as there is a feeling that they will lead to more risky behaviour but this seems to be countered by the positive statistics of successful rescues when a skier has triggered their airbag. I have been skiing with an ABS Vario 15 pack since 2010 and have stocked them since we opened our shop in December 2012. The gas bottle operation of this kind of pack, however, is limited by mobility between continents.
Products such as the Black Diamond Halo 28 Jetforce Backpack utilise a battery operated fan to inflate the bag. This new technology improves the ability for these bags to be transported across borders without the need for additional gas bottles.


