

Regular readers of aussieskier.com will know that over the last couple of years I’ve been doing more and more skiing in the backcountry. Rather than offering this from an expert’s perspective, which it most certainly isn’t, I’m writing a series of posts which are an account of my own personal transition to skiing in the BC. The aim of this series is to give never-evers an insight into the basics if they are considering a transition of their own.
Part 1 of this post focused on the motivation behind becoming a backcountry skier, Part 2 of this focused on Safety, and this section will focus on Equipment. I have already covered the Safety Equipment required in Avalanche zones so we will just be talking about the hardware for getting around in the BC.
So – what equipment do you need to go backcountry skiing. Well the short answer is none! There’s absolutely nothing stopping you from slinging your skis over your shoulder and going for a walk to an untouched area. Plenty of top-notch skiing is accessed by a short bootpack from the top of a lift, however the further you intend to venture, the more this can be assisted by specialist equipment.
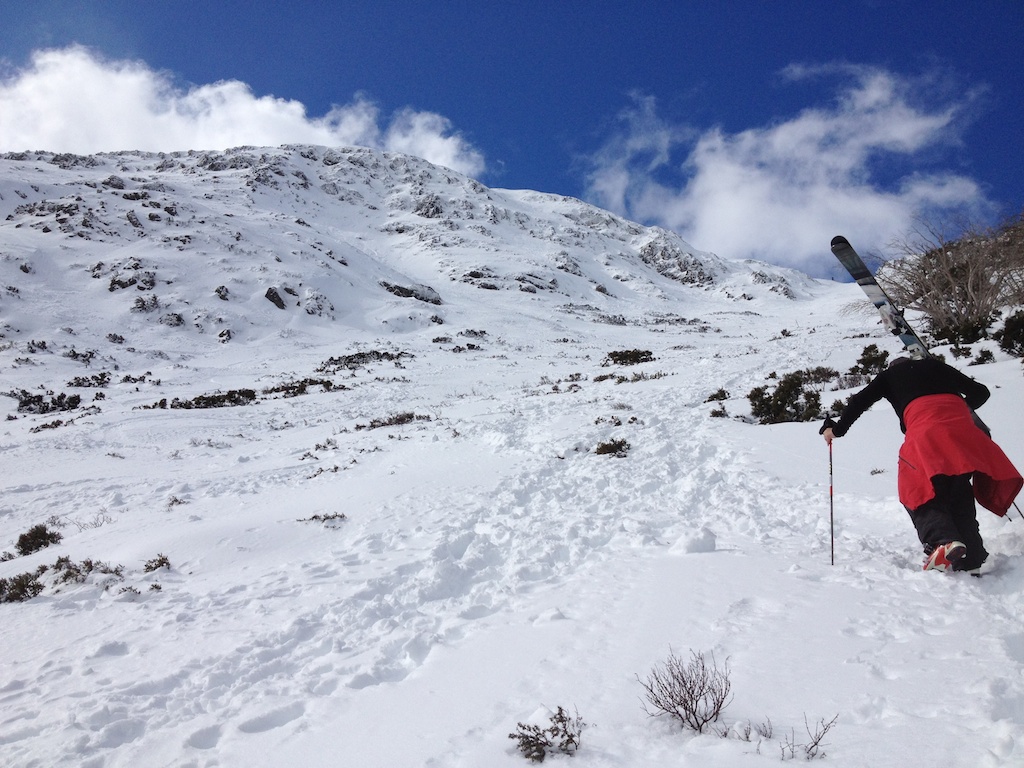
Backcountry skiing is a world awash with equipment – obsessed with shaving grams with exotic materials. But in this article we will focus on the bare minimum equipment required for a hitherto Alpine Skier to venture into some slackcountry/backcountry lines.
Fundamentally the two most important items are Touring Bindings and Skins. There are devices called Alpine Trekkers that even remove the need for touring bindings, but having been on a long tour with a group member using trekkers, I cannot recommend them in any way shape or form.
Touring bindings accept either an Alpine or Touring Boot, and have two modes – one where the heel is locked down for skiing, and one where the boot is allowed to pivot at the toe permitting a walking stride. Skins are a strip of material, with nylon or mohair on one side, and sticky glue on the other. The material has a plush direction which means that when the skins are stuck on the ski, the plush allows them to glide forward but prevents them from sliding backwards. The combination of these two pieces of equipment means that you can walk up the hills, and then ski back down. We will talk about Touring boots a little later on, and while they are a very useful piece of equipment, they aren’t 100% necessary for an Alpine skier dipping their toes into the touring world.

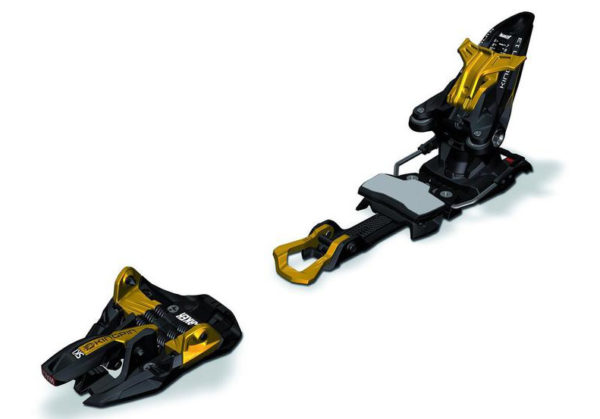
Touring Bindings
Touring Bindings have evolved from fairly flimsy arrangements that were quite unsuitable for vigorous downhill skiing, to modern day equipment which permits efficient uphill movement and uncompromised descents. Marker, with their introduction of the Duke/Baron range really blew this market wide open. While the weight of these bindings is generally considered too heavy for serious backcountry skiing, they have maximum DIN ratings of 16-13 respectively which cater for the most aggressive of skiers.
At the other end of the spectrum is Tech bindings, such as the G3 Ion – these are a super-minimal, lightweight touring binding designed to power skiers deep into the backcountry. Their secret is that they are suitable for some rather hardcore descents as well, which is belied by their mousetrap-like appearance. Most of the crazy ski touring/ski mountaineering exploits you see on the net are done on Tech bindings, but their design means that they are not much fun on firm snow due to the rigid ride created by their lack of elasticity provided by a conventional style bindings.
Marker have recently released a binding called the Kingpin that aims to address these shortcomings, combining a light weight traditional heel piece with a lightweight pin toe piece. Tech bindings require special inserts in the boot toe/heel – these are pretty commonplace amongst Touring boots but not generally available in Alpine boots.
So as with many aspects of backcountry equipment we are seeing a convergence of traditional Alpine companies heading towards BC gear, and traditional Backcountry companies beginning to cater for people that want to ski fast, on big skis, and hit jumps in the BC. However for somebody just starting out in the BC it would be better to opt for a binding such as the Baron or Marker Tour F10/F12, or the Salomon Guardian/Atomic Tracker. The reason I say this is that they have barely compromised ‘skiability’ and it also reduces the cost of entry as a ski mounted with these bindings can also be used in-resort whereas Tech options generally lend themselves to a touring specific rig.
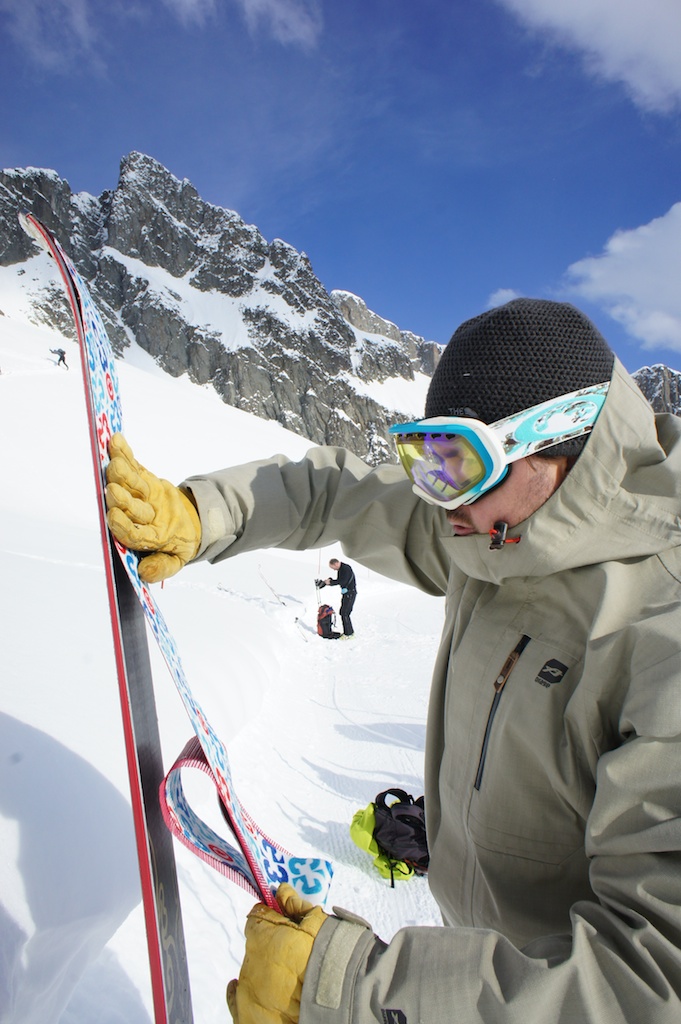
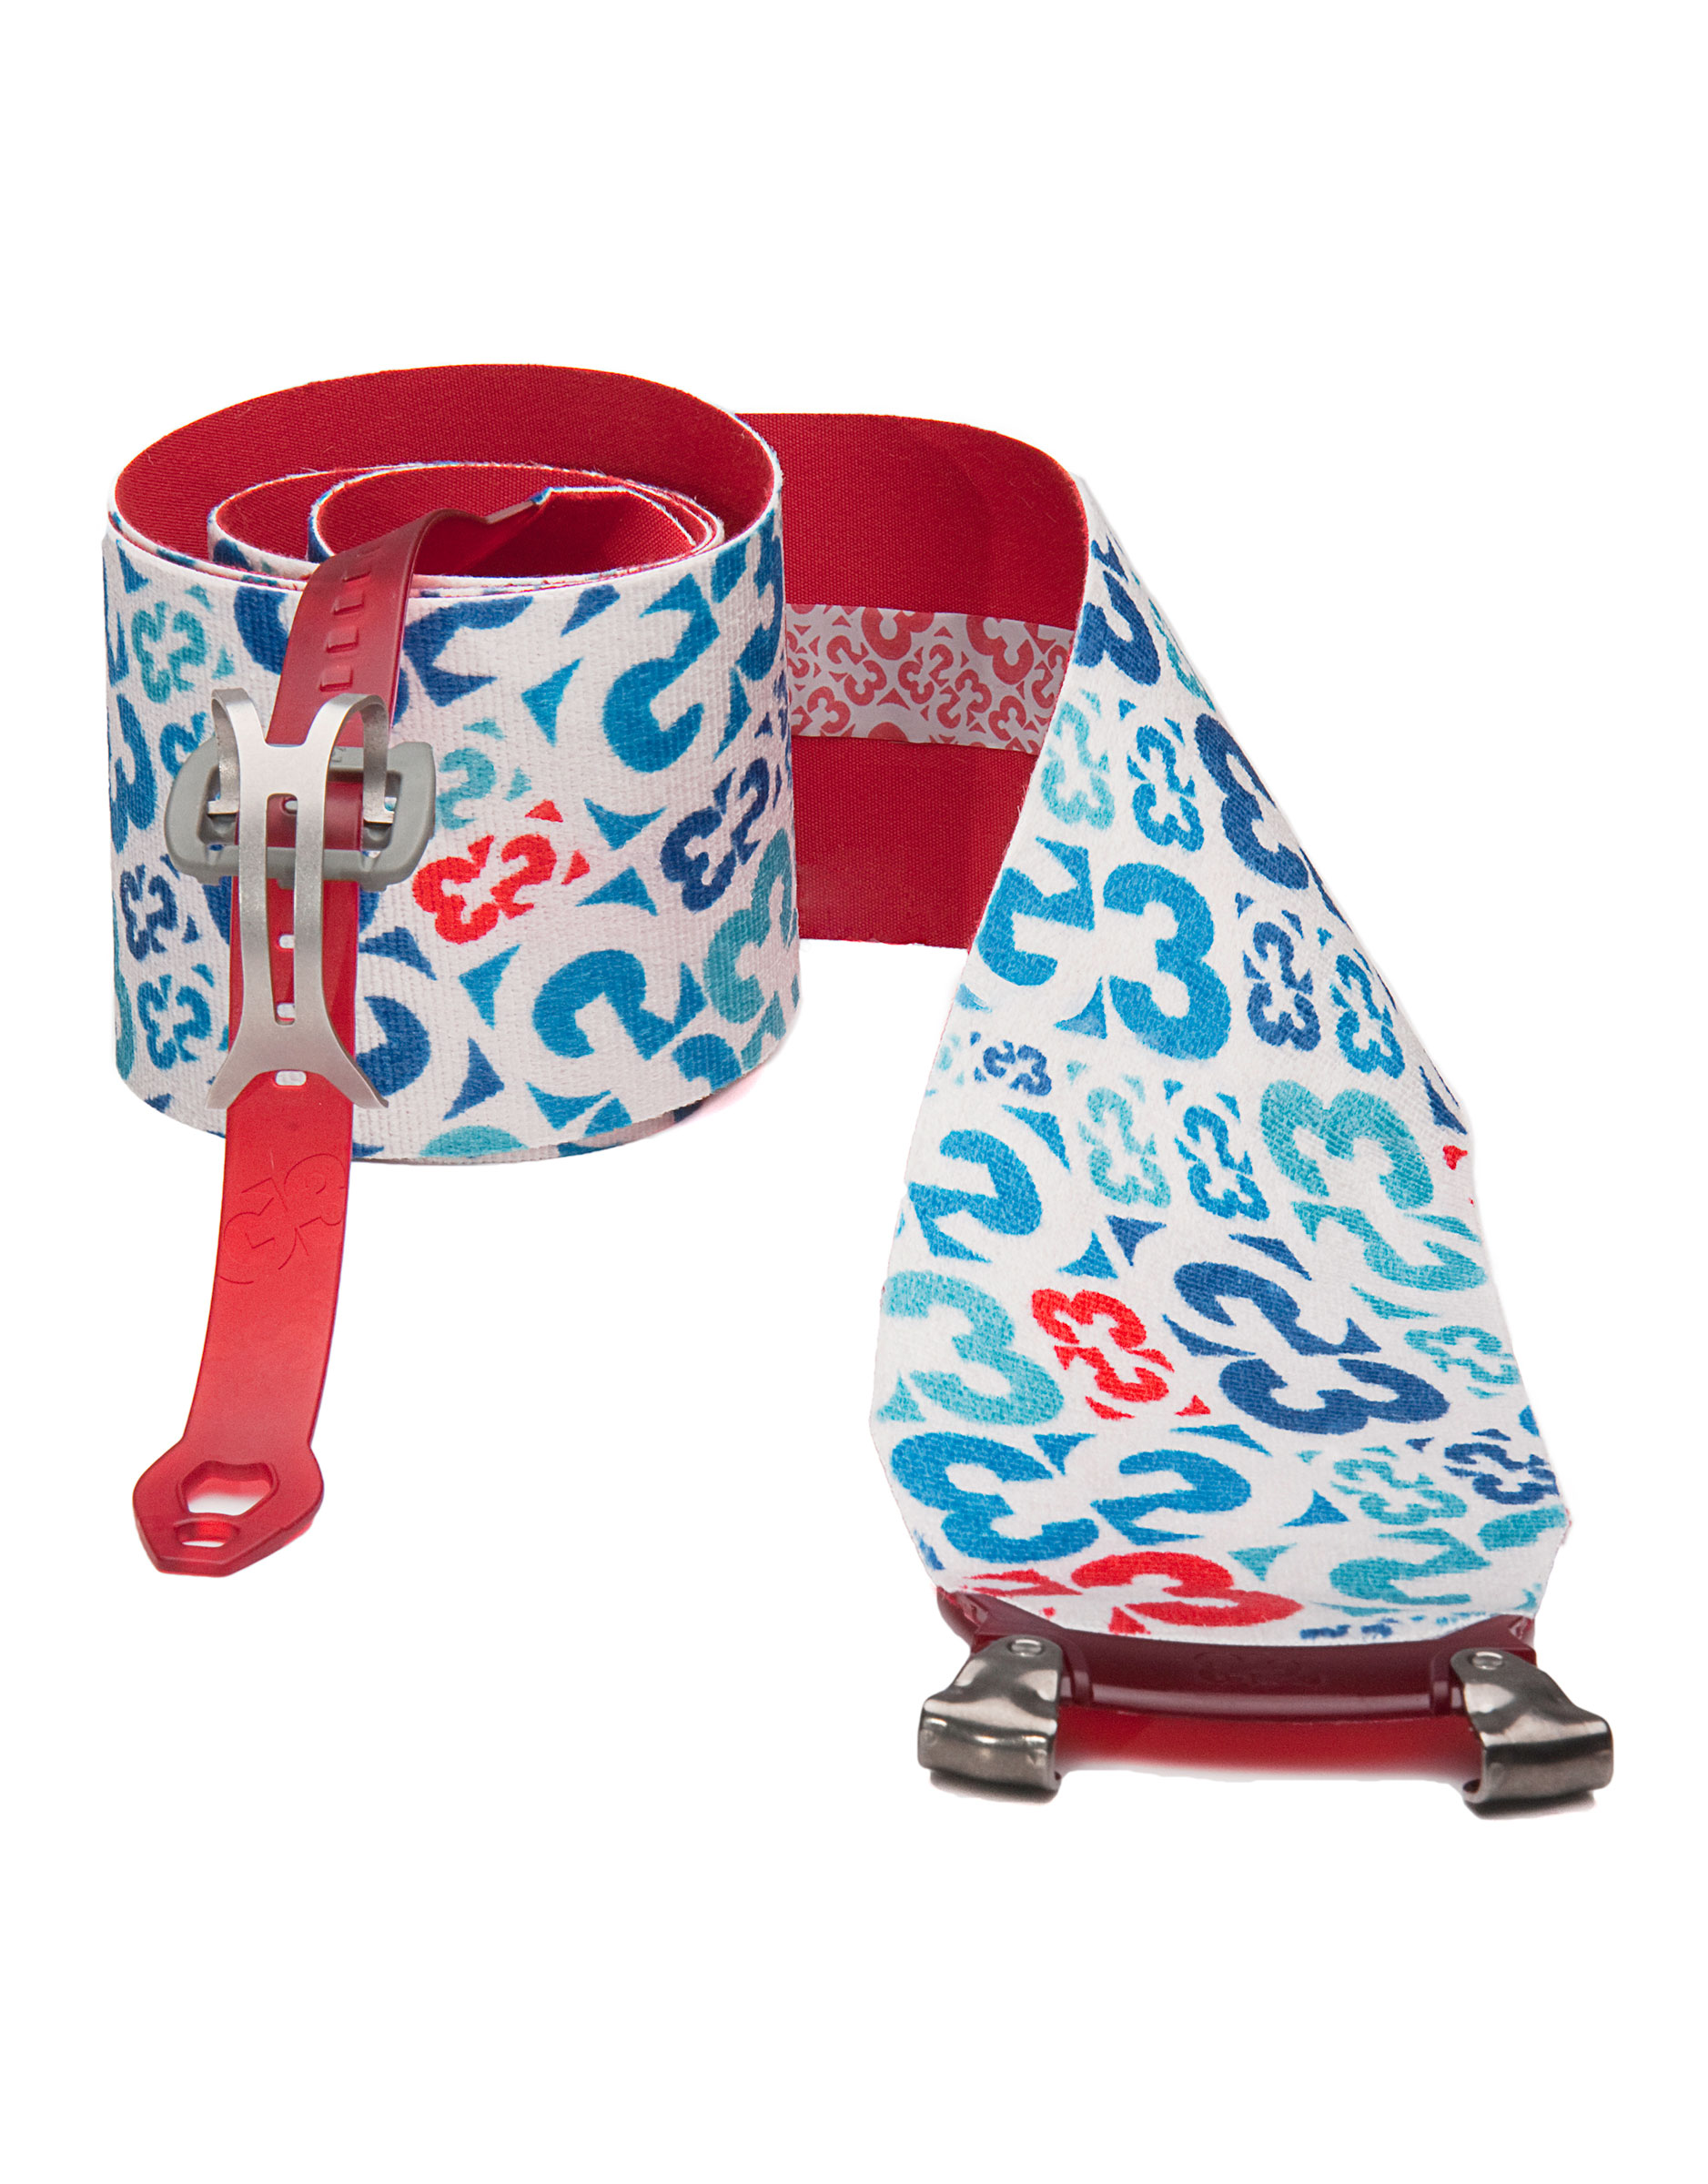
Skins
Skins are a pretty simple proposition – firstly find a skin that will cover most of the base of your ski – choose a skin width that matches or is slightly less than the width of your ski tip, and use the supplied cutting tool to trim them to shape. More experienced backcountry users opt for less skin coverage on their bases but for a beginner it is better to have full coverage to reduce backwards slipping on icy sidehills etc. It is very important to take good care of your skins, especially the glue. Always use the supplied ‘cheat sheets’ to cover the glue when packing skins away, and keep them stored in their bag so no debris can get stuck in the glue – once it’s in there, it will be there forever. When you are a long way from home, the most important thing in your backcountry kit is the glue on your skins, so take care of them. Some people even store their skins in the freezer over summer to keep the glue in prime shape. When going through changes of temperature it’s possible for ice to form on the skin plush which then collects large amounts of snow – you can rub some wax on the skins to alleviate this, or even chocolate works due to the fat content. I’ve got some funny looks rubbing chocolate onto my skins, but it was much better than persisting with 6″ of snow caked on the bottom.
Skis
It’s not necessary to have an Touring specific ski as any alpine ski will do, but there are a few characteristics that are useful. A waist width of 90-100mm is recommended unless you’re regularly touring in heavy snow areas like Utah or Japan. 90-100mm will allow you to deal with most conditions that the BC can present – not too wide for icy steeps, but enough girth to make the deeper snow enjoyable. Tip rocker is a fantastic feature, as you encounter all kinds of crusts in the BC, but a twin-tip can be very annoying. It’s very useful to be able to stick your ski tail deep into the snow, when fitting skins or even pegging a tent. Also twintips can get annoying & tangled when doing kick turns. Tail rocker is fine, but as long as it’s not accompanied by a noticeable twin.
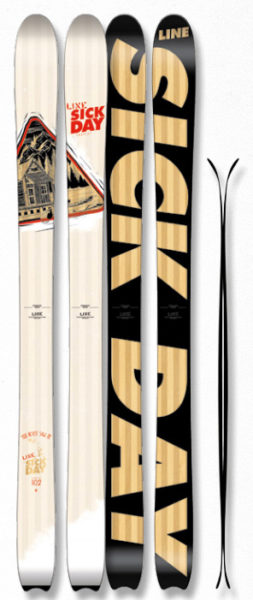
Once you decide to venture further into the BC then the weight of skis becomes a factor. Many companies have lighter weight versions of their skis like the Line Sick Day Tourist I took to France, which is a lighter weight version of the Sick Day, and then there are dedicated BC ski companies like Dynafit and Black Diamond. My first touring skis were a pair of Volkl Gotamas that were previously my alpine powder skis – they weren’t perfect but I had spent up big on the rest of my touring gear and remounted them & used them until they died. It was fine and they worked for a number of trips until I could replace them with something more suitable.
As mentioned earlier touring boots aren’t 100% necessary to begin ski touring, but if the bug hits you will want them before long. They are generally categorised by their lighter weight, switchable walk mode and a grippy sole, often made from Vibram. The walk mode allows the cuff to pivot well back beyond vertical and the grippy sole is a godsend when scrambling around. There are many other features of touring boots but these are the three which categorise them in comparison to Alpine boots. Many touring boots also feature the heel/toe fittings for Tech Bindings, and it’s worth noting that unless your Alpine binding has an adjustable toe height that a touring sole will not necessarily fit in the binding and release correctly.
As with the touring bindings, we are seeing a convergence of traditional Alpine companies like Atomic, Tecnica, Salomon etc producing backcountry oriented boots models, and traditional BC companies like Dynafit and Scarpa producing stiffer models for skiers who want to go faster and drive bigger skis in the BC.
As for specific models – well that’s up to your bootfitter. Every foot is different, and the various brands suit different shapes so consult a good quality local bootfitter for a recommendation. If you want to know more, have a chat with Tom, our bootfitter by phone, email or dropping past the shop!

Other
You don’t need specialist poles to begin ski touring, but as with boots if you find you like it, you will want to get new poles. Good touring poles are lightweight, adjustable in length and have a foam or rubber grip that extends below the usual handle so you can keep your hands level on sidehills.
There are plenty of other ancillary items that you will use to make life easier & safer in the Backcountry, like a good quality Backpack, Ski Crampons plus a multitude of other items which go beyond the scope of this article as a guide for beginners. And that’s even before we get into the clothing!!!
Please don’t hesitate to contact us if you require any assistance with gear to get you going in the BC – we are stocking a small range of items which will continue to expand & reflect our on personal expansion into Backcountry skiing.
