It’s no secret that we are smitten with the Chamonix area having skied there approximately a month a year since 2010 and we hosted our first aussieskier Adventures tour to the area in Feb/March of 2017.
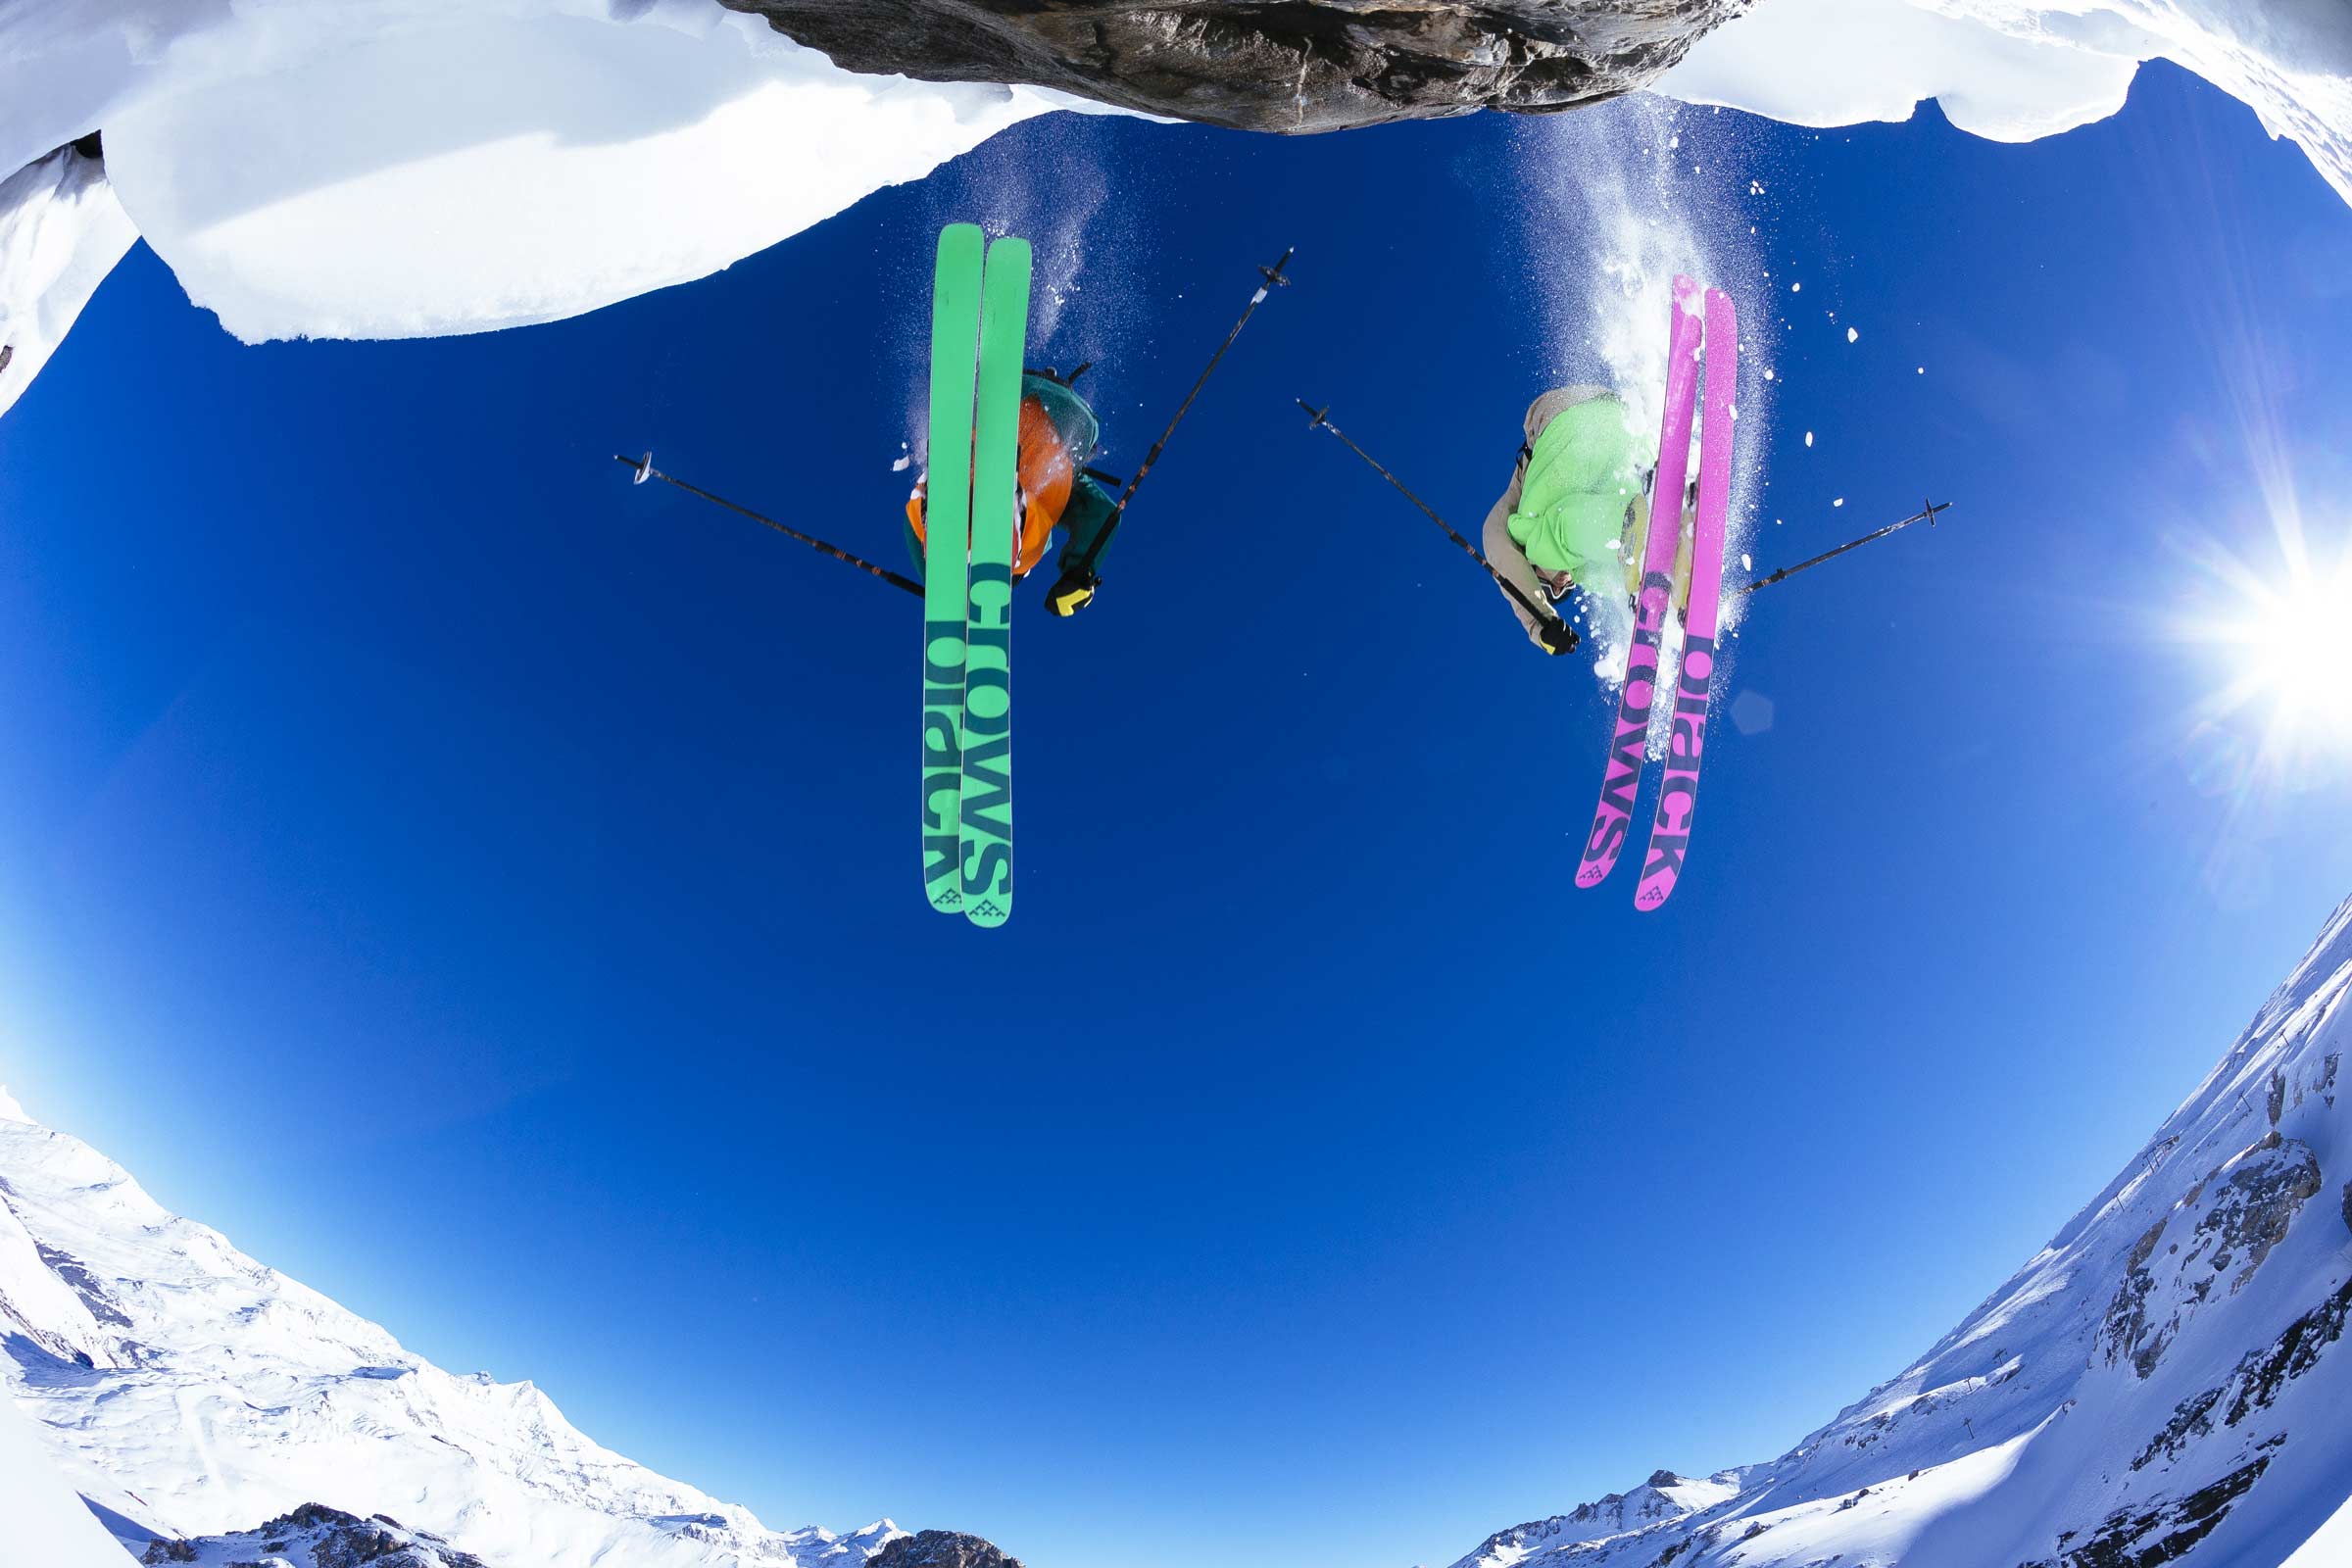
Black Crows Skis were formed in Chamonix in 2006 by professional skiers Bruno Compagnet and Camille Jaccoux, and in this period have grown to become a significant independent brand, and when you’re in the line for the tram to the Aiguille du Midi or Grands Montets you will see many of the local rippers with their trusty Crows. Their skis have been designed and manufactured to perform in Chamonix, which is the most demanding environment of all.
Black Crows Skis now in Australia
We have been working on bringing Black Crows to Australia for over 2 years, and this process has been accelerated by our relationship with their Australian Sales/Marketing executive and pro skier Chris Booth. Our plans crystallised during our trip to Chamonix in Feb/Mar of this year after meeting with Chris, founder Bruno and ski designer Julien Regnier. We followed this up at the SIGB ski test in Kuhtai, Austria in March where we skied on the bulk of the current range and walked away very impressed, and also very informed to place our first order.
We found the overall feeling of the brand to be smooth skiing, with a damp but not dull feeling, and solid without being crazy stiff. Overall an excellent balance for on and off-piste skiing with no nasty surprises.
Our first delivery arrived yesterday, with the bulk of the womens skis to come in a second delivery and we are stoked. A November delivery will follow with the wider models.
There’s few holidays that are as fun for families as a trip to the mountains. Being out in the fresh air and wide open spaces is refreshing and a great way to spend time with the kids, while wearing them out at the same time!
But being out in the elements on unfamiliar and busy ski trails can be dangerous for kids. Here’s a few tips for keeping them safe out on the slopes.
1. Ski School
Having been a ski instructor for many years, I know the benefits of providing a safe environment for children to learn and grow. Ski instructors are trained on the way in which to select appropriate terrain and build strong skills that will help kids progress to be advanced skiers more rapidly. Not only will they be safe, but they’ll have fun learning amongst their peers, playing games and drinking hot chocolate!
2. Warmth Thermal underwear is an essential layer to staying warm out there. Couple this with a fuzzy or puffy mid-layer and outerwear that’s wind and water proof. They’ll be begging you to stay on the slopes till the lifts stop turning. Kids have a larger surface to bodyweight ratio to adults, meaning that they cool off much quicker and are more prone to hypothermia.
3. Bright Clothes
Australia may be mostly desert, but we get more than our fair share of horrible weather. When this becomes fog, rain or snow up on the mountains, it can quickly turn into a white out situation where little can be seen. It’s disorienting for the best of us, but kids are often unaware that if they stray just a few extra metres, they may no longer be able to see their family or group. When you can, dress them in something bright that will help them stand out and have the highest possibility of being visible. This will have the added benefit of you being able to more easily spot them in a crowd.
4. Eye Protection
At the snow the suns rays can be stronger than at the beach because you’re at altitude and the snow reflects the UV rays, magnifying the effect. Make sure your kids have sunnies or goggles that they wear all day as Snow Blindness can seriously damage the cornea of the eye.
5. Sunscreen
This high level of UV radiation means that all exposed areas of skin are at risk and need to be slip, slopped and slapped! Apply sunscreen on the kids before putting on their ski boots, to give it time to be absorbed and take effect. And stash a small bottle in their pocket so they can reapply at lunch!
6. Helmet
Over the years there’s been plenty of debate as to whether ski helmets should be worn. The Australian Ski Areas Association recommends them, and many ski schools have made wearing a helmet compulsory for all children participating in snowsports lessons. While it’s every parents decision, it is encouraged that you educate yourself on the benefits and limitations of helmet usage.
7. The Alpine Responsibility Code
They’re never too young to learn how to be a responsible rider, and the Alpine Responsibility Code is a great starting point. It’s printed on most trail maps and provides great ways to reduce risks when out on the mountain.
8. Back Protection
In the event of a crash, in particular a sharp hit to a specific spot, a back protector is designed to distribute impact pressure to your back more evenly and help you to avoid broken bones.
While not compulsory, if your kids are hitting the park pretty hard or getting into freestyle skiing or racing, you might want to do some research at the benefits and limitations of wearing a back protector.
9. Meet Ups
Becoming lost or separated from your group on the mountain happens in a split second, and mobile reception can’t be guaranteed, so it’s a great idea for groups of skiers to agree on a meeting point in the event that someone gets lost.
For kids, the first rule for kids is to never load a lift without the family or friends, that way you’ll all be reunited at the bottom of the run, rather than having kids ride the lift on their own and waiting for each other in the often stronger elements at the top. The next is that if they’re lost, they need to find and tell a mountain employee like a ski instructor, ski patrol, or liftie. Same goes for parents, if they’ve lost their child, locate a mountain employee as ski resorts have lots of eyes on the hill and are great at getting the word out and starting the search quickly. Lastly, make sure you put a business card in their pocket and that they know it’s there so they can give it to a mountain employee in the event that they’re lost.
10. Stay Hydrated and Fuelled
Food provides energy for active adventure activities. It is necessary for maintain movement and body temperature in a cold environment. Make sure you eat a good breakfast, consider eating a little more than usual and certainly drink more water than usual. Stop when you are tired and warm up with a hot chocolate!
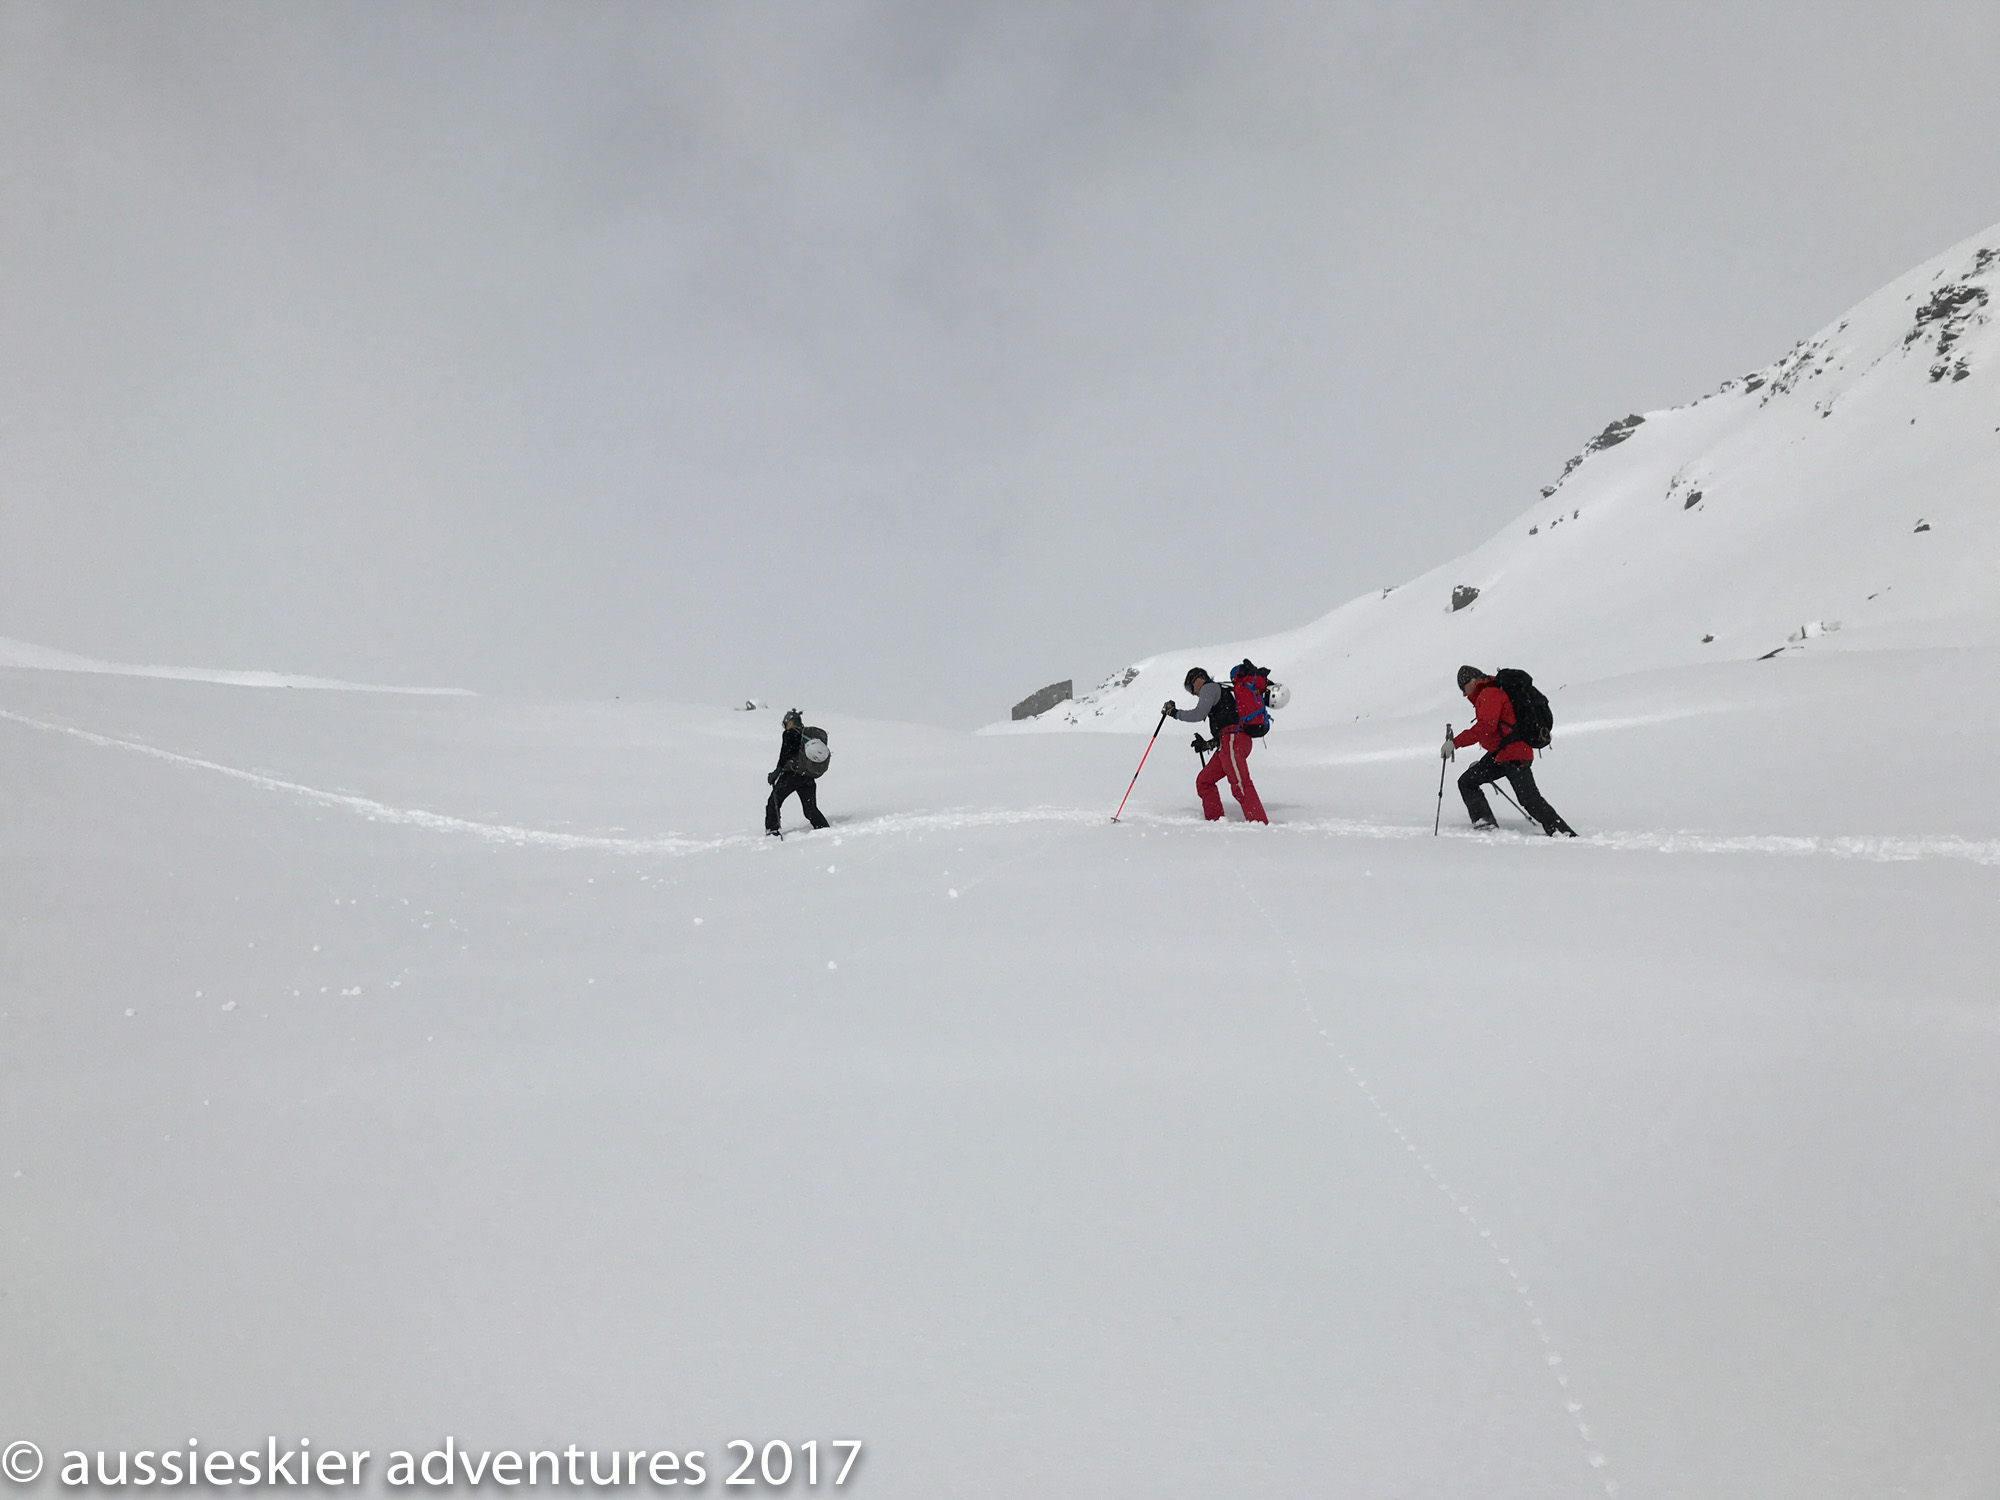
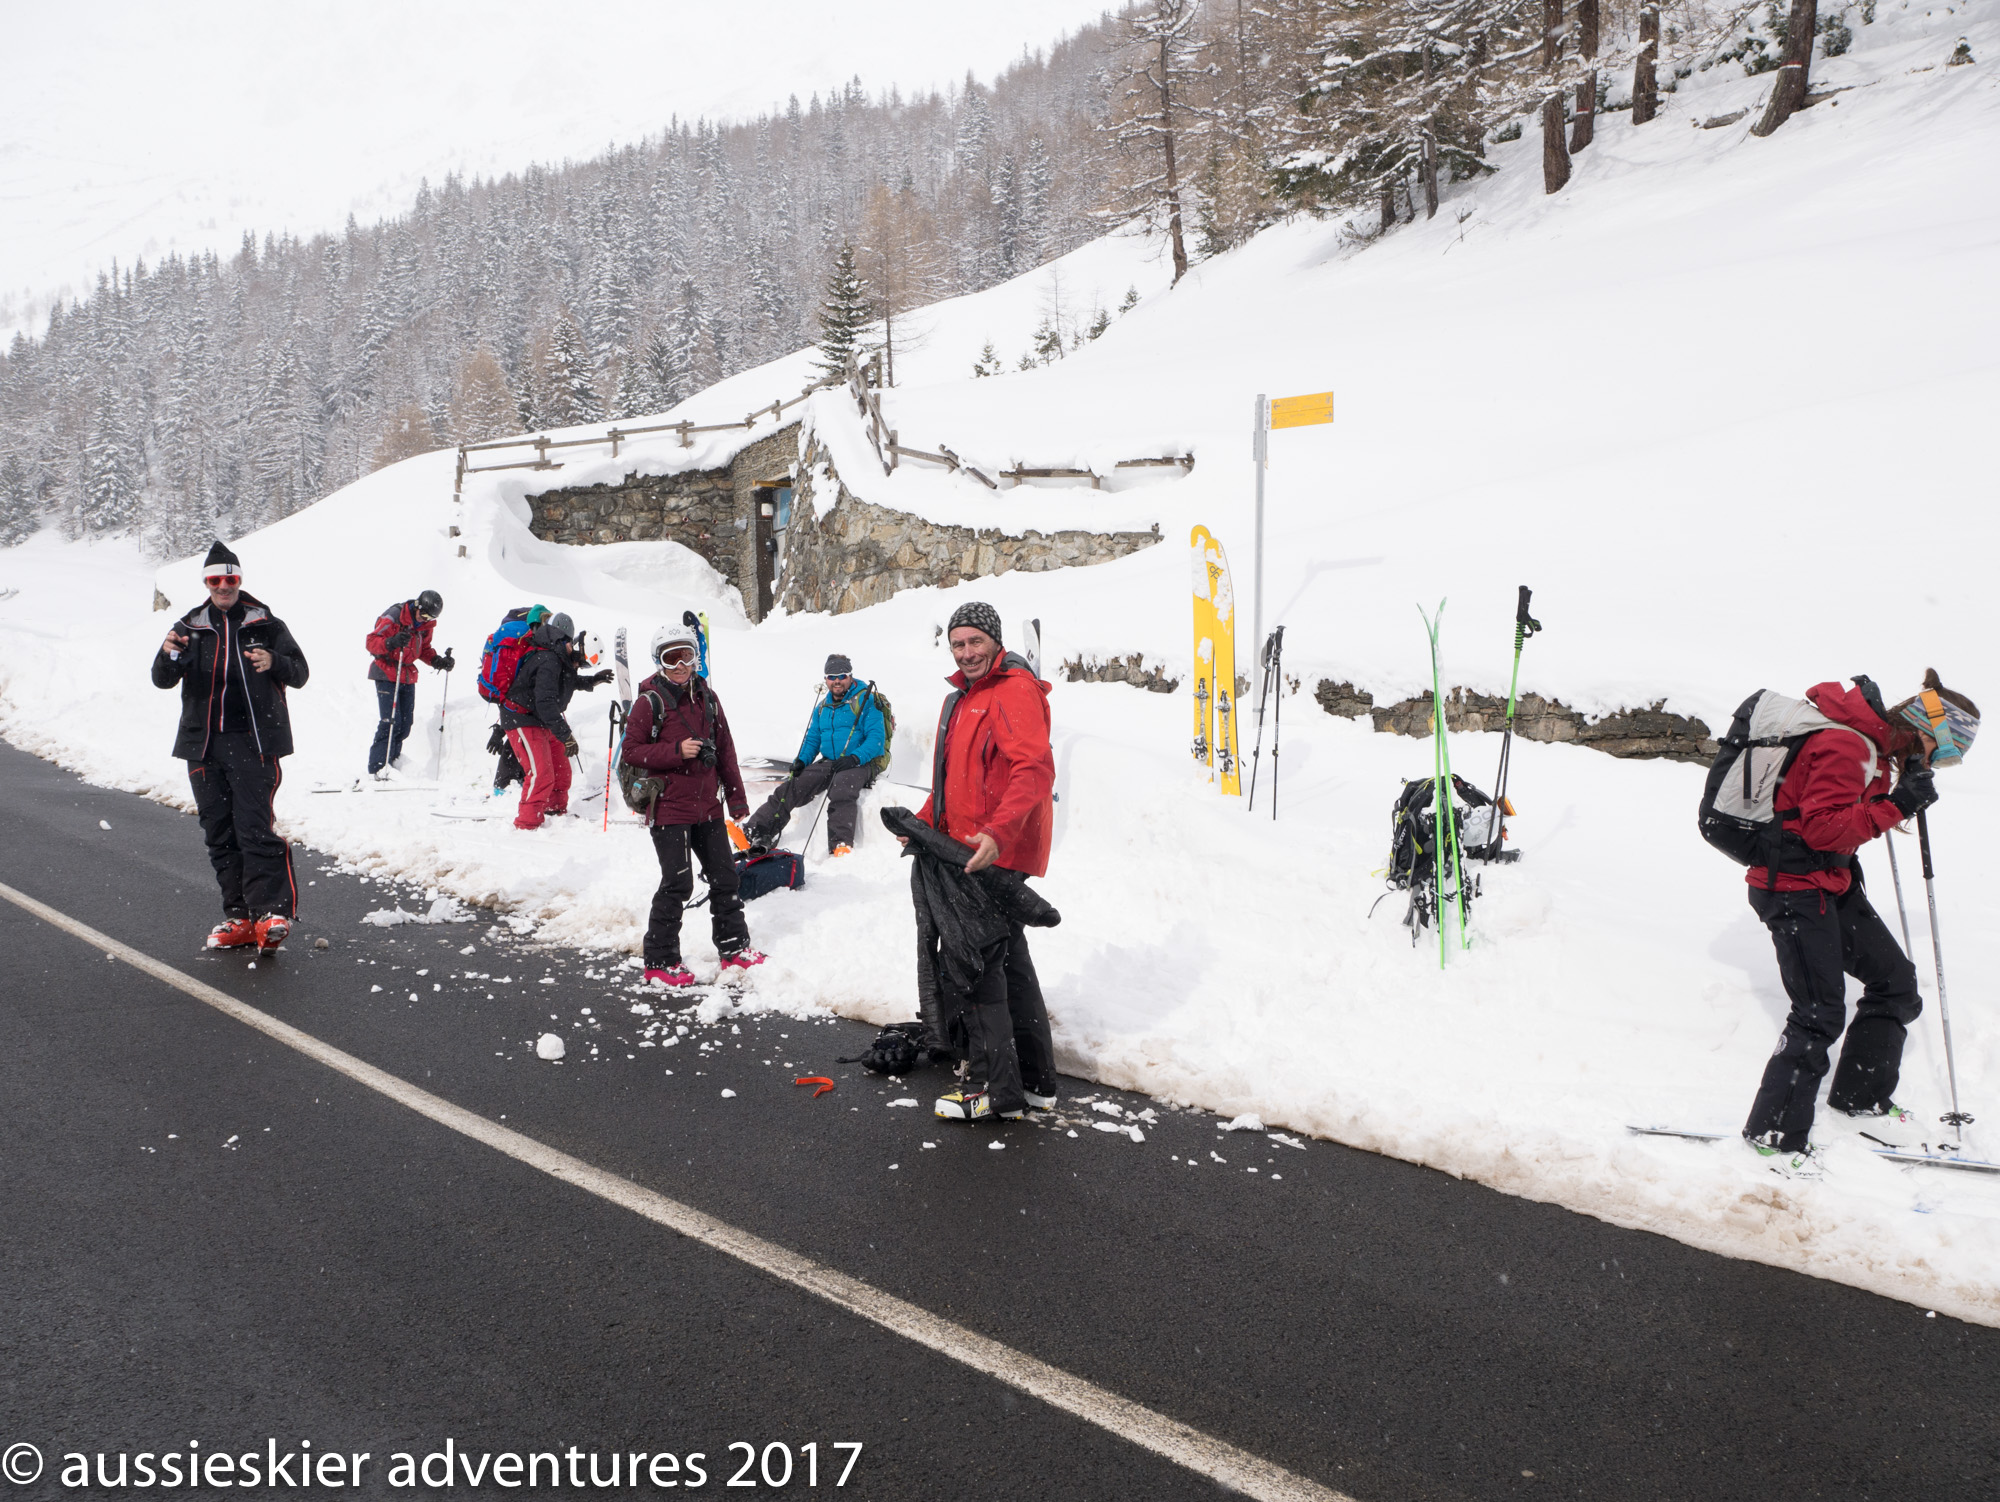
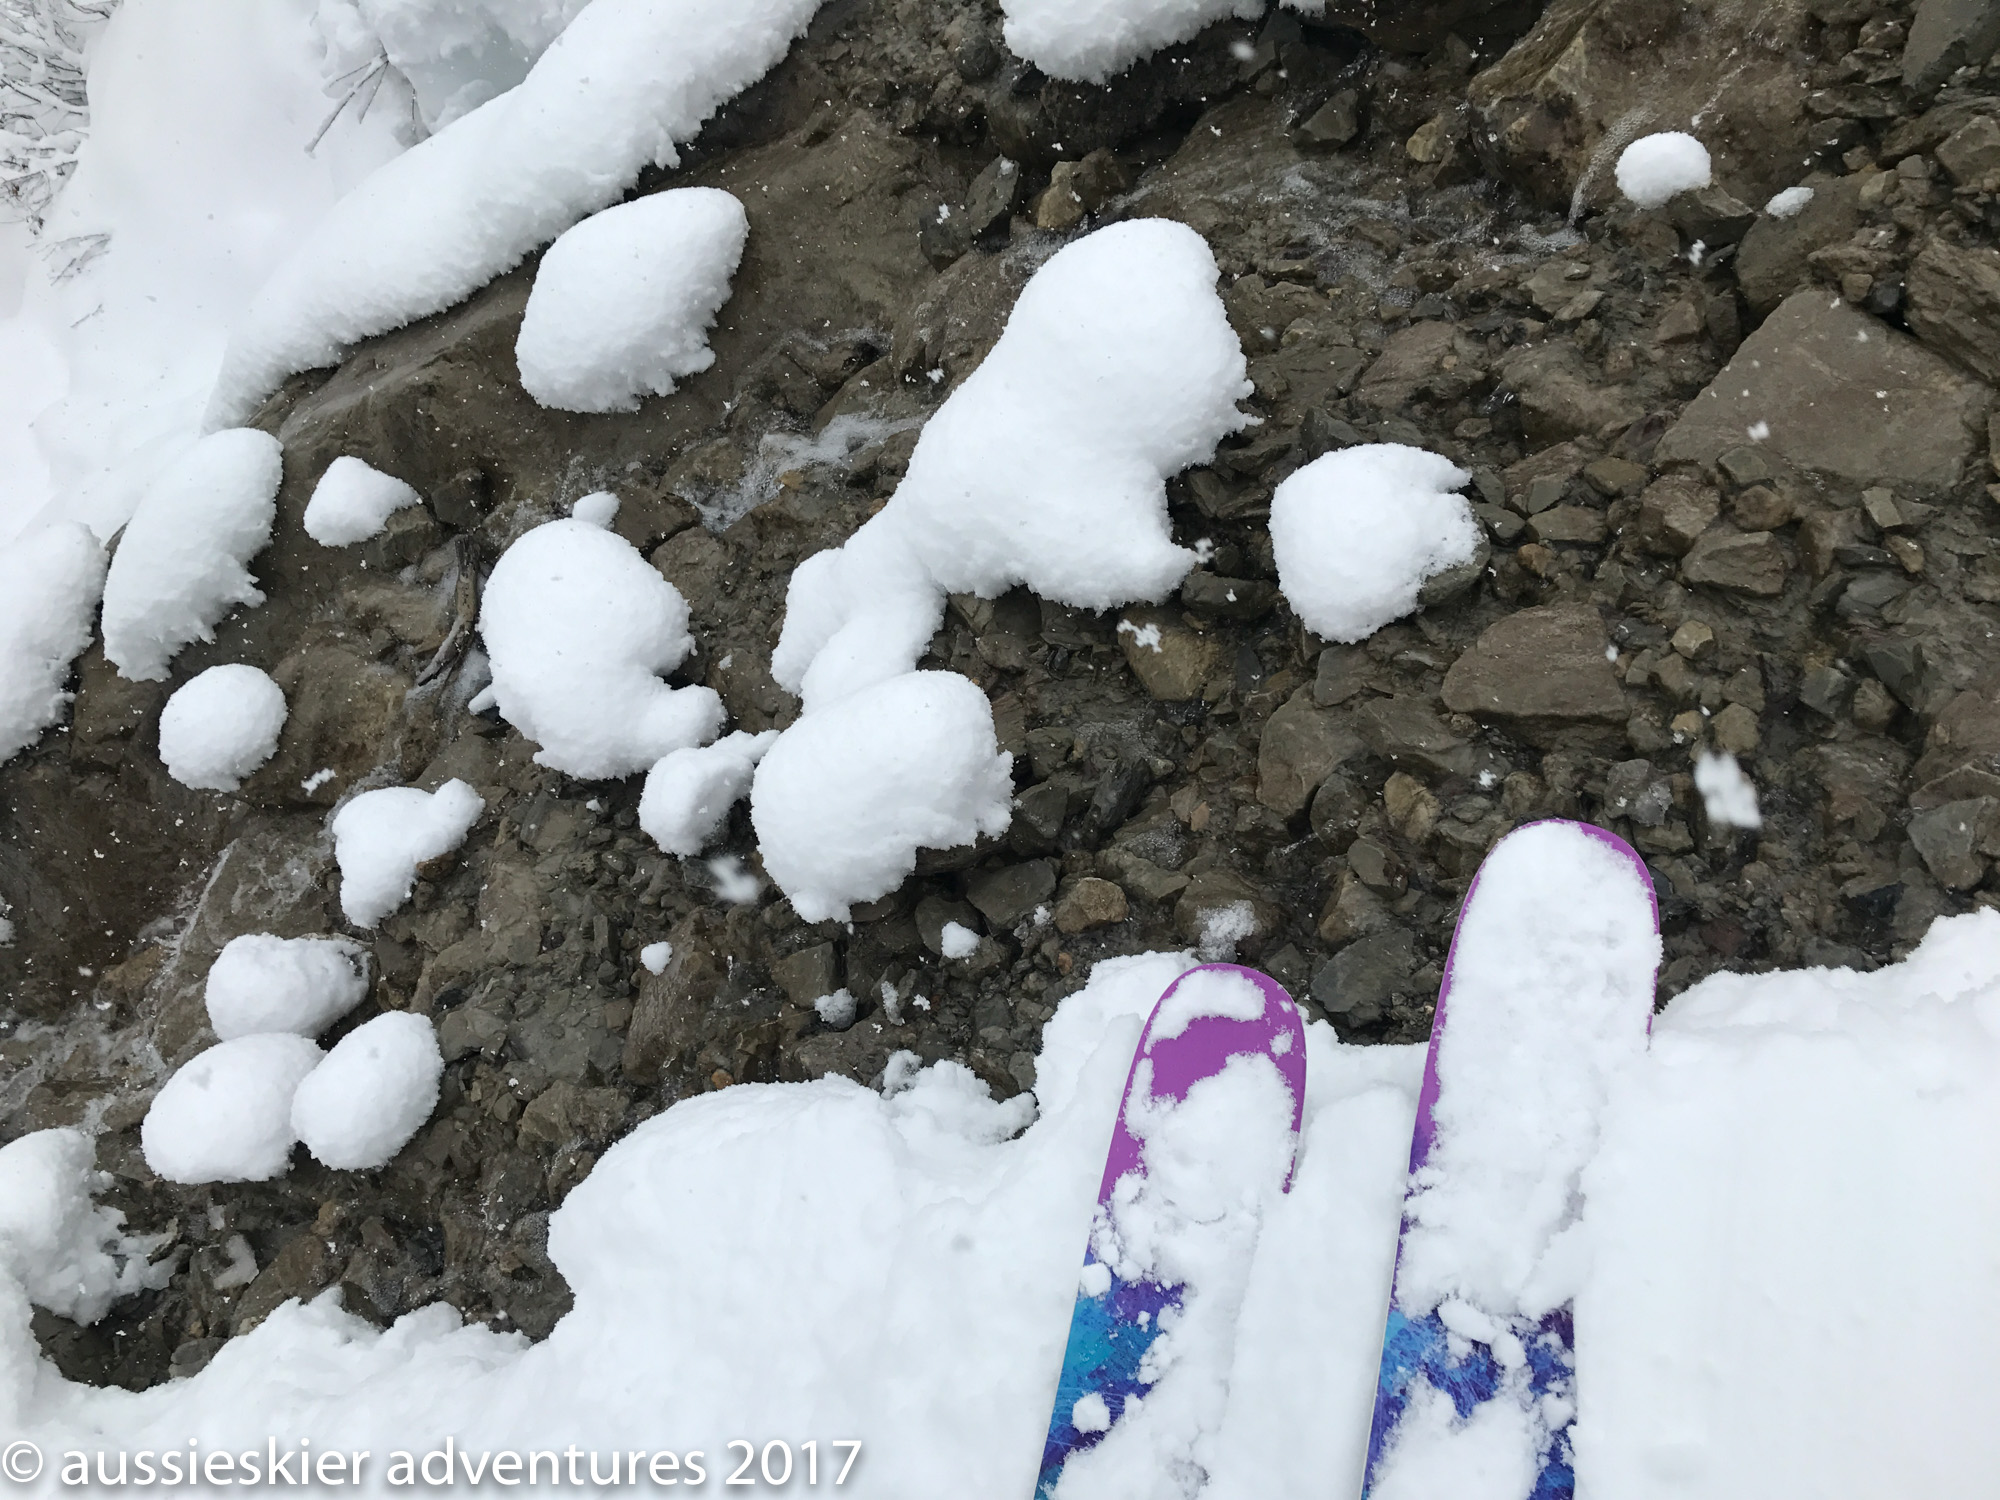
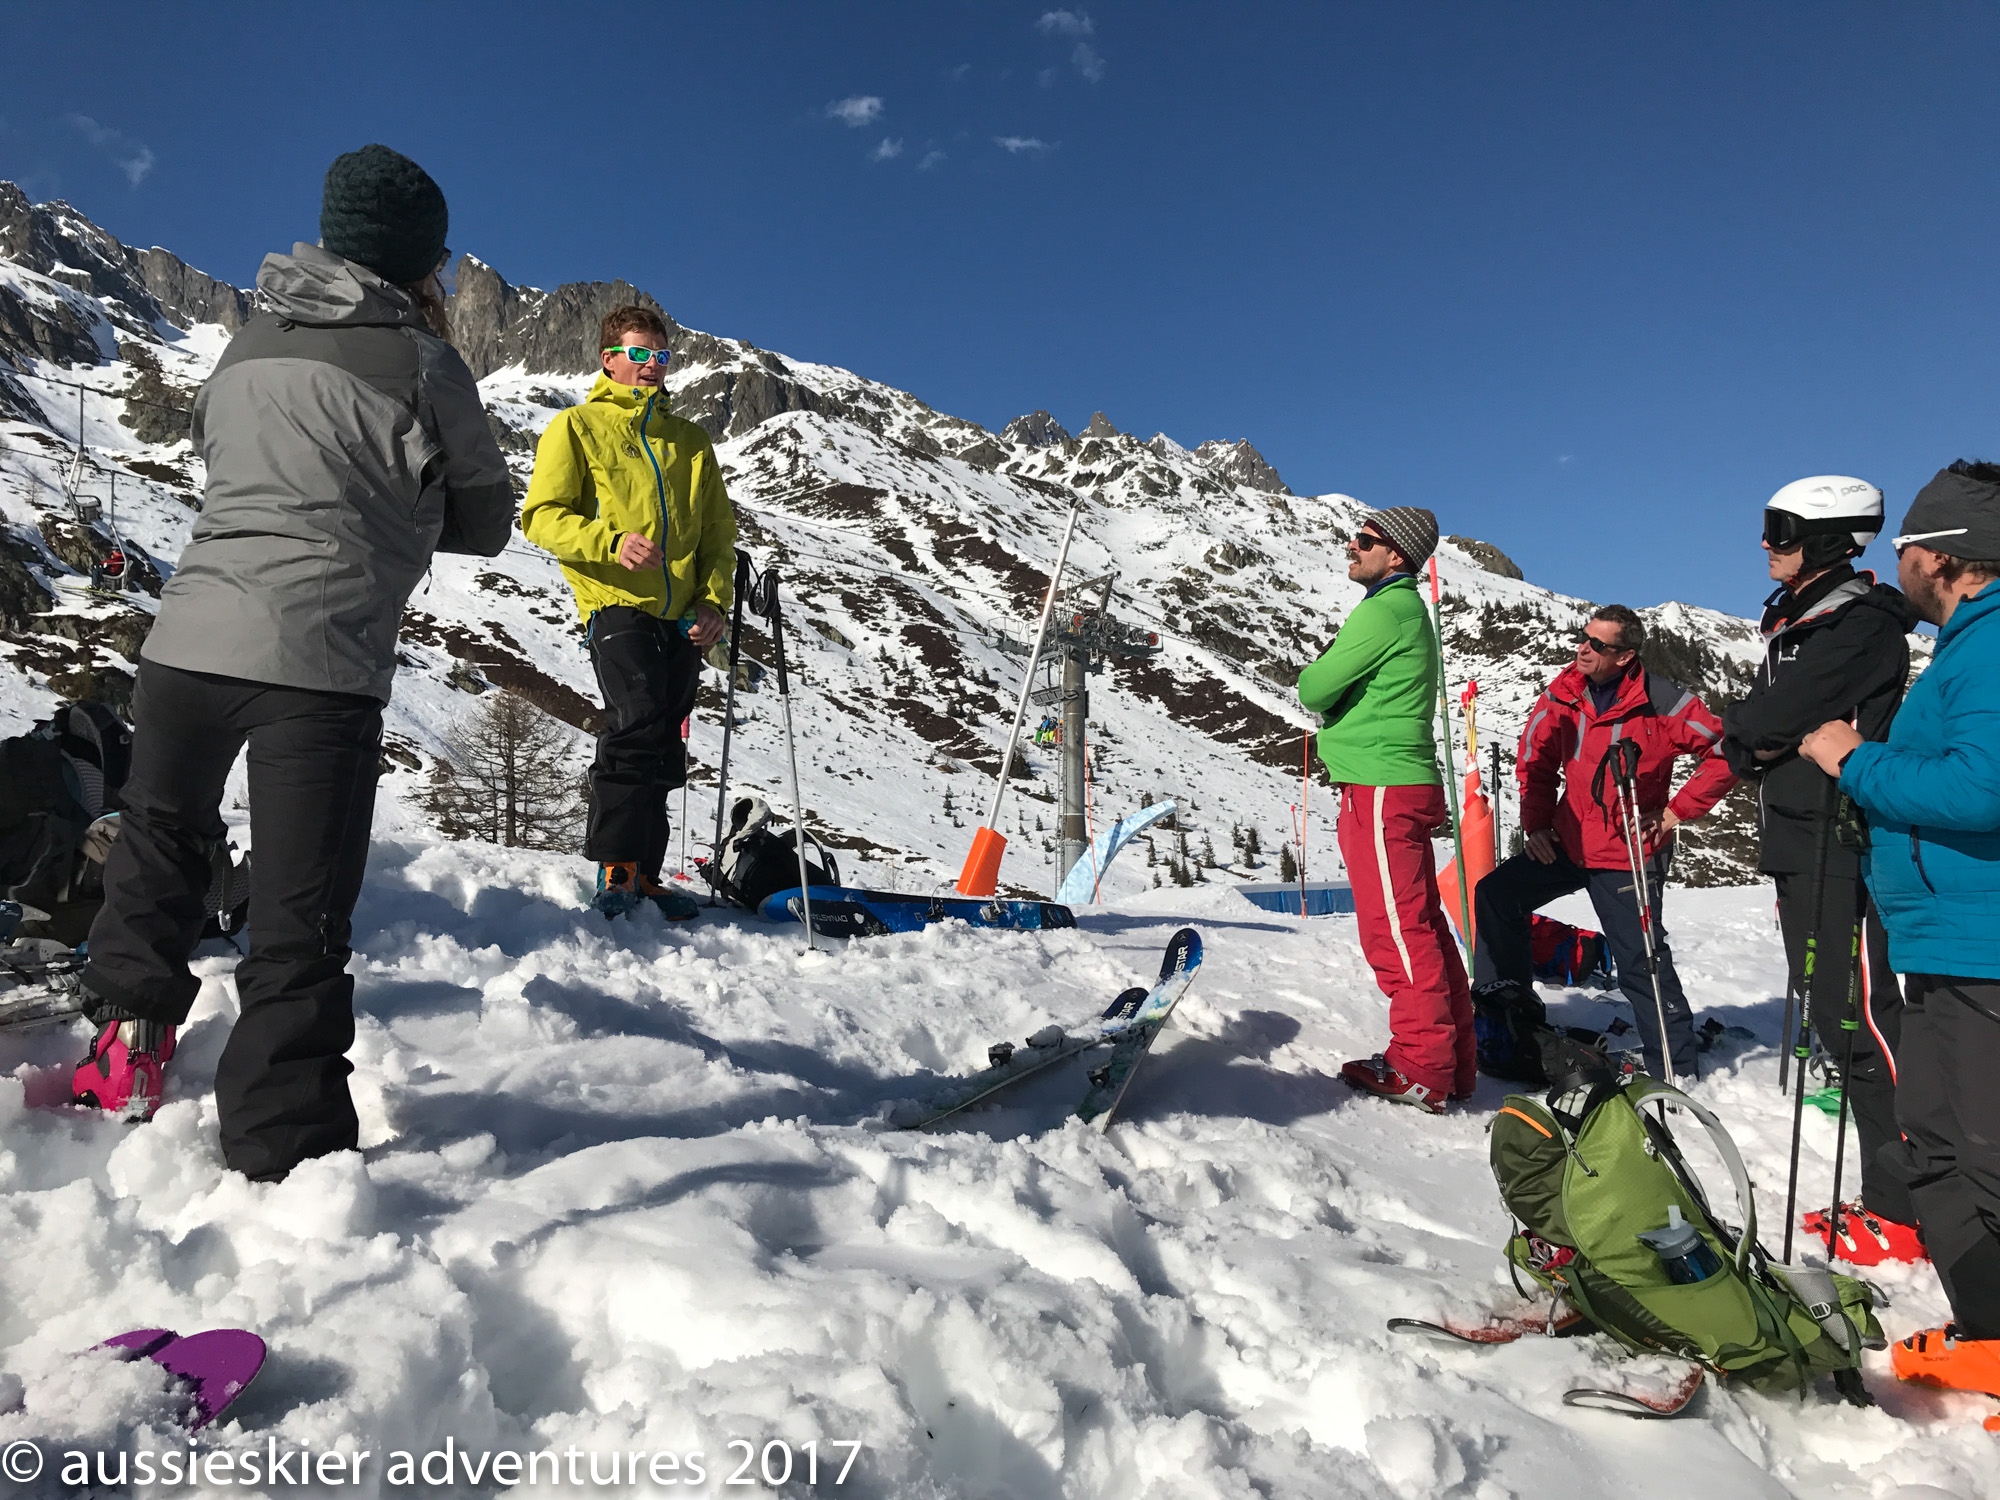
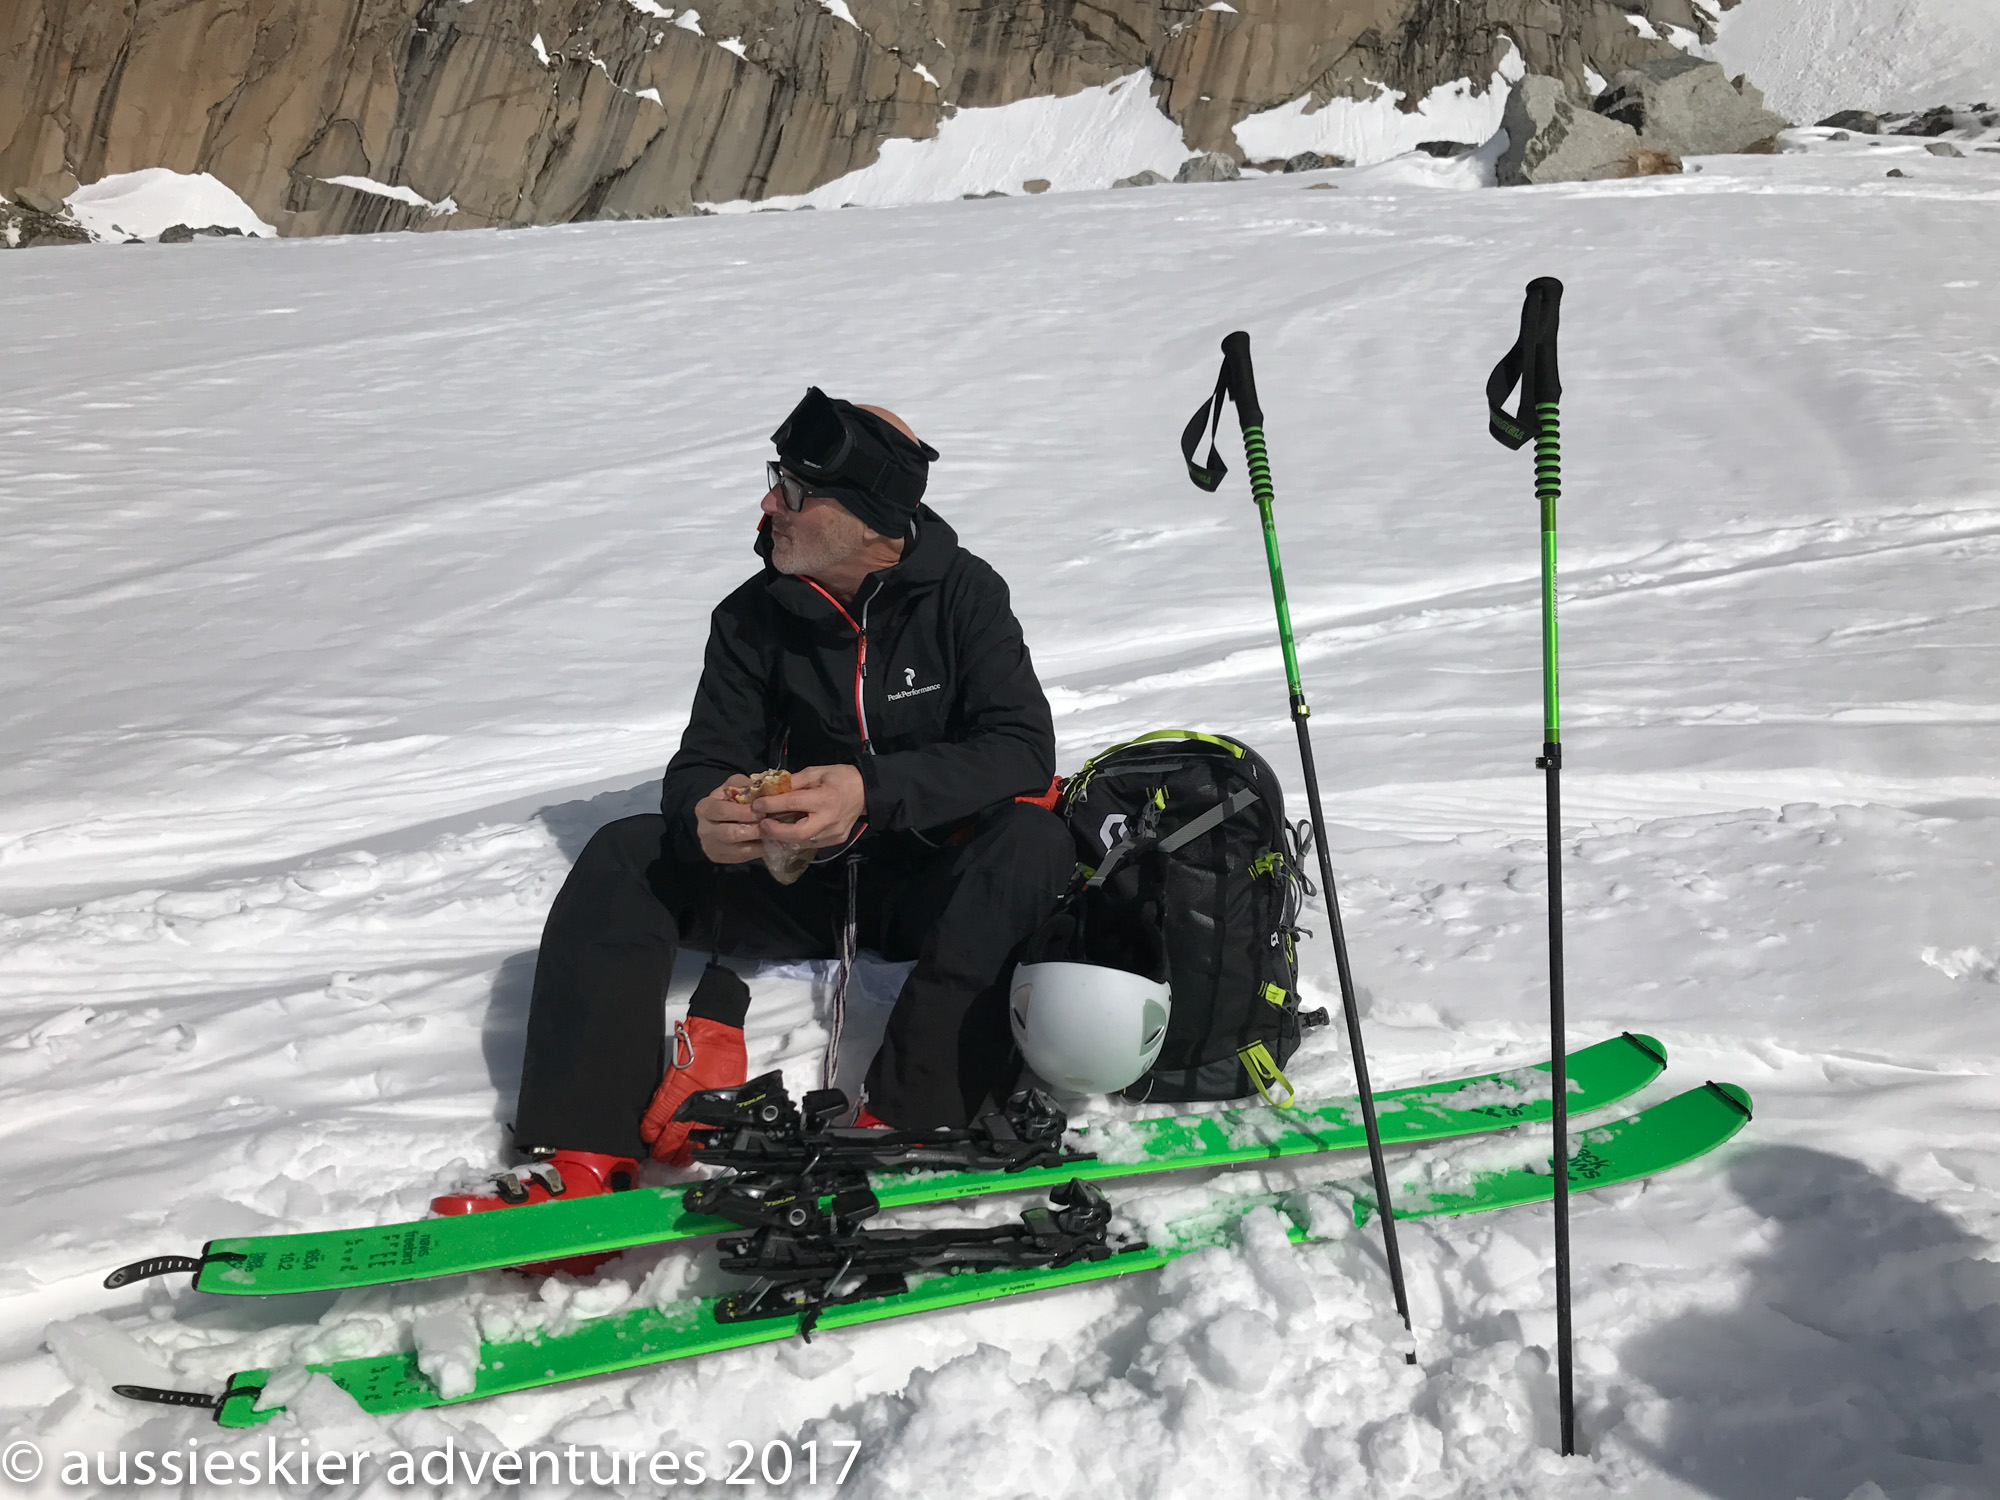
Day 4 didn’t warrant a post on it’s own, heavy snowfalls, high winds and poor visibility were the order of the day. Temperatures had warmed in Italy so that wasn’t an option so we headed to Grands Montets for a day of resort powder skiing with the hordes. I don’t think anyone in the group took a photo. We had a couple of nice runs but spent the day in anticipation of the weather clearing and the prospect of heading up the Aiguille du Midi the following day.
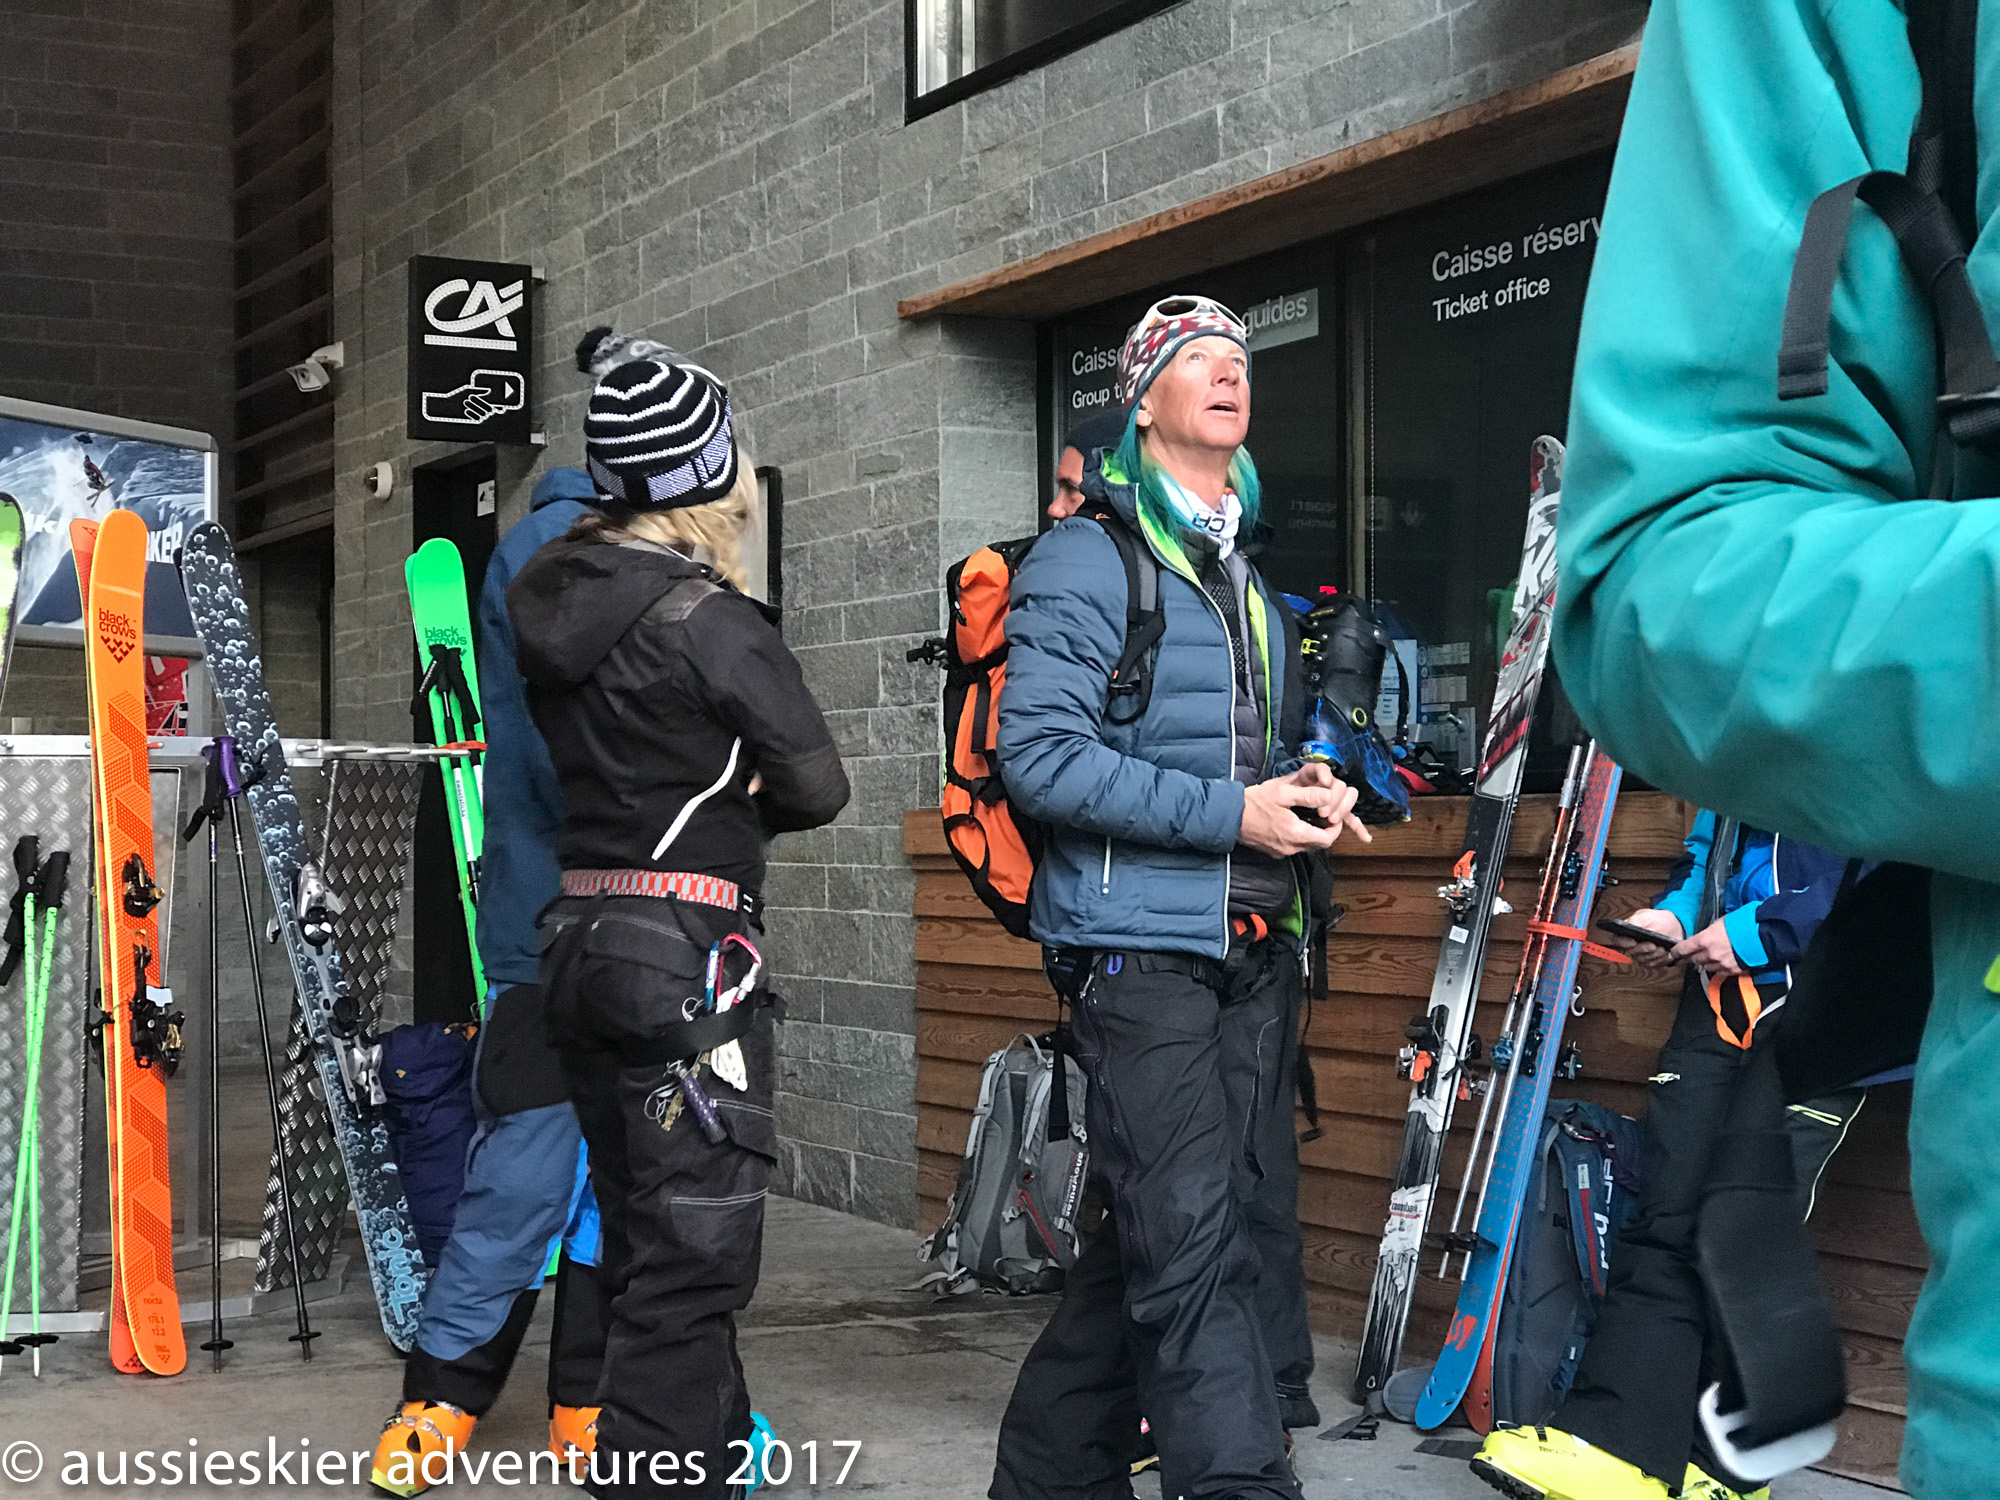
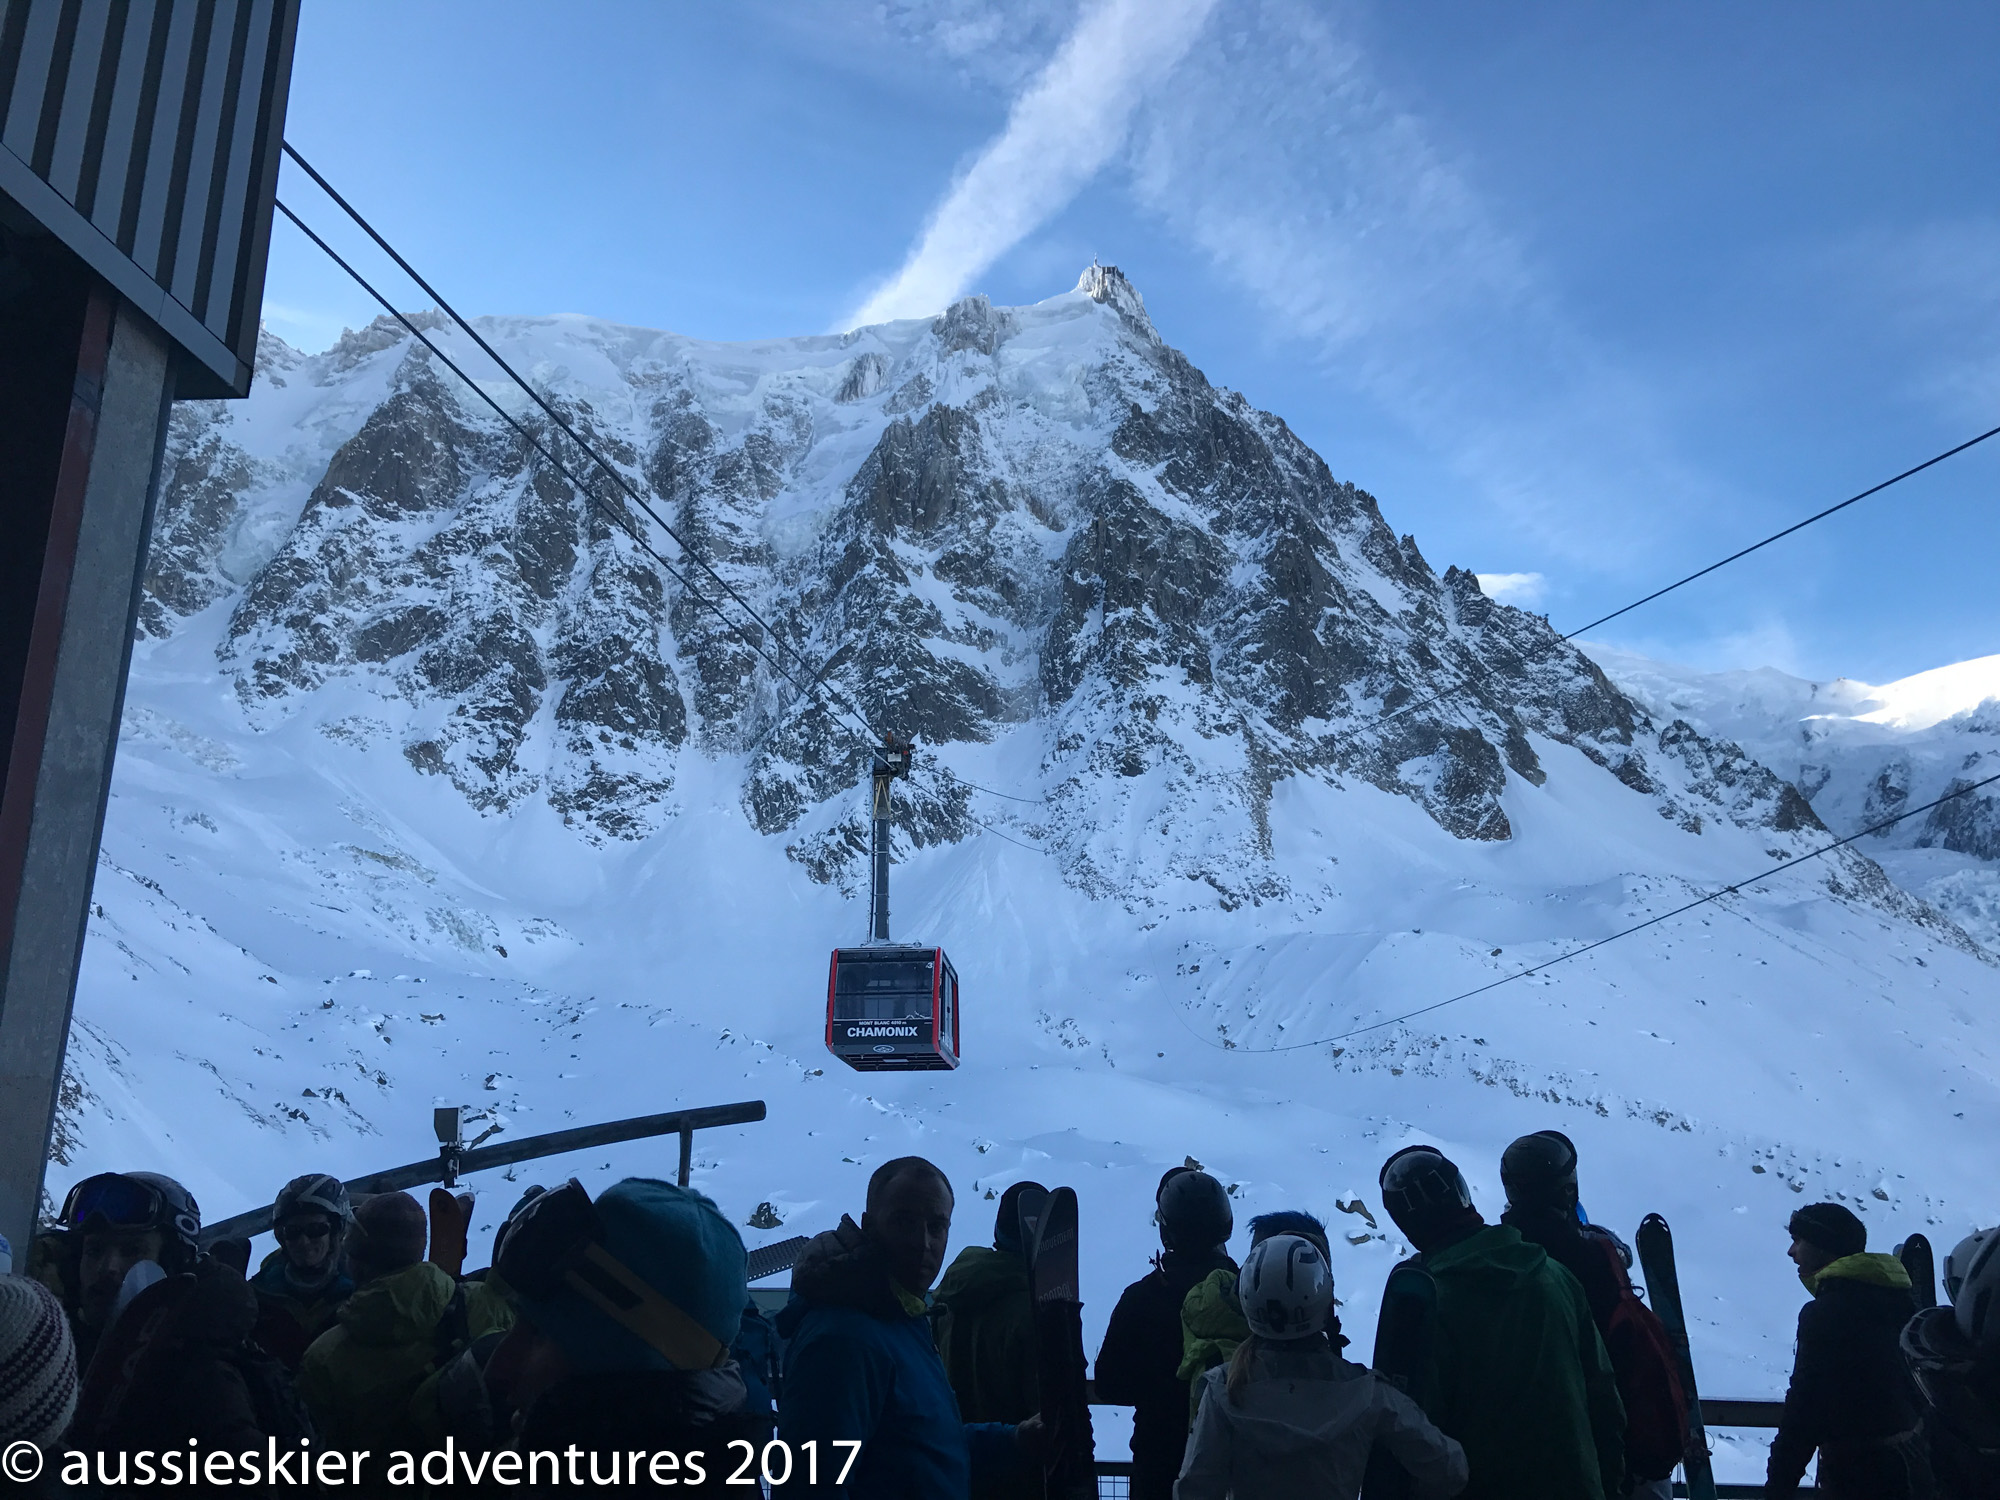
And fortunately the weather co-operated – we woke to clear skies and not much wind aloft, but a forecast of a foehn wind coming from the Italian side in the afternoon. So we arrived at the tram station bright & early but after some classic French miscommunication by the lift company ended up on the 4th tram instead of the first. When we saw Glen Plake in the line we knew we were in the right place.
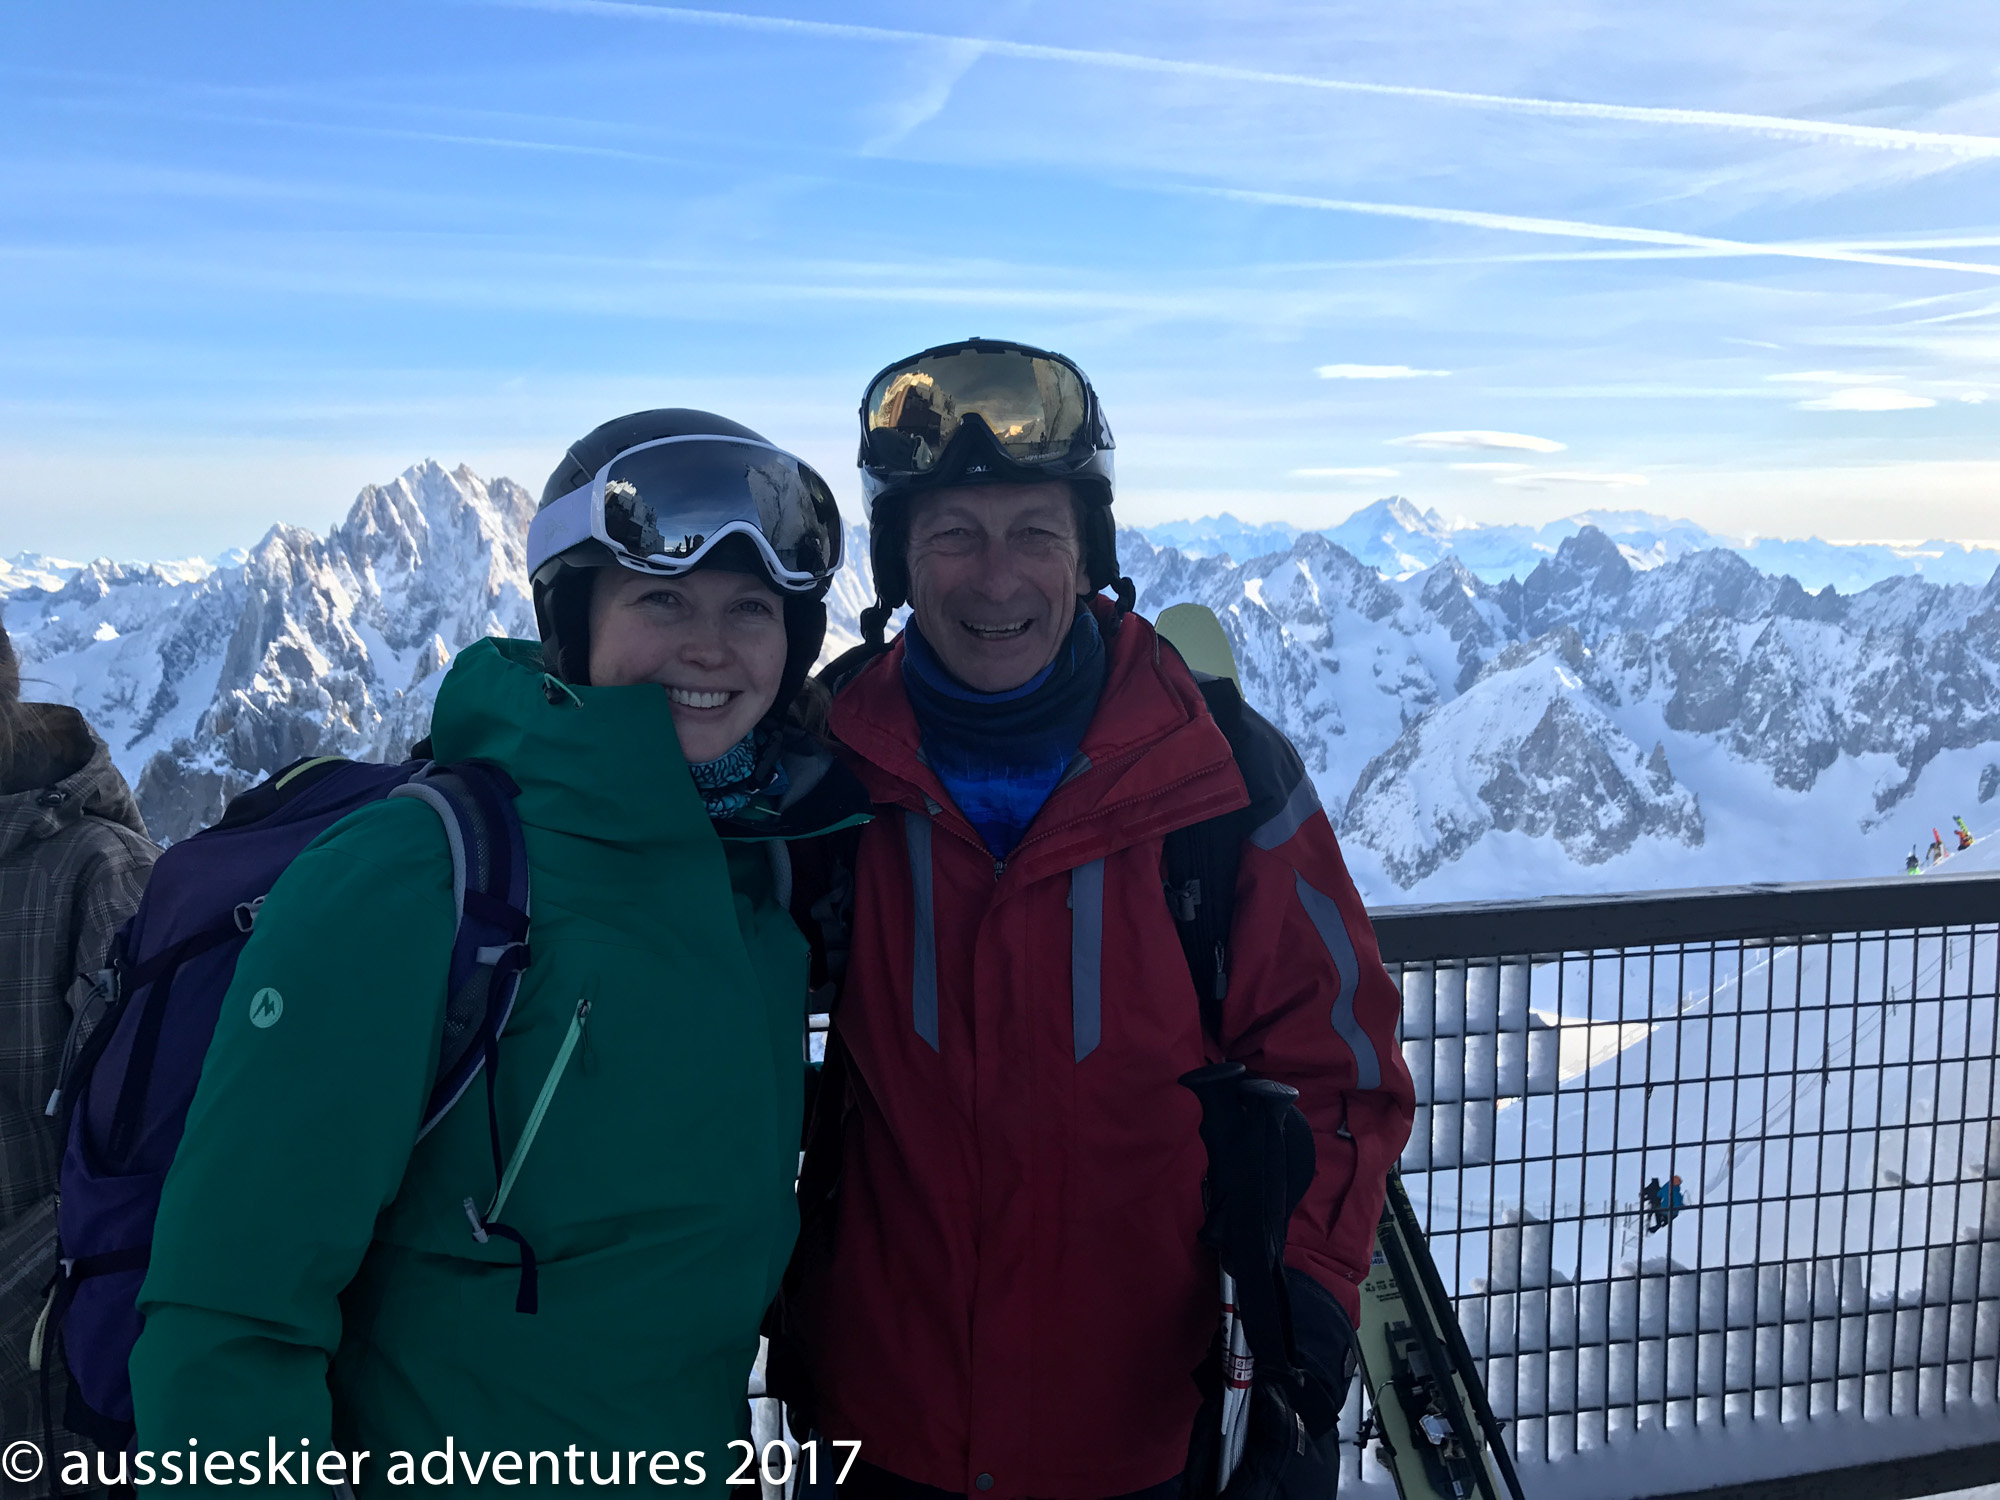
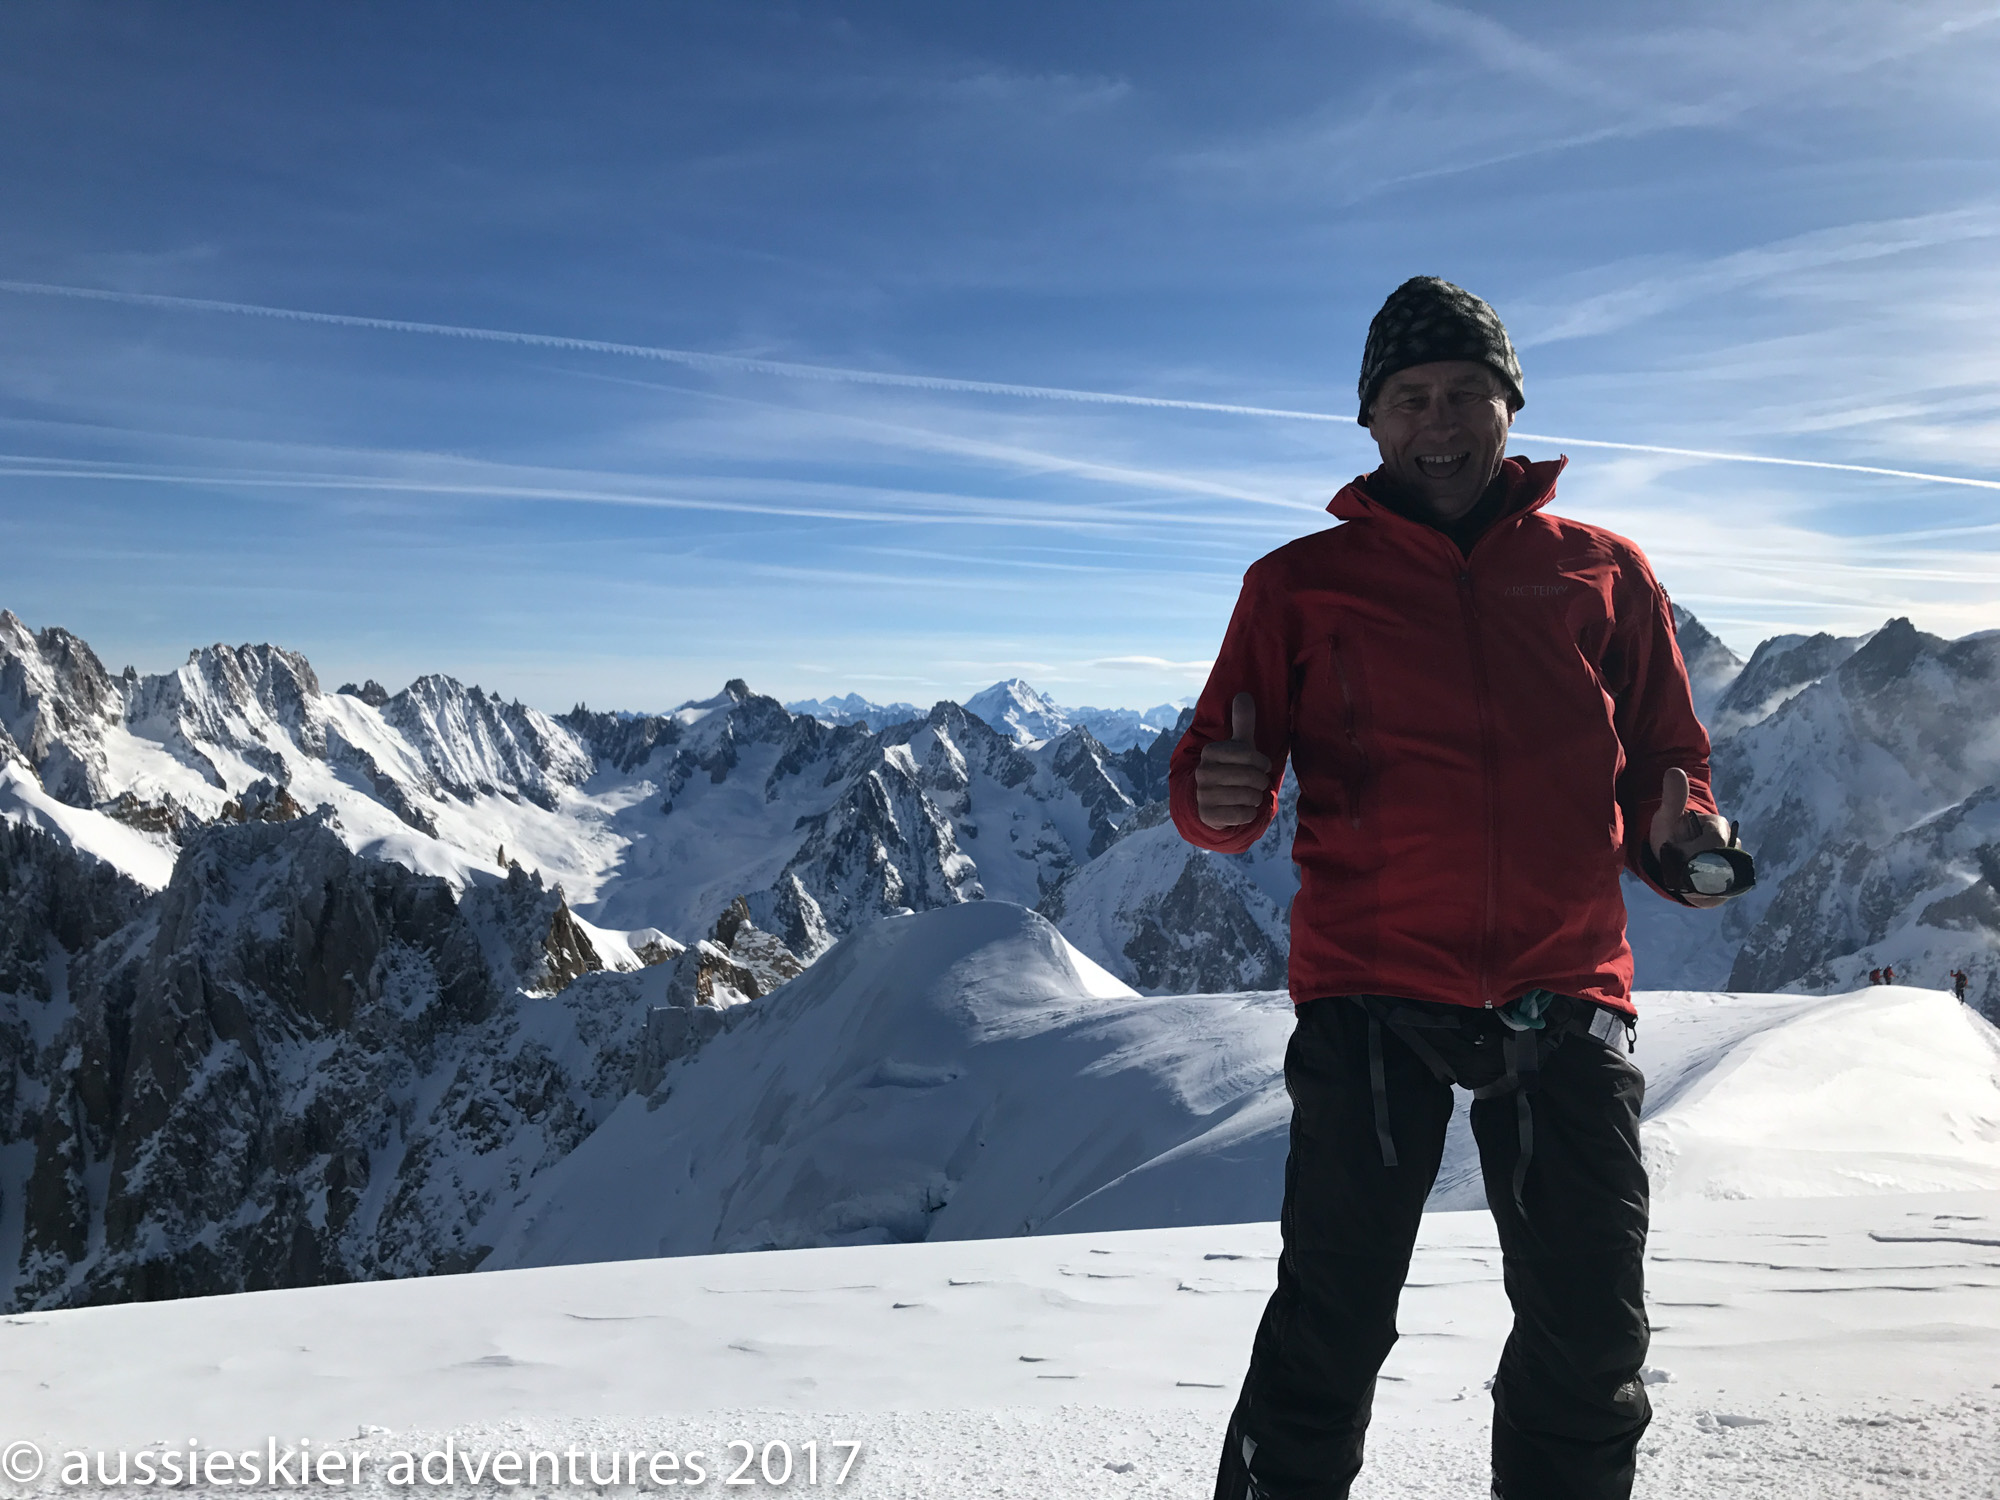
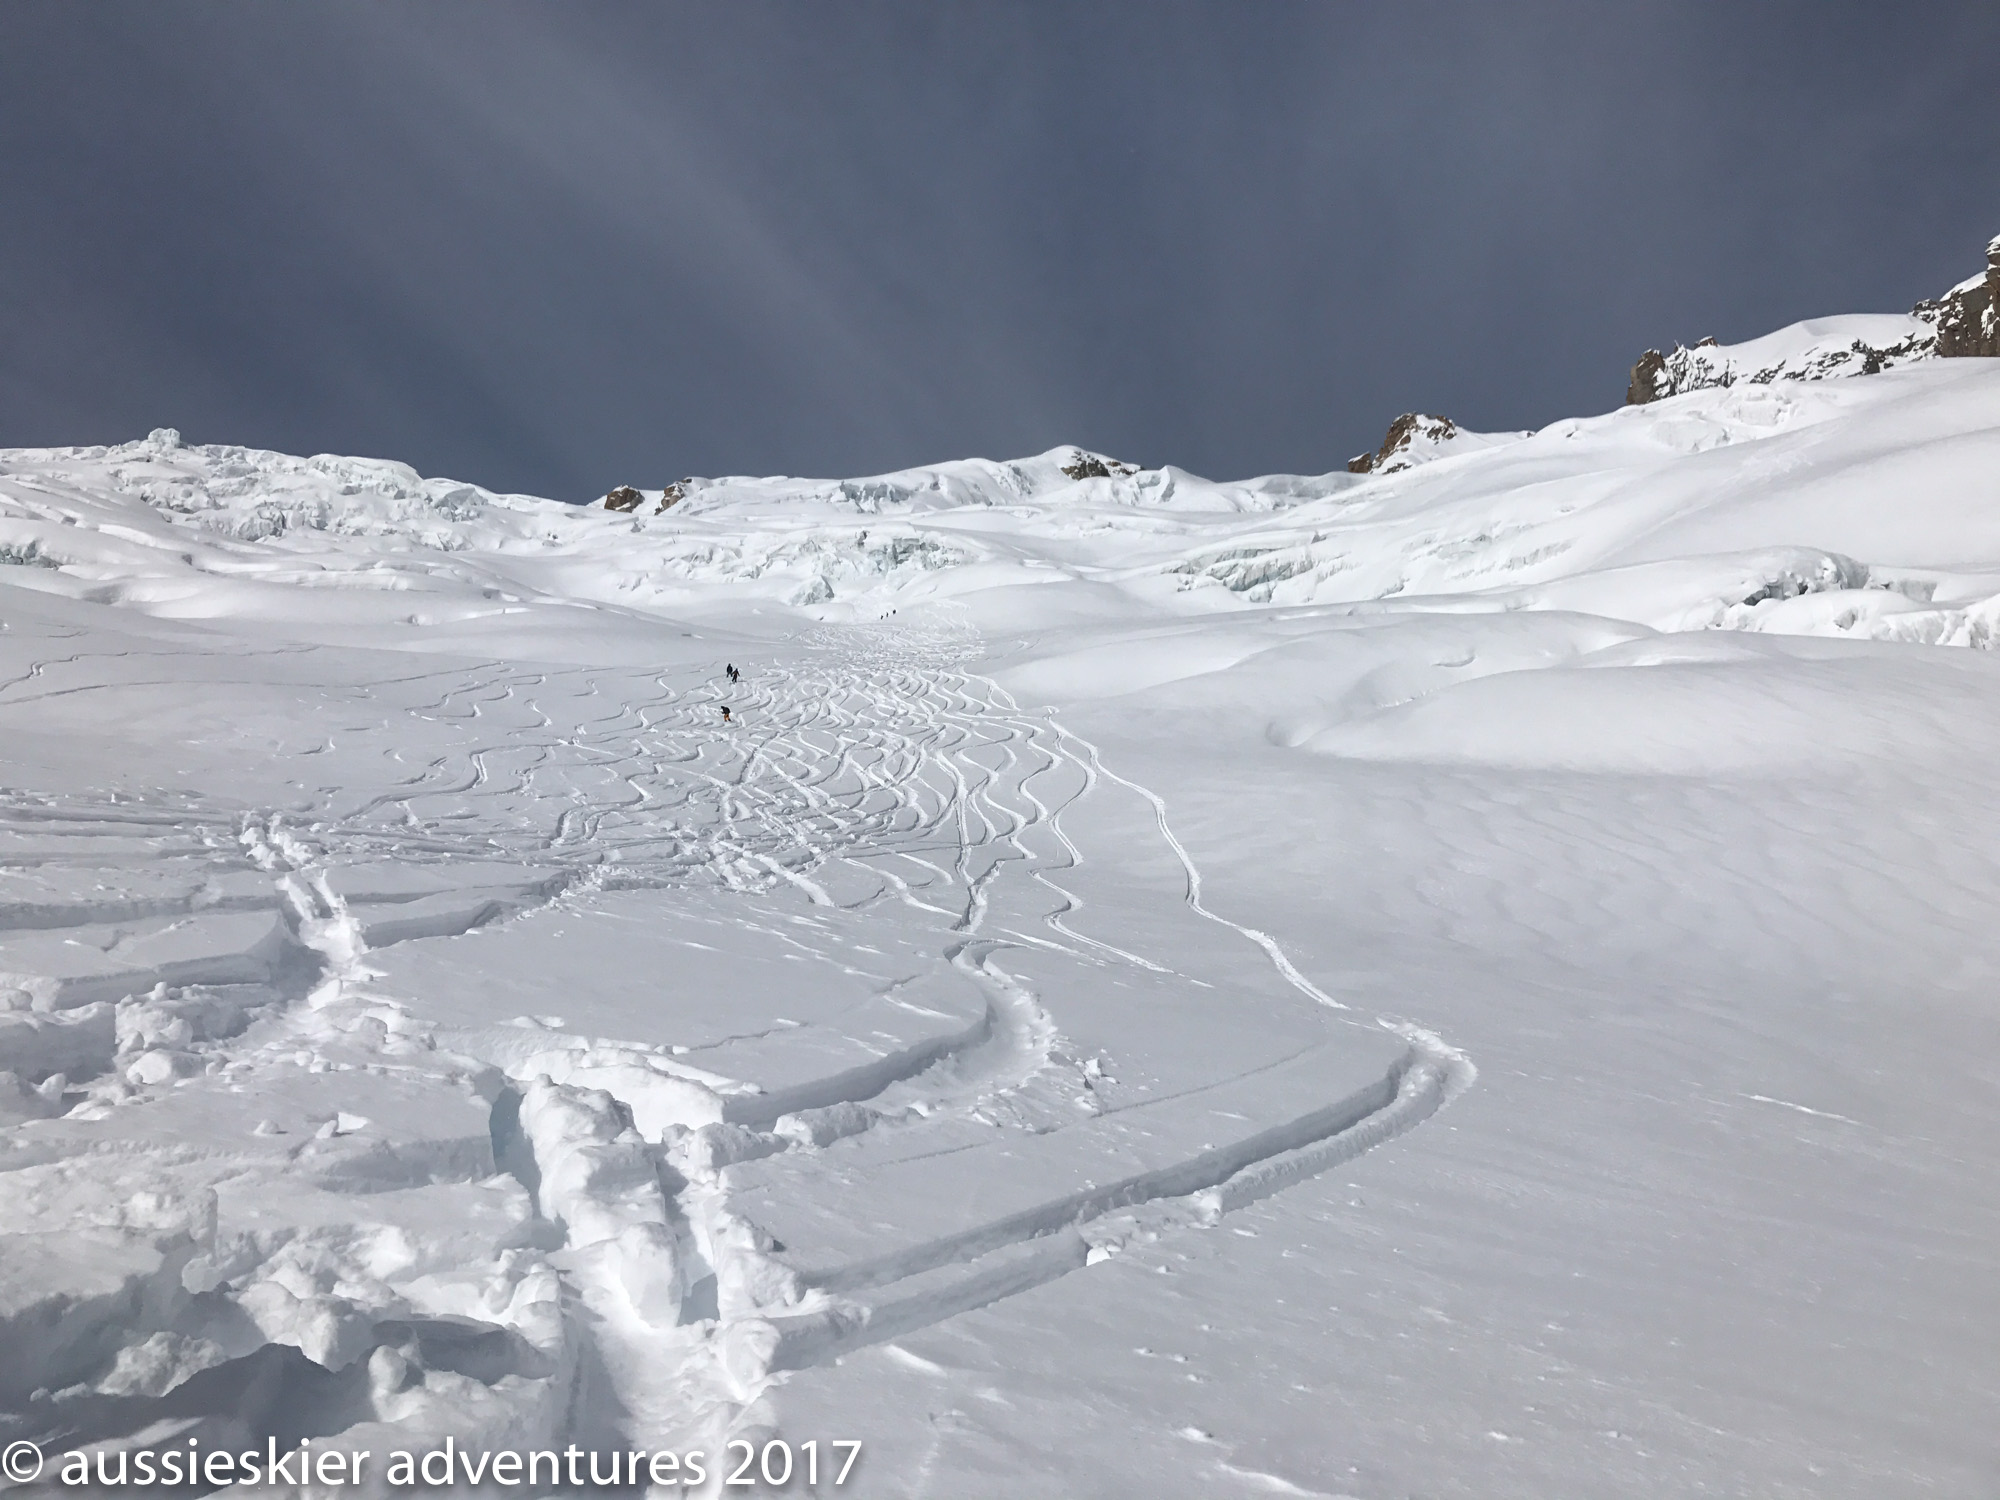
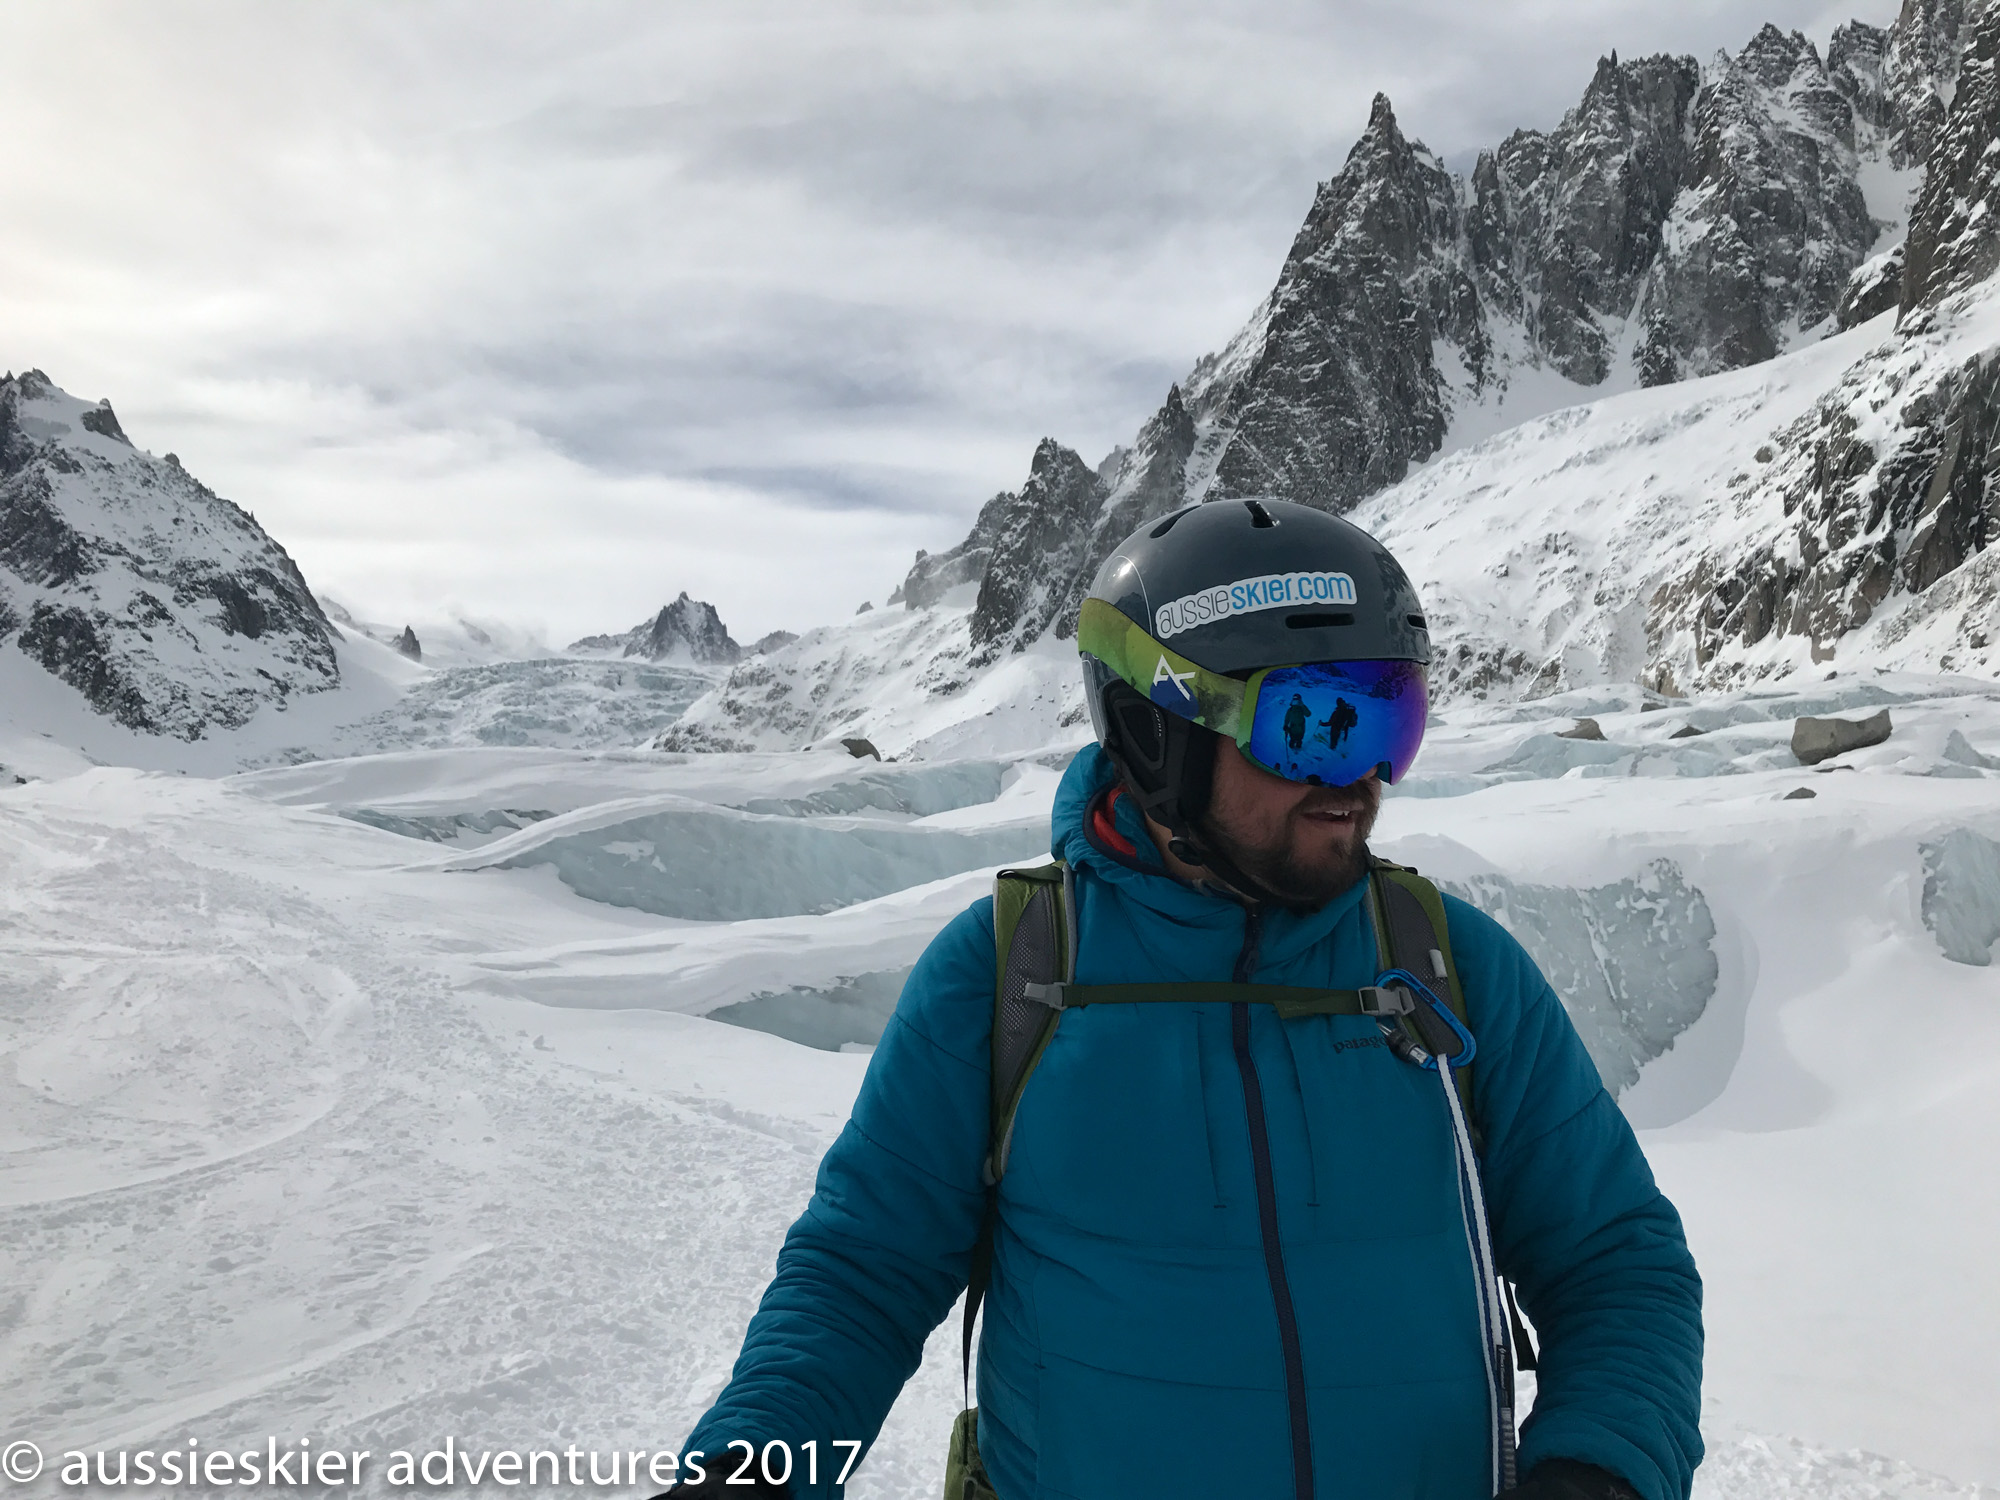
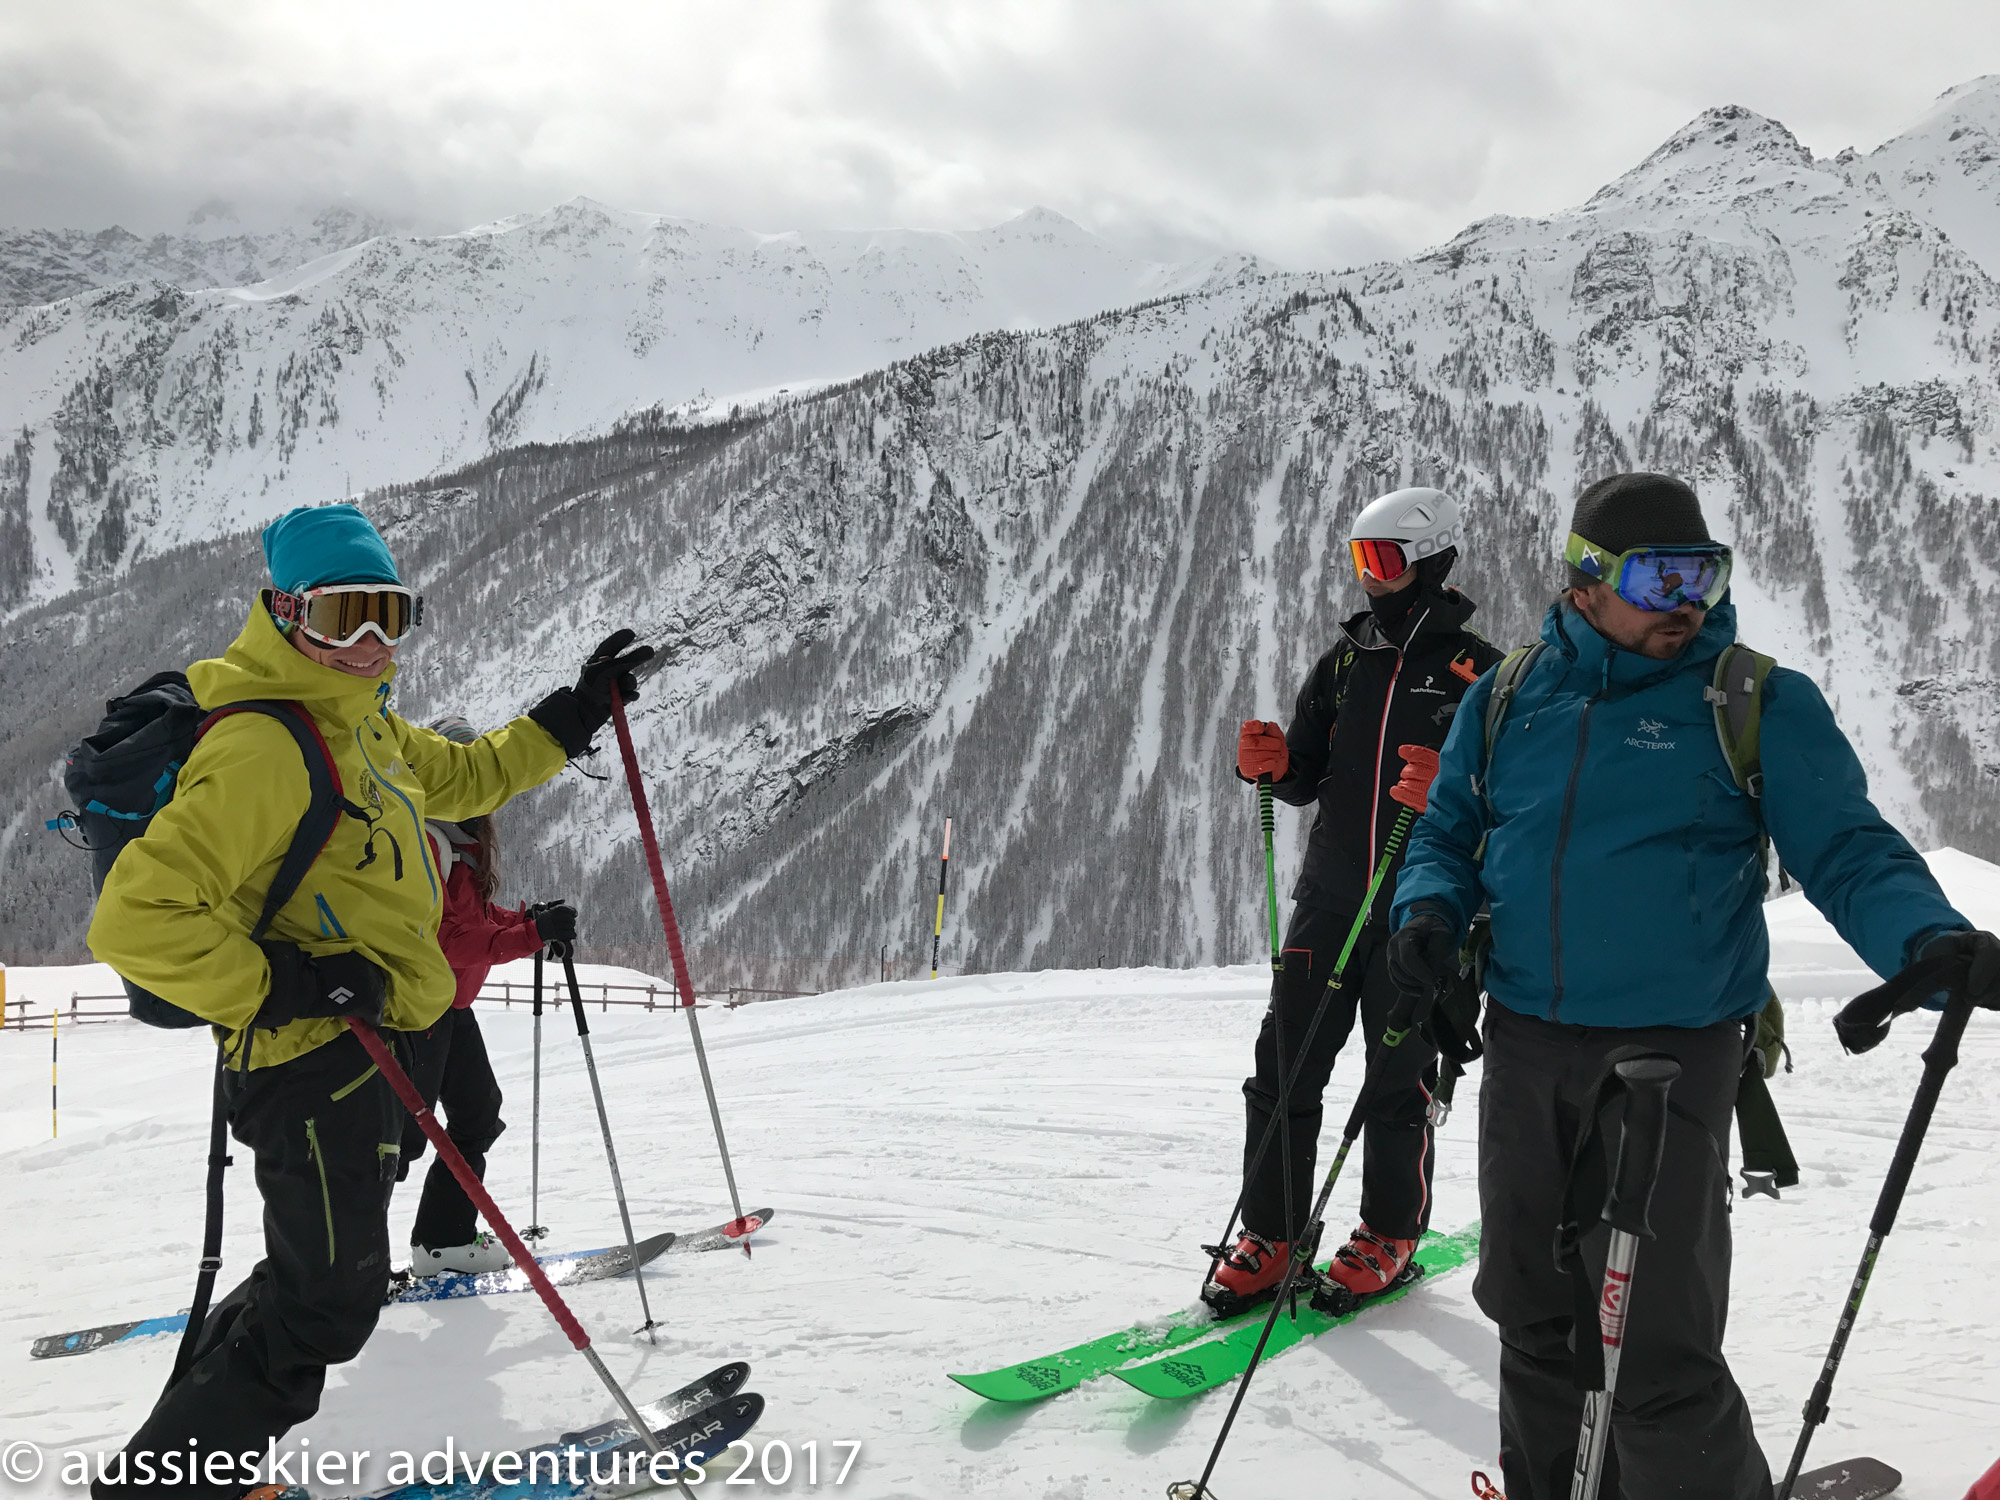
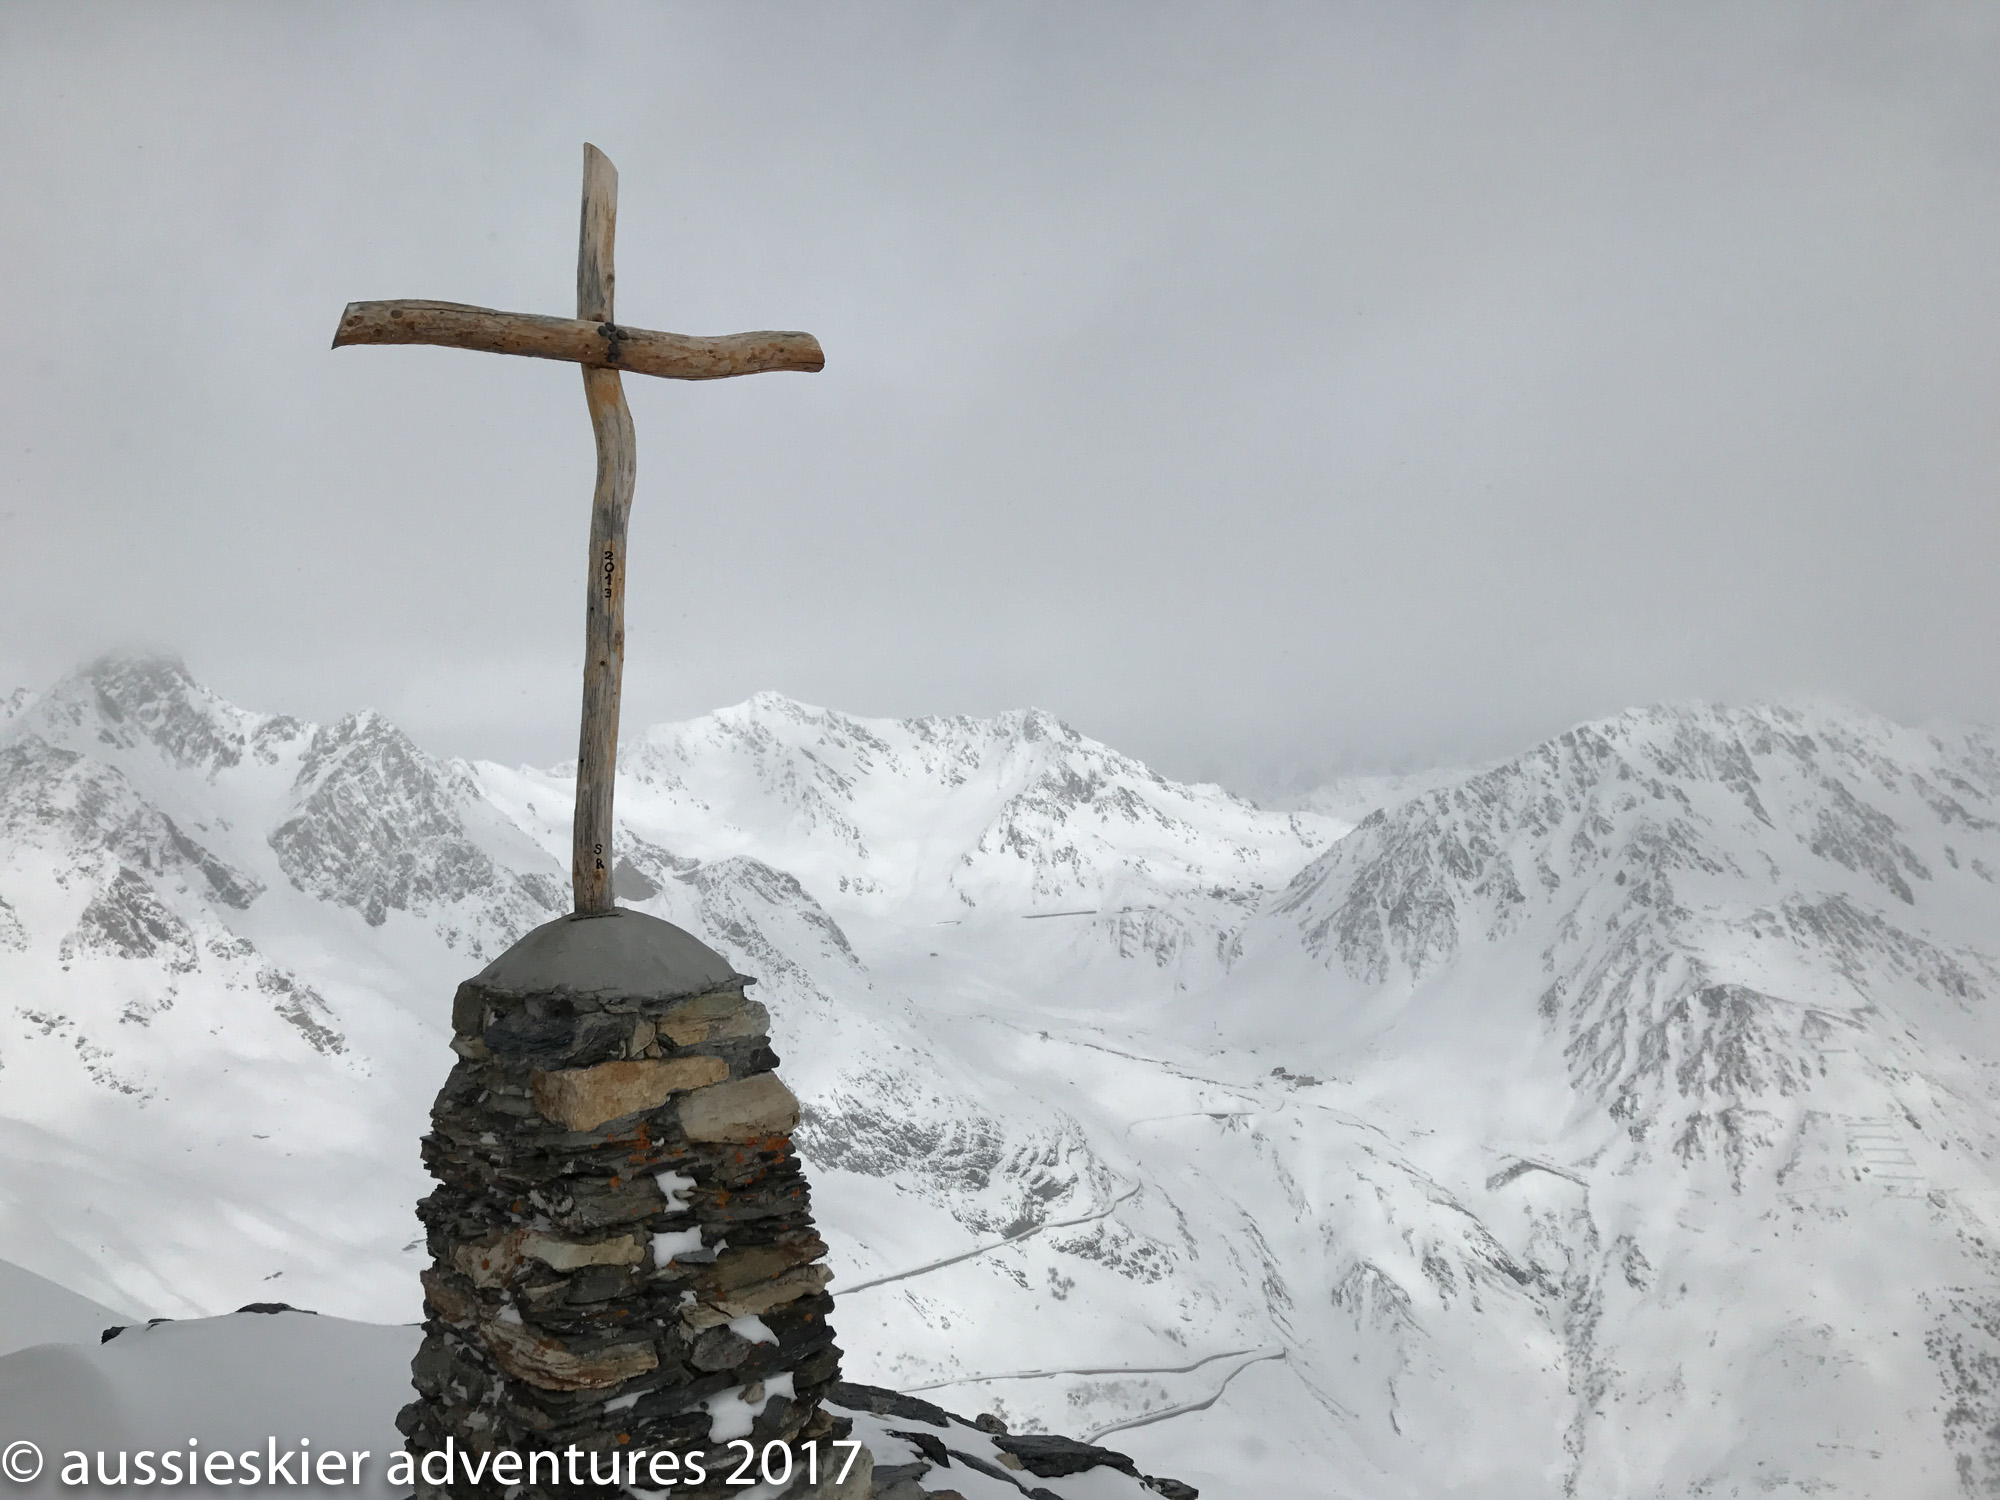
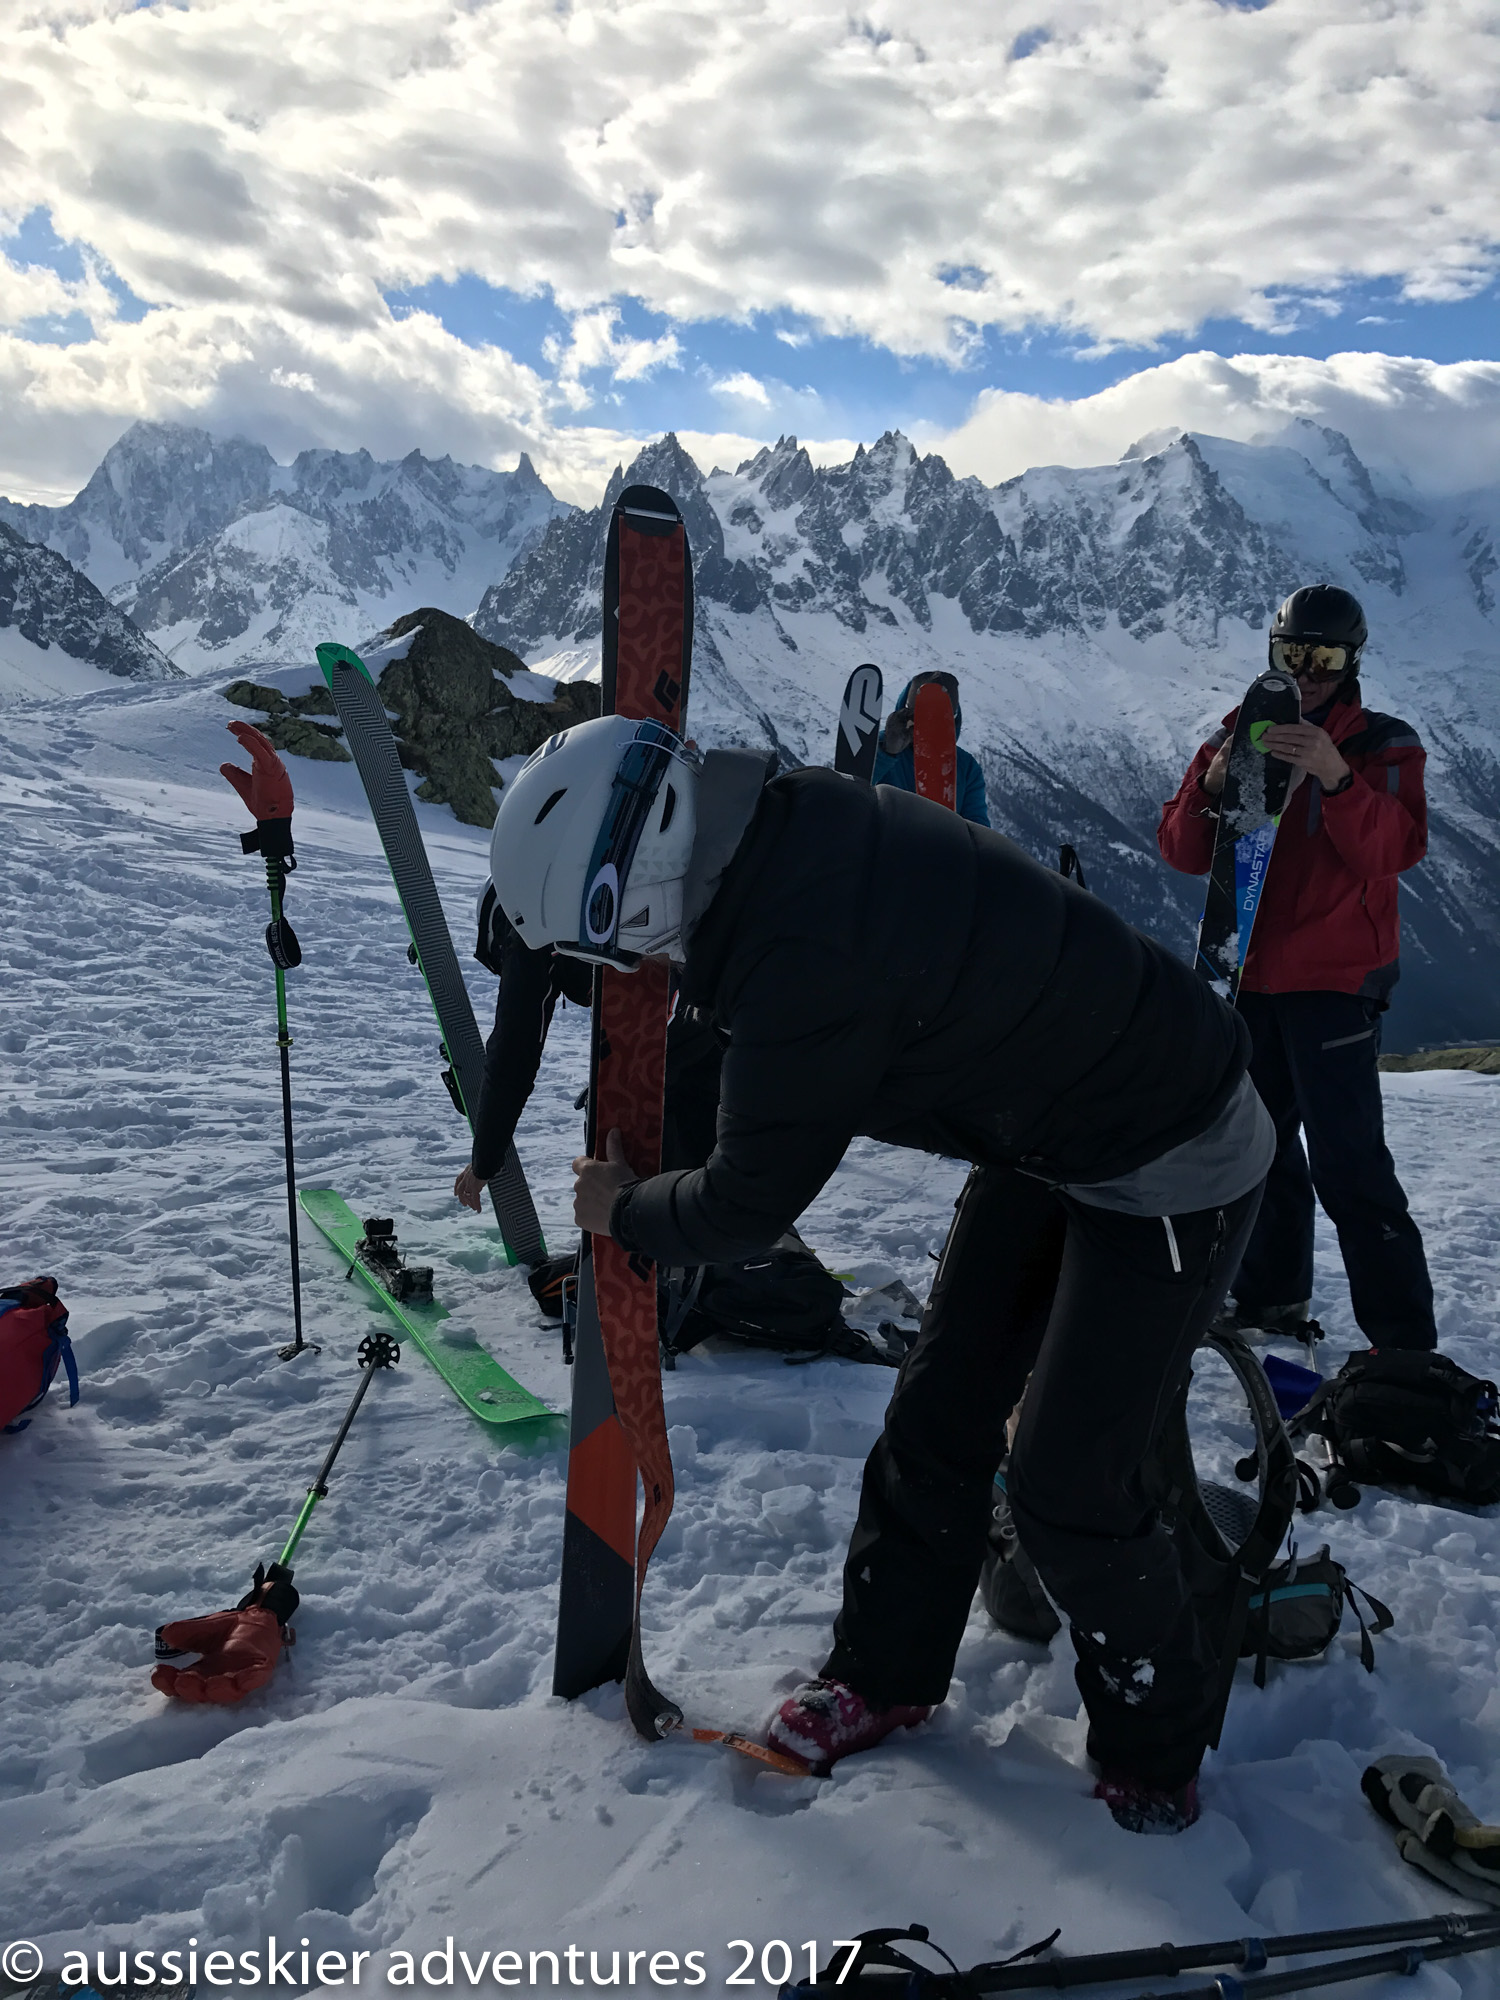
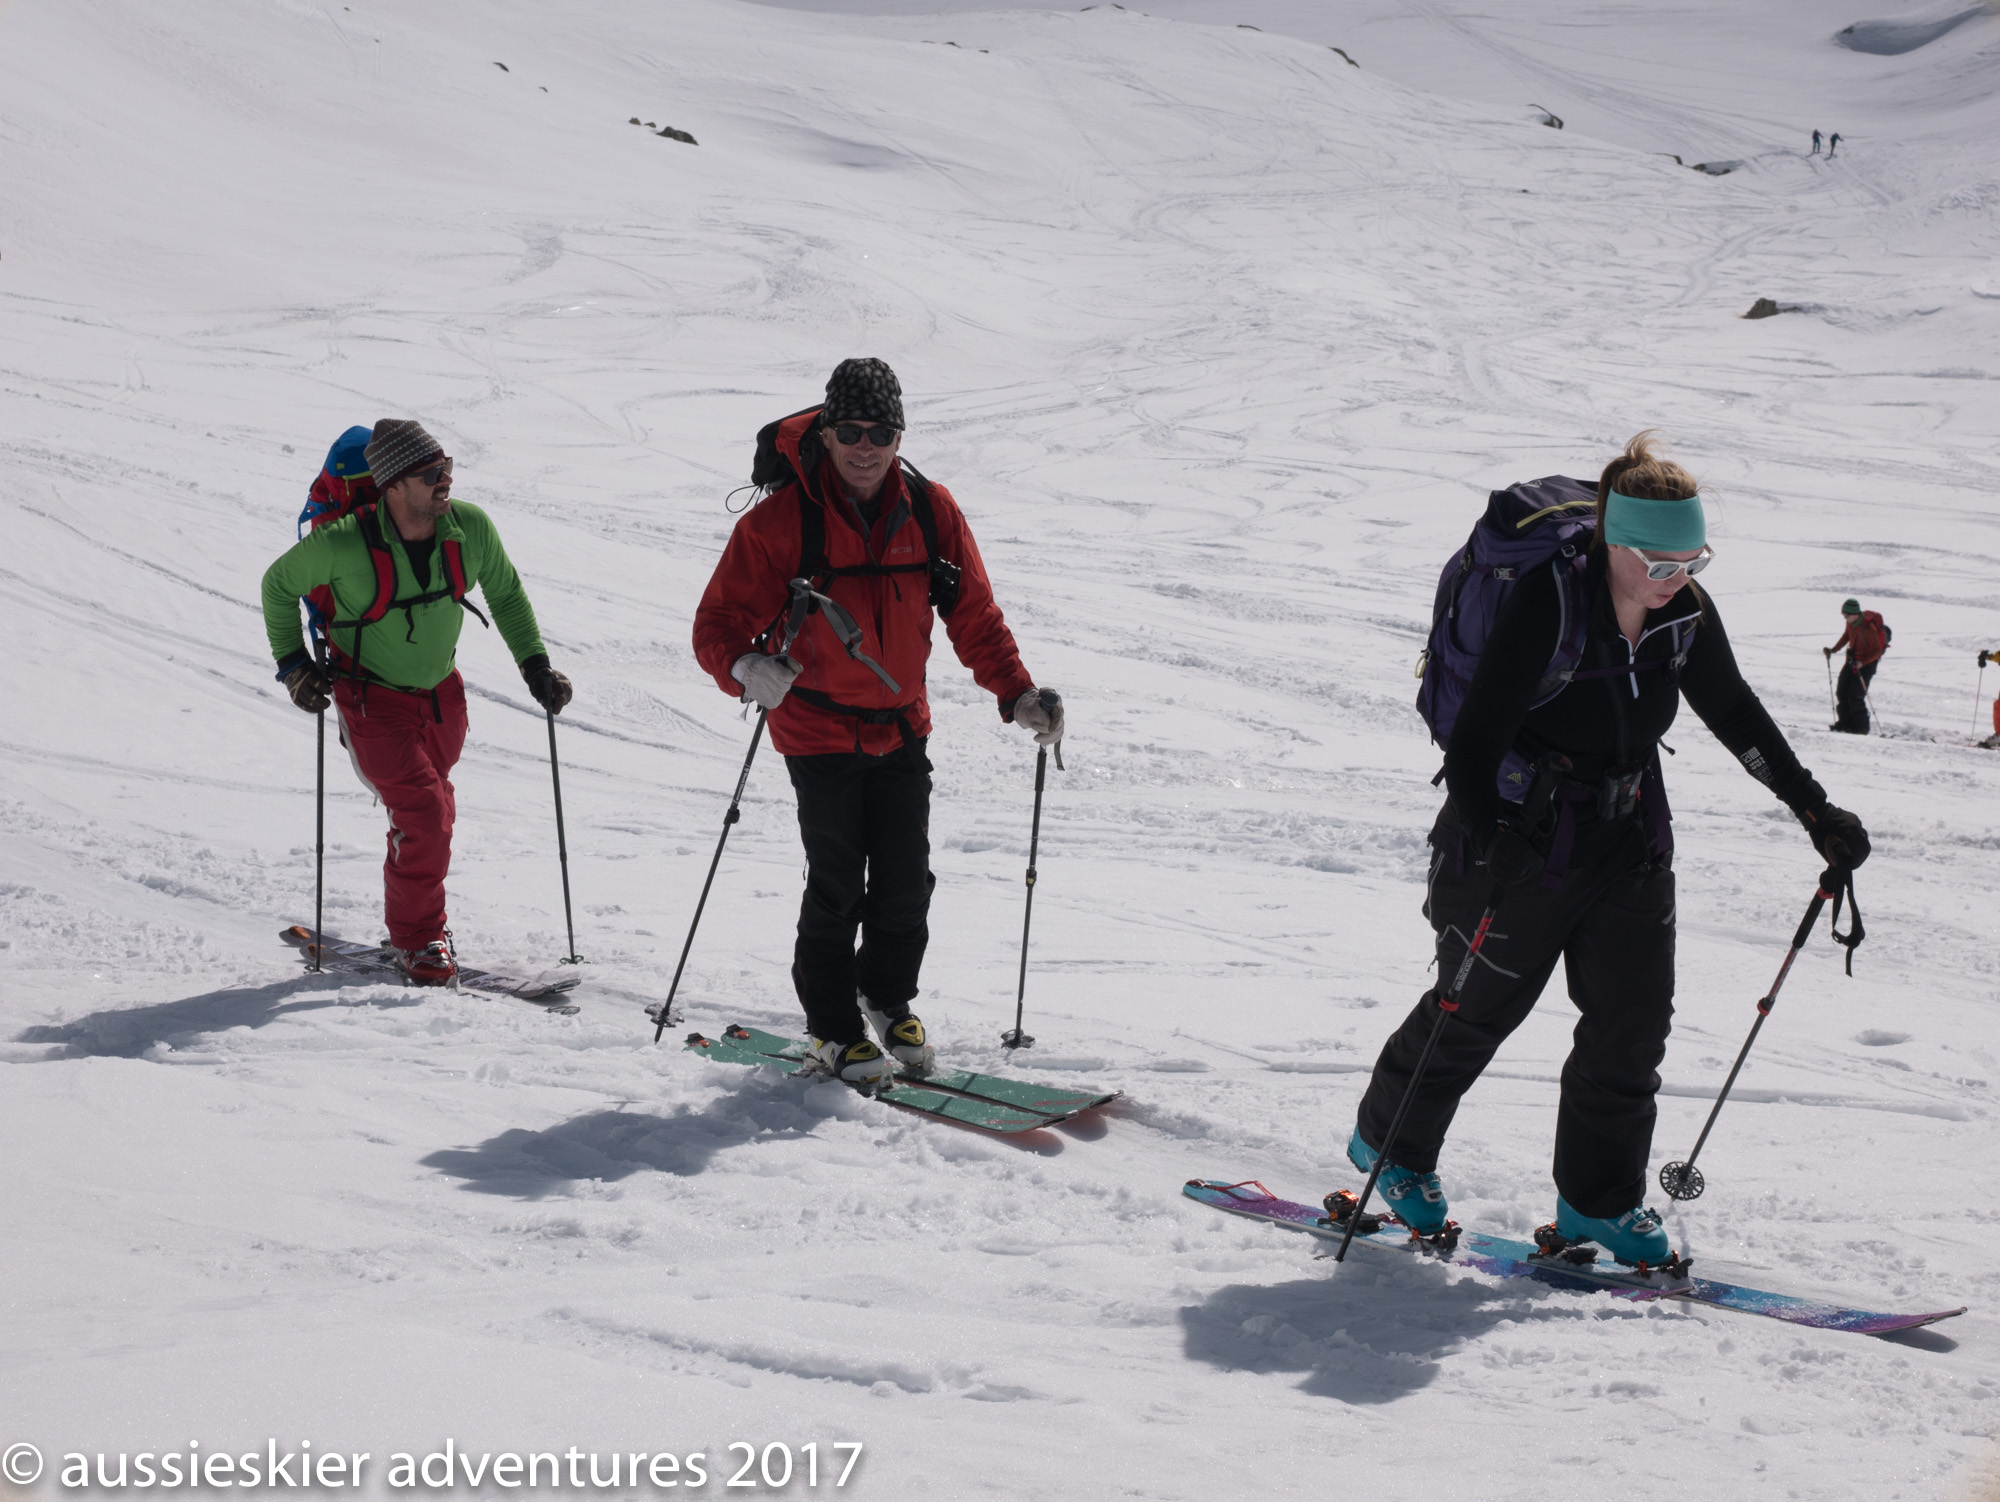
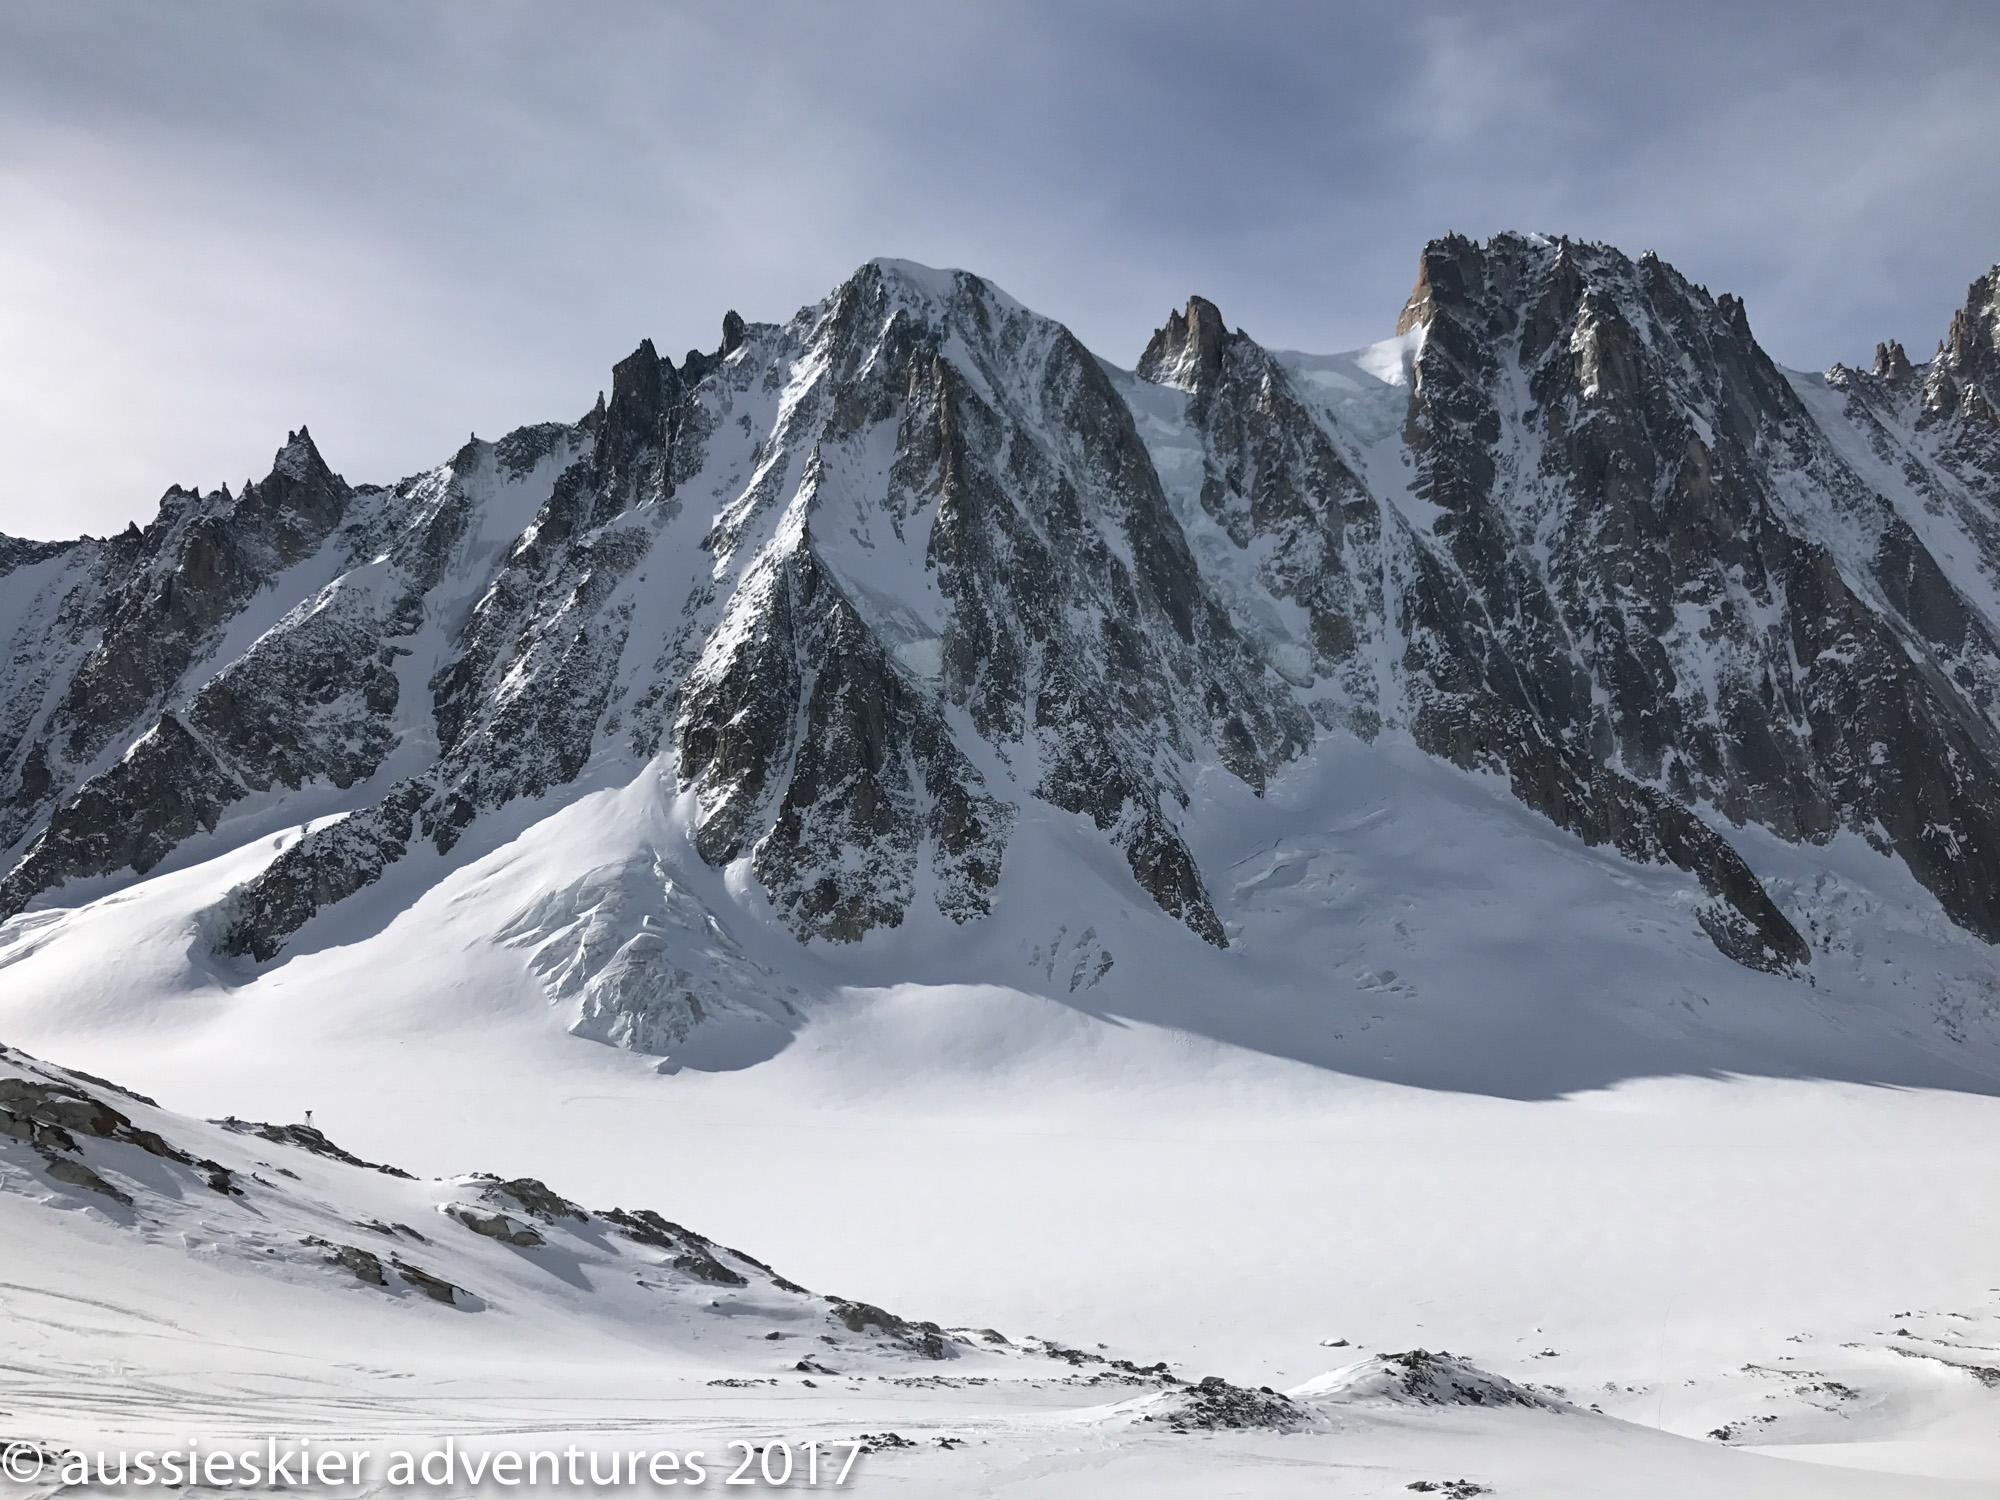
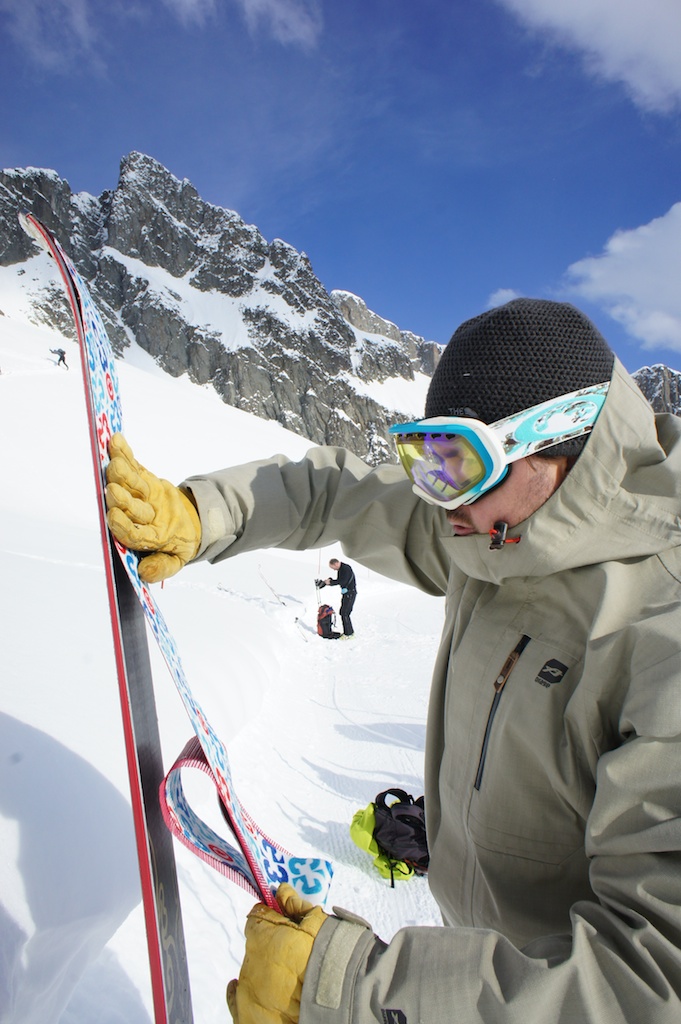
Chamonix 2017 – Vallee Blanche
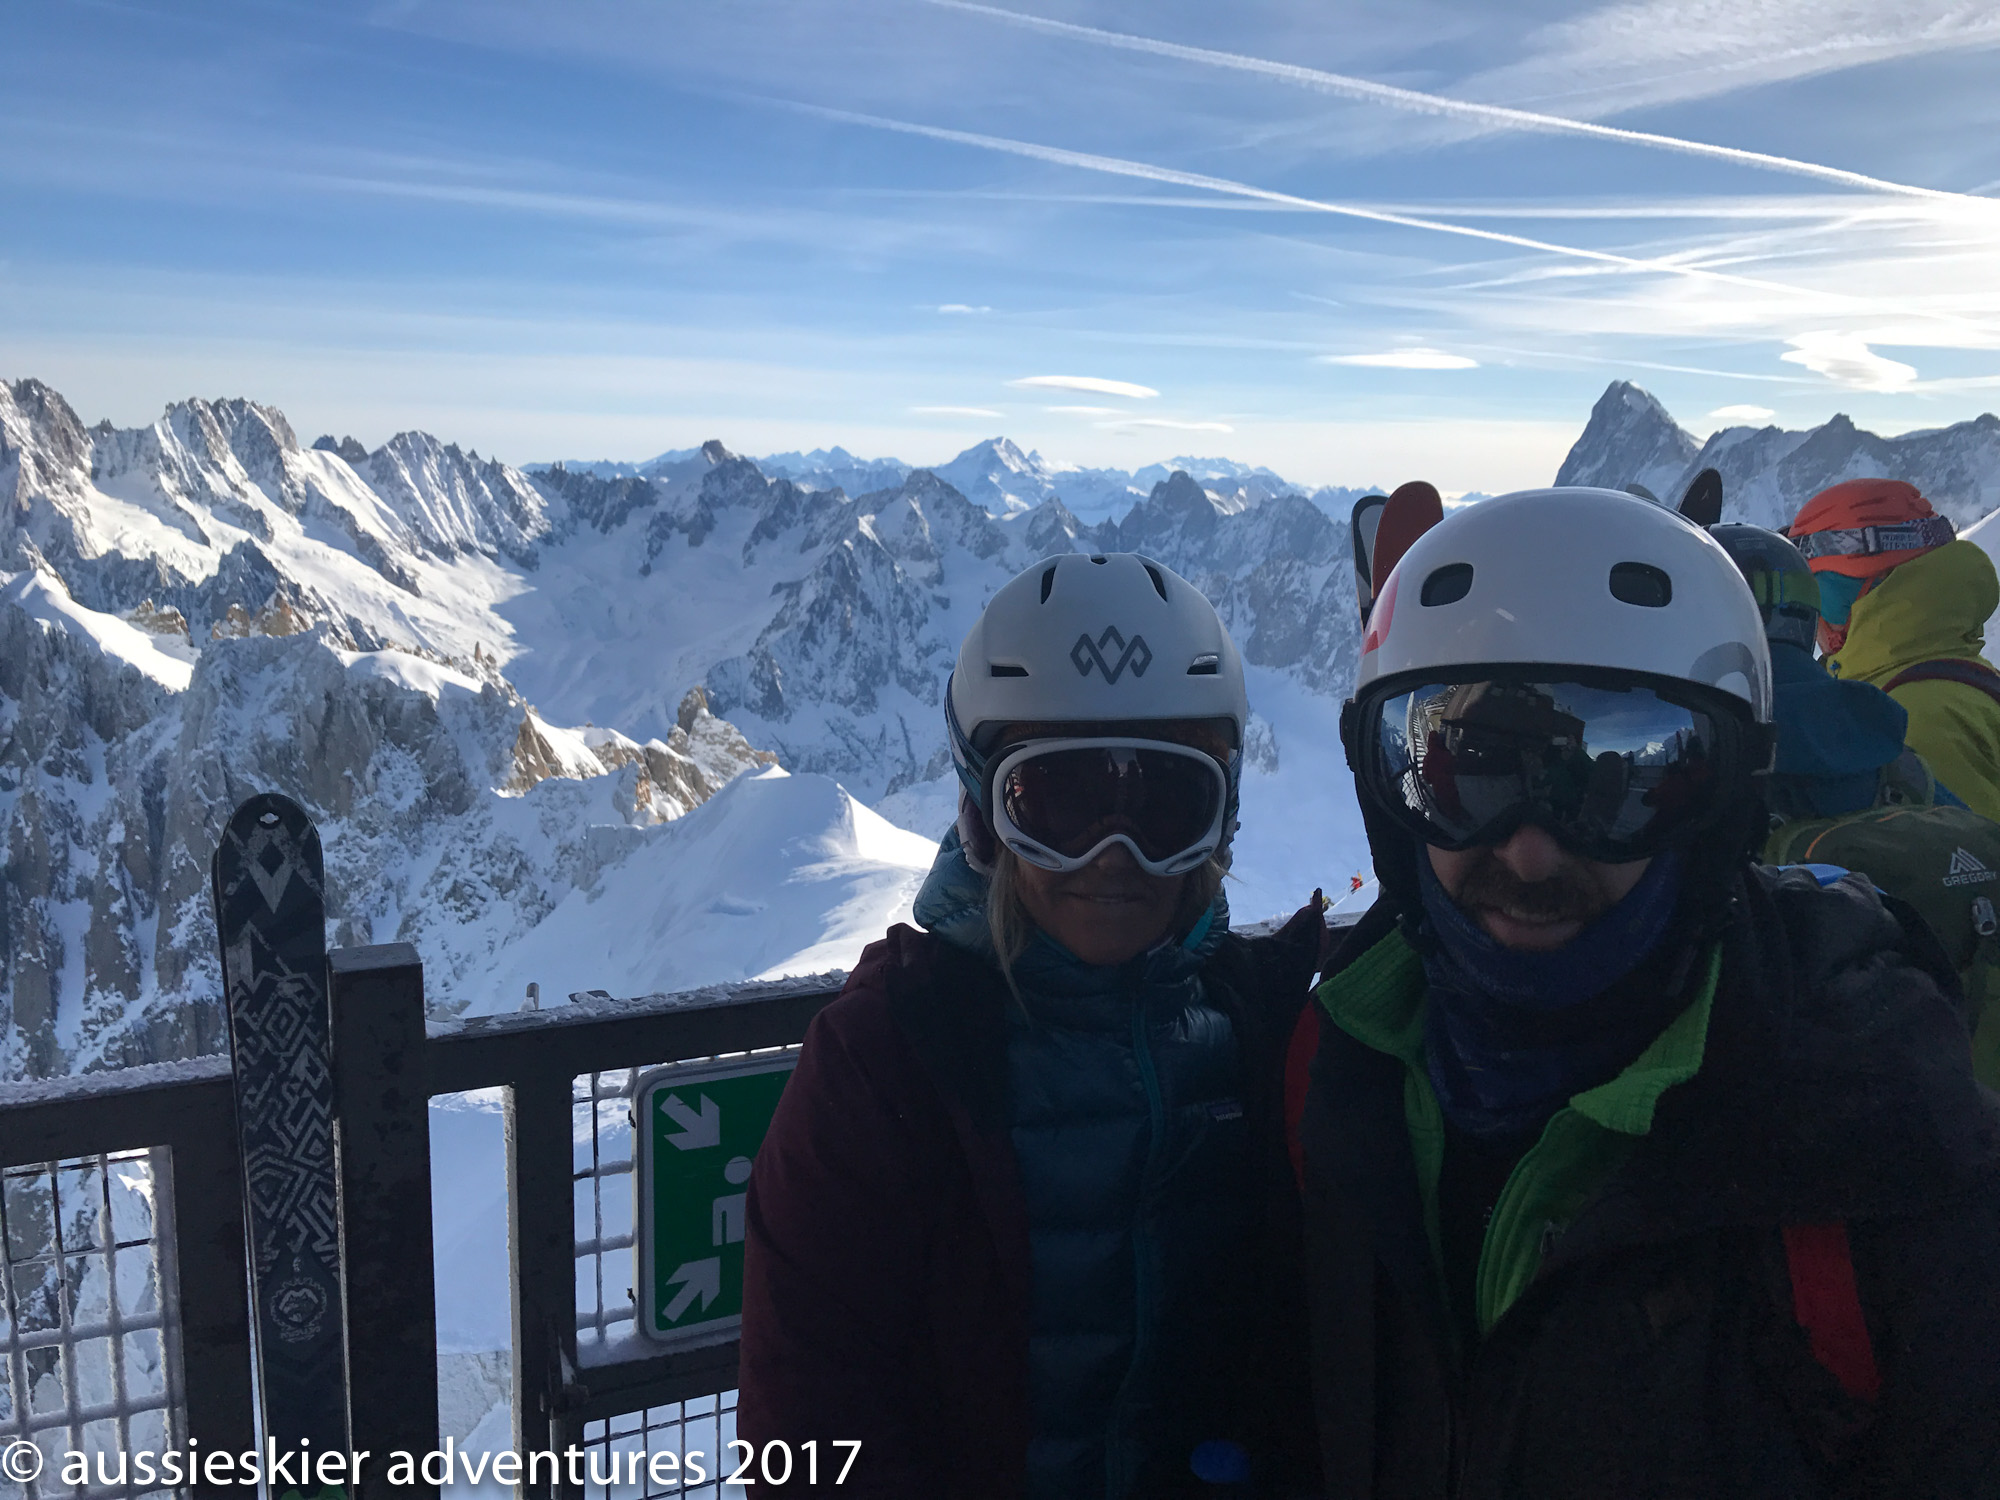
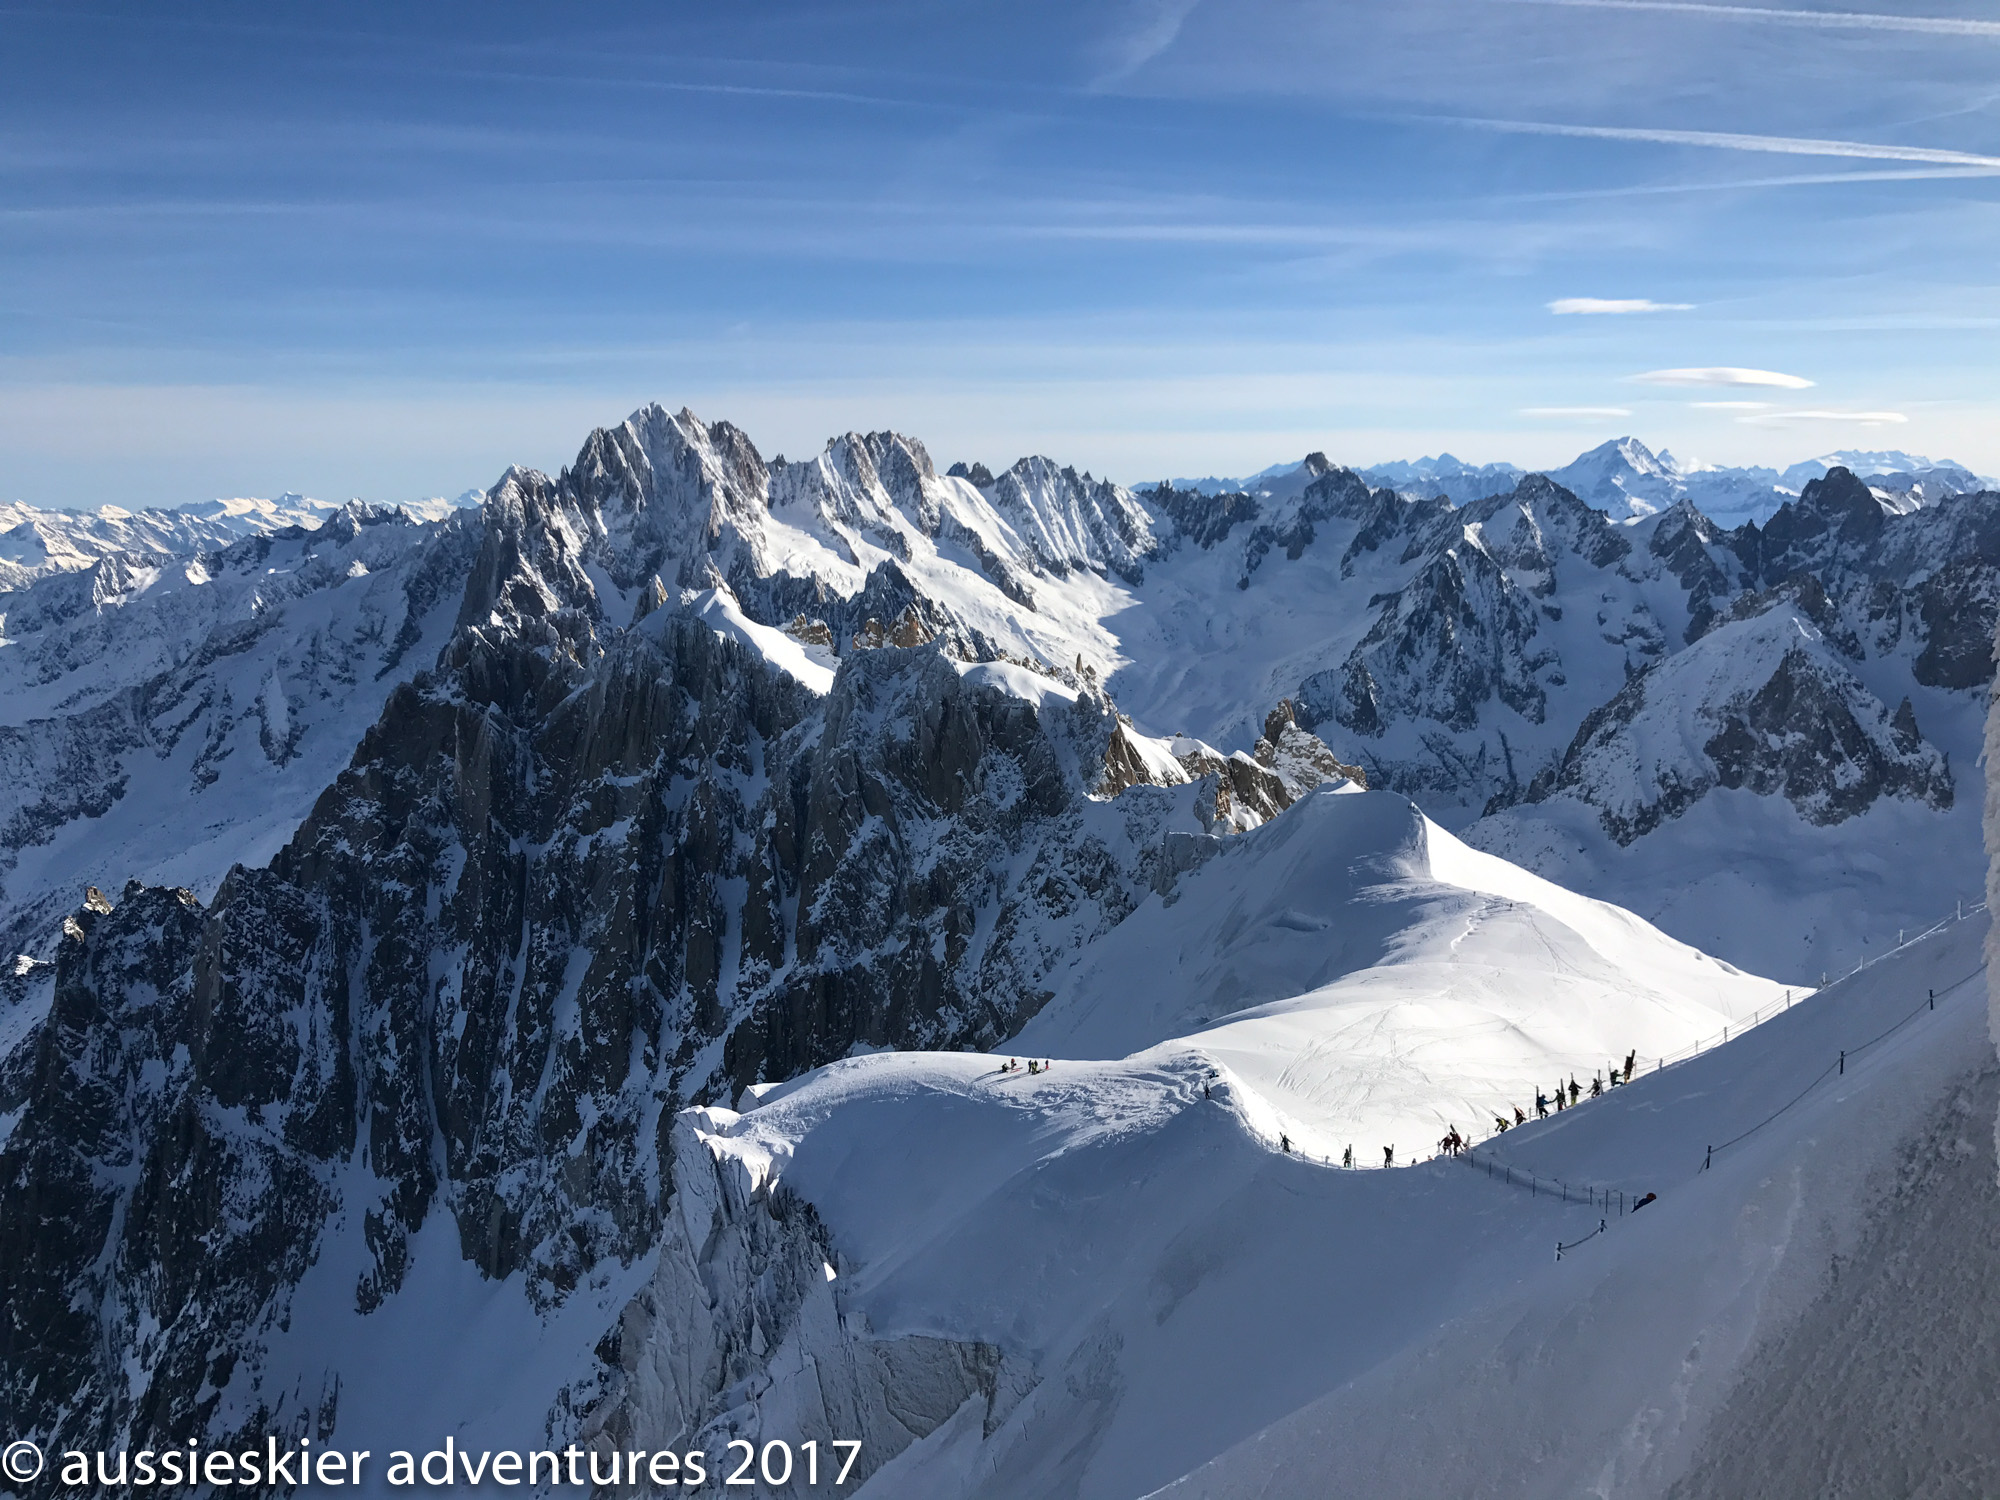
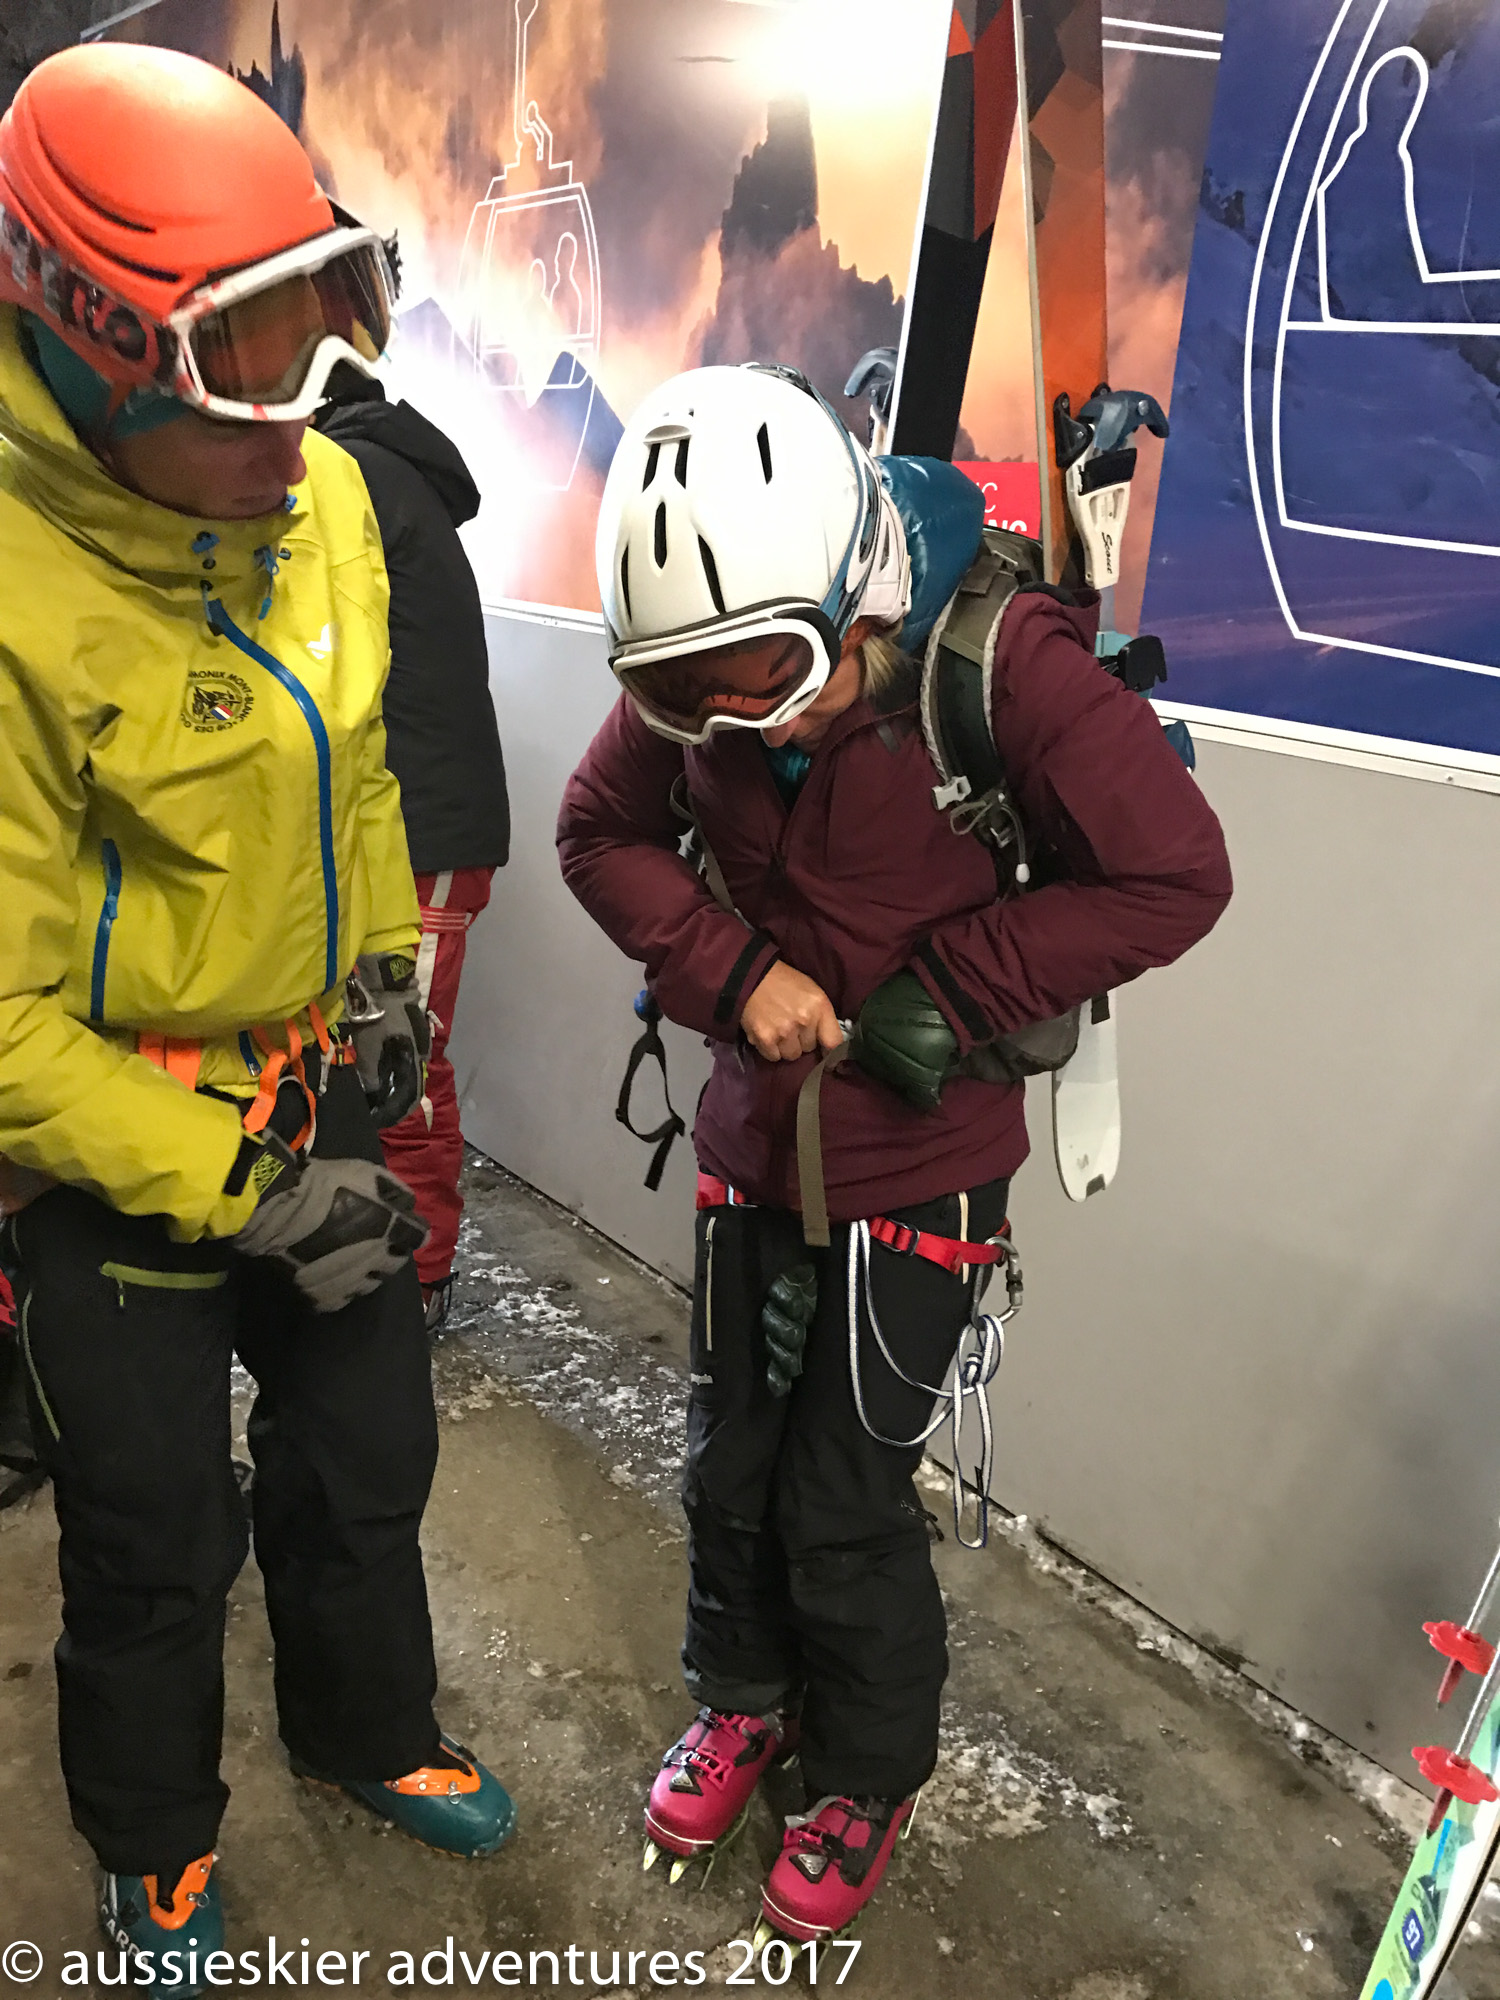
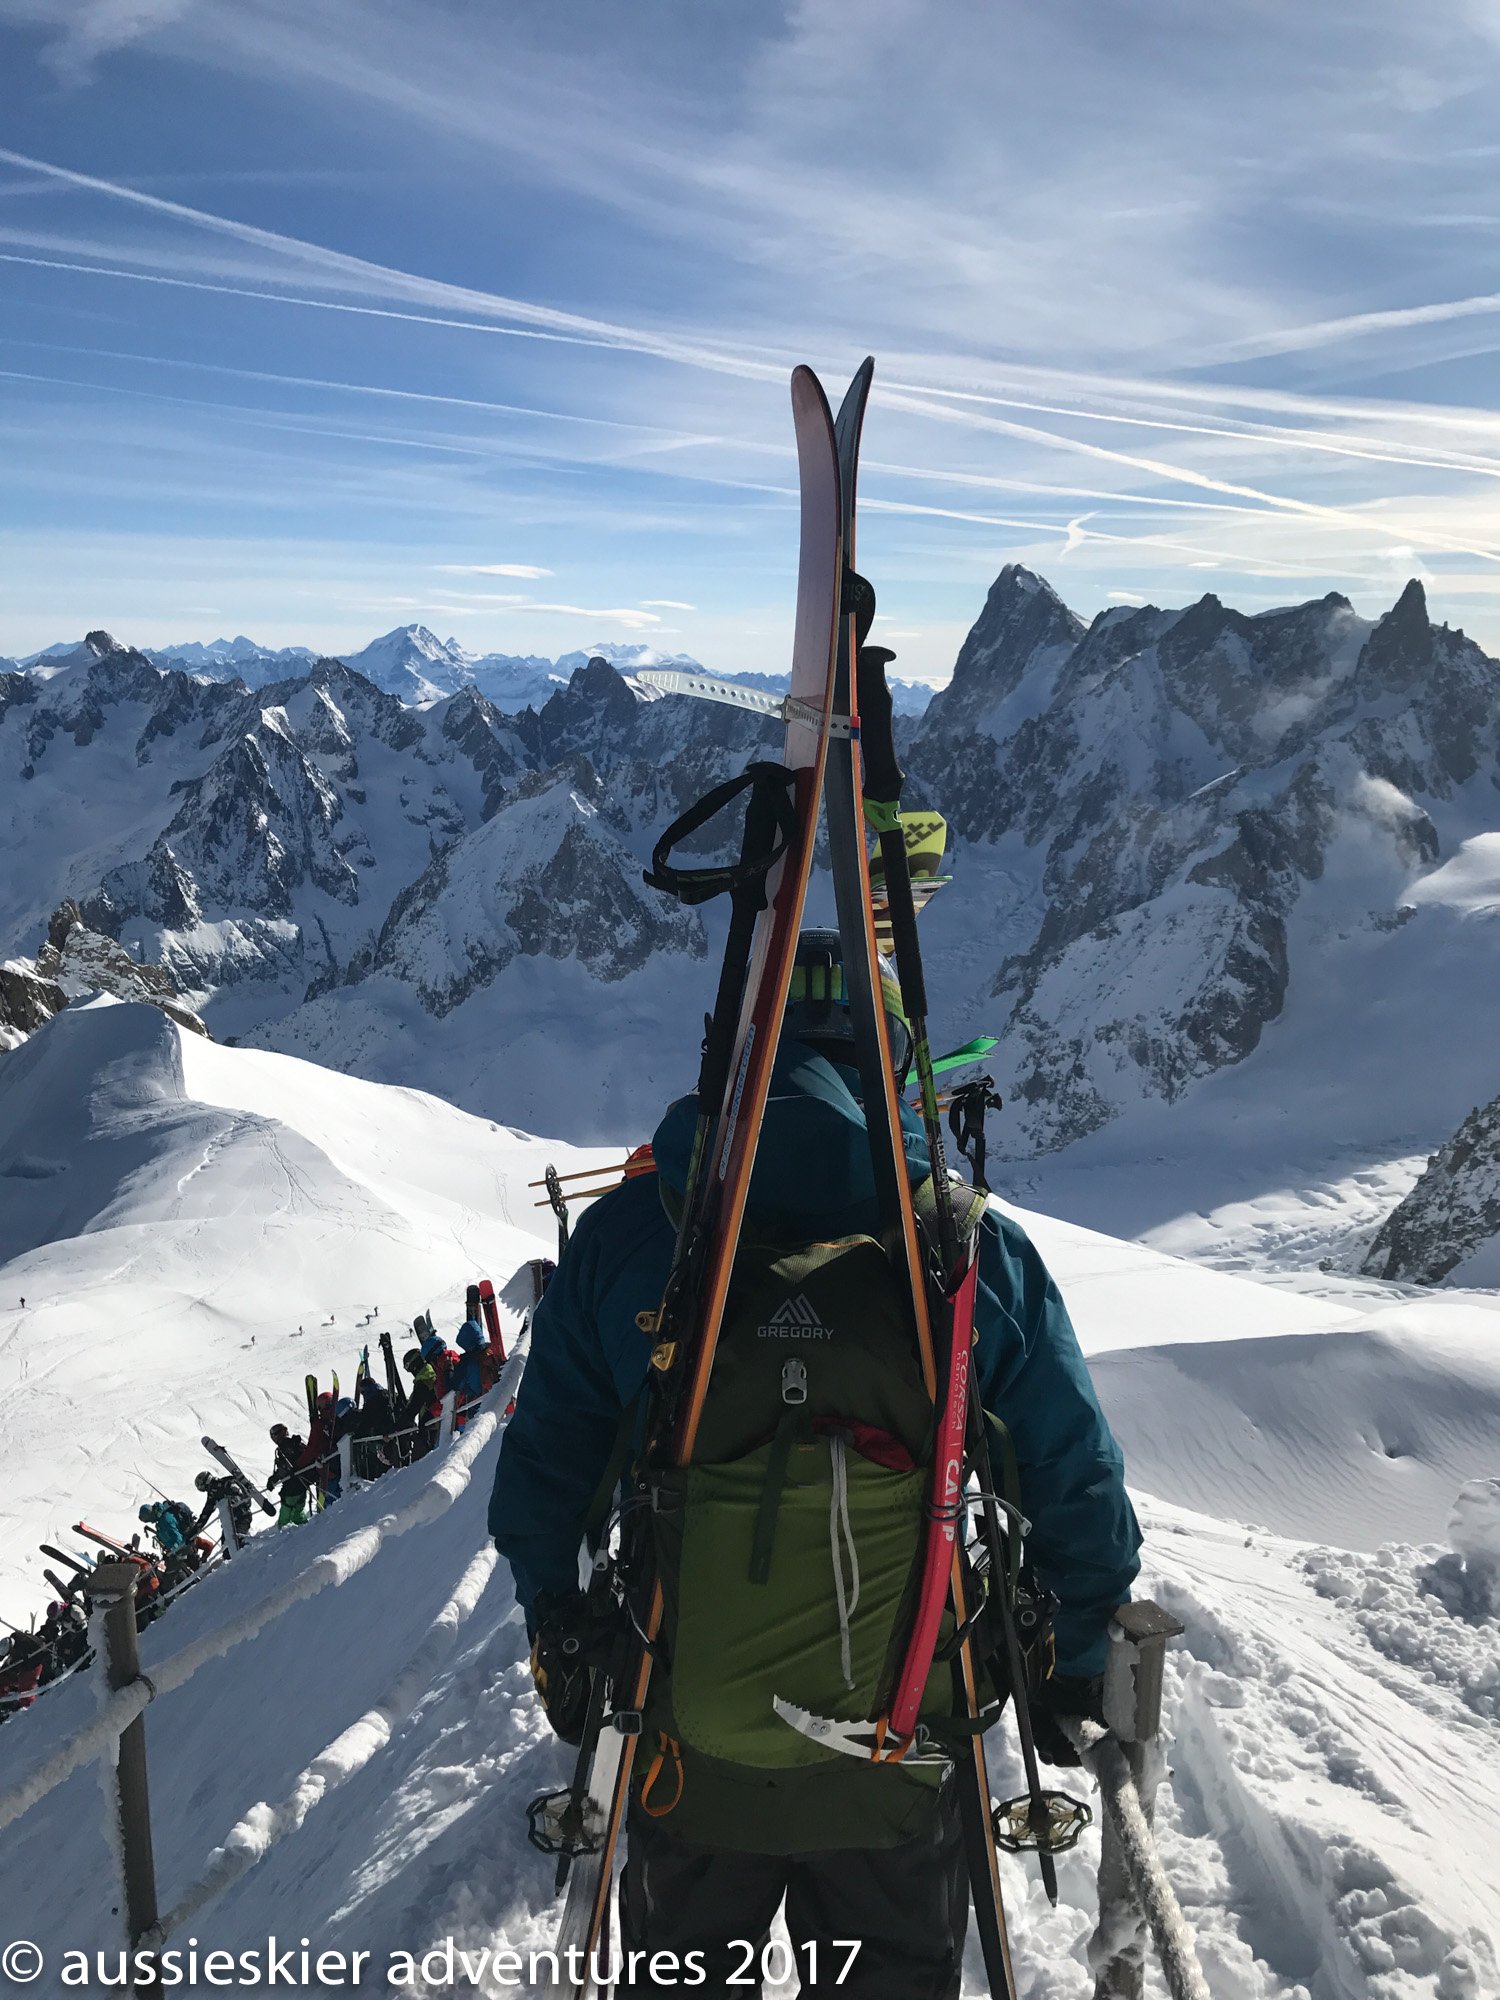
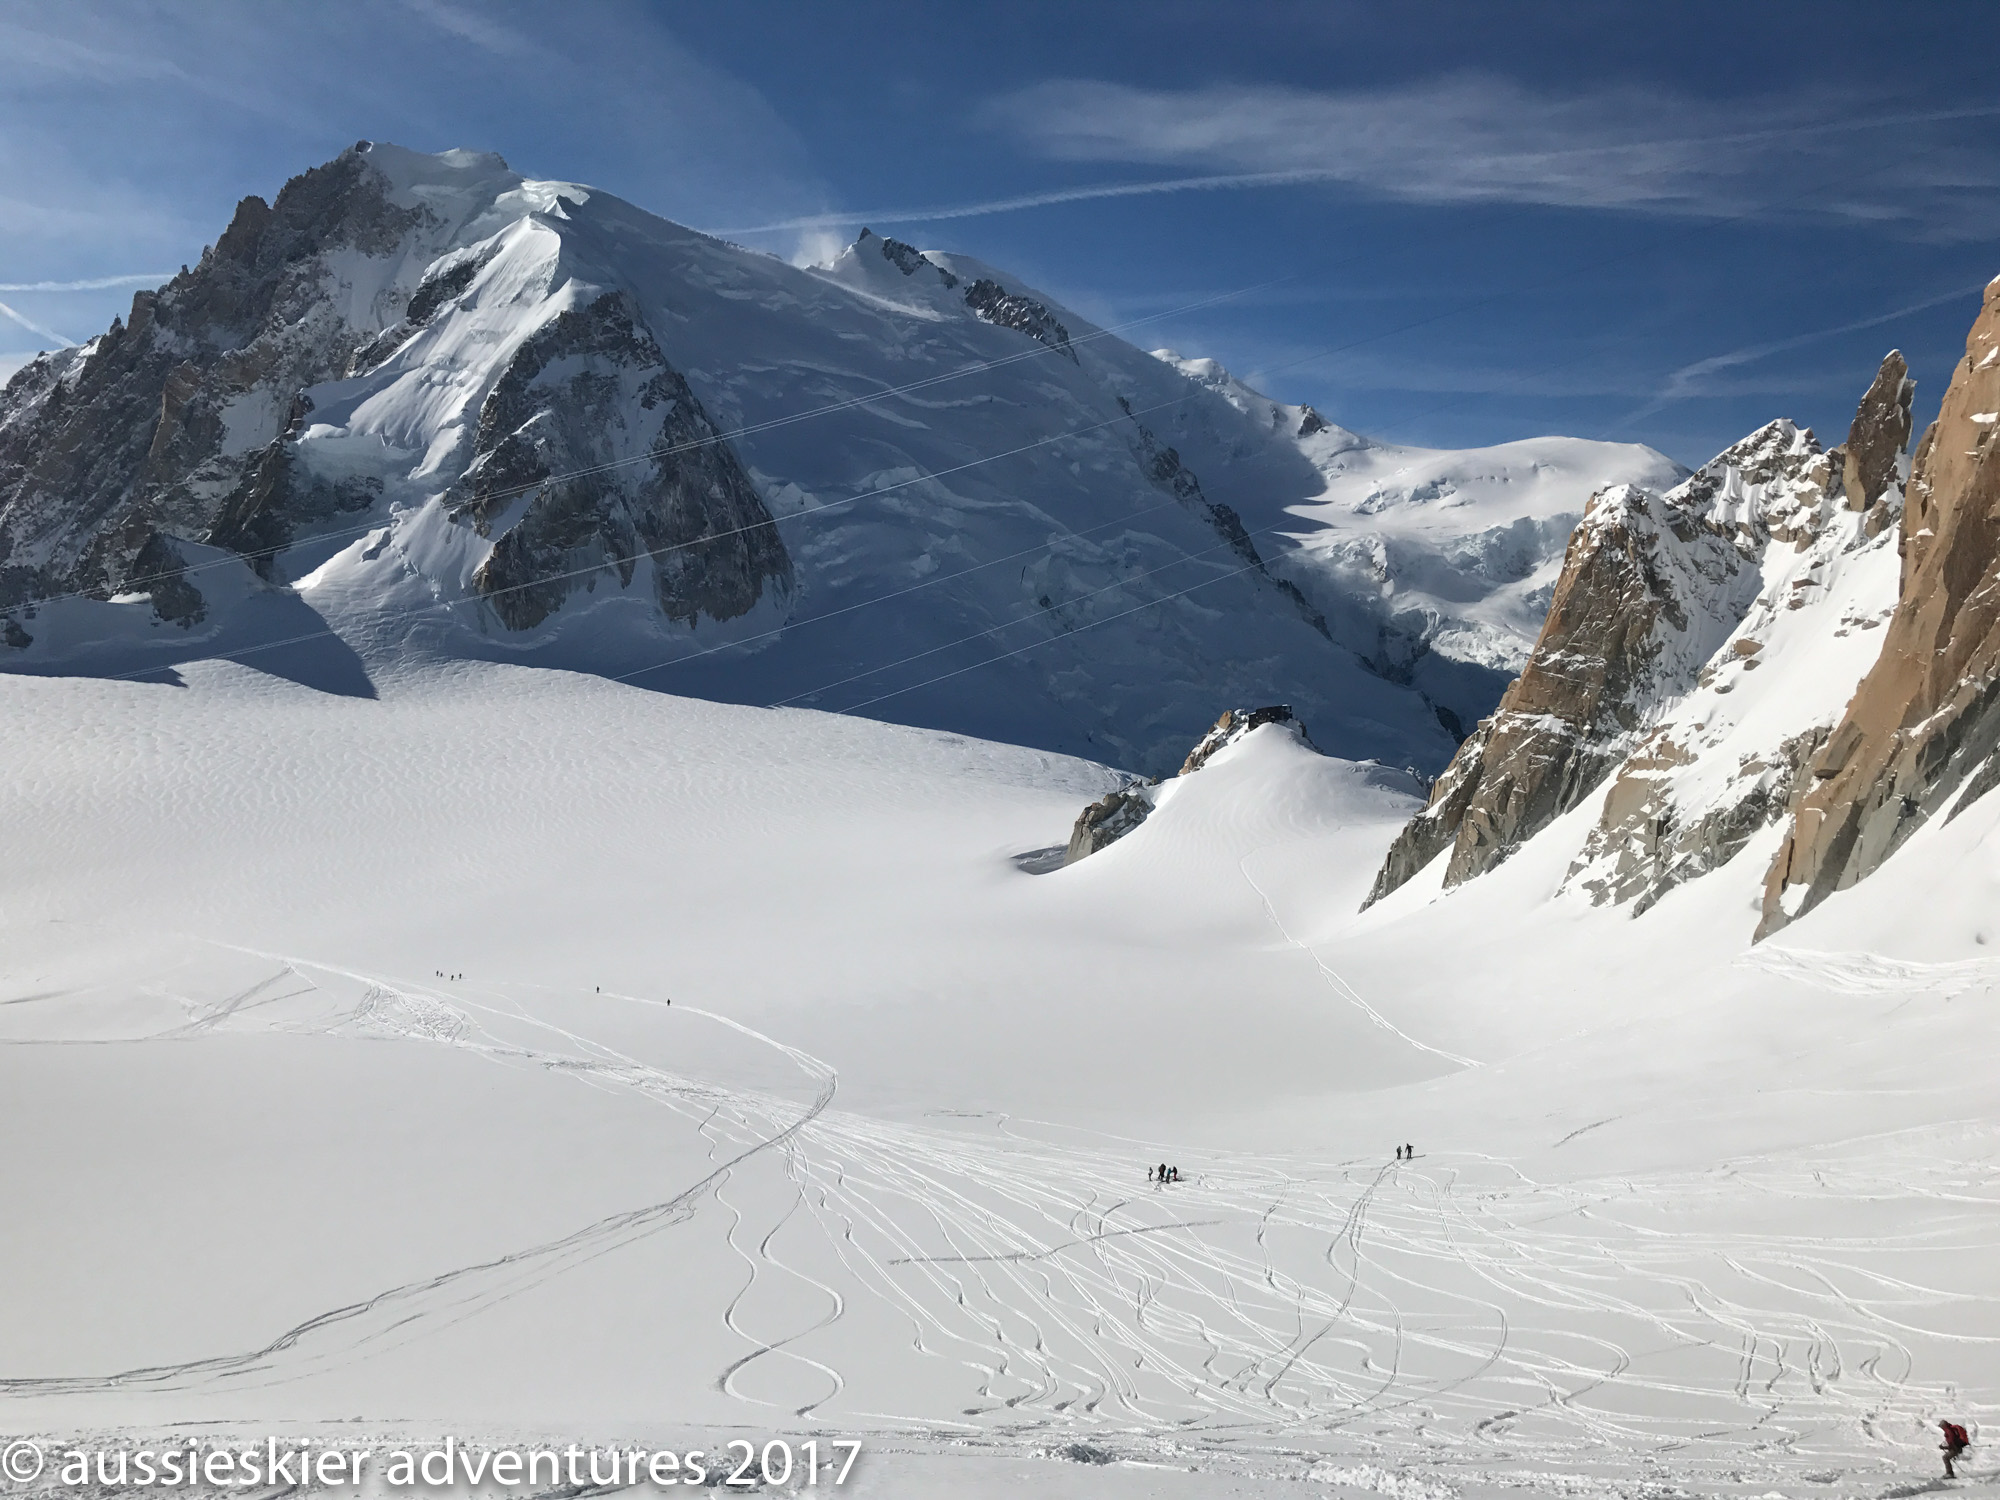
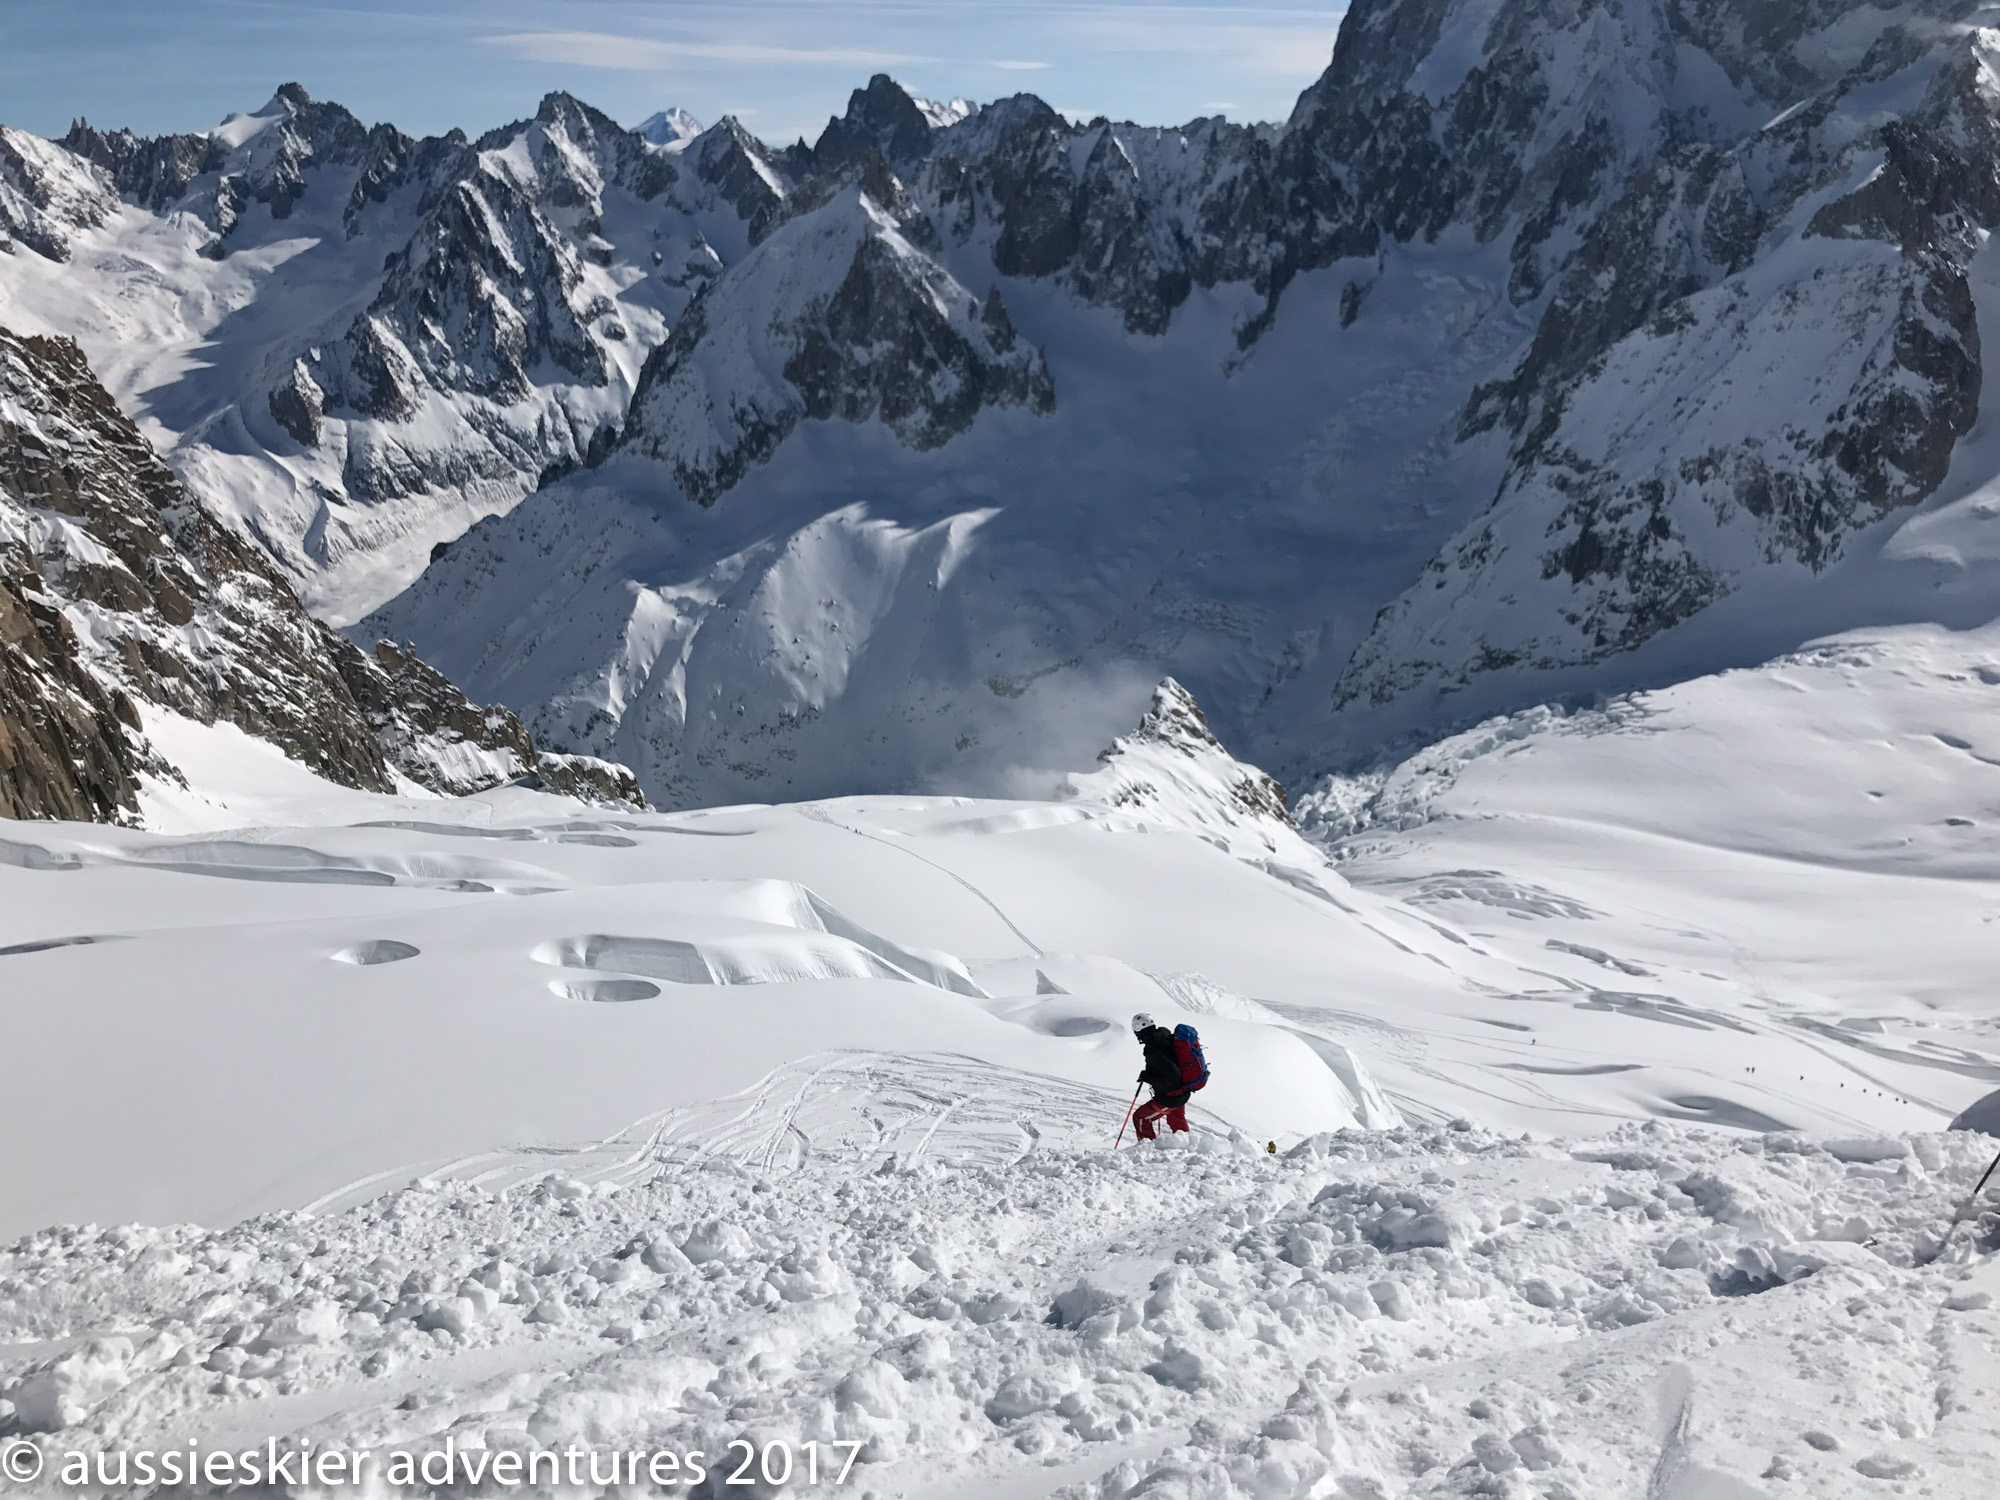
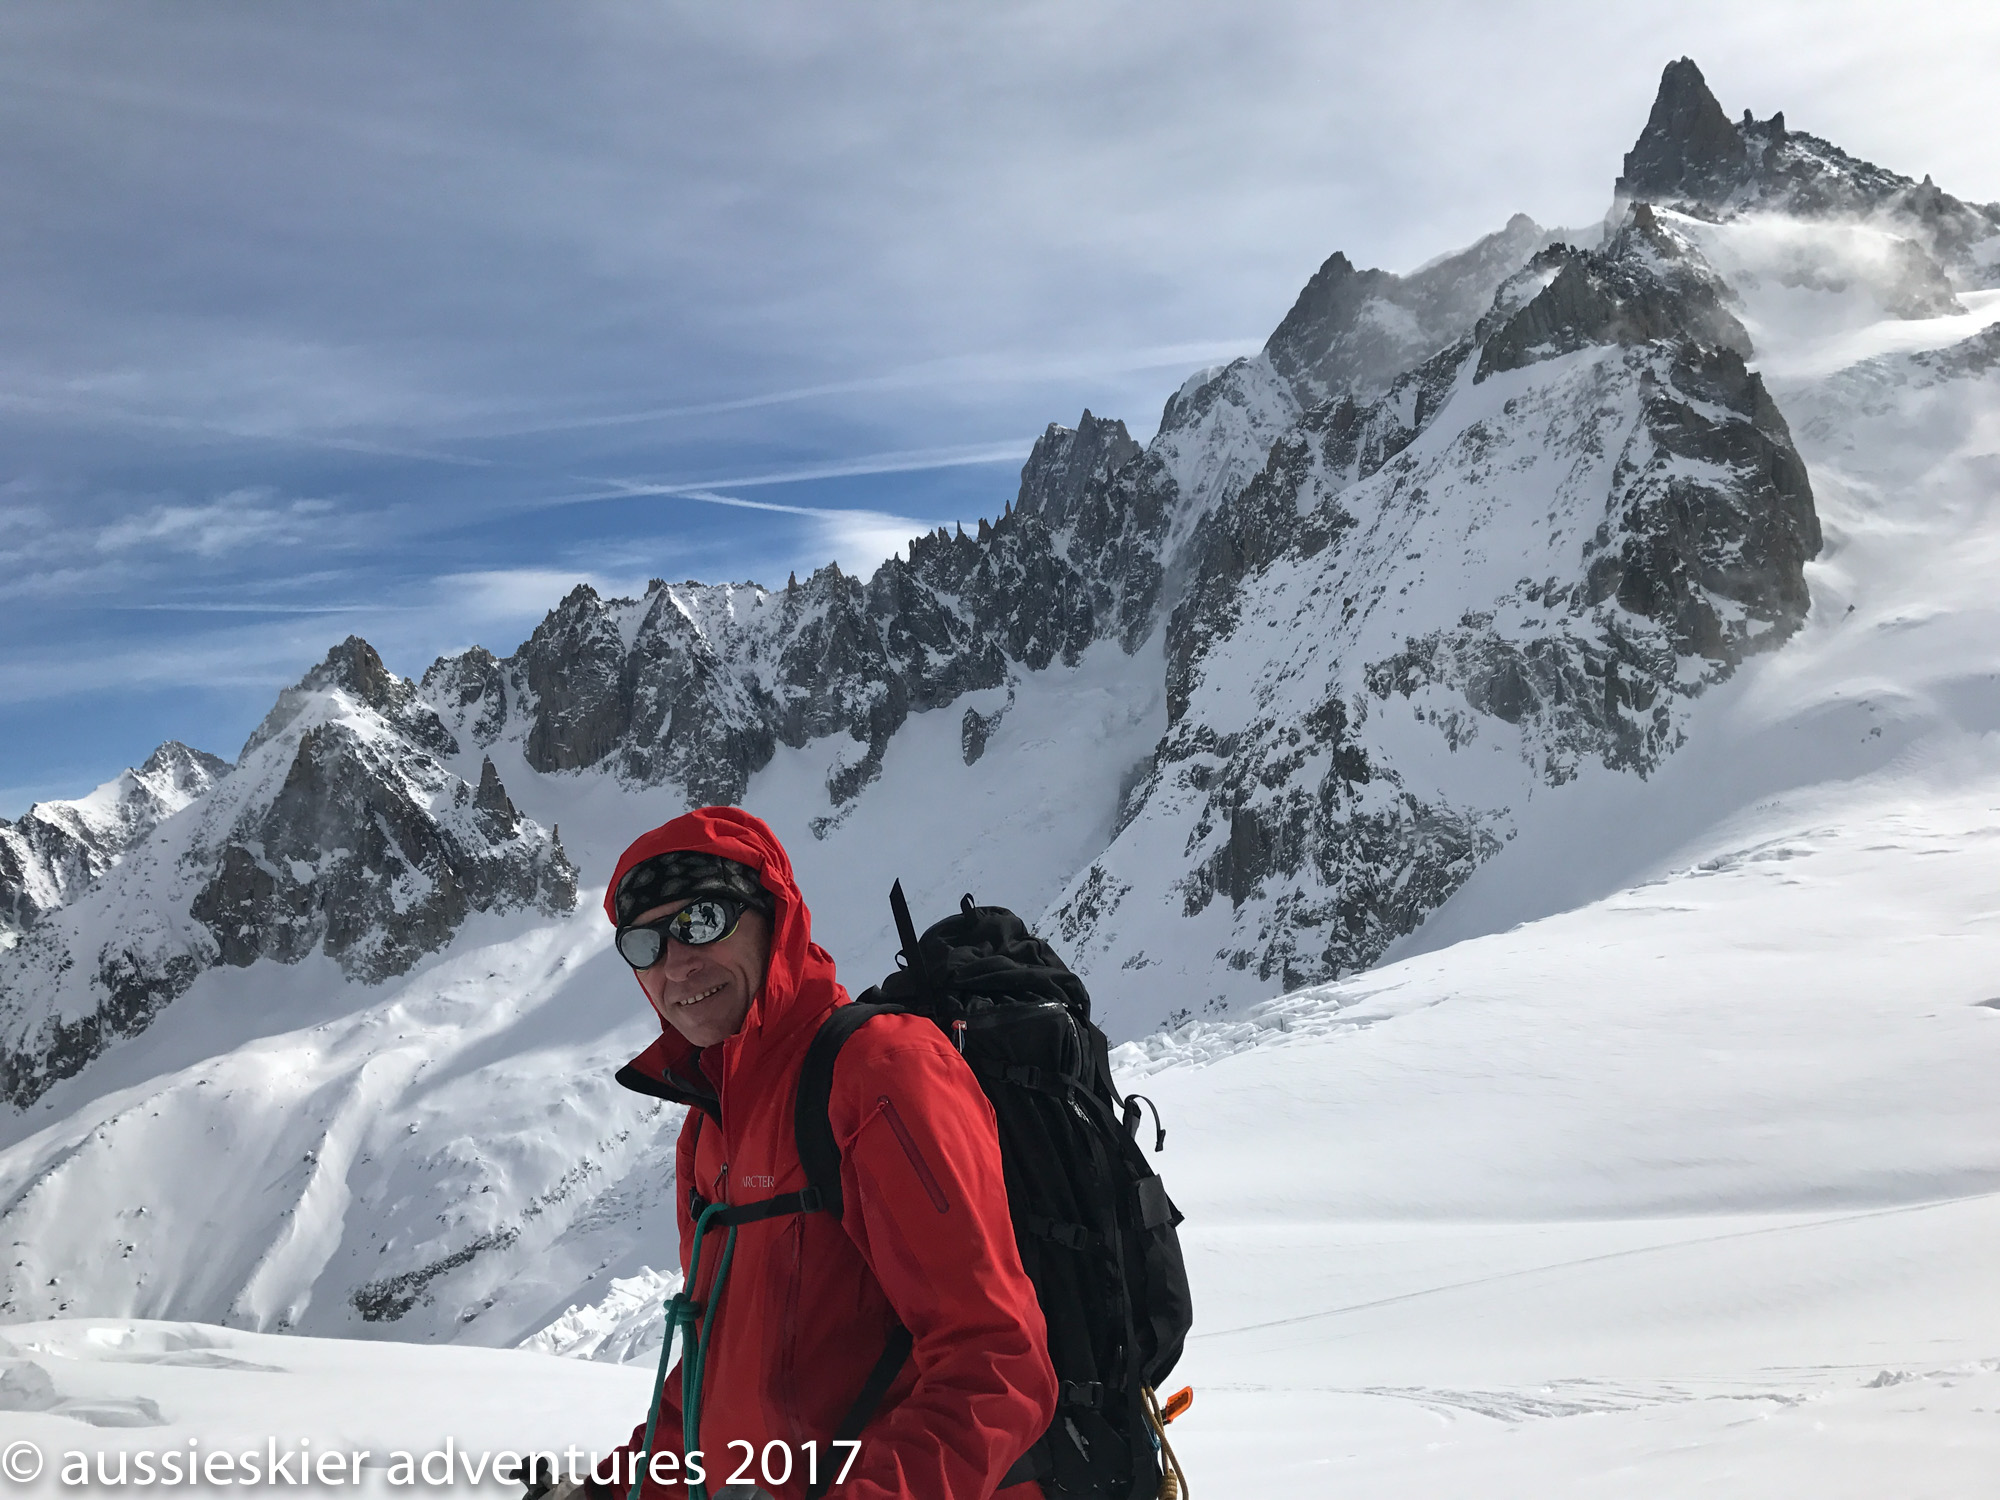
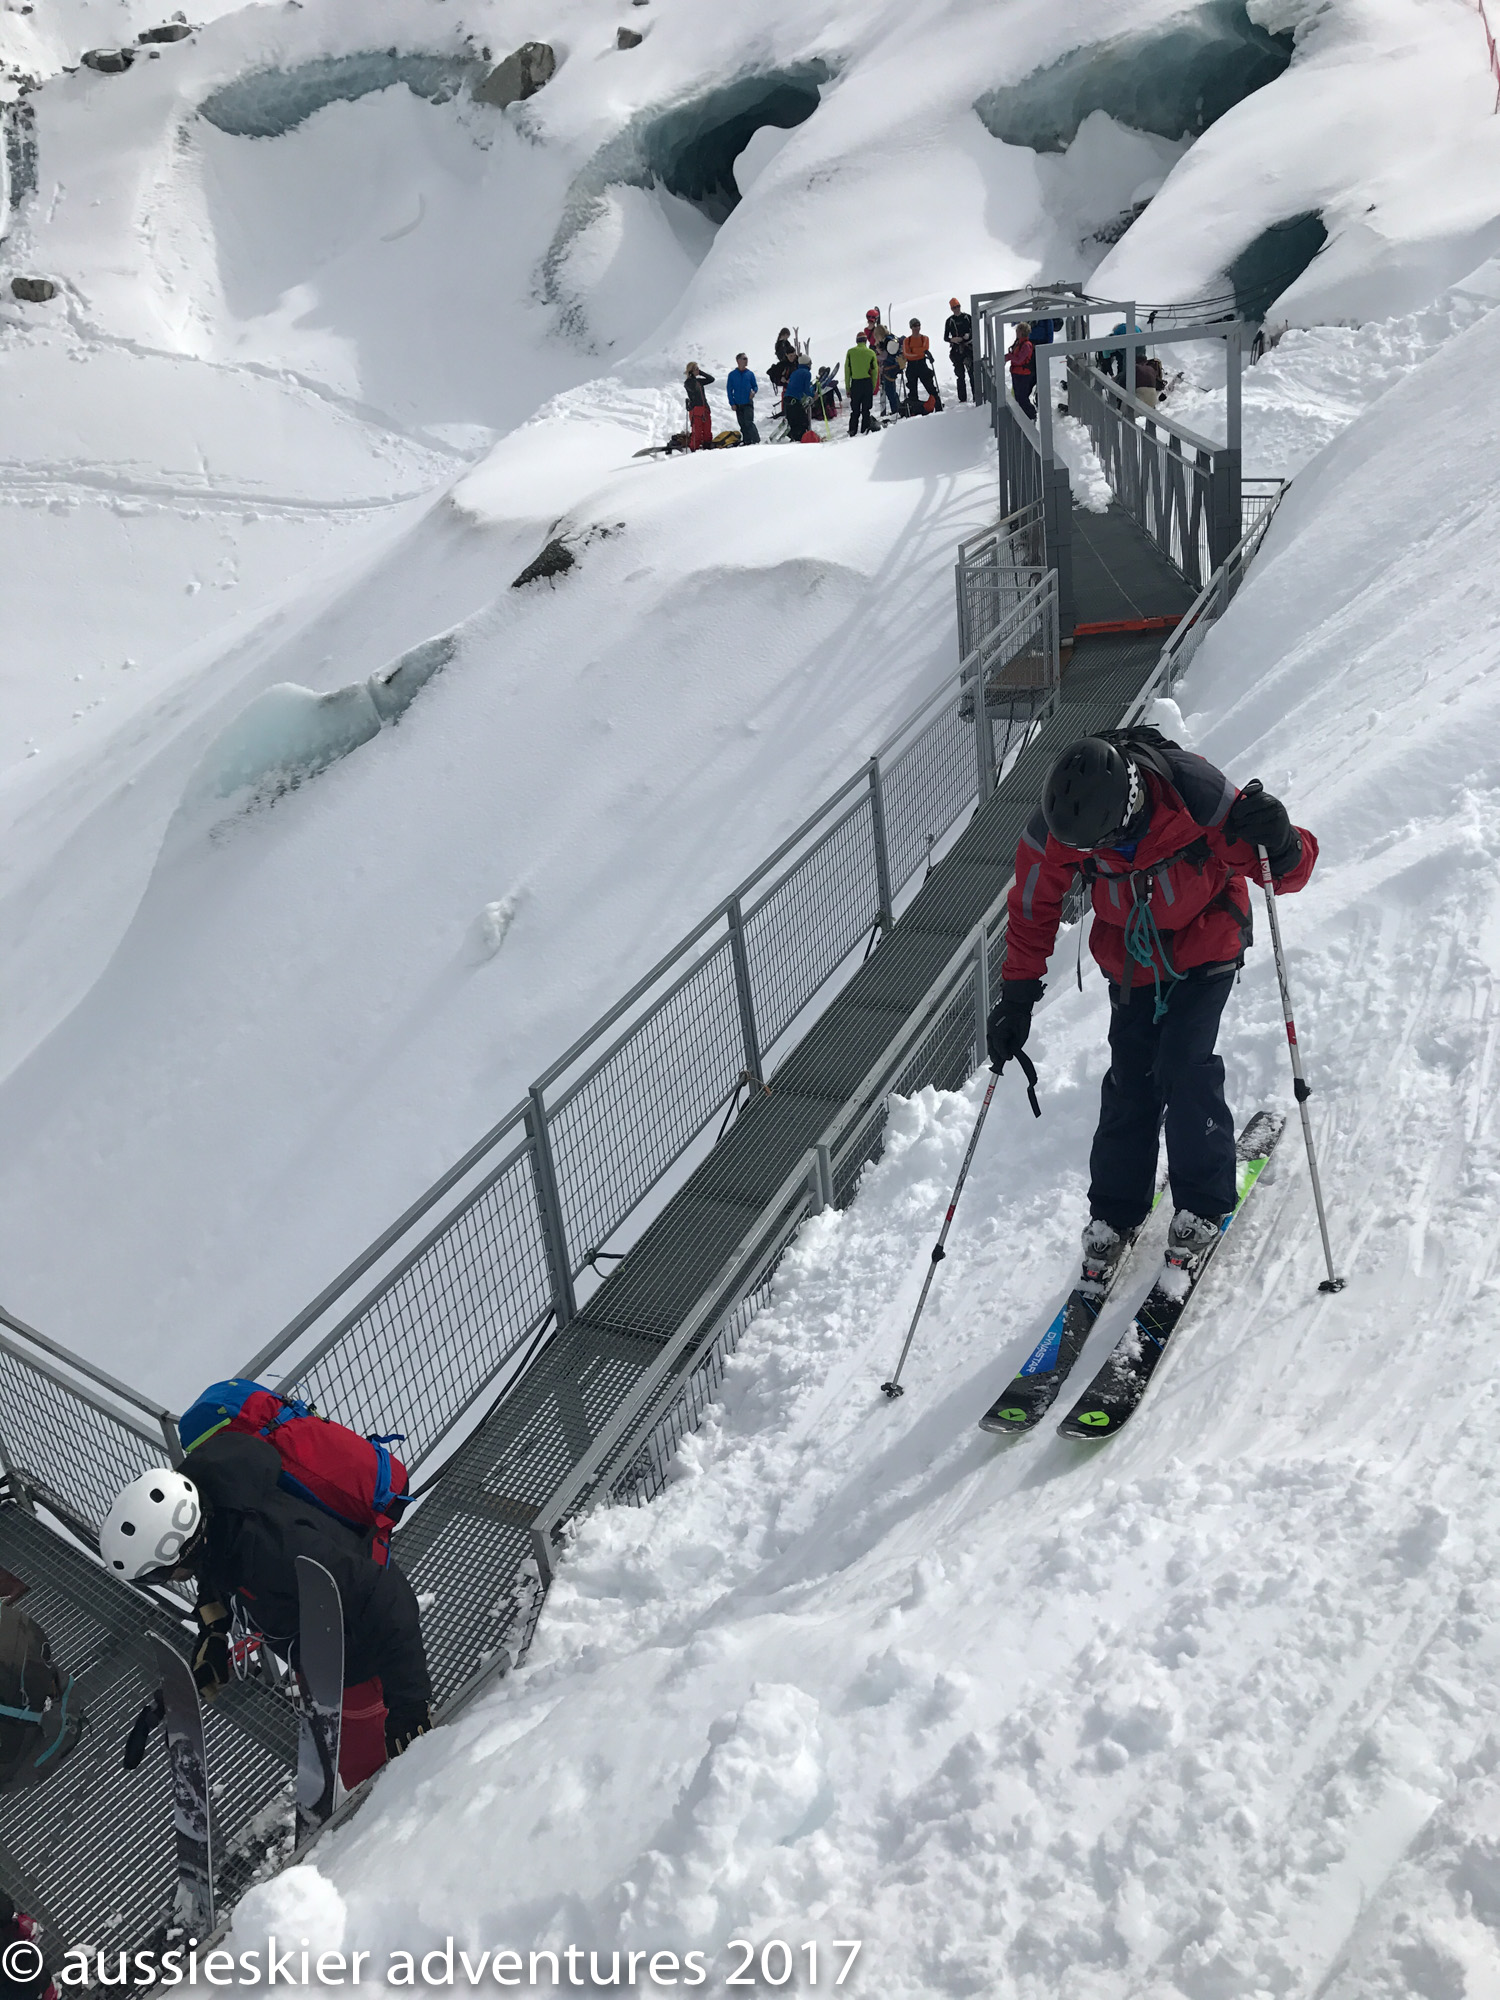
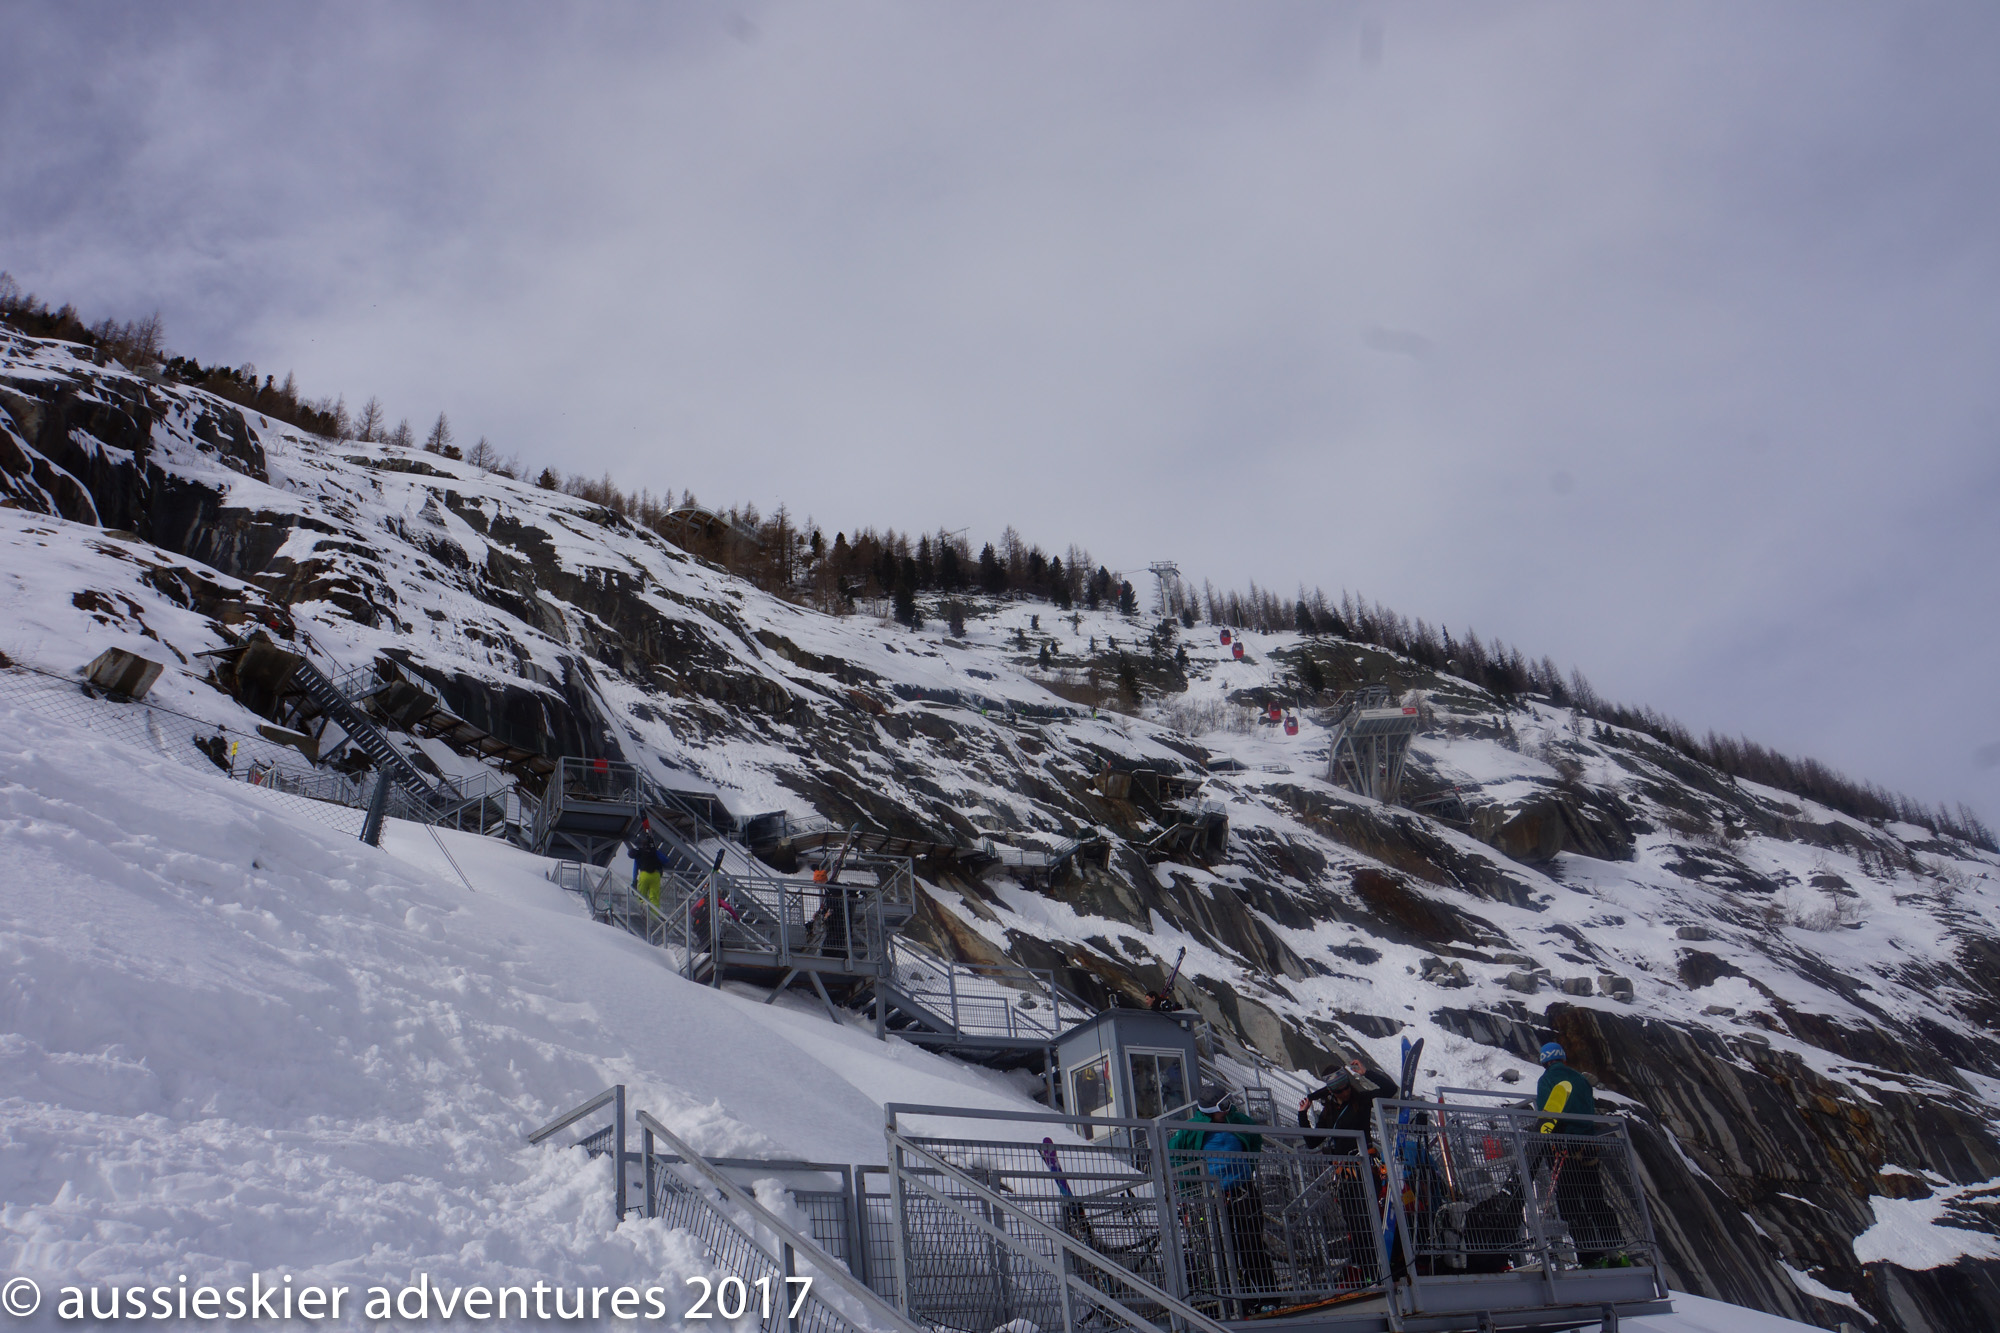
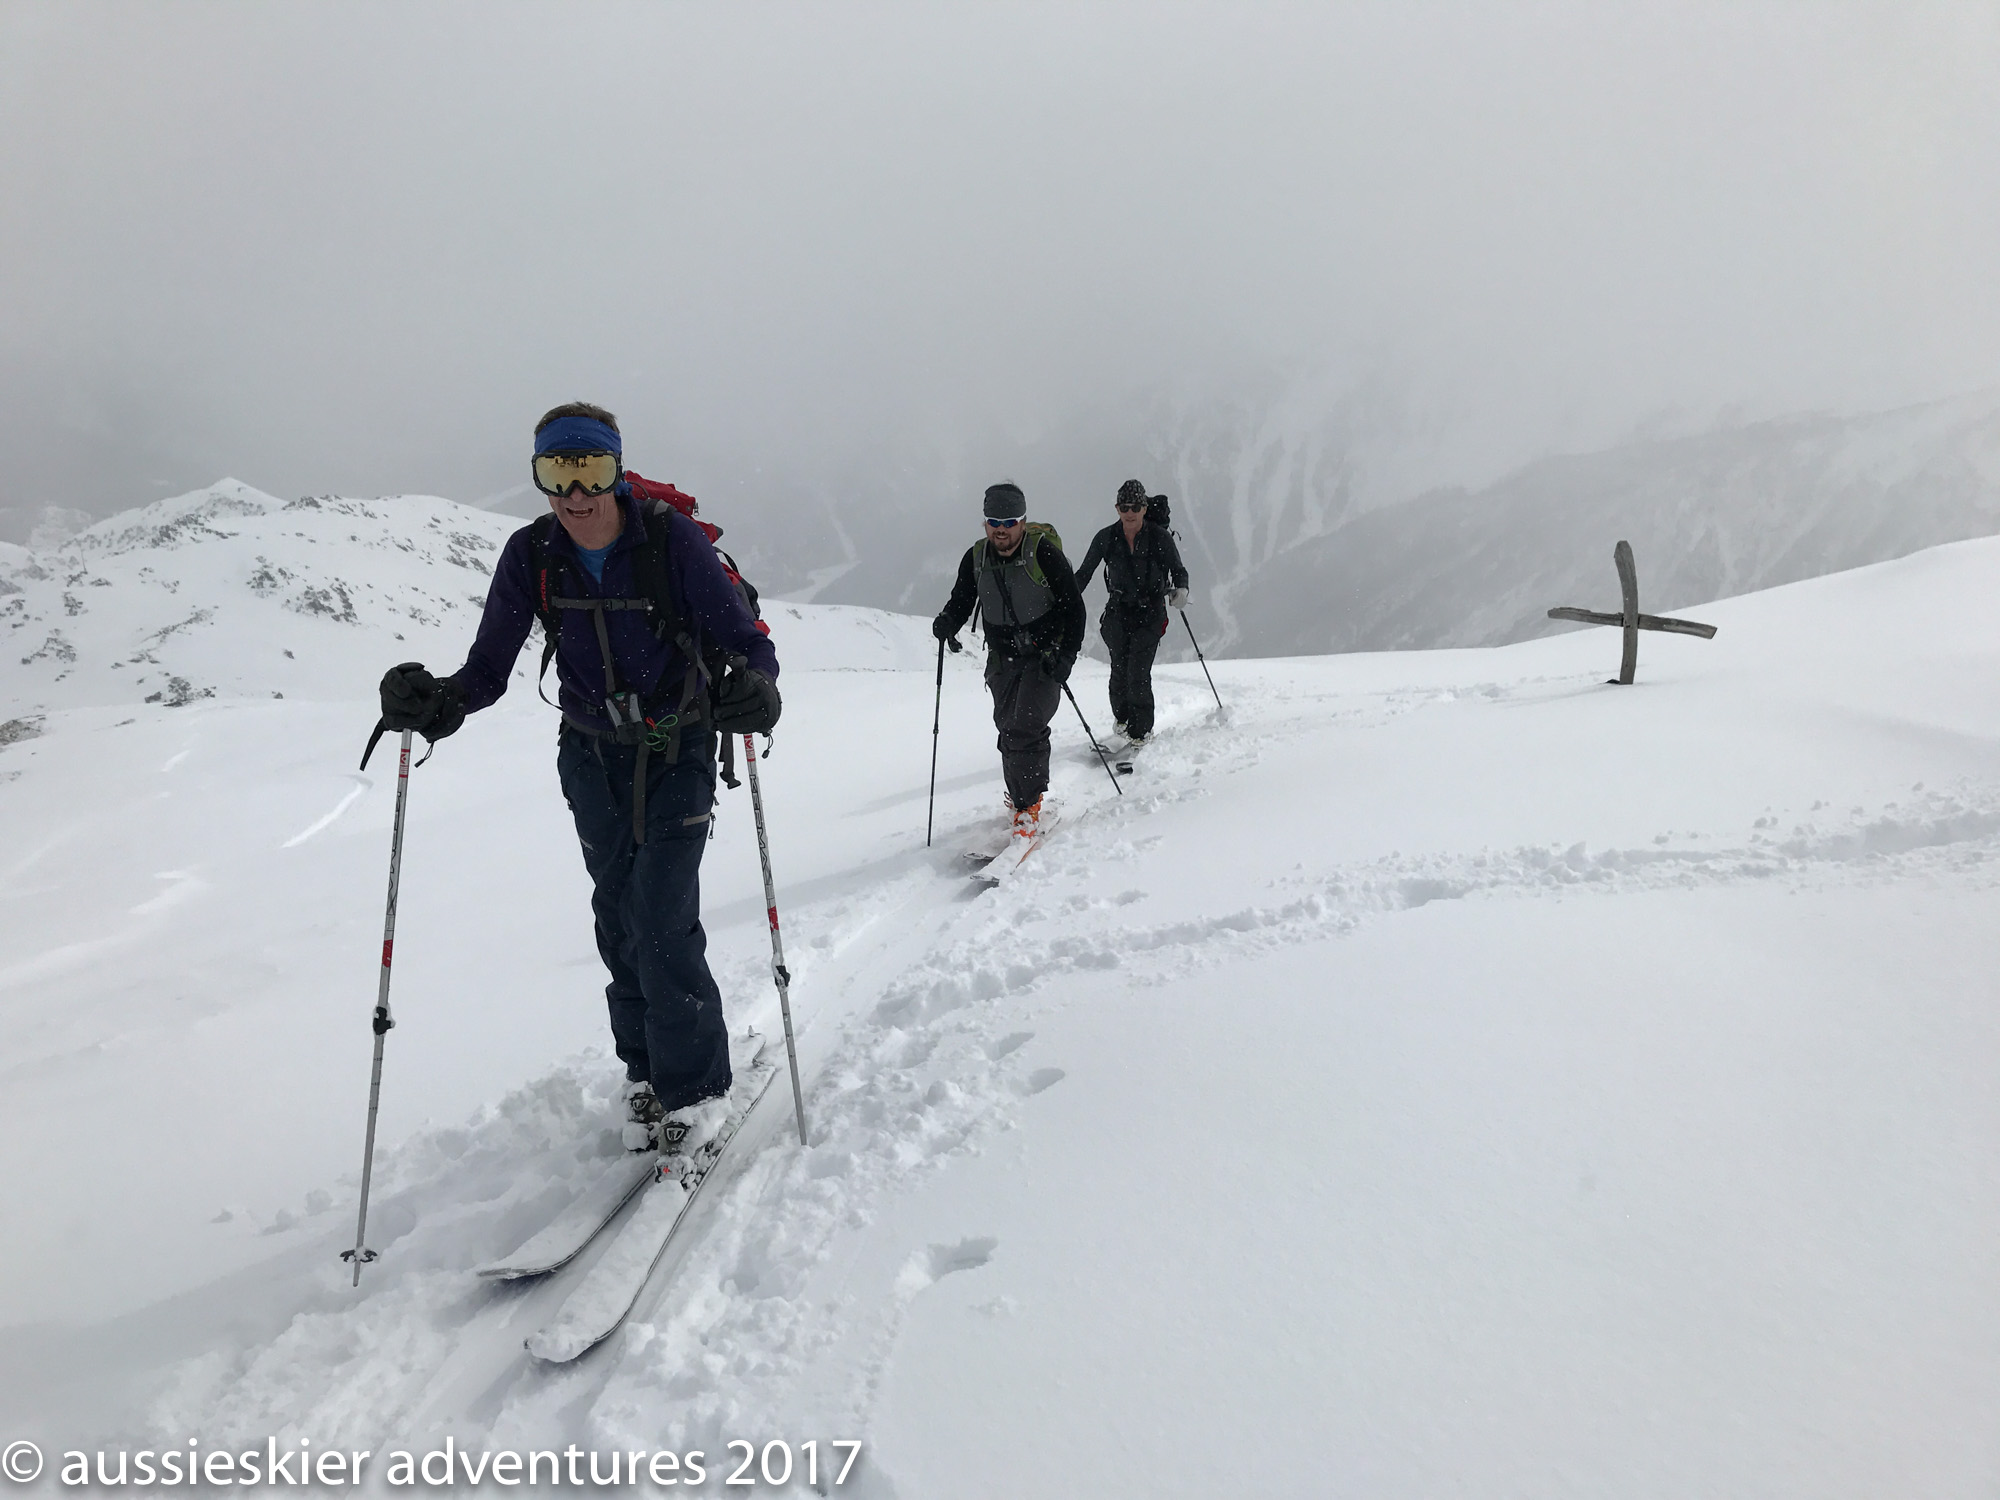
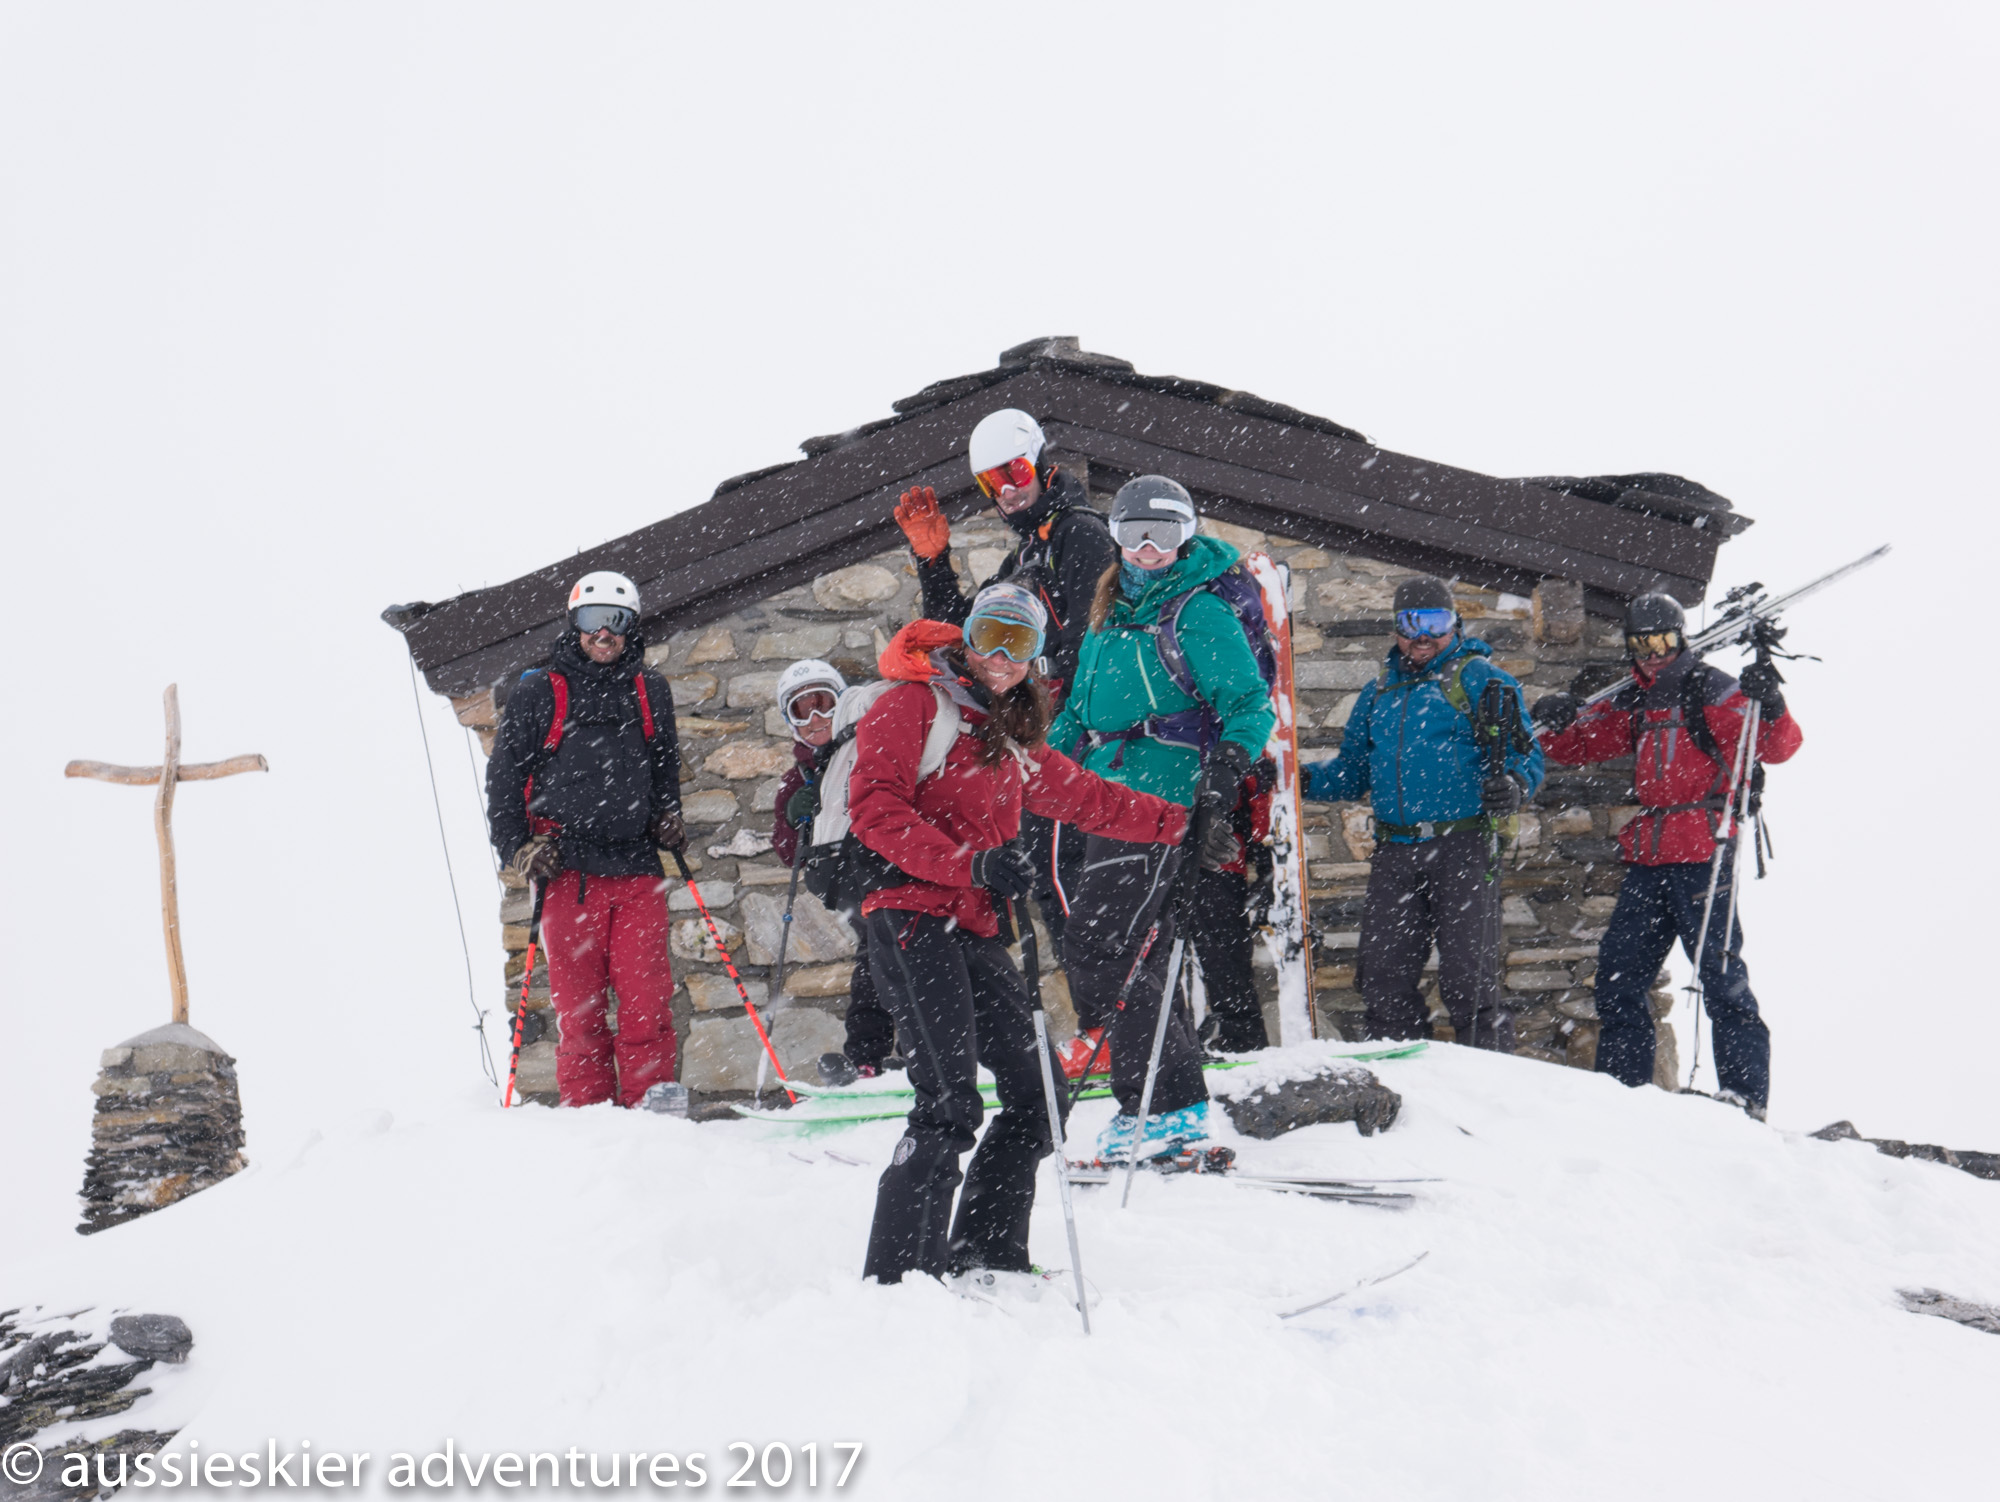
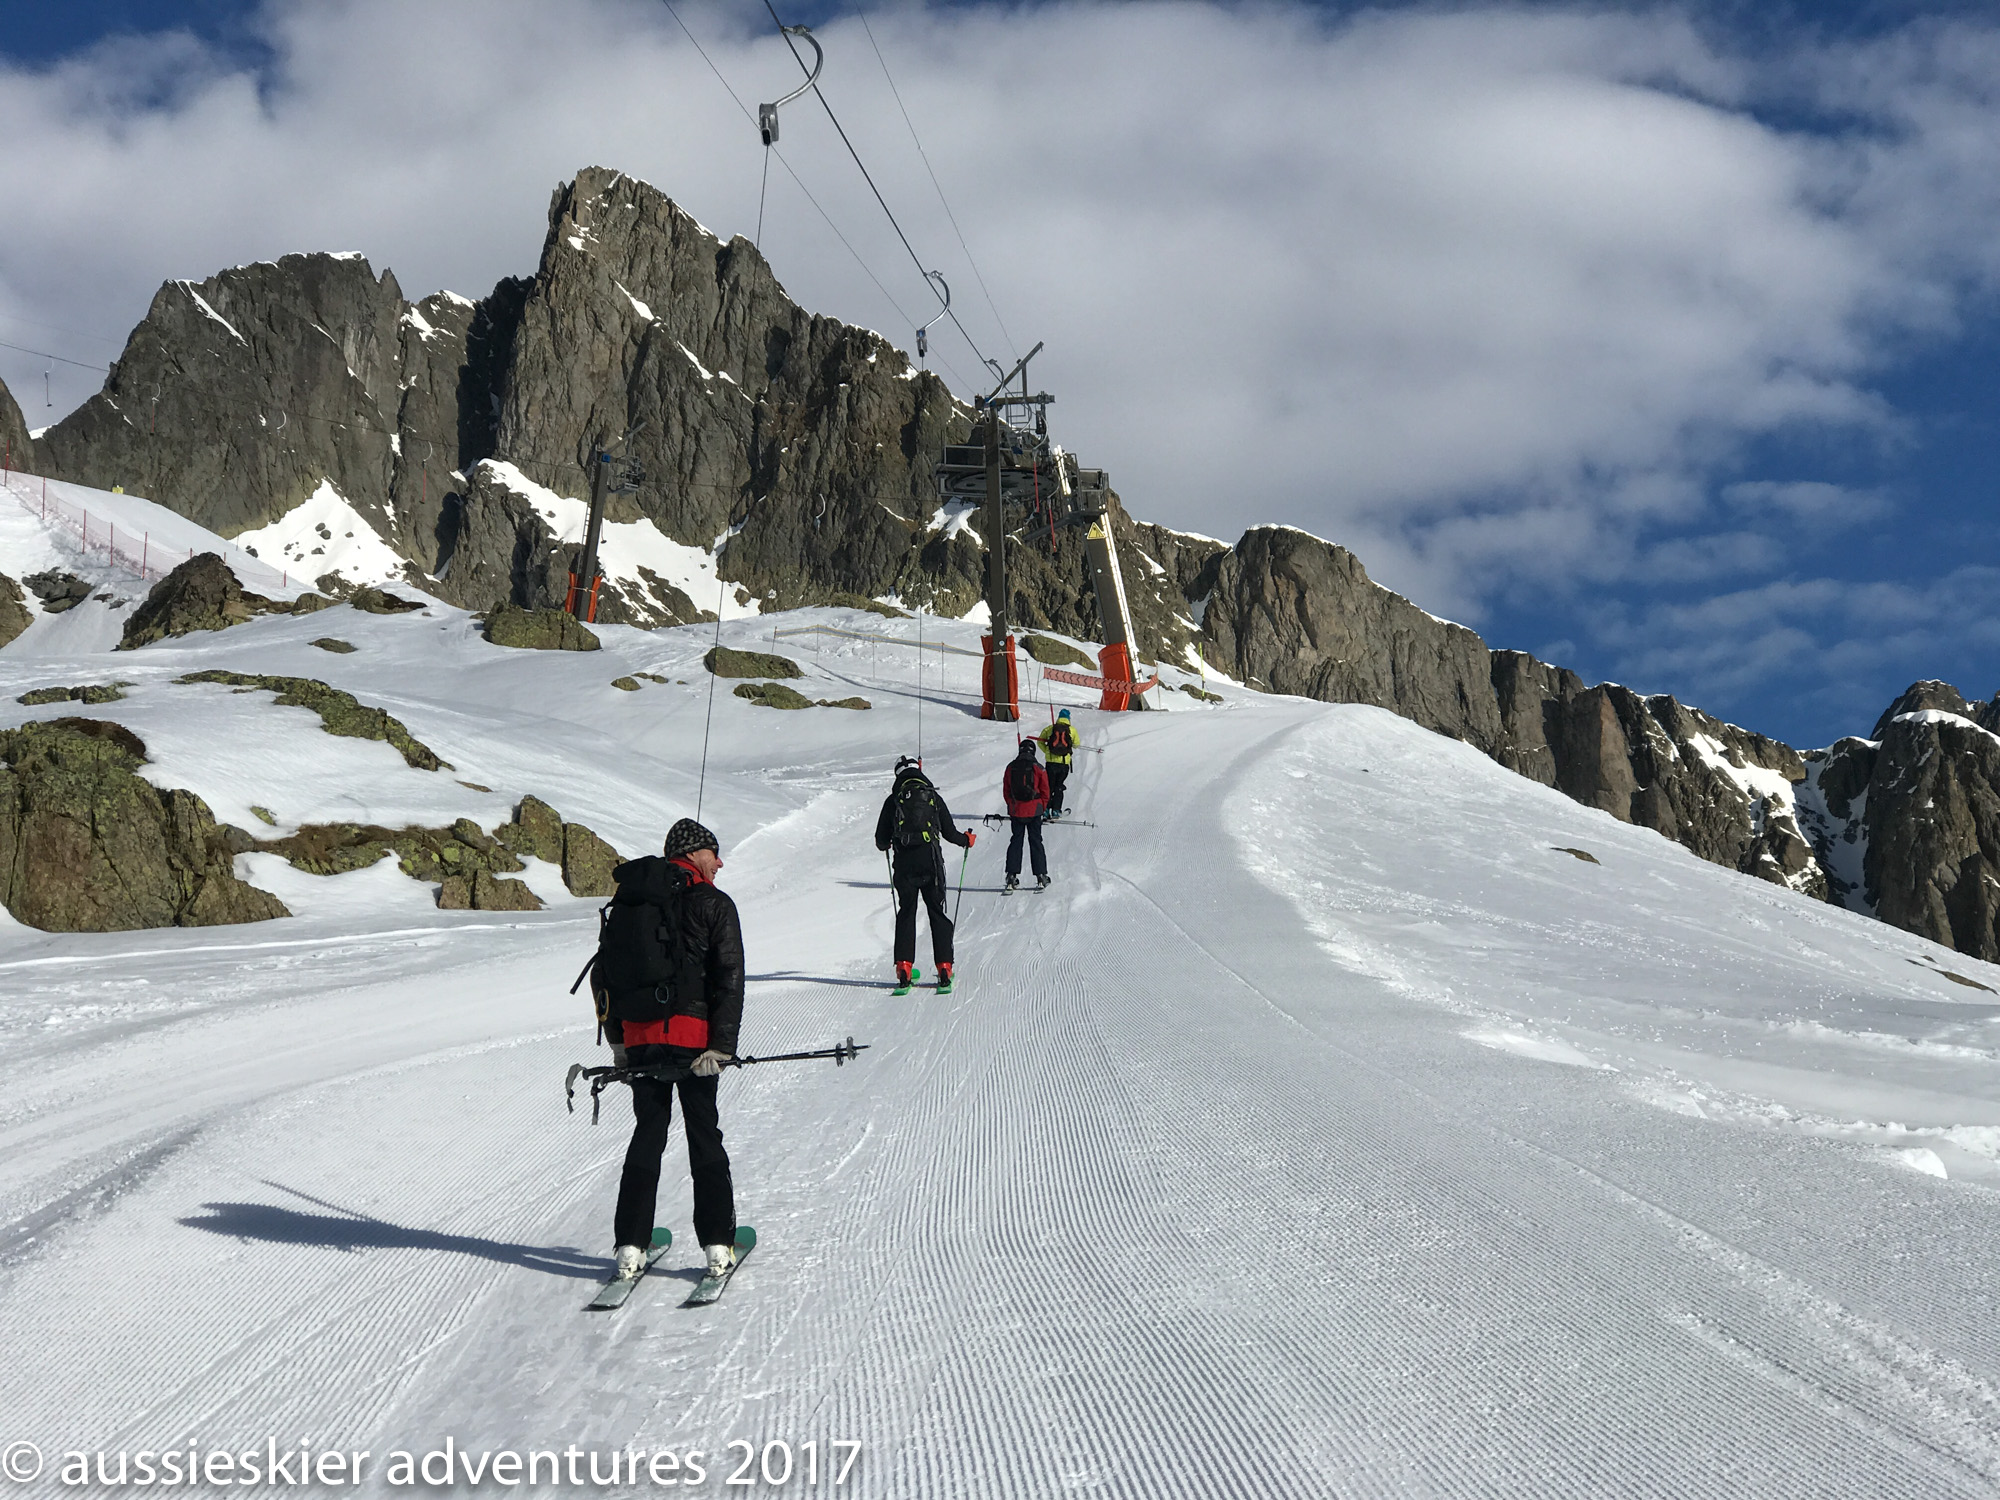
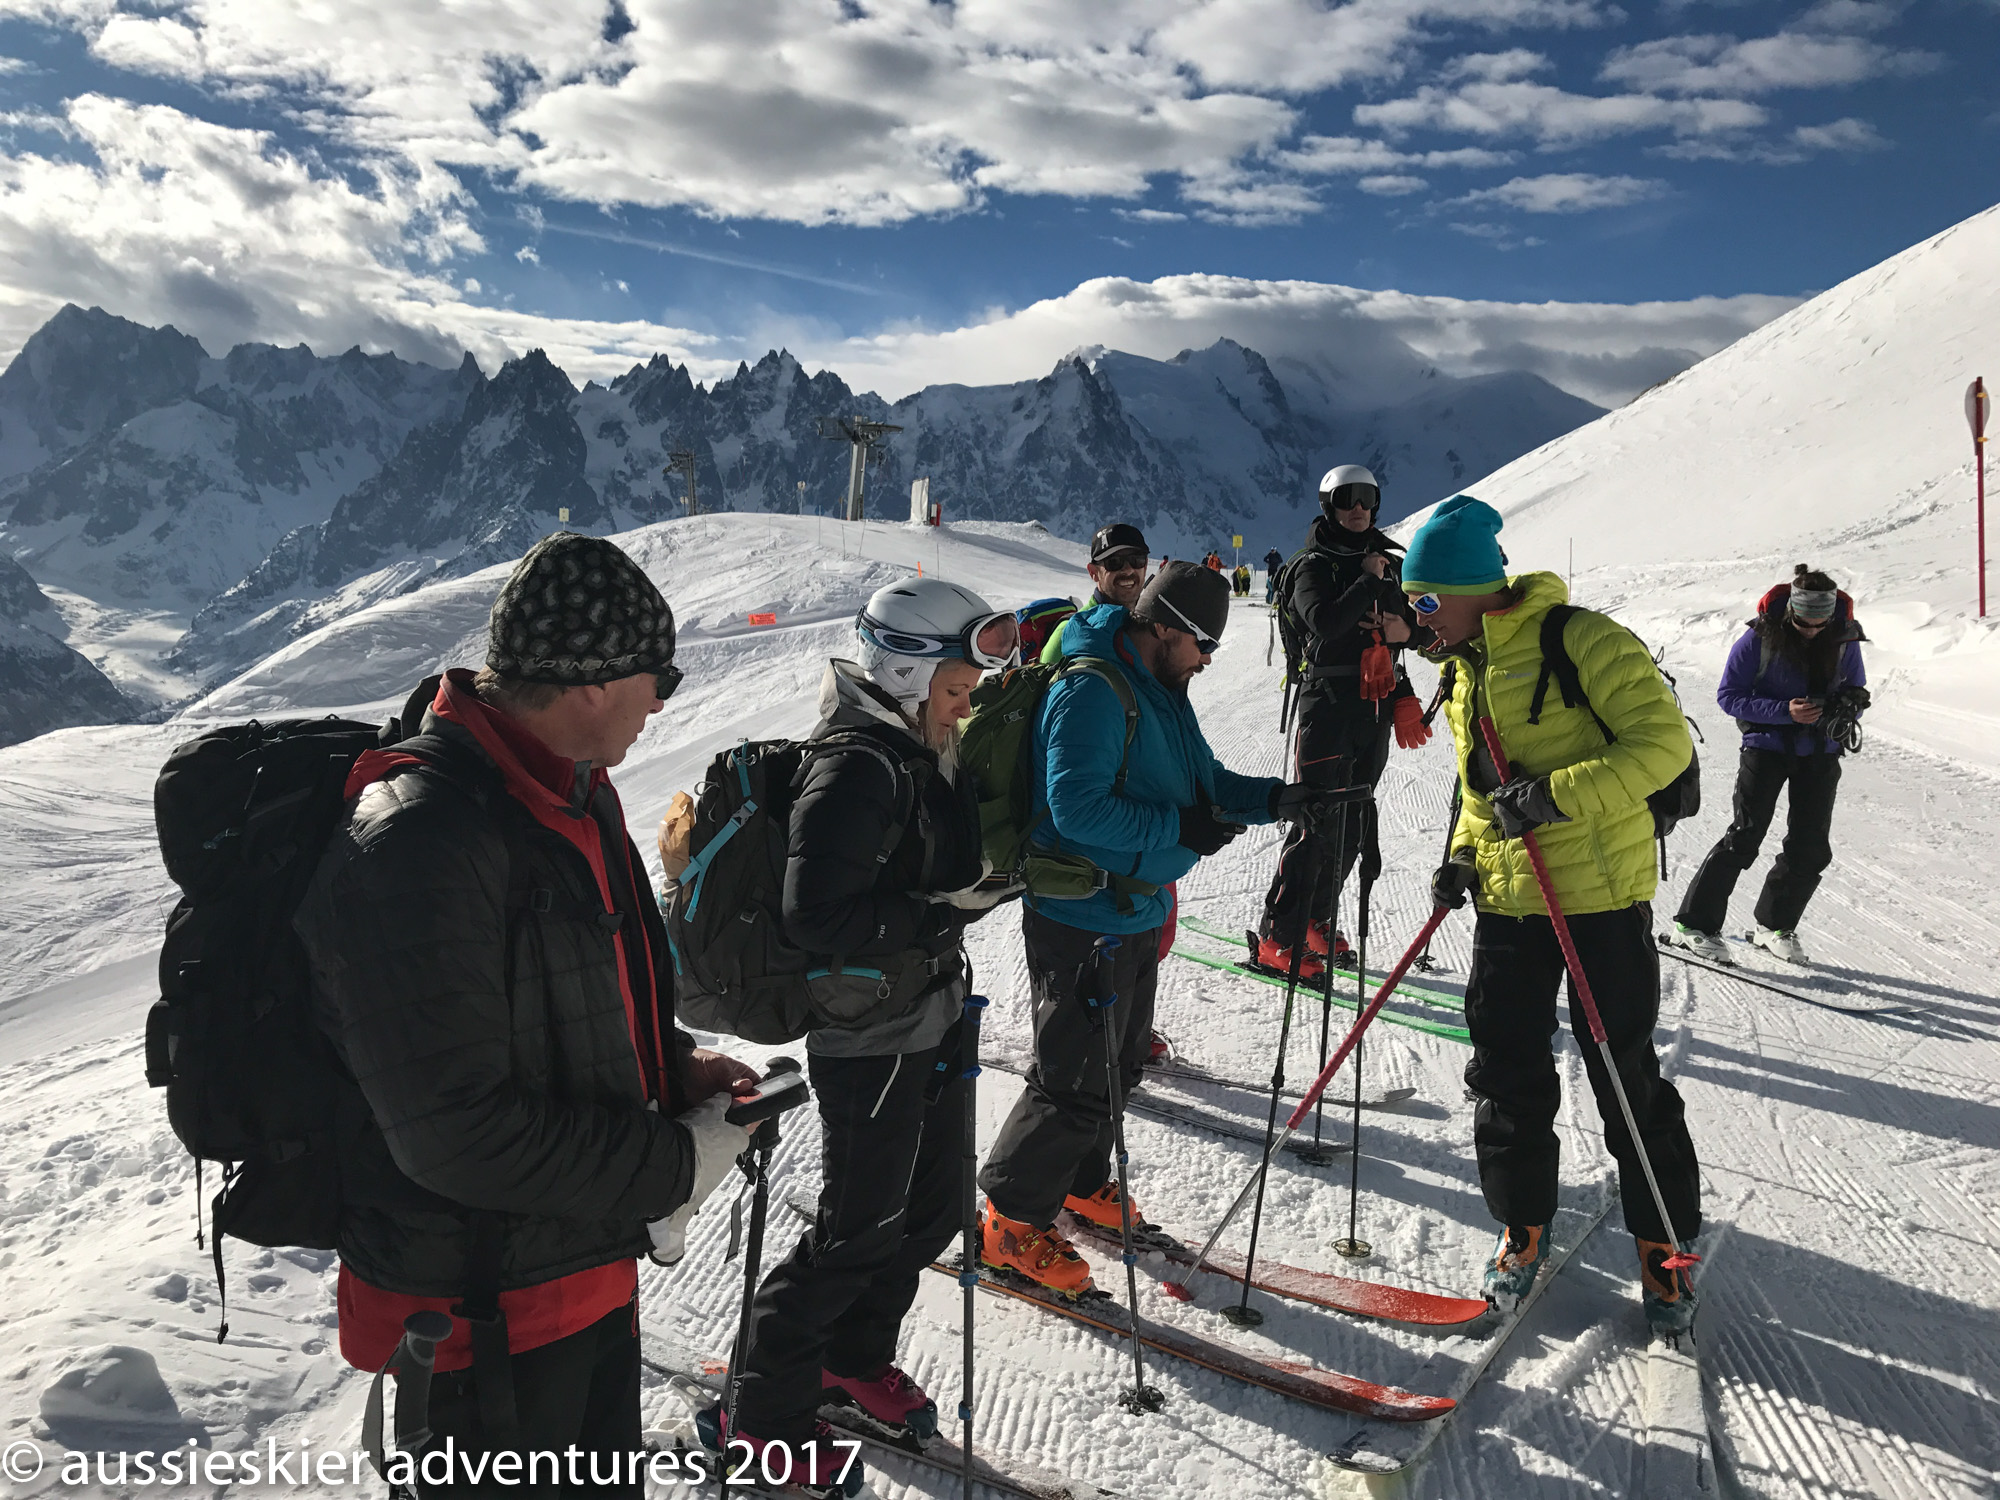
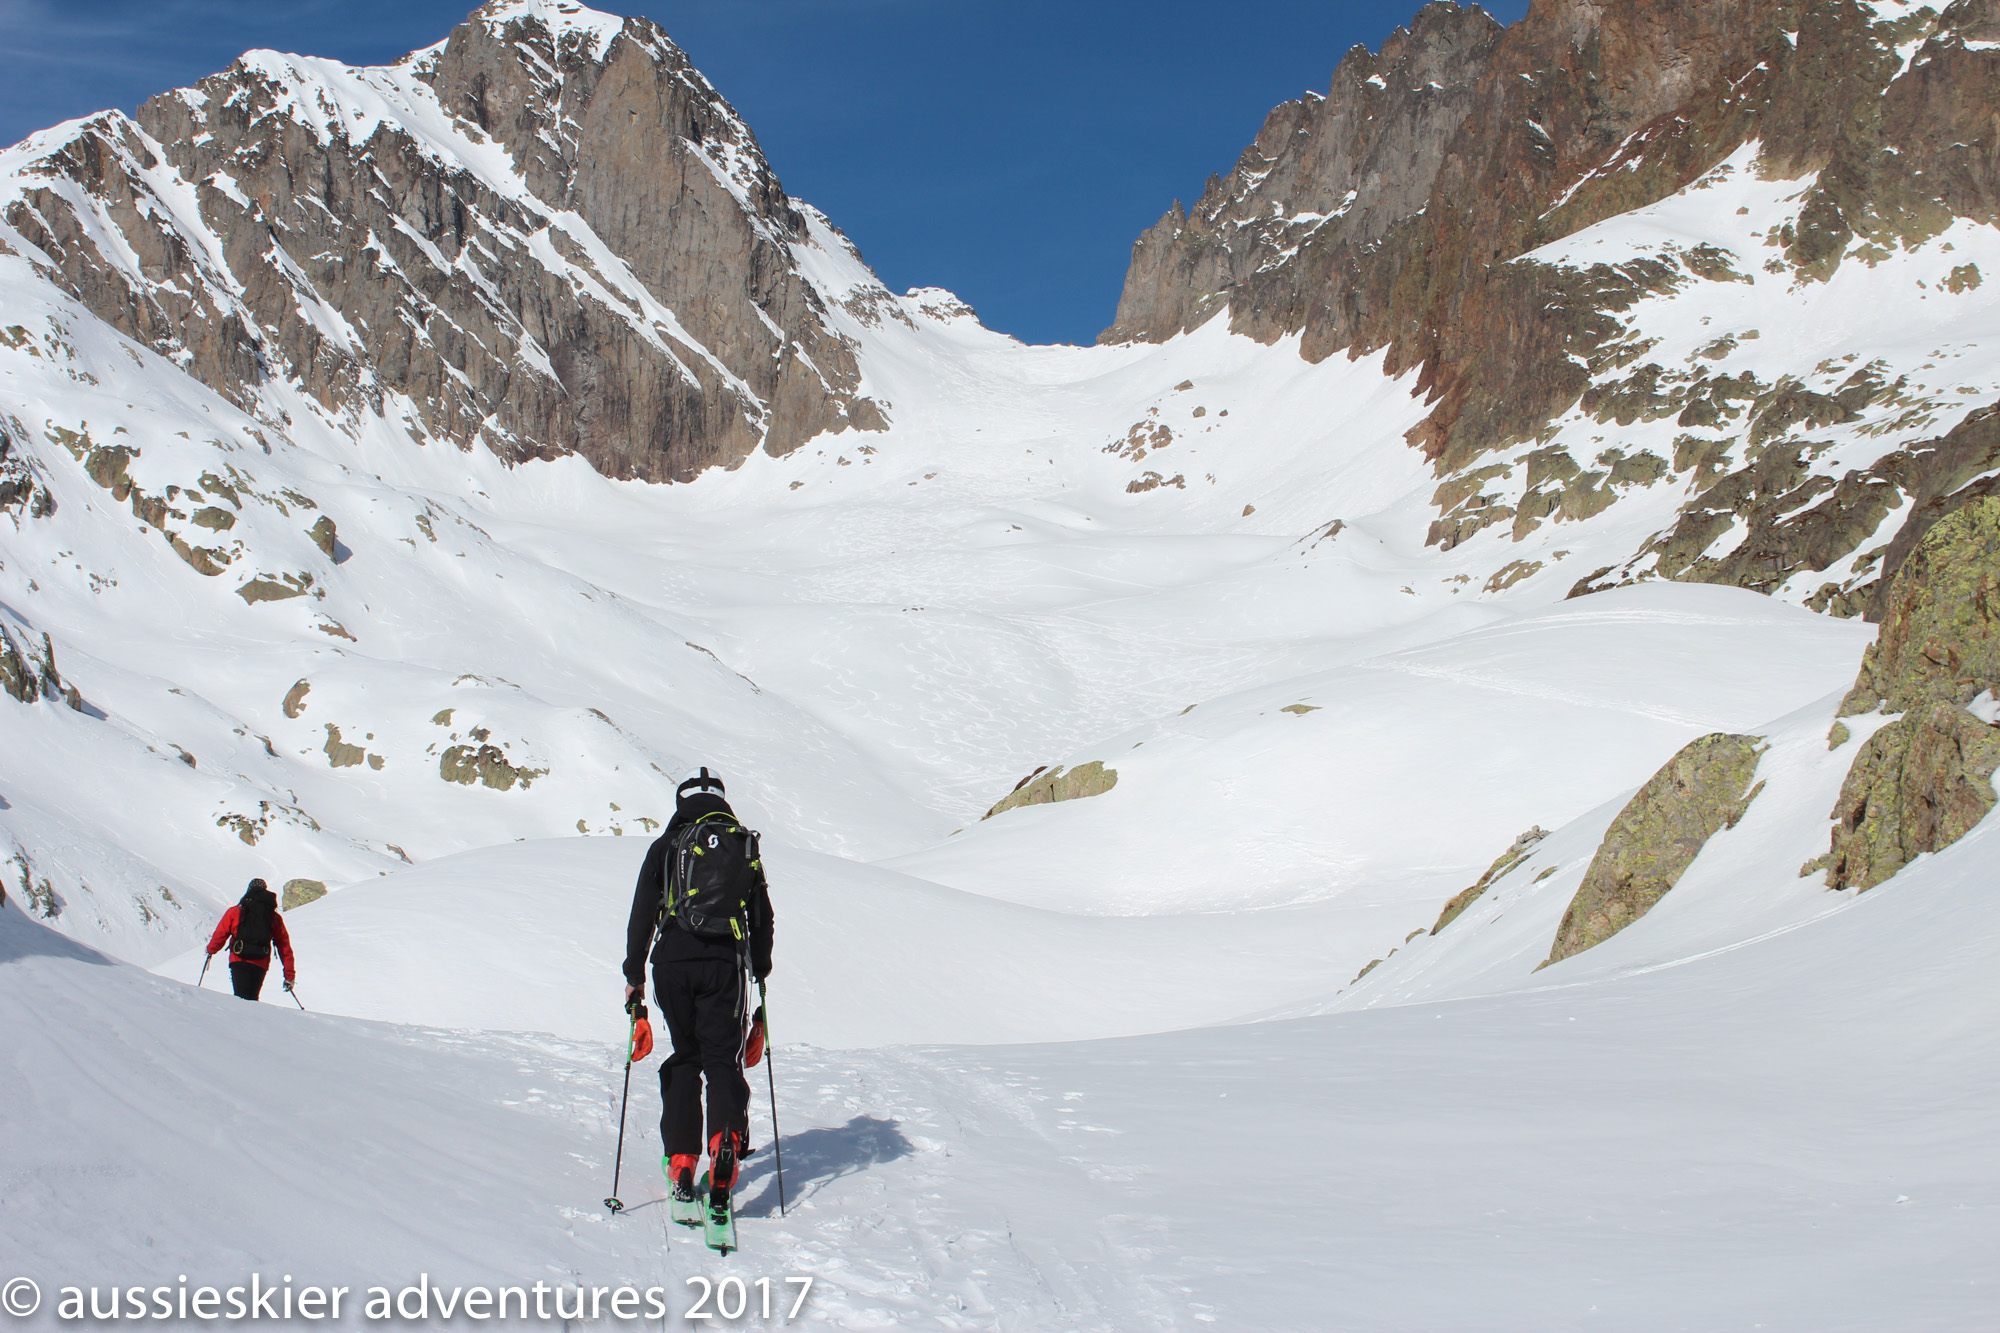
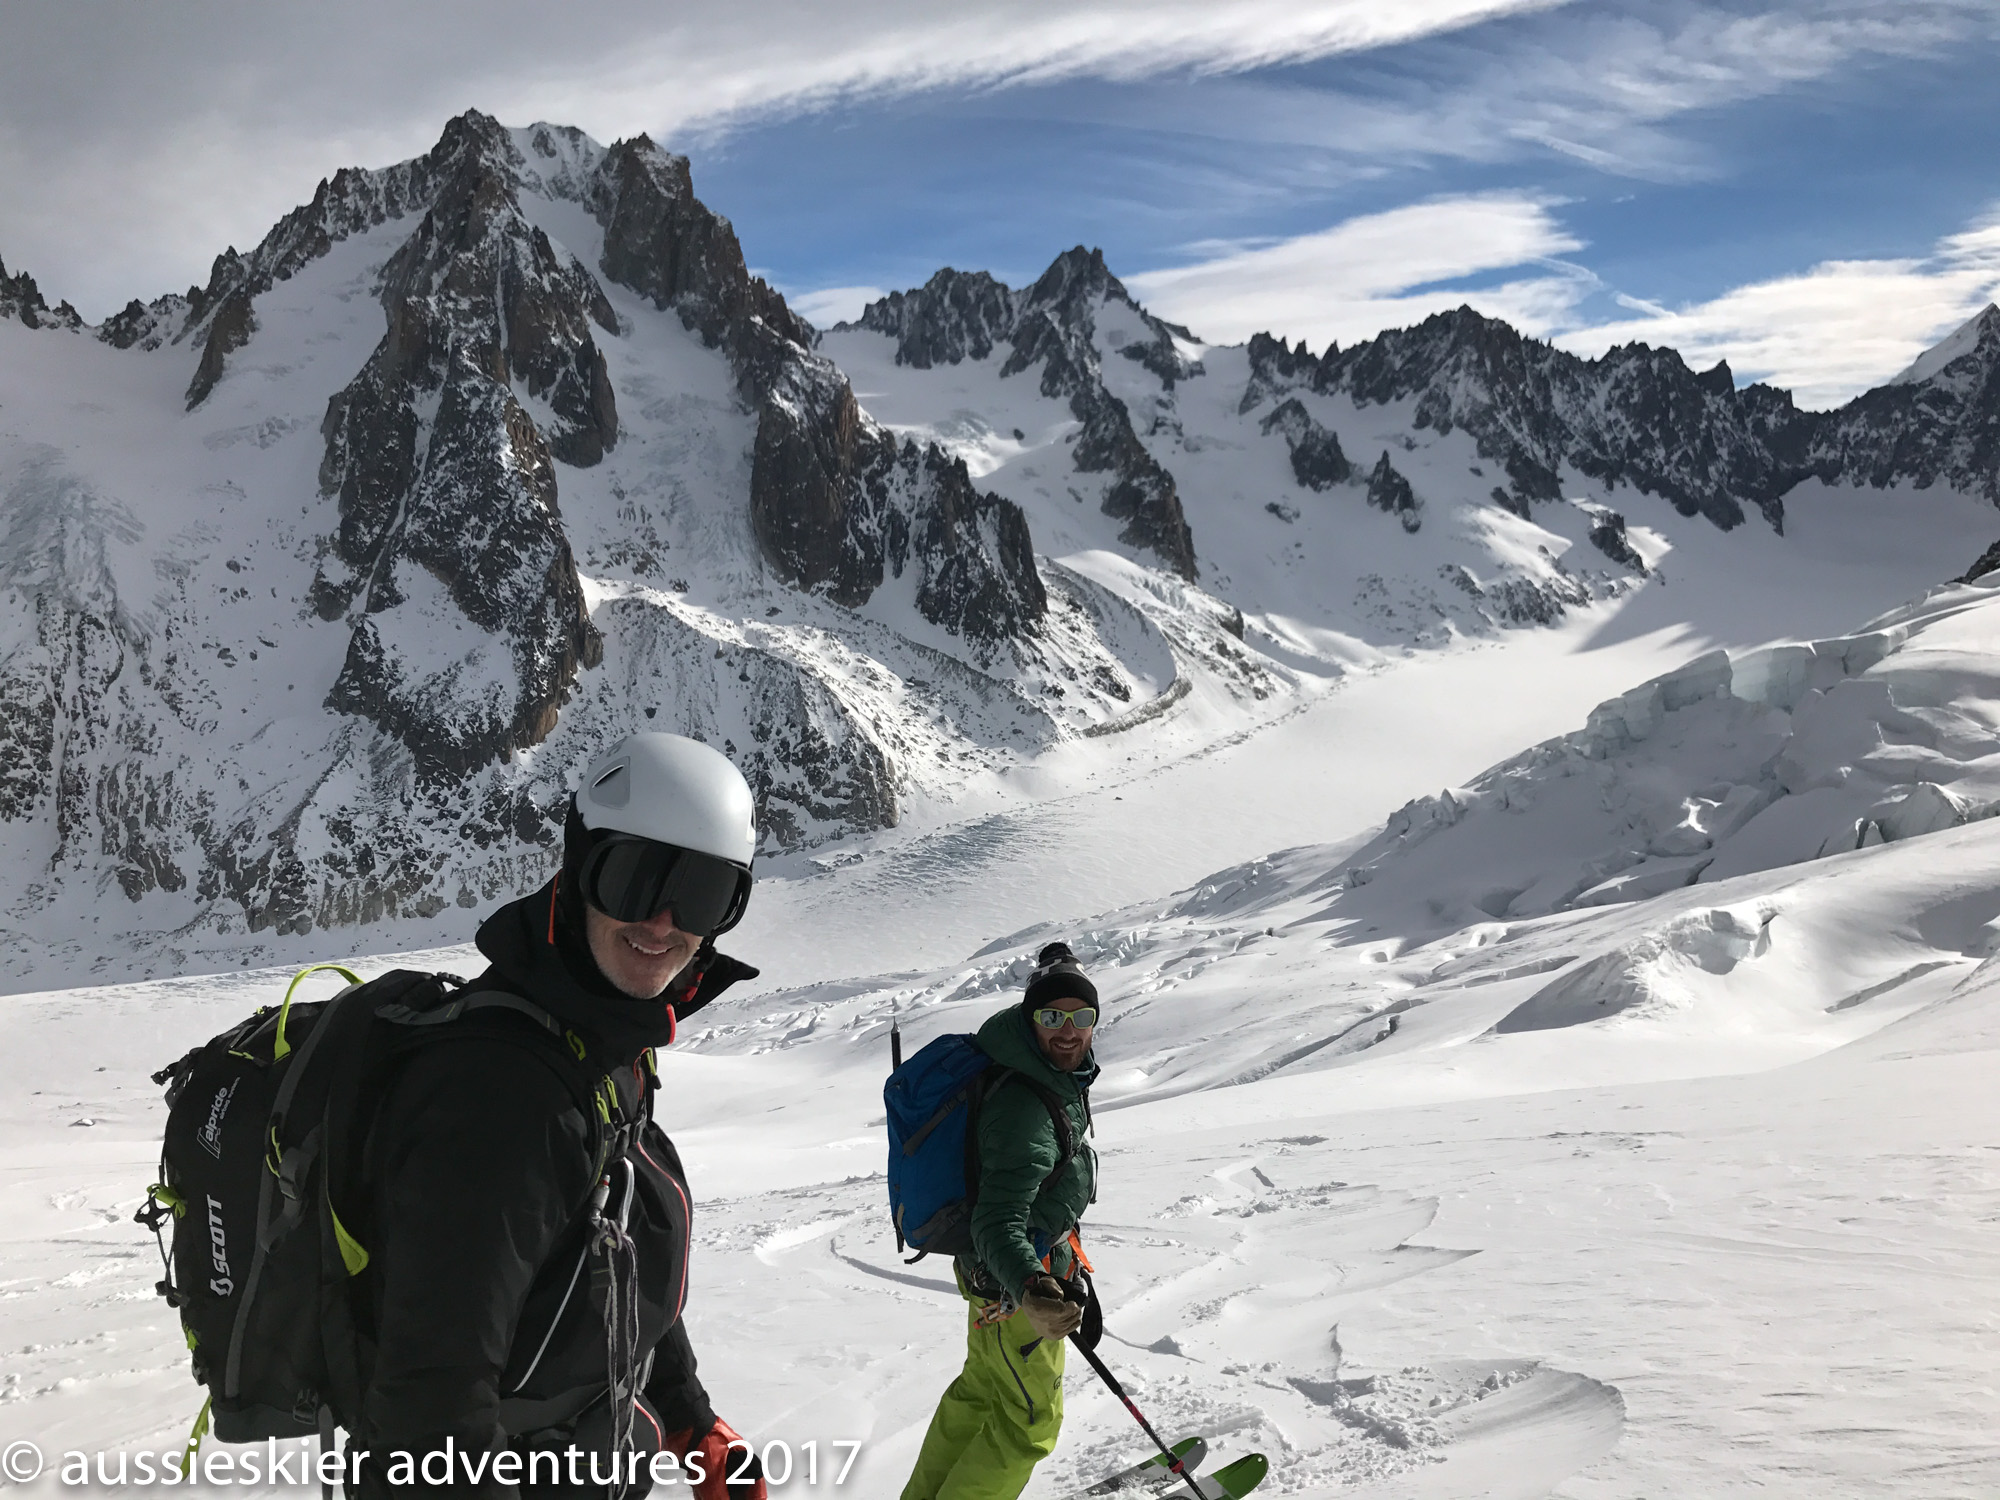
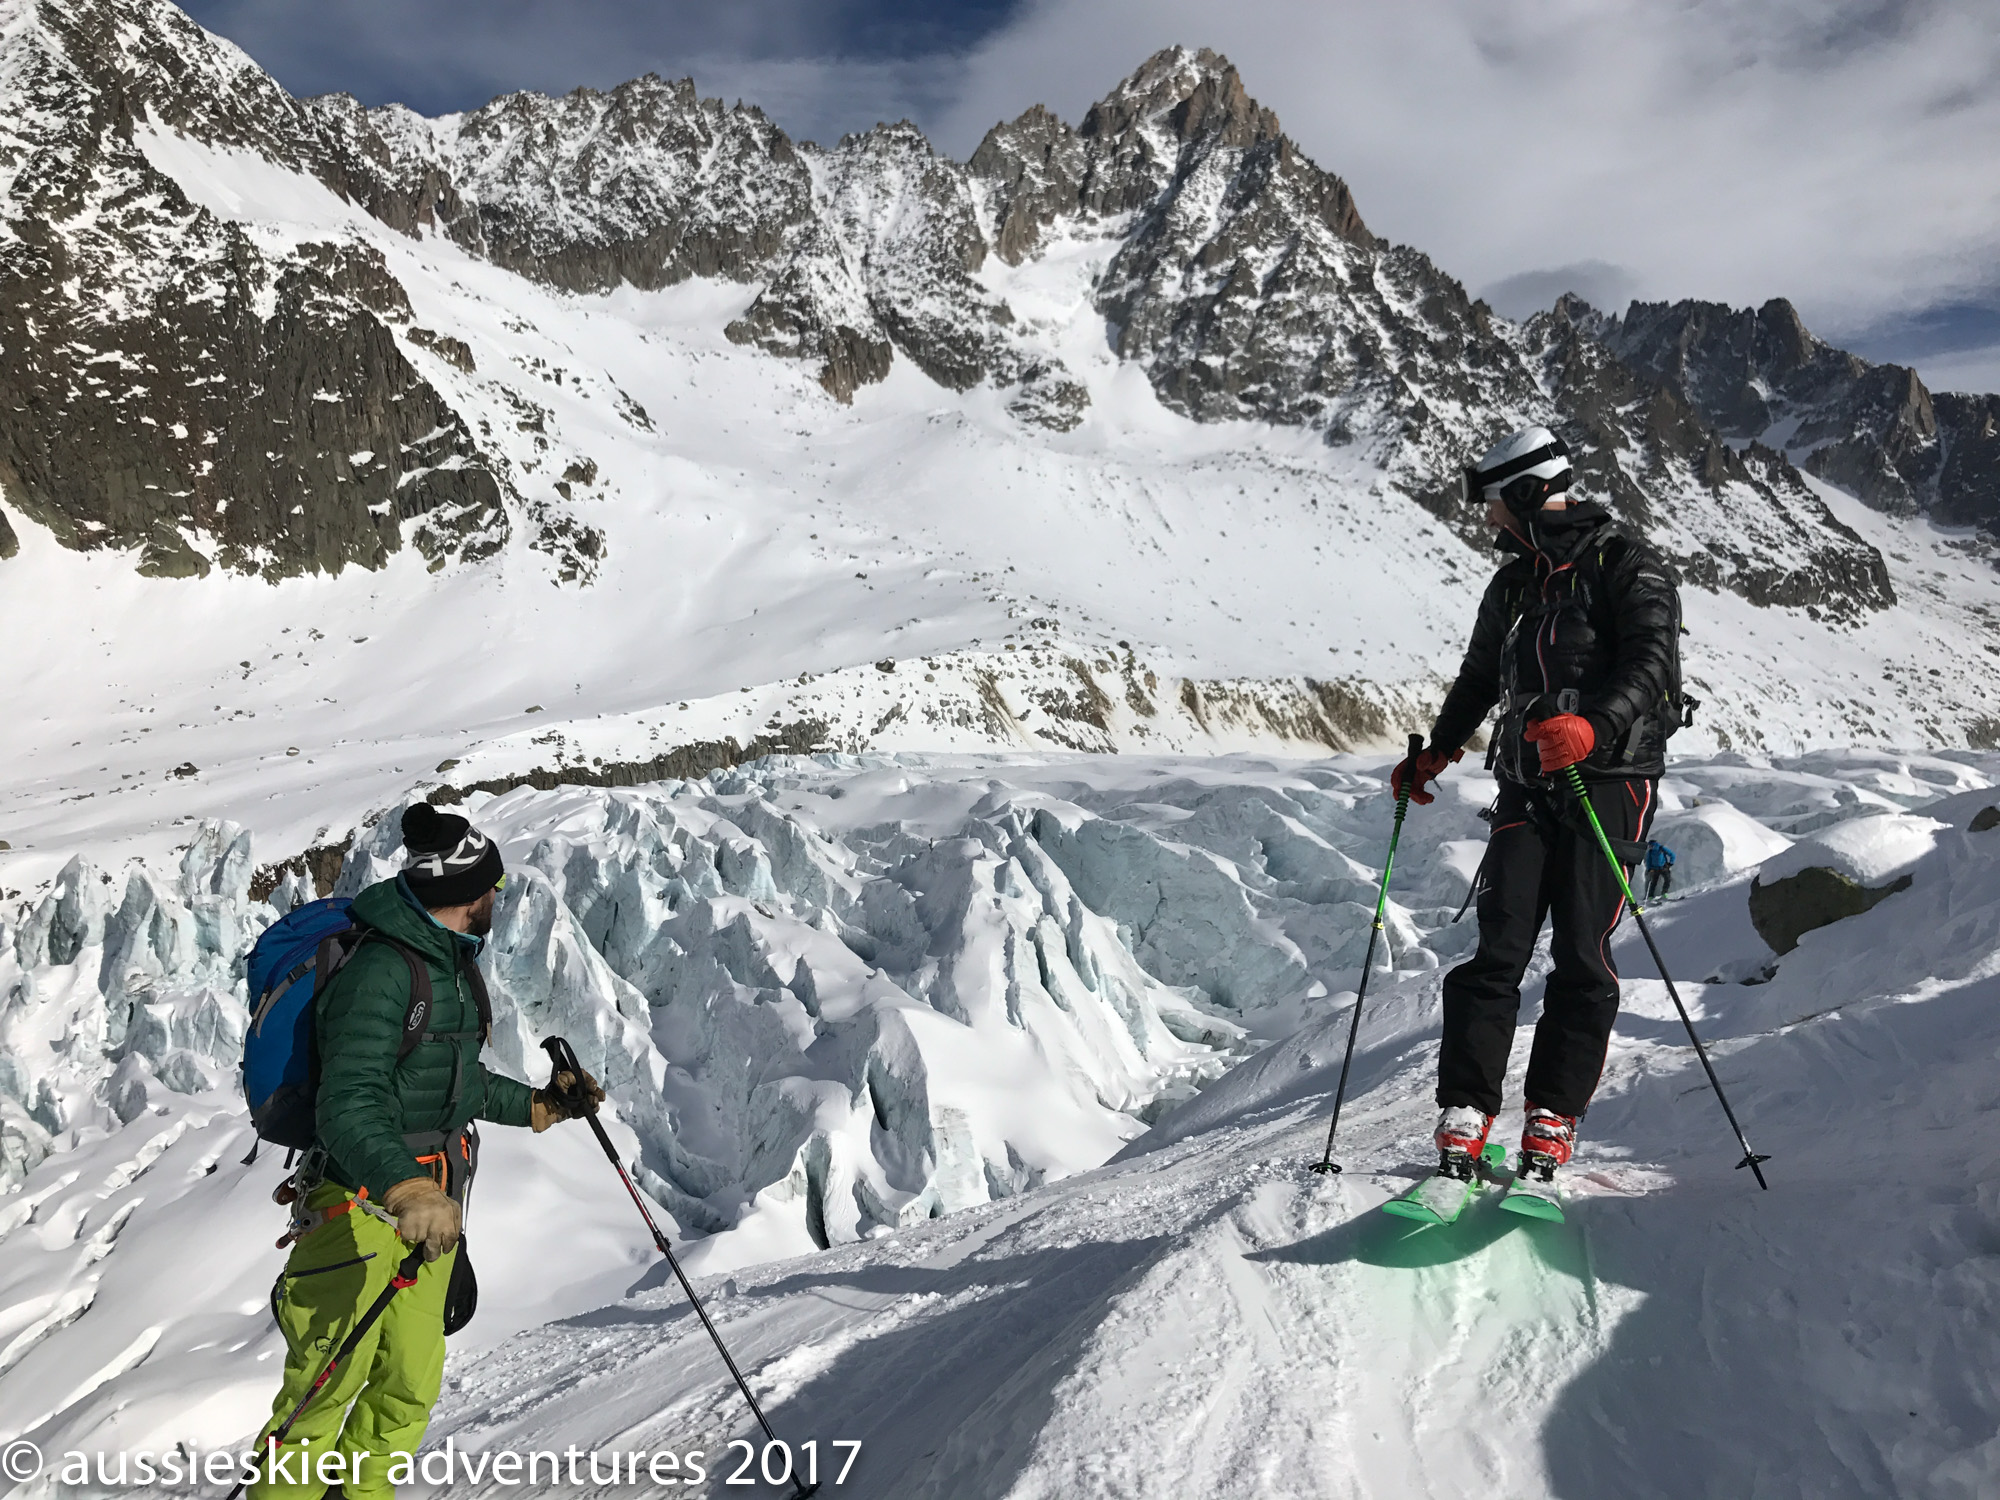
We rode the two cable cars and within a matter of minutes we were up at 3810m at the top of the tram, which is as much a space station as a ski lift. A few snaps were taken on the bridge, but then it was time to don crampons and rope up for the arete.
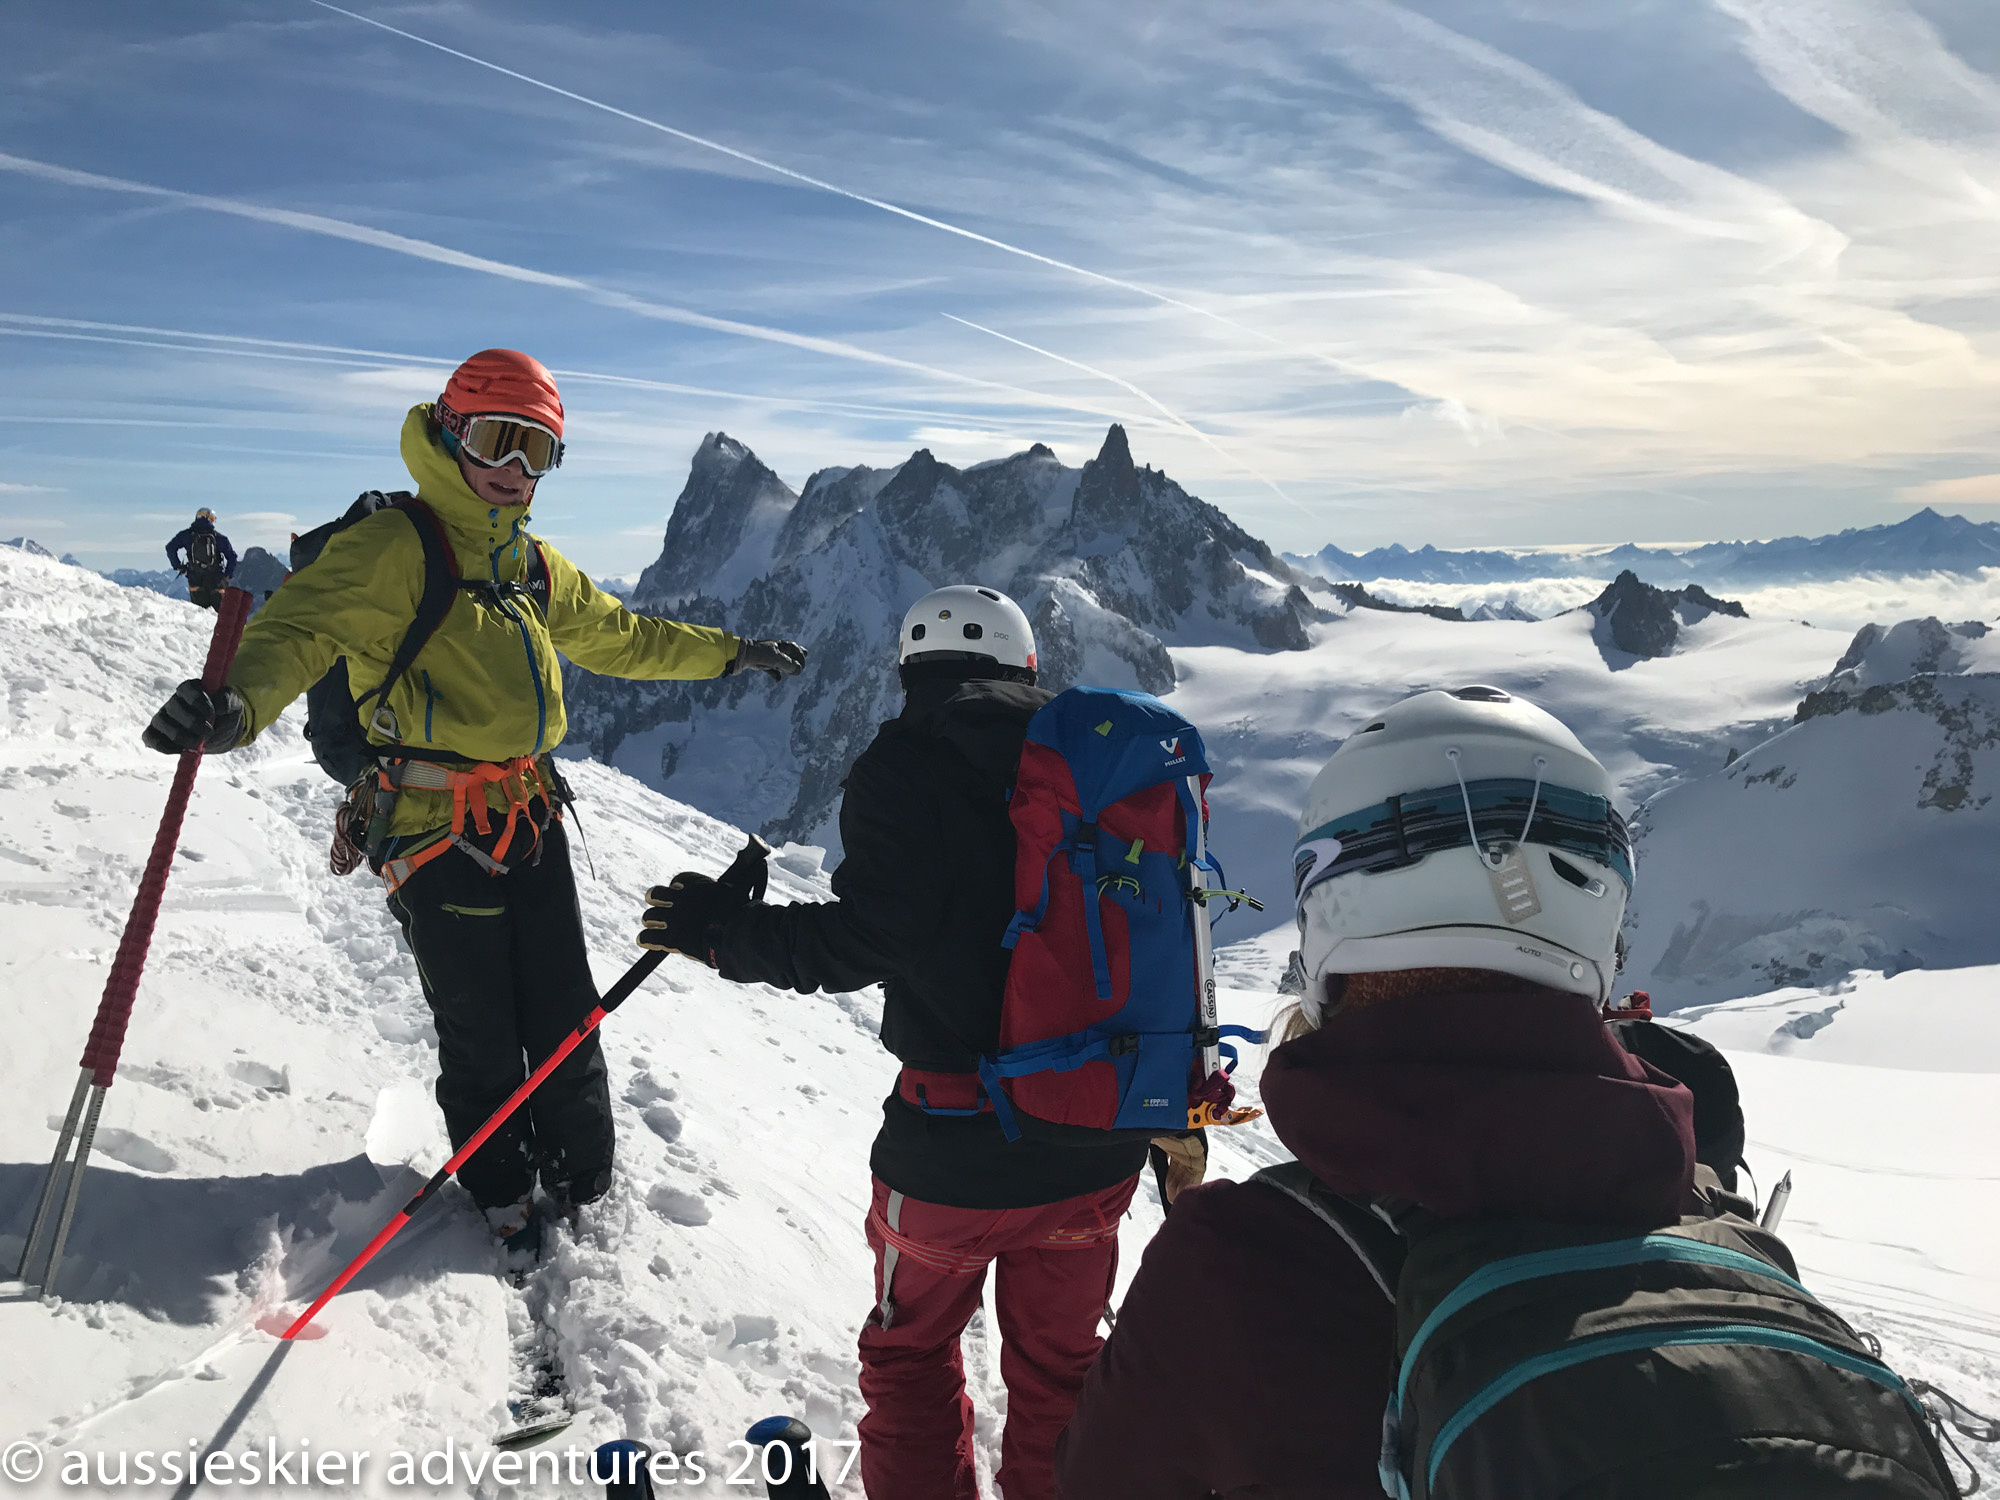
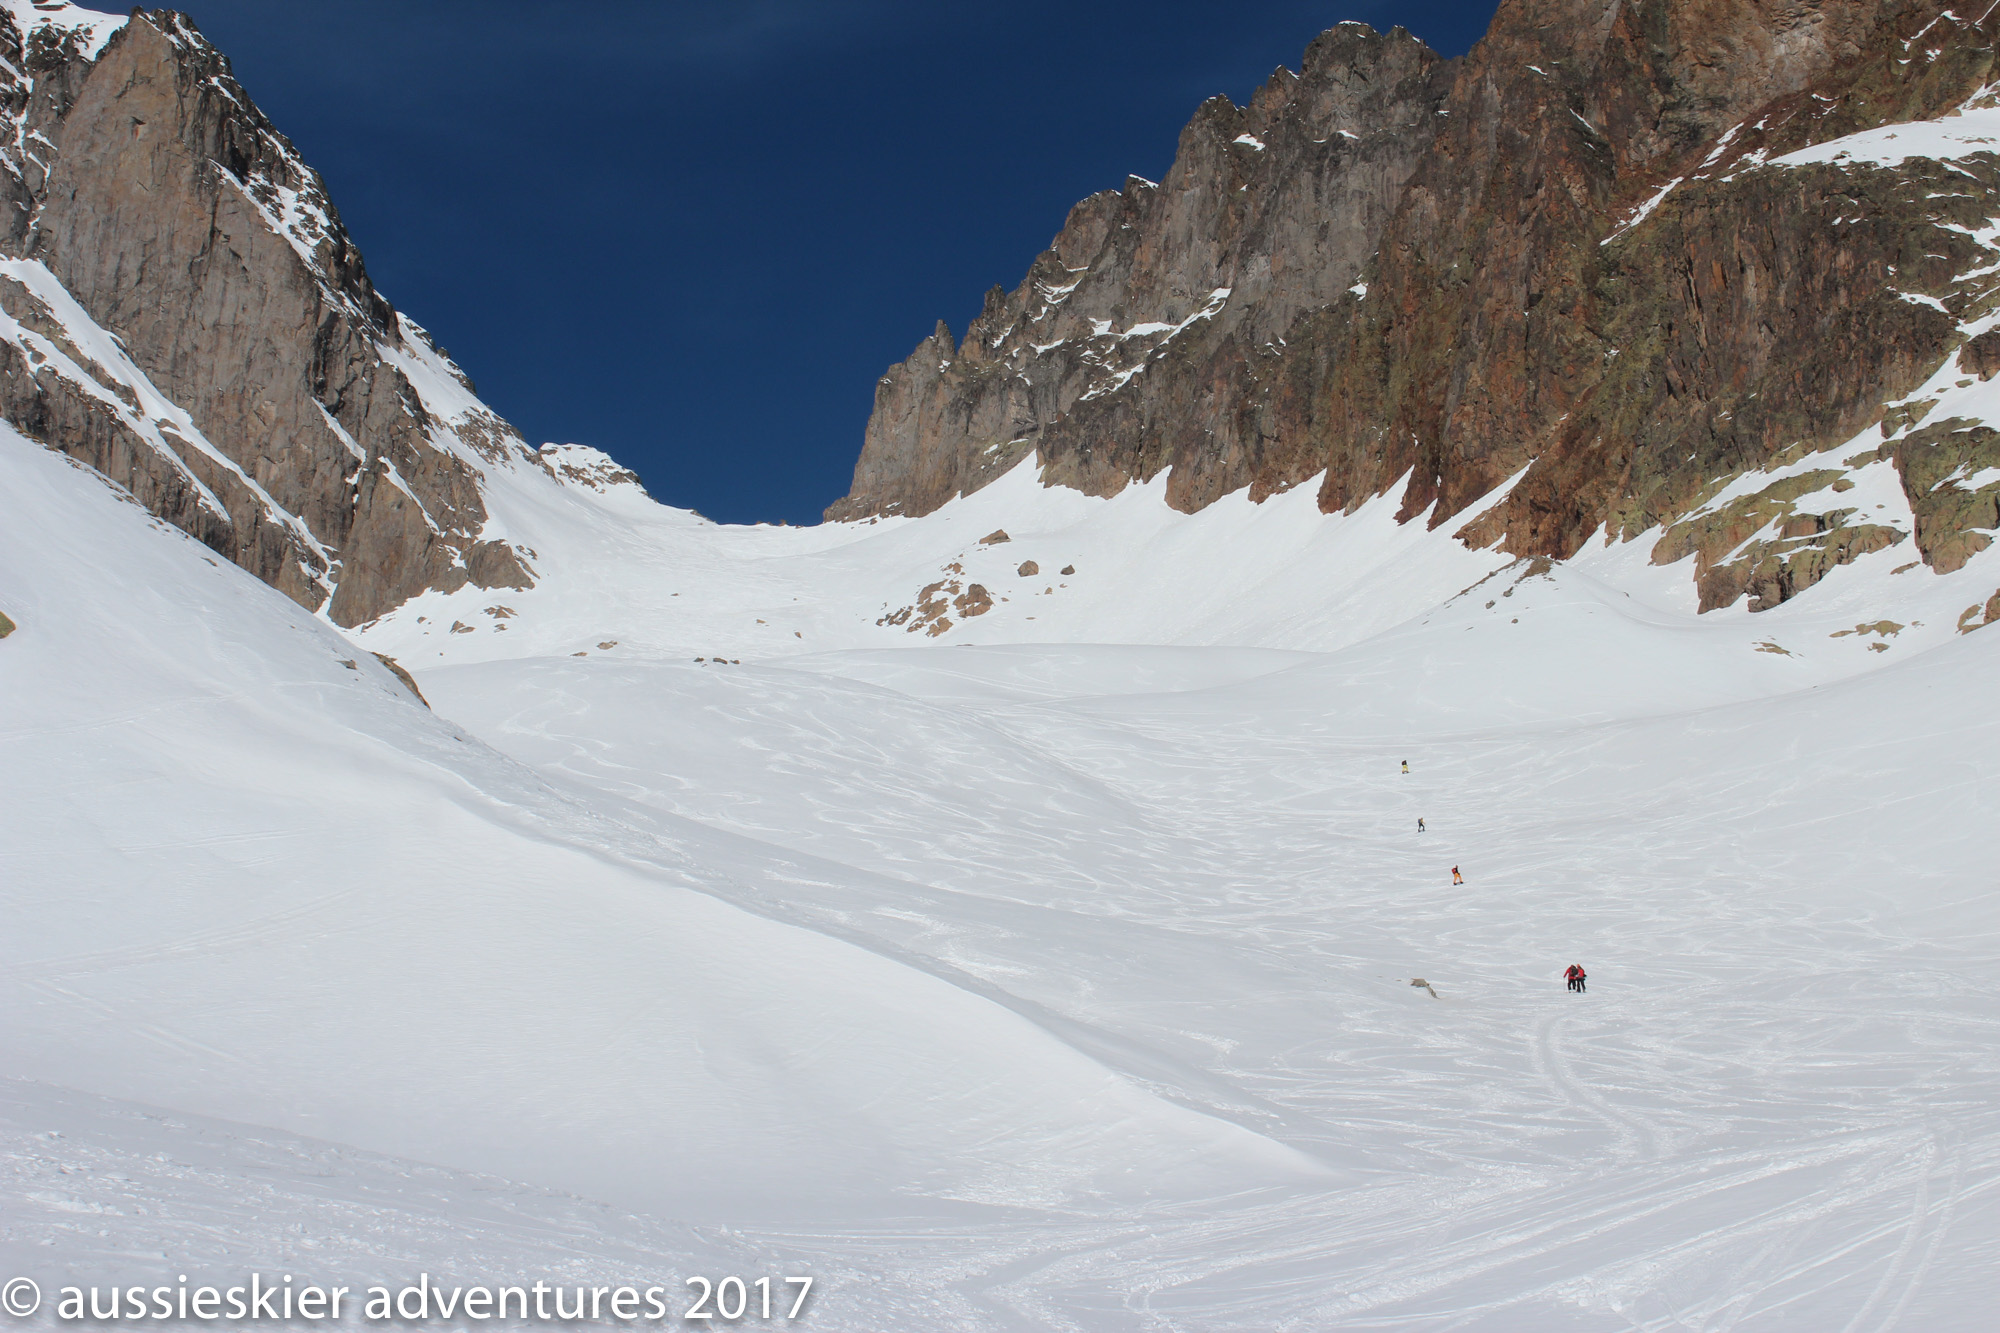
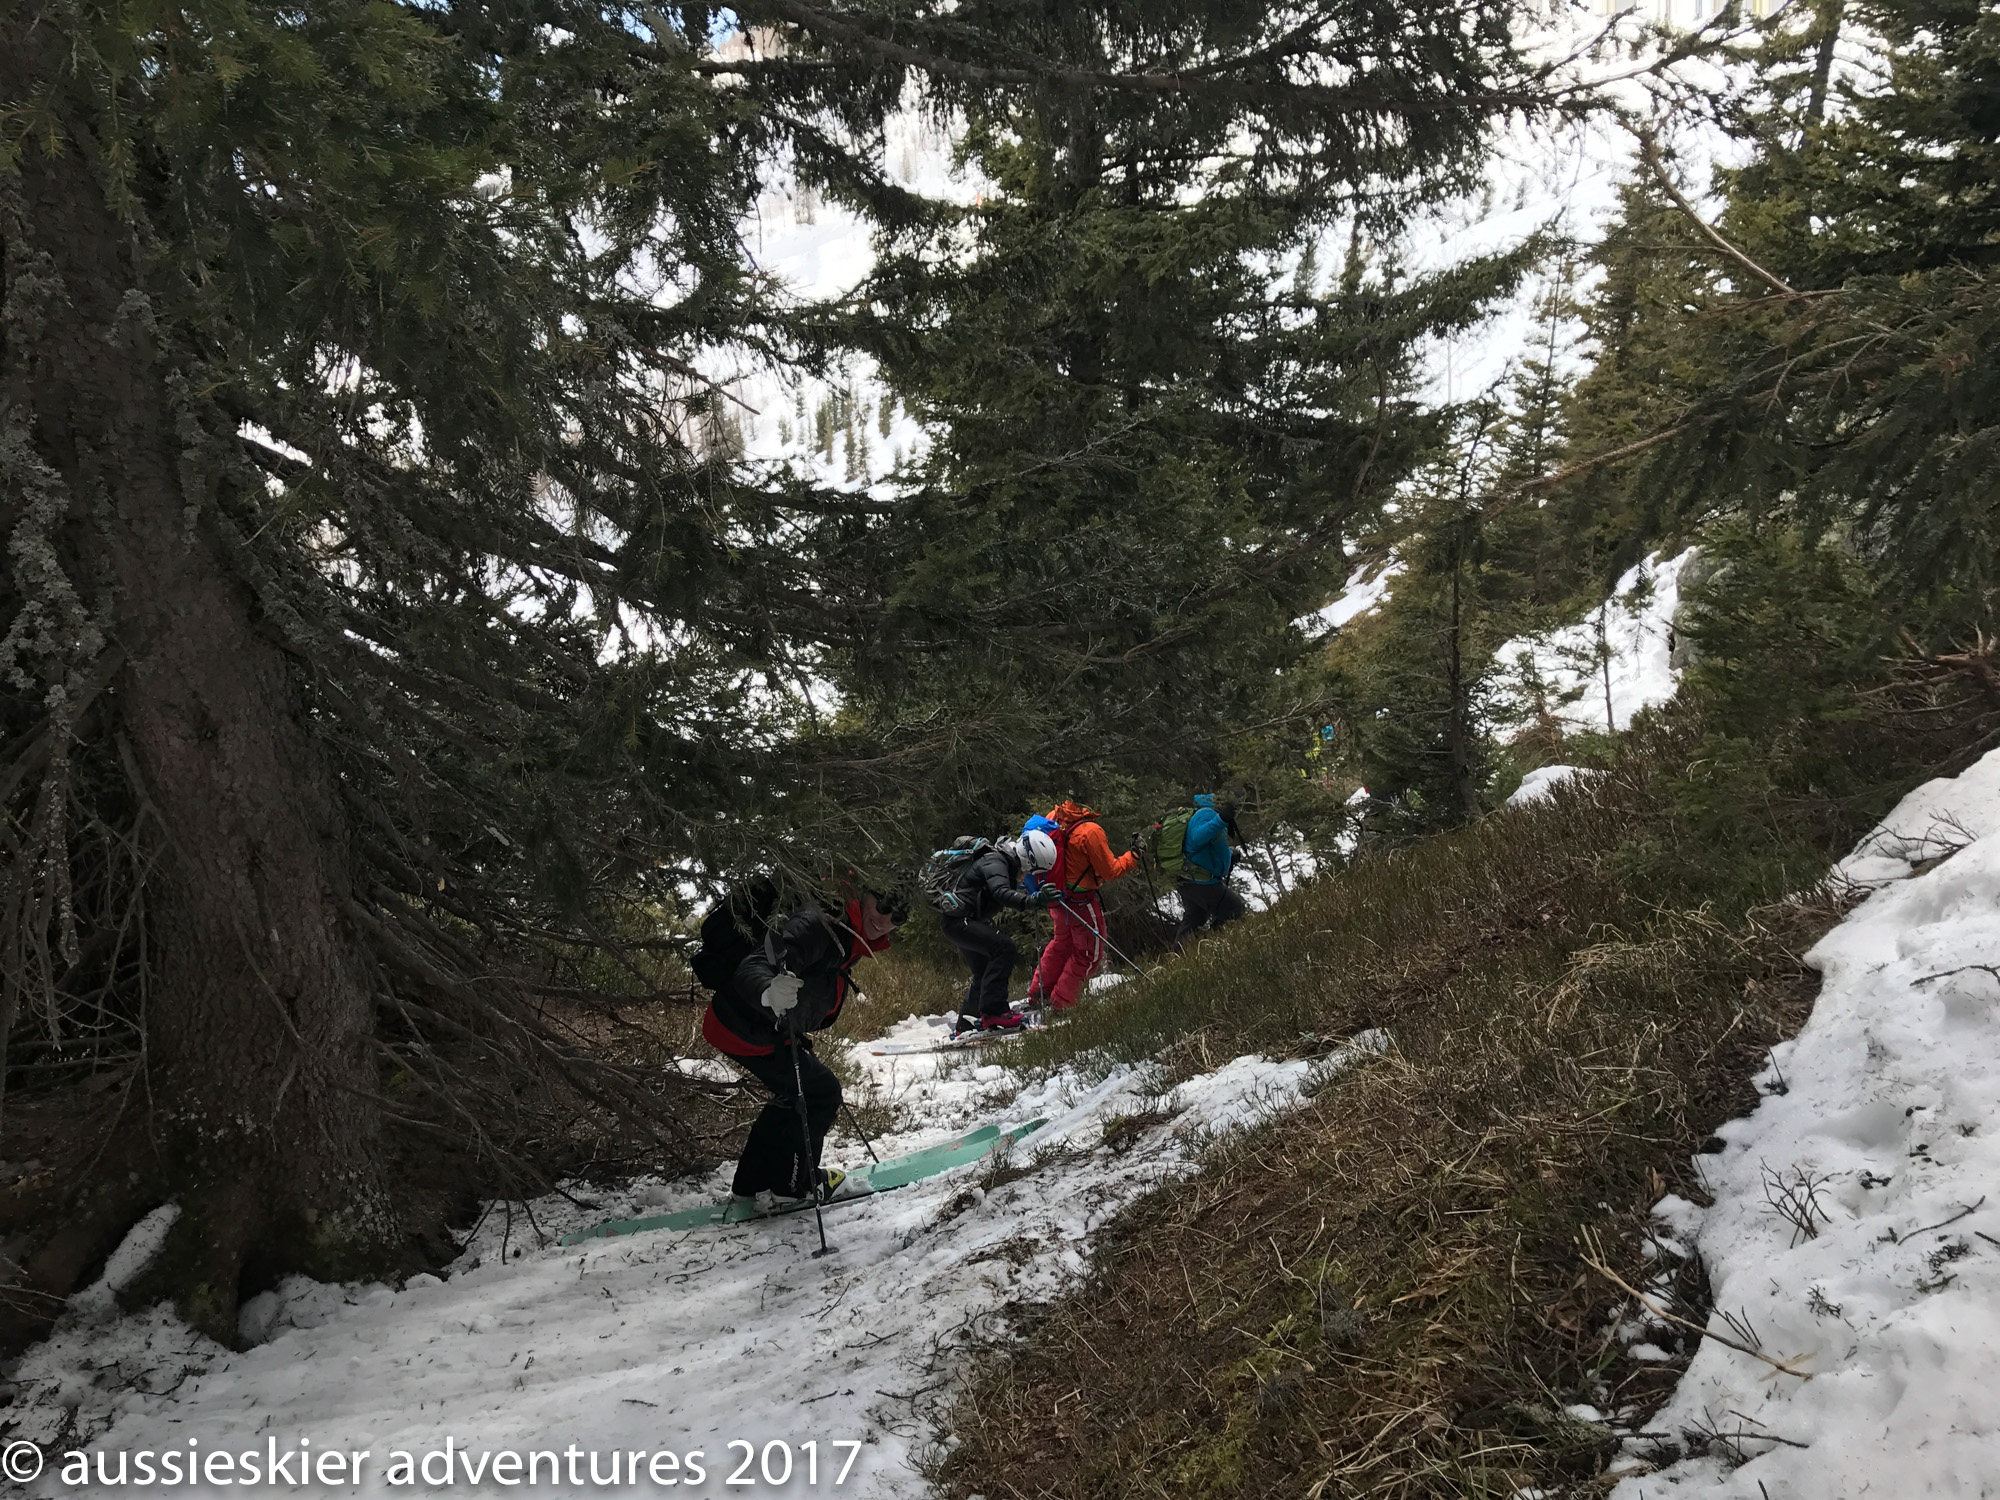
The famous arete is perhaps the most nerve-wracking section of the Vallee Blanche, it’s an exposed ridge that you need to walk down, with significant drops on either side. However it is expertly roped by the lift staff and with soft snow, expert guides and the right equipment it’s not as death-defying as it might seem. We split into two groups to walk the arete and everybody completed it with aplomb. When we reached flat ground it was time to remove crampons etc, a lot more happy snaps and get in to ski mode.
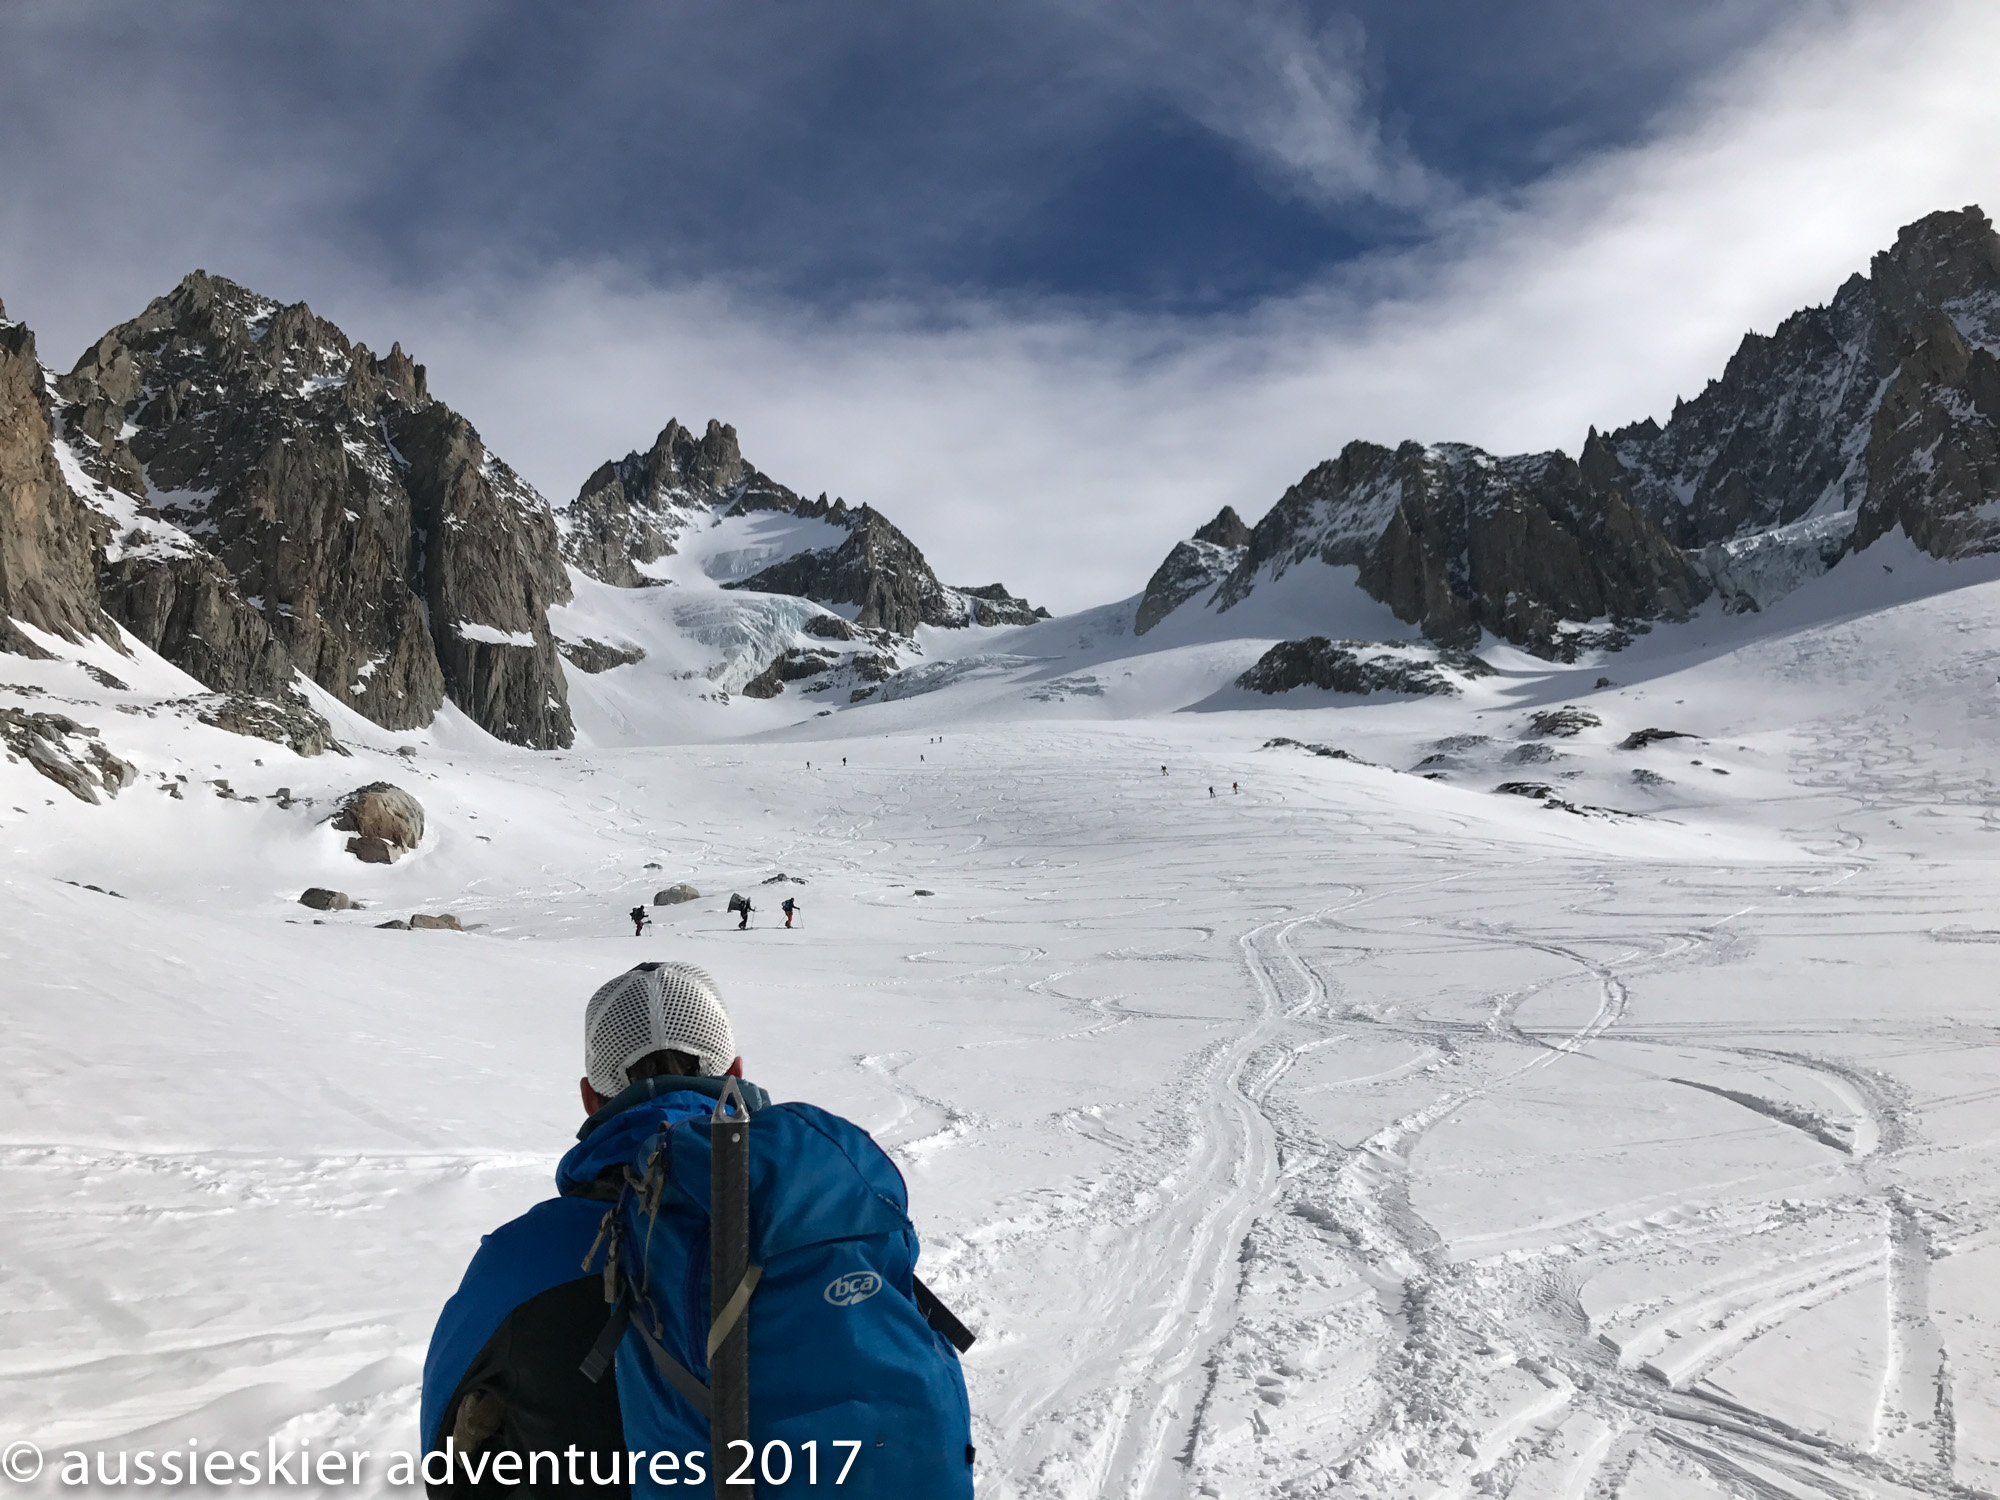
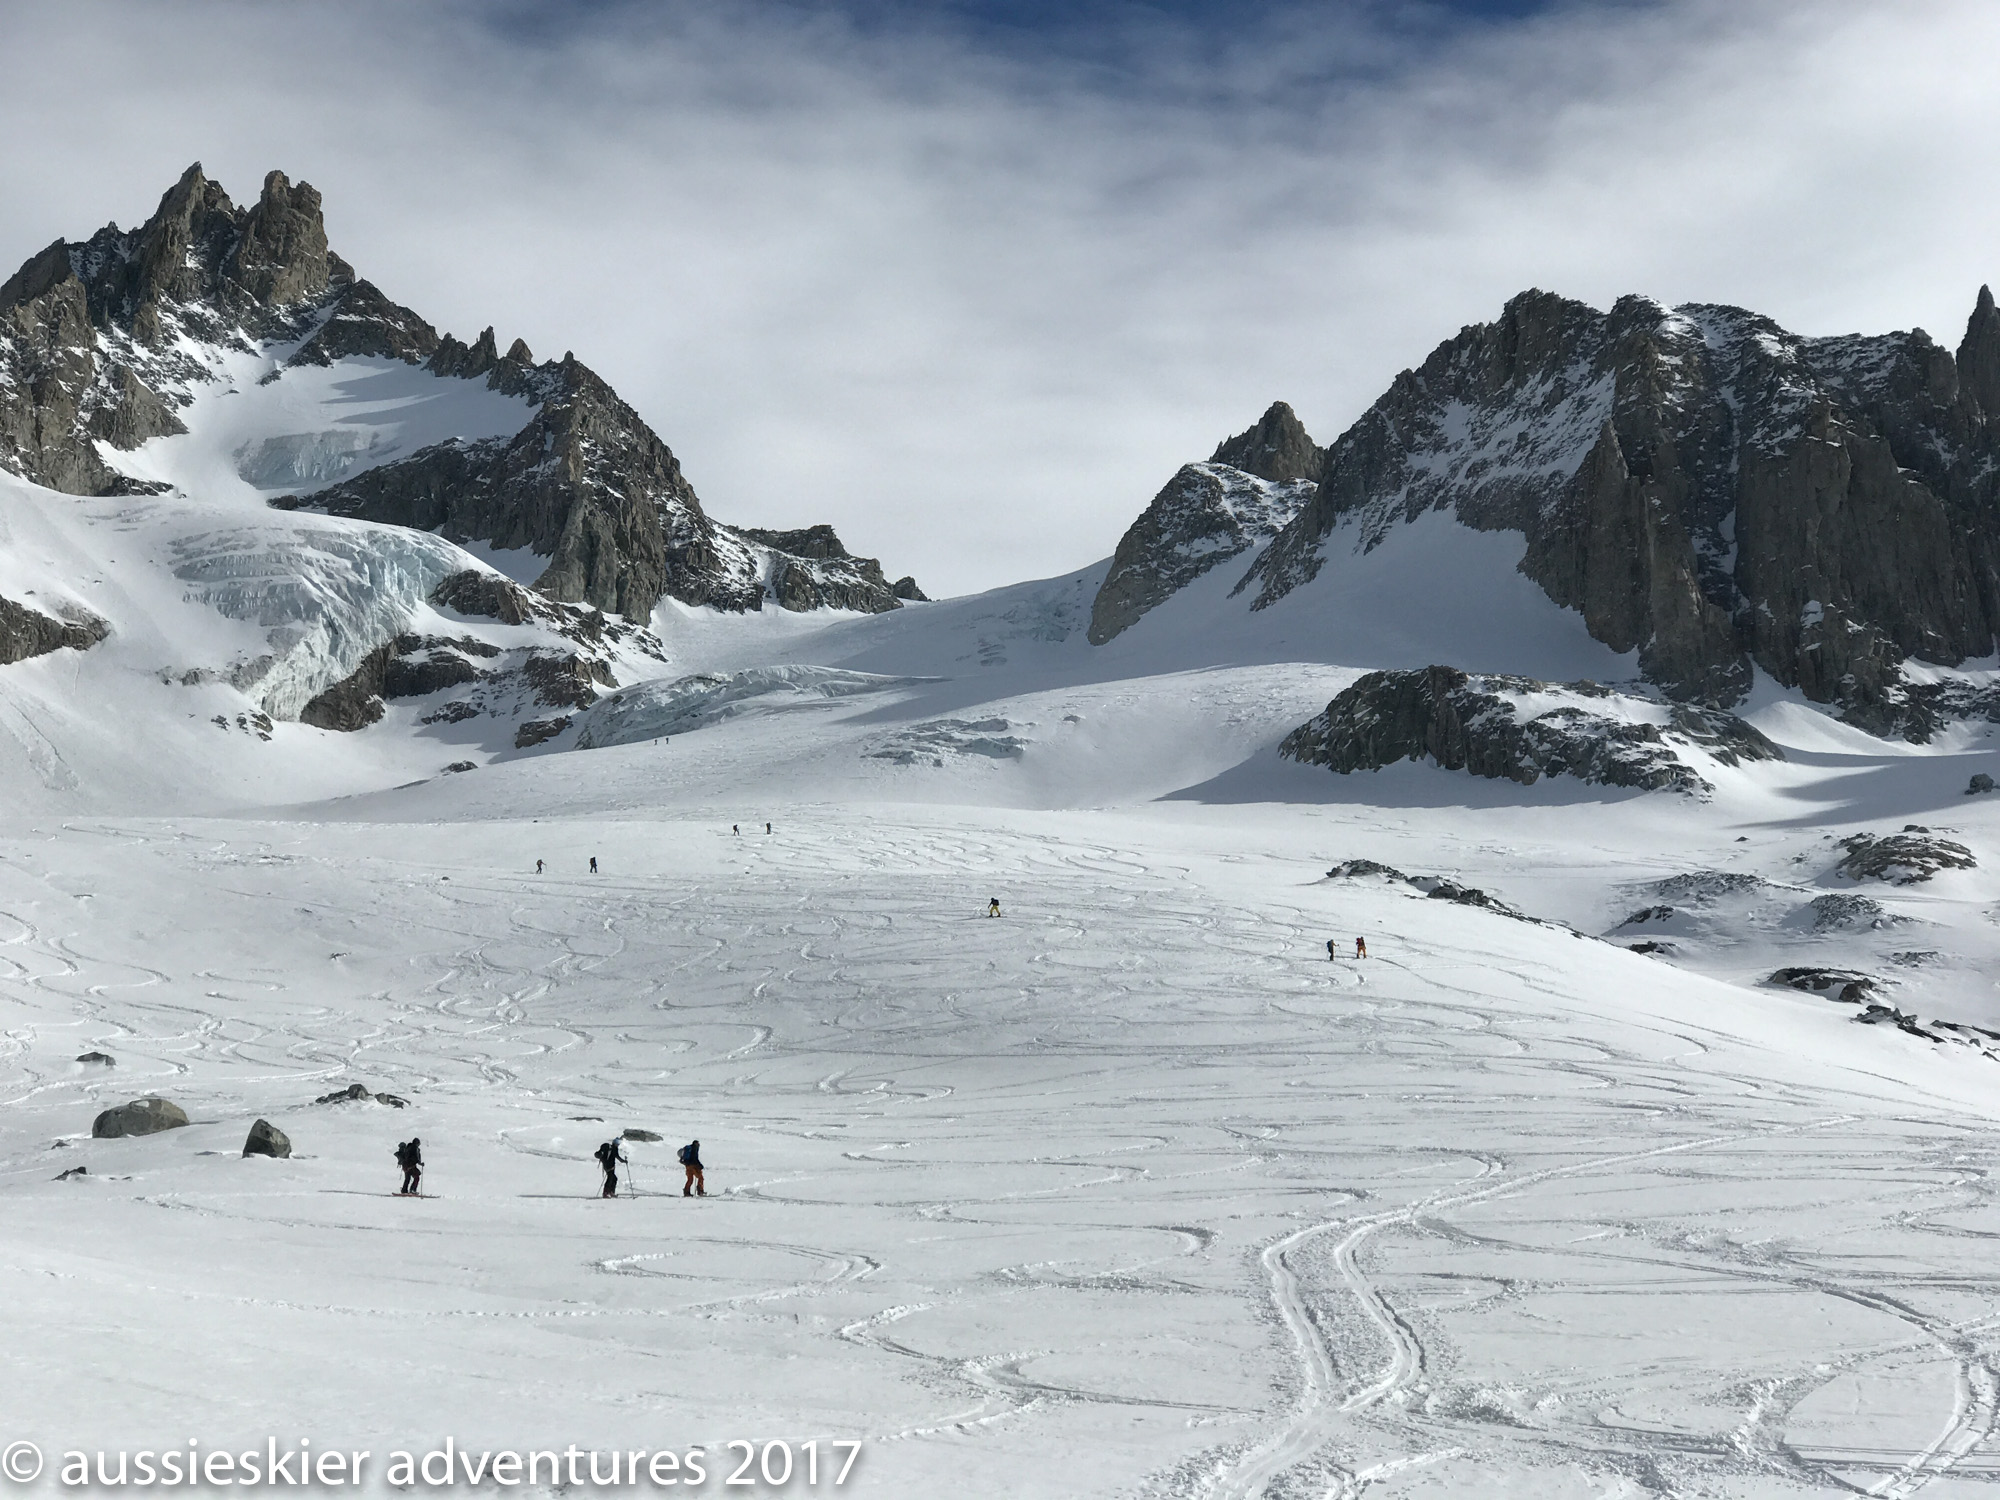
We split into two groups for the descent, one group took the classic Vallee Blanche itinerary and the others went on the Moyen Envers variation which is a little steeper and more technical.
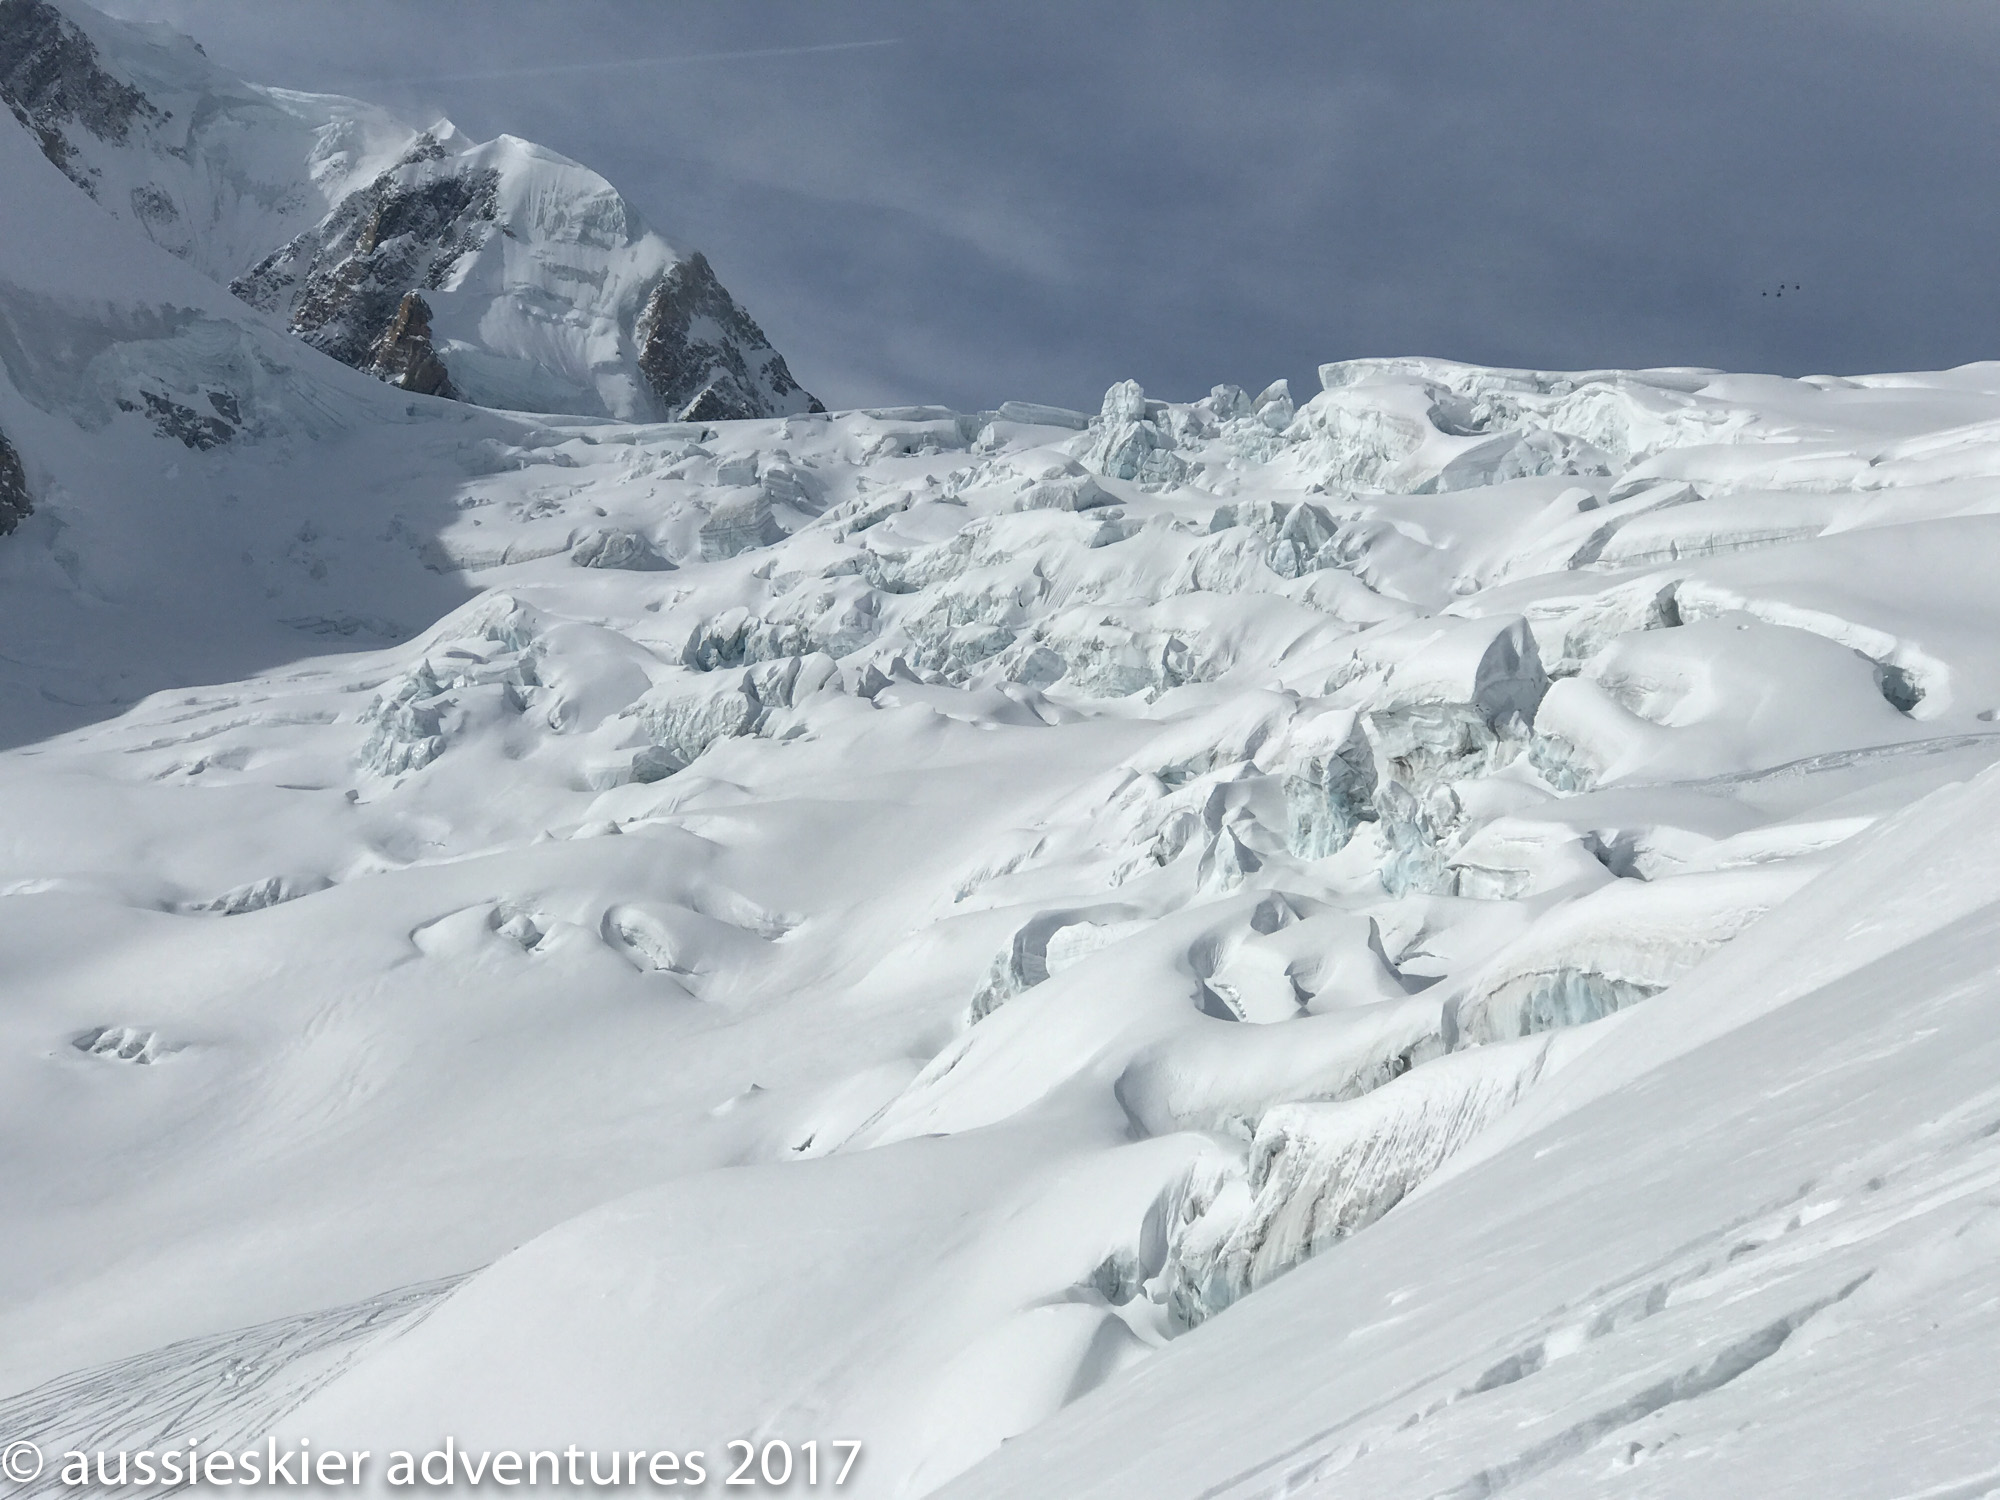
As over a metre of new snow had fallen during the storm the skiing was excellent – after the first pitch in blower powder we decided to get the drone out to film some skiing – unfortunately it was actually windier lower down so we weren’t able to use it again.
https://www.instagram.com/p/BRL1fLPBIz9/
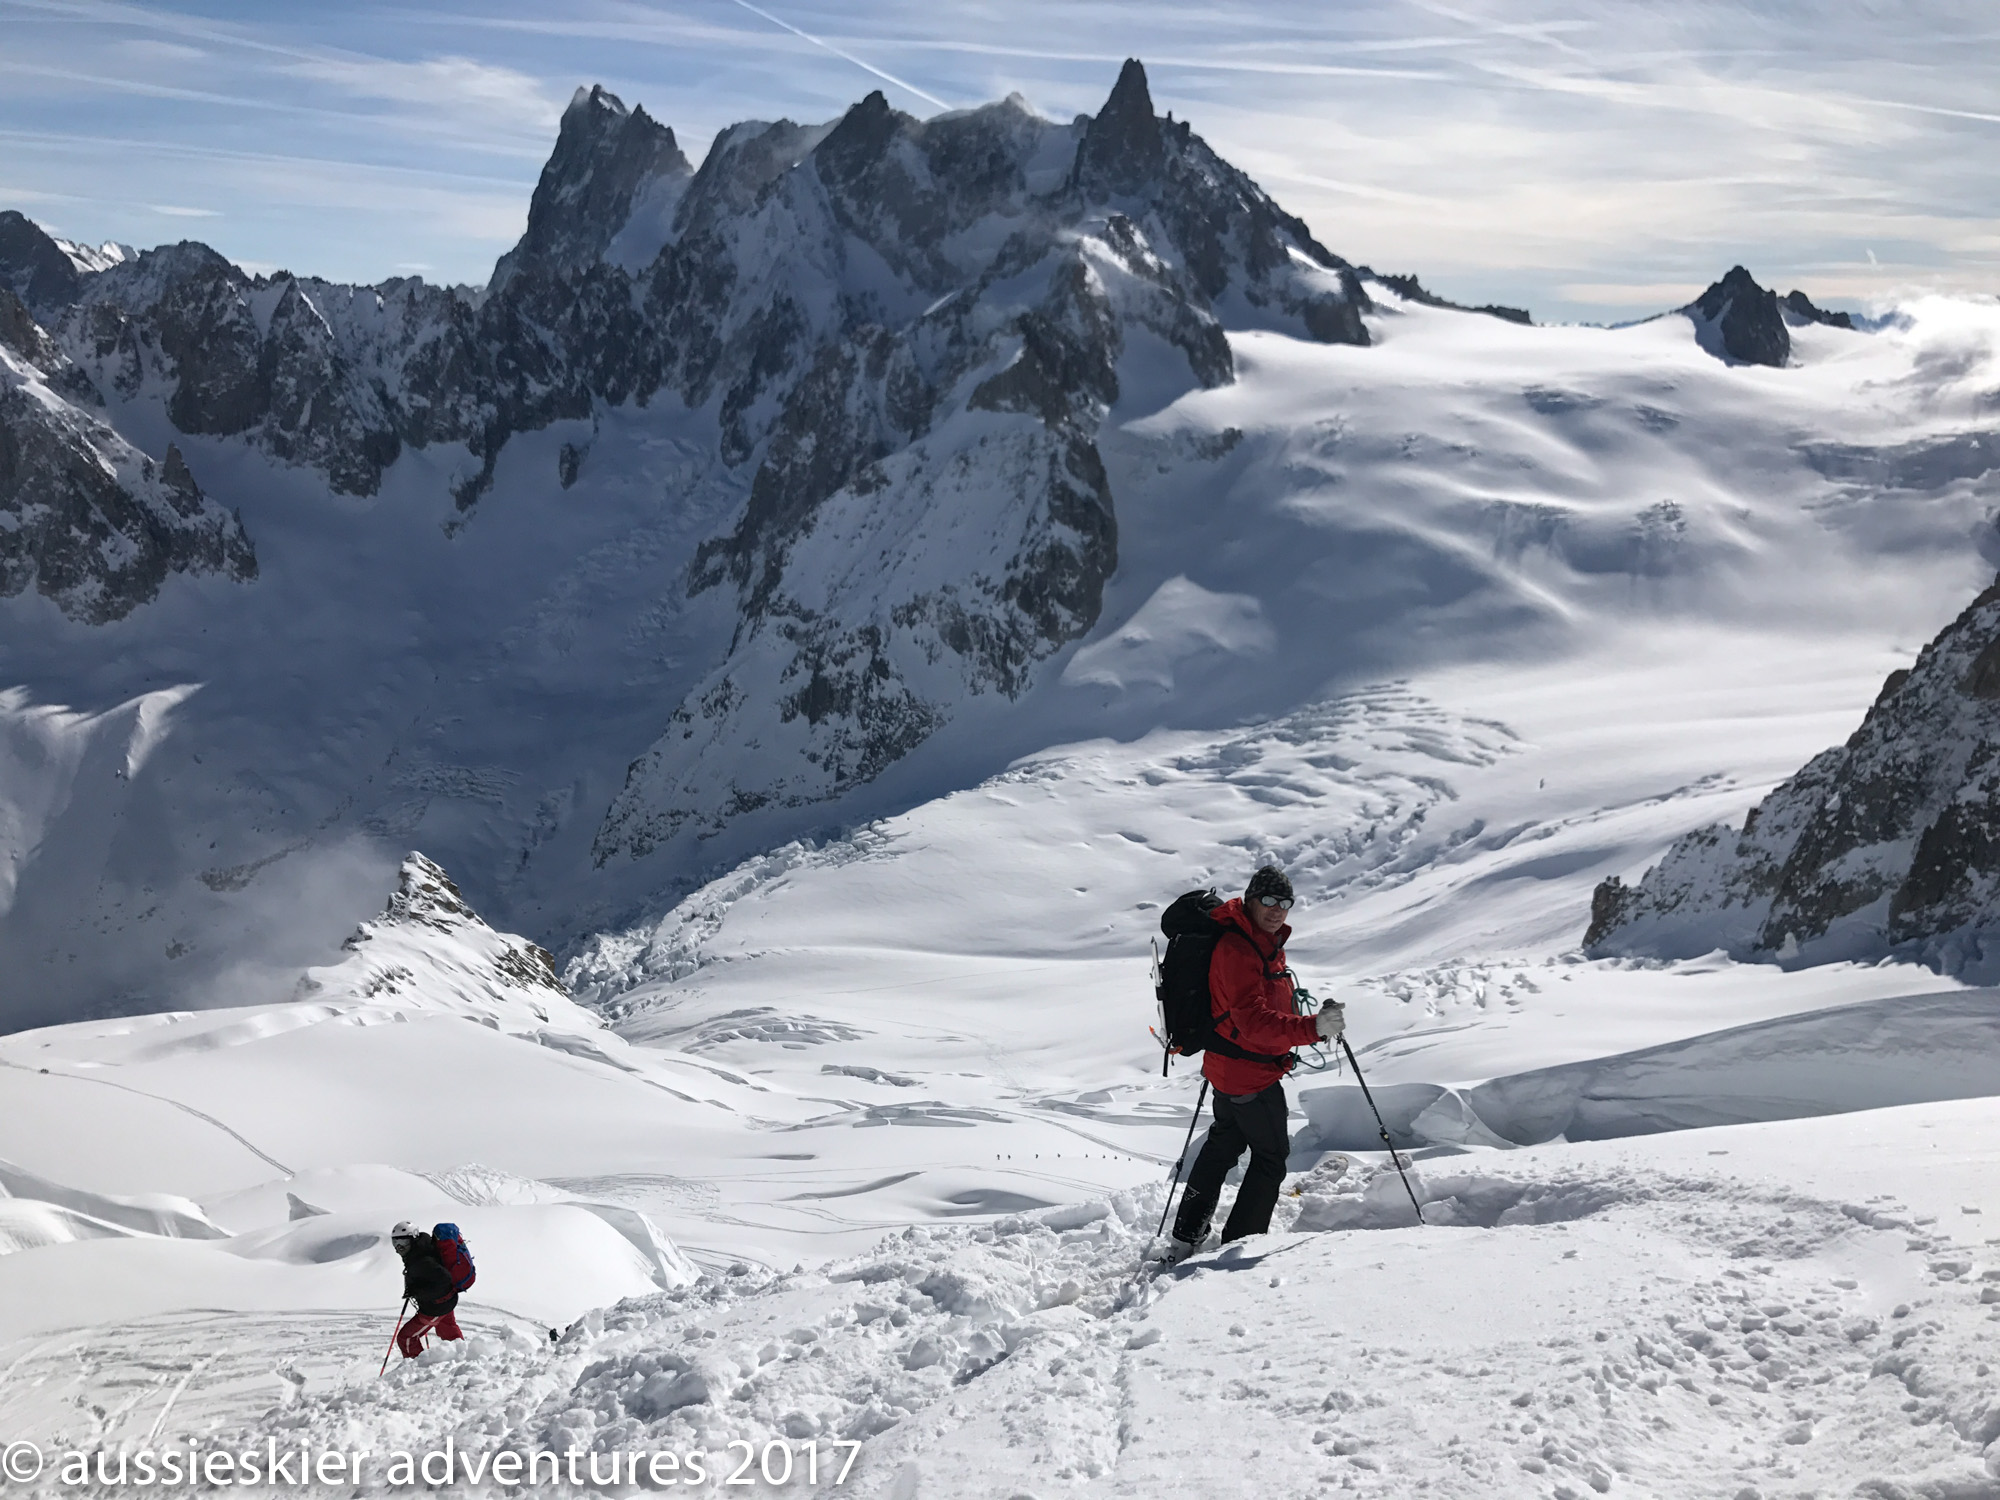
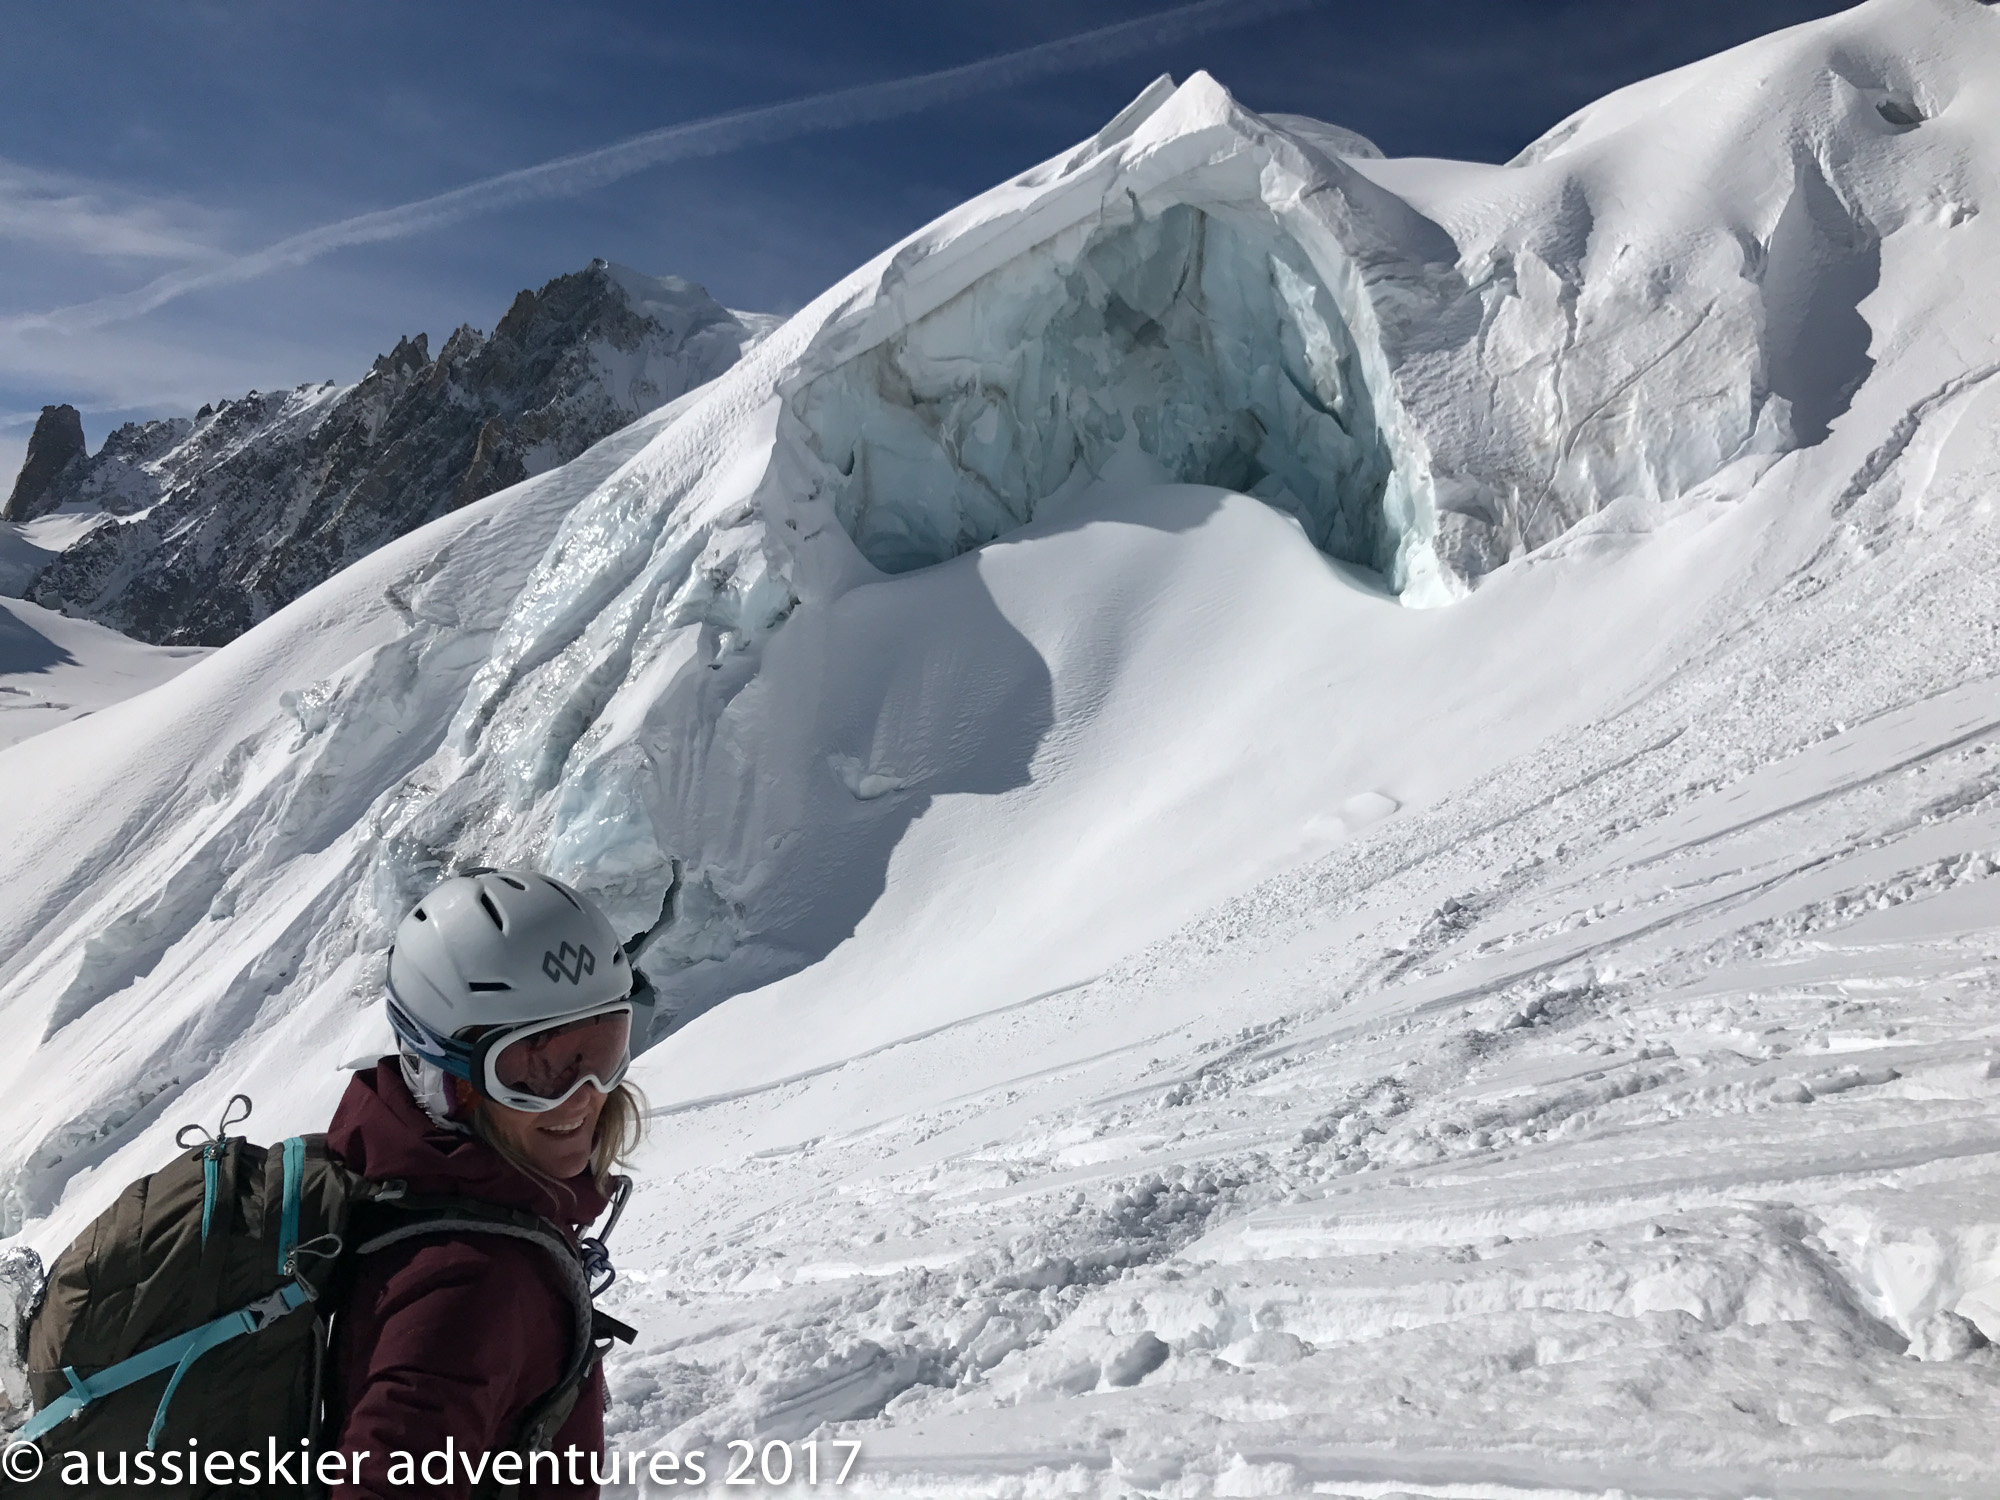
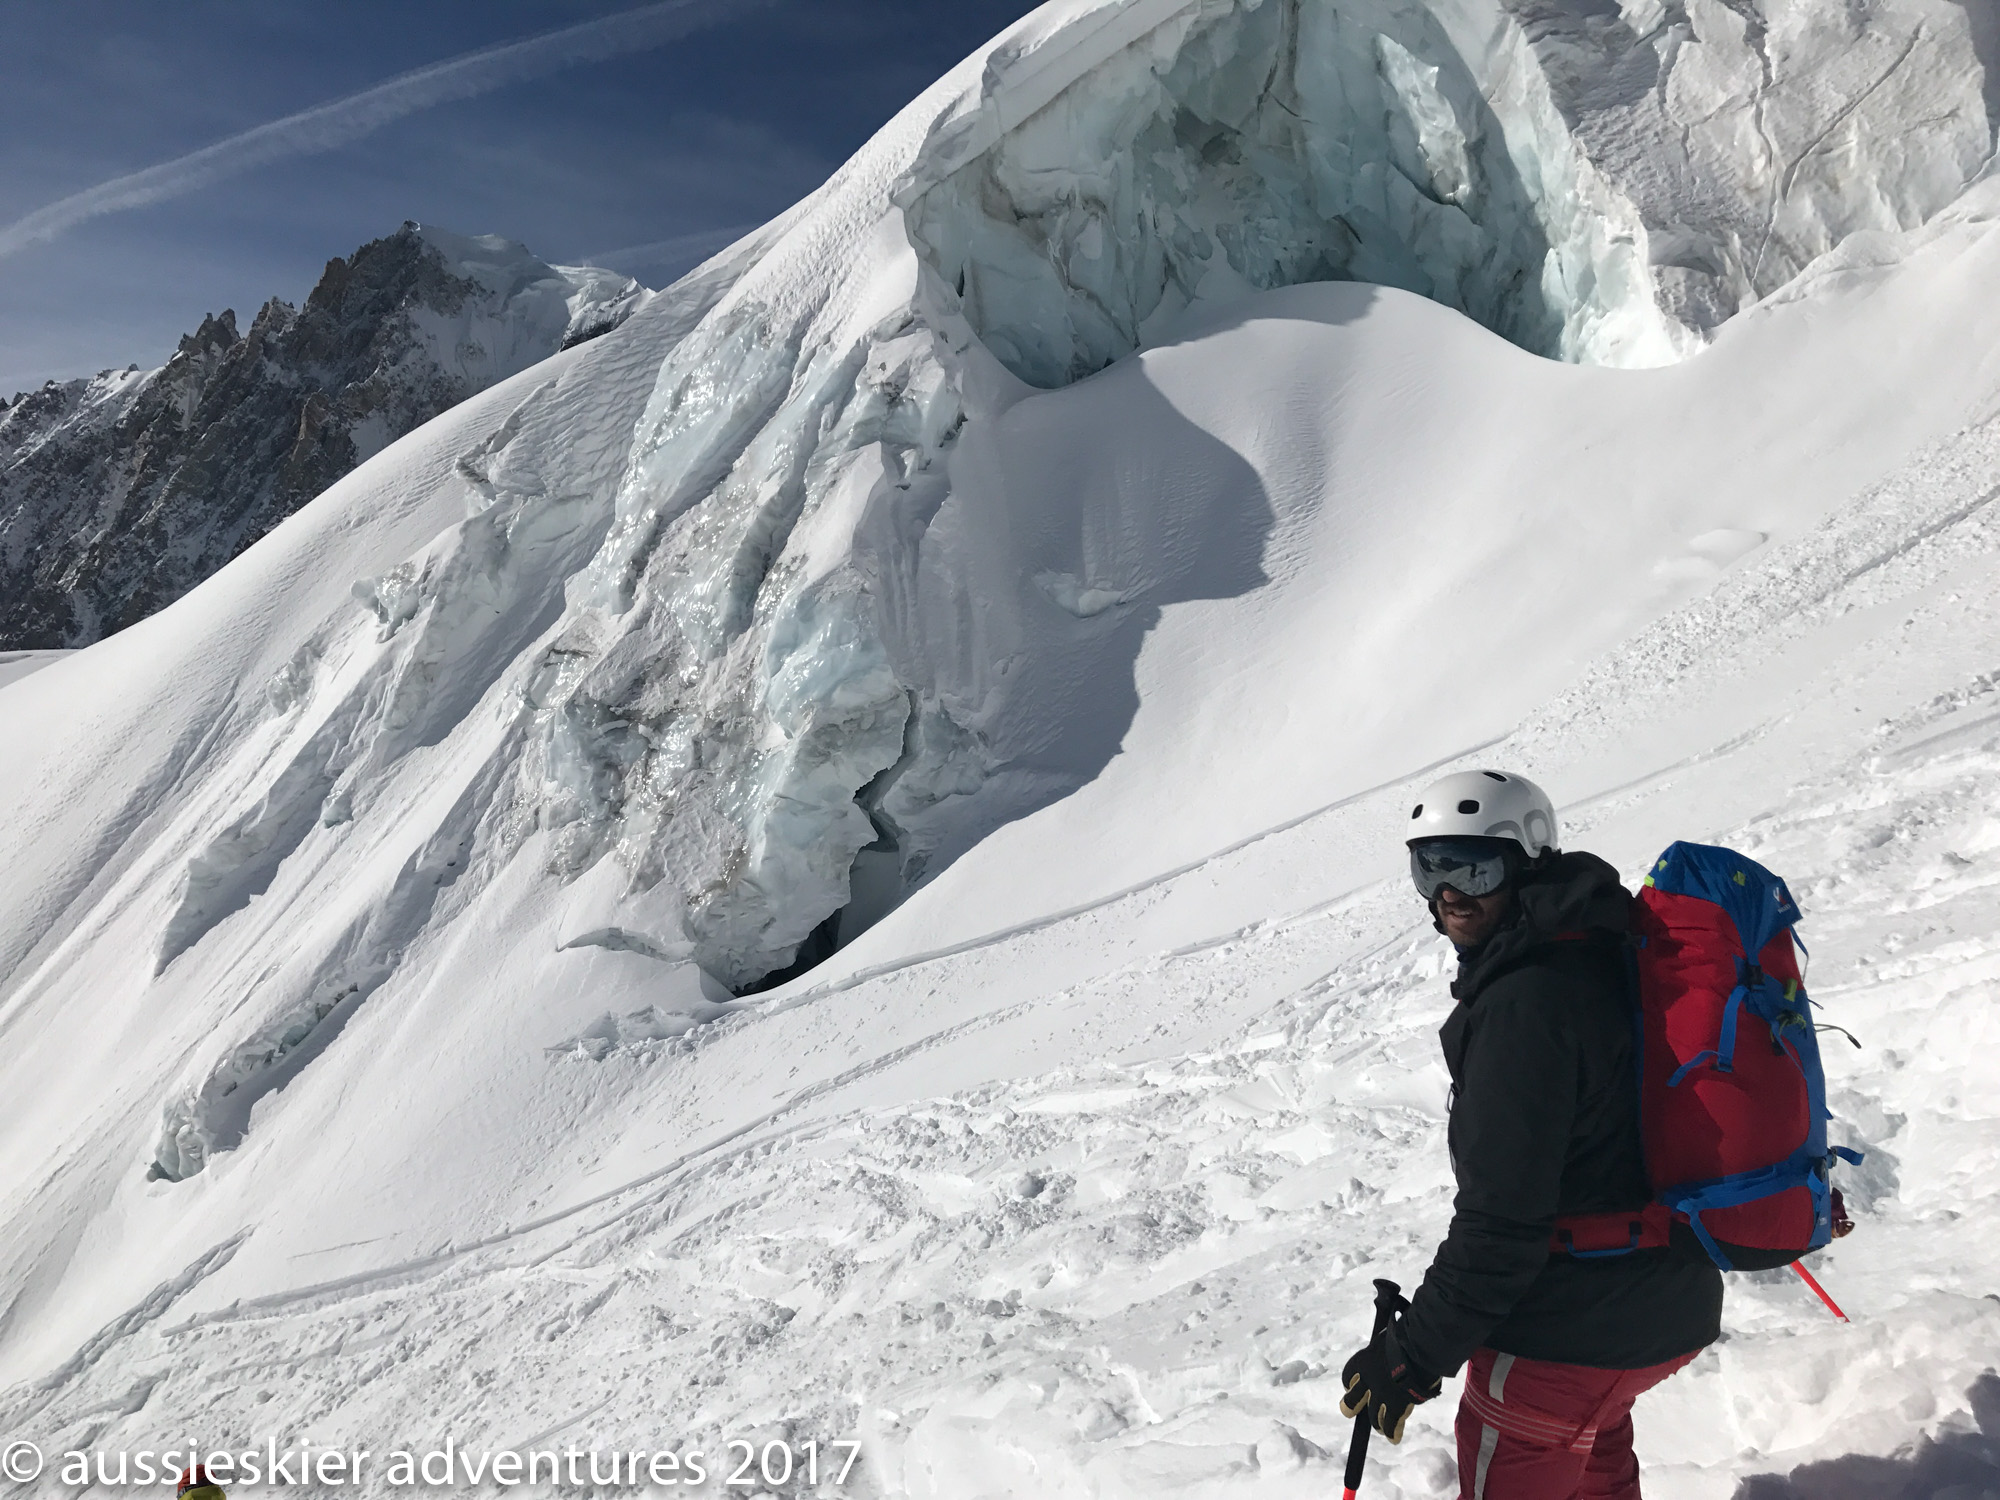
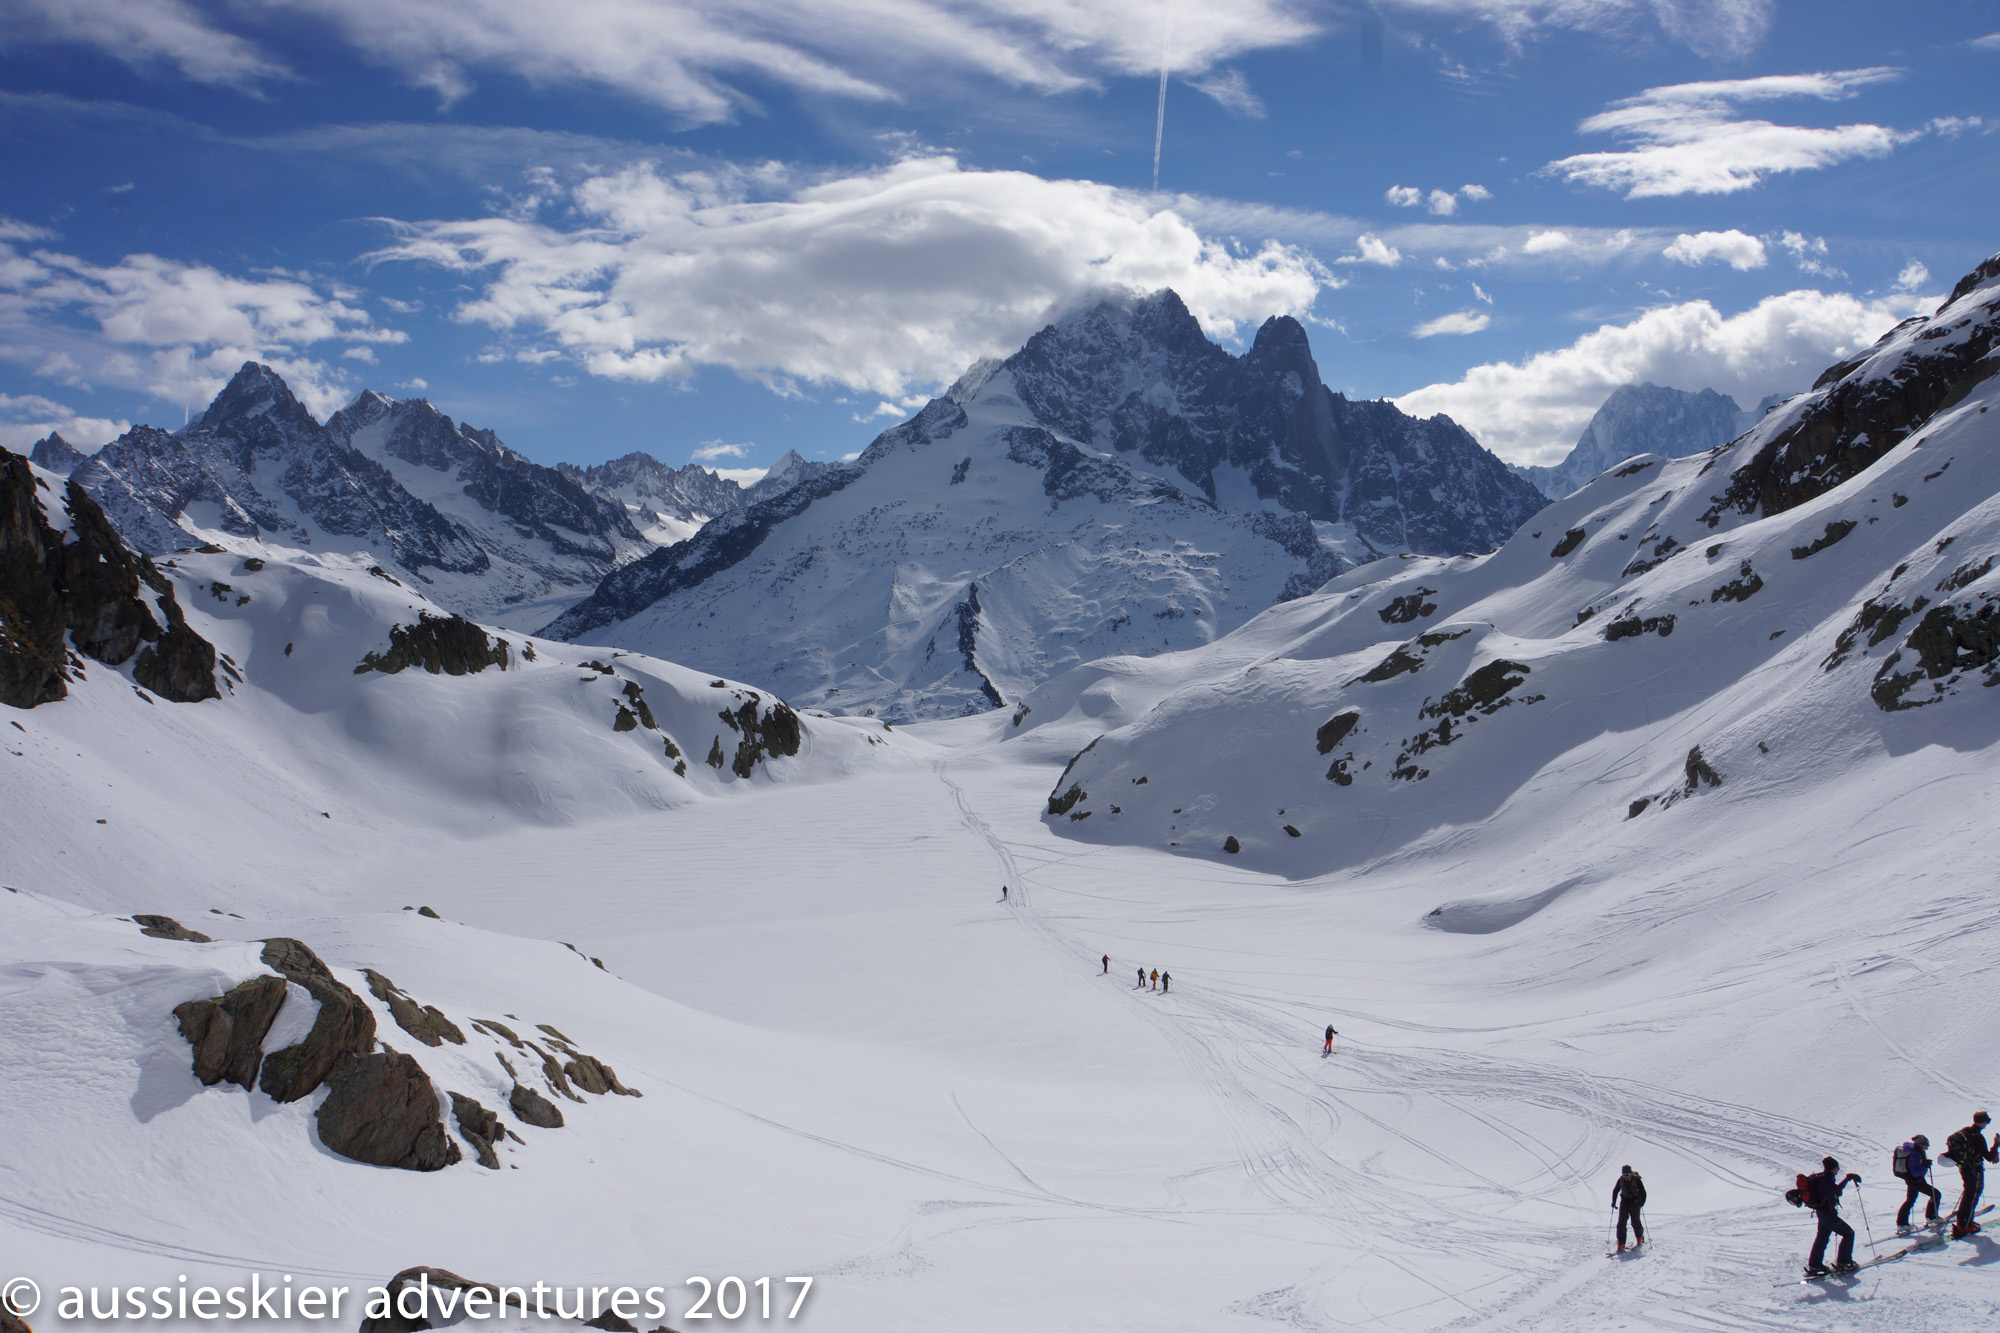
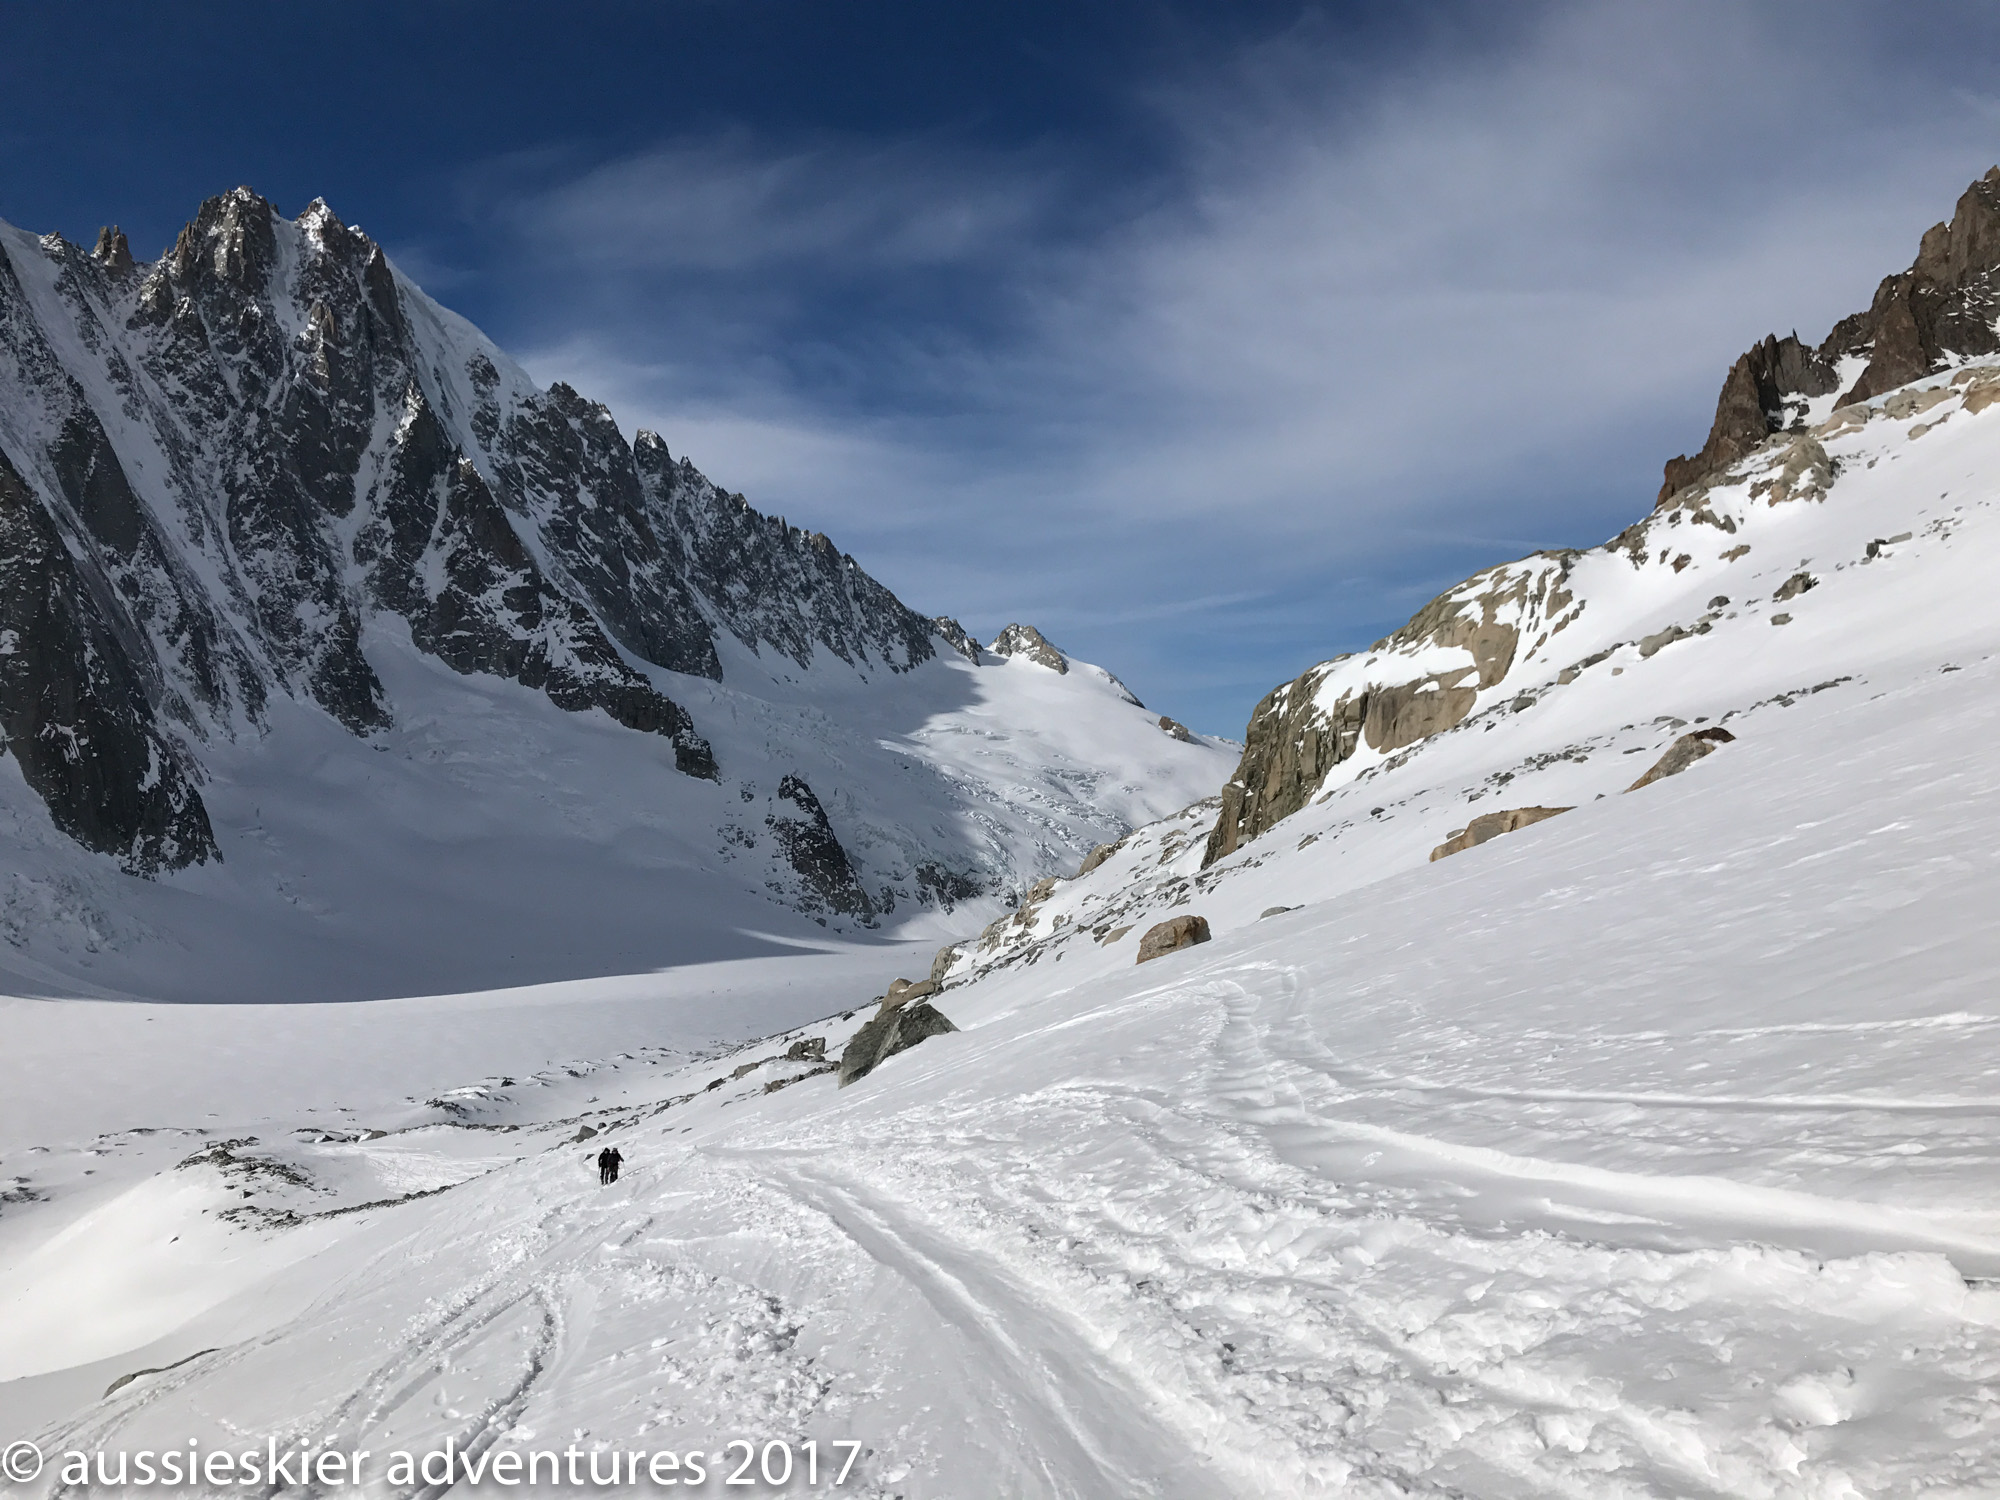
The Moyen Envers twists and turns its way down the glacier and we descended in perfect snow marvelling at the amazing glacial serac formations.
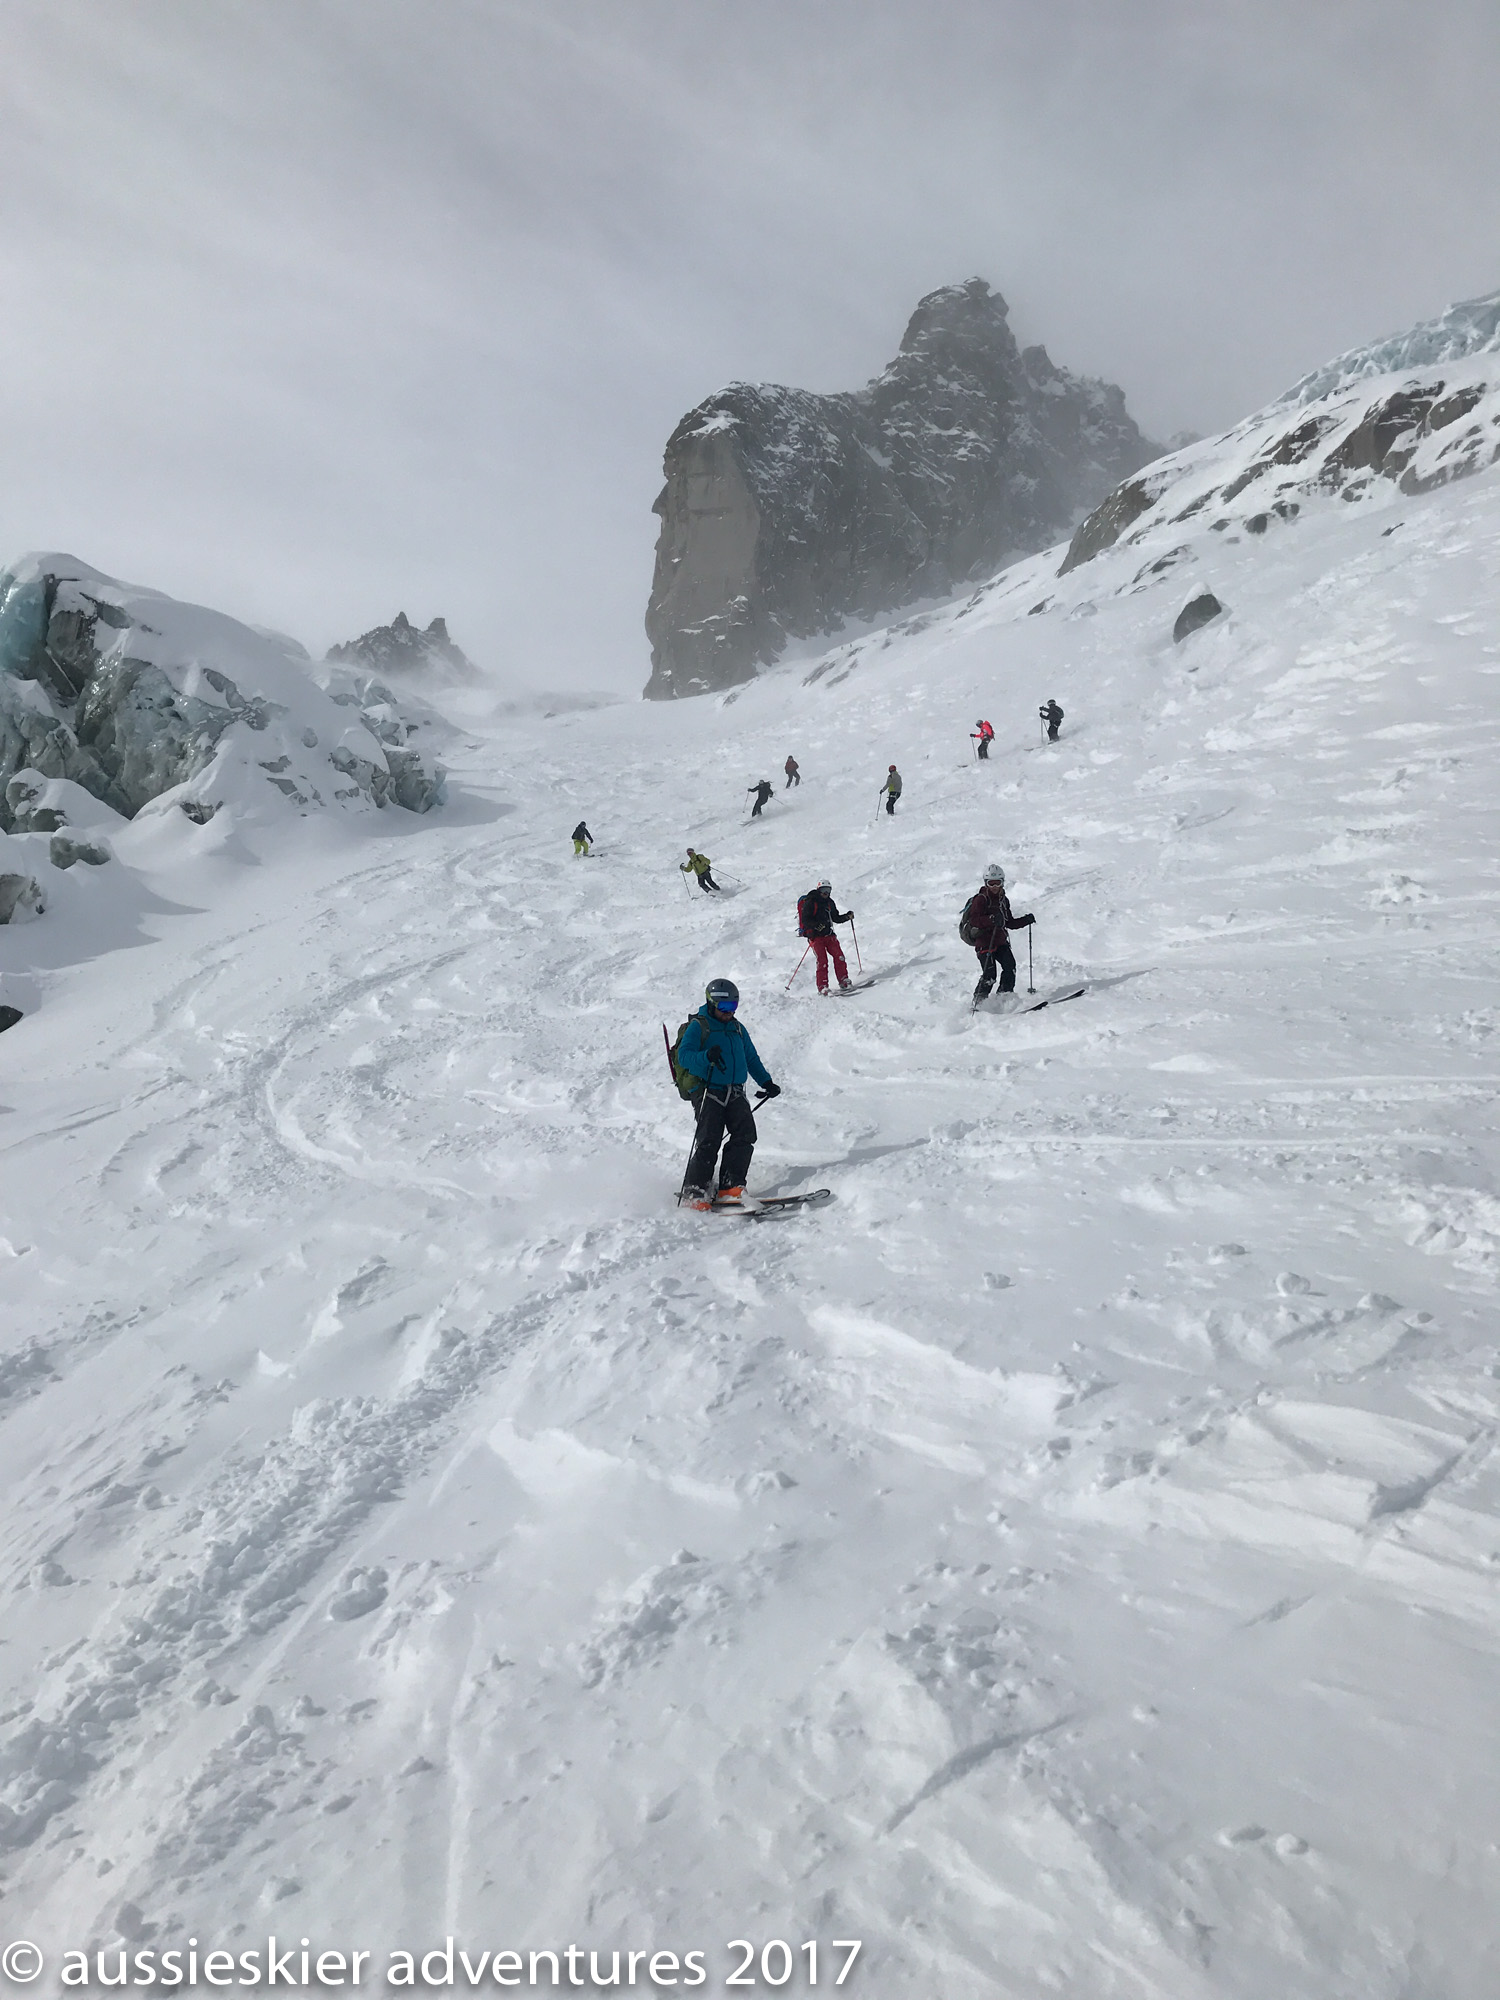
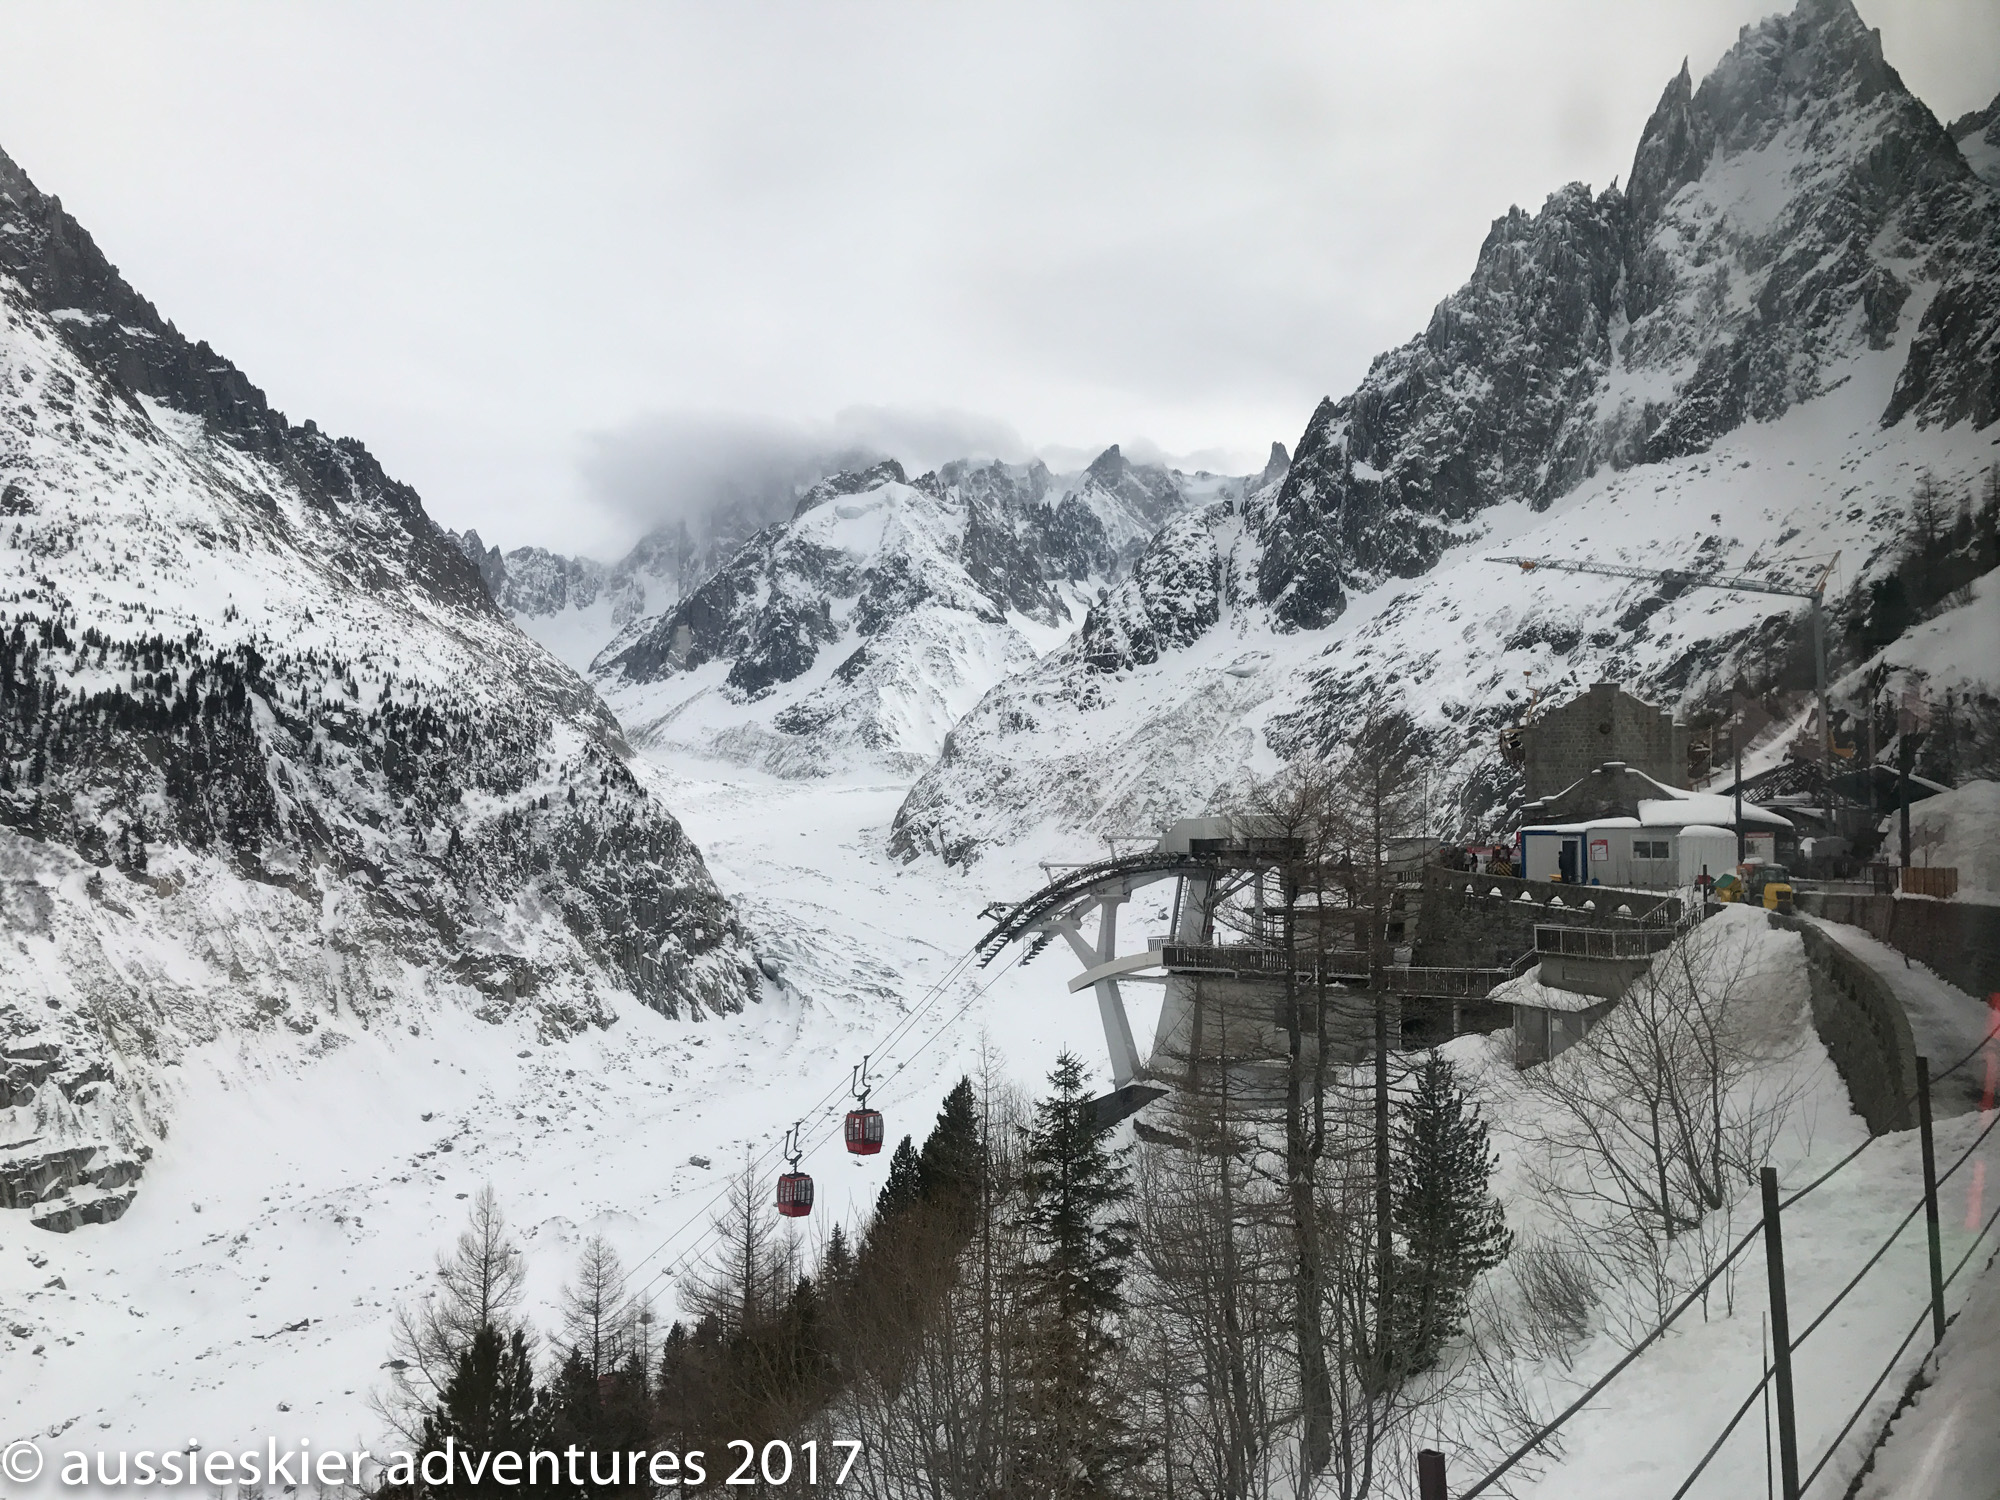
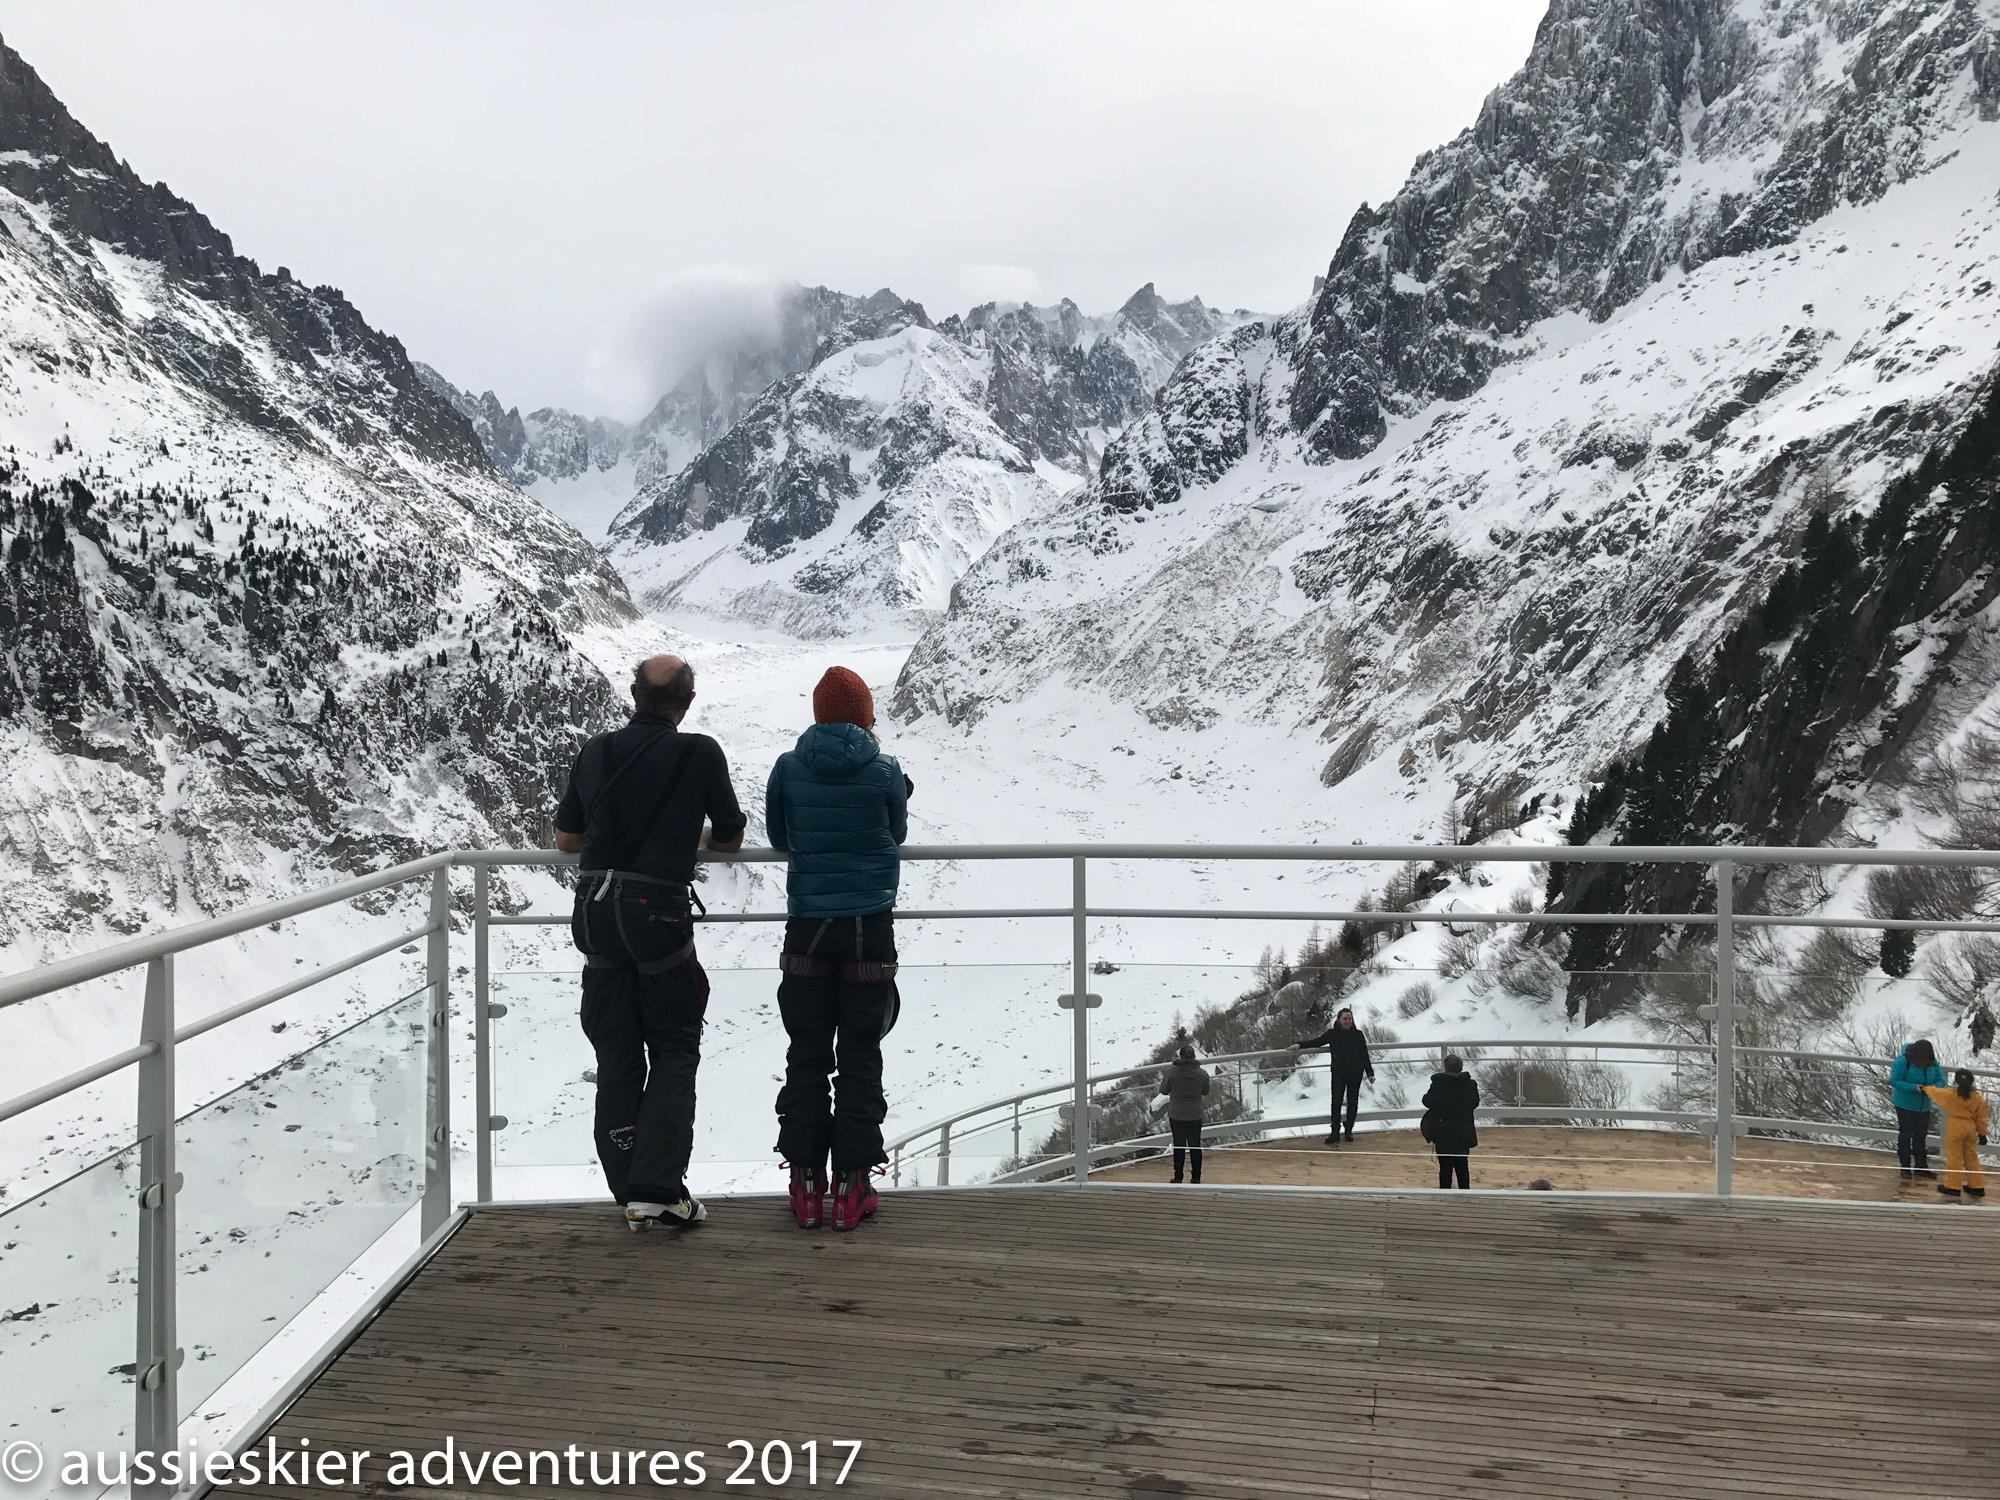
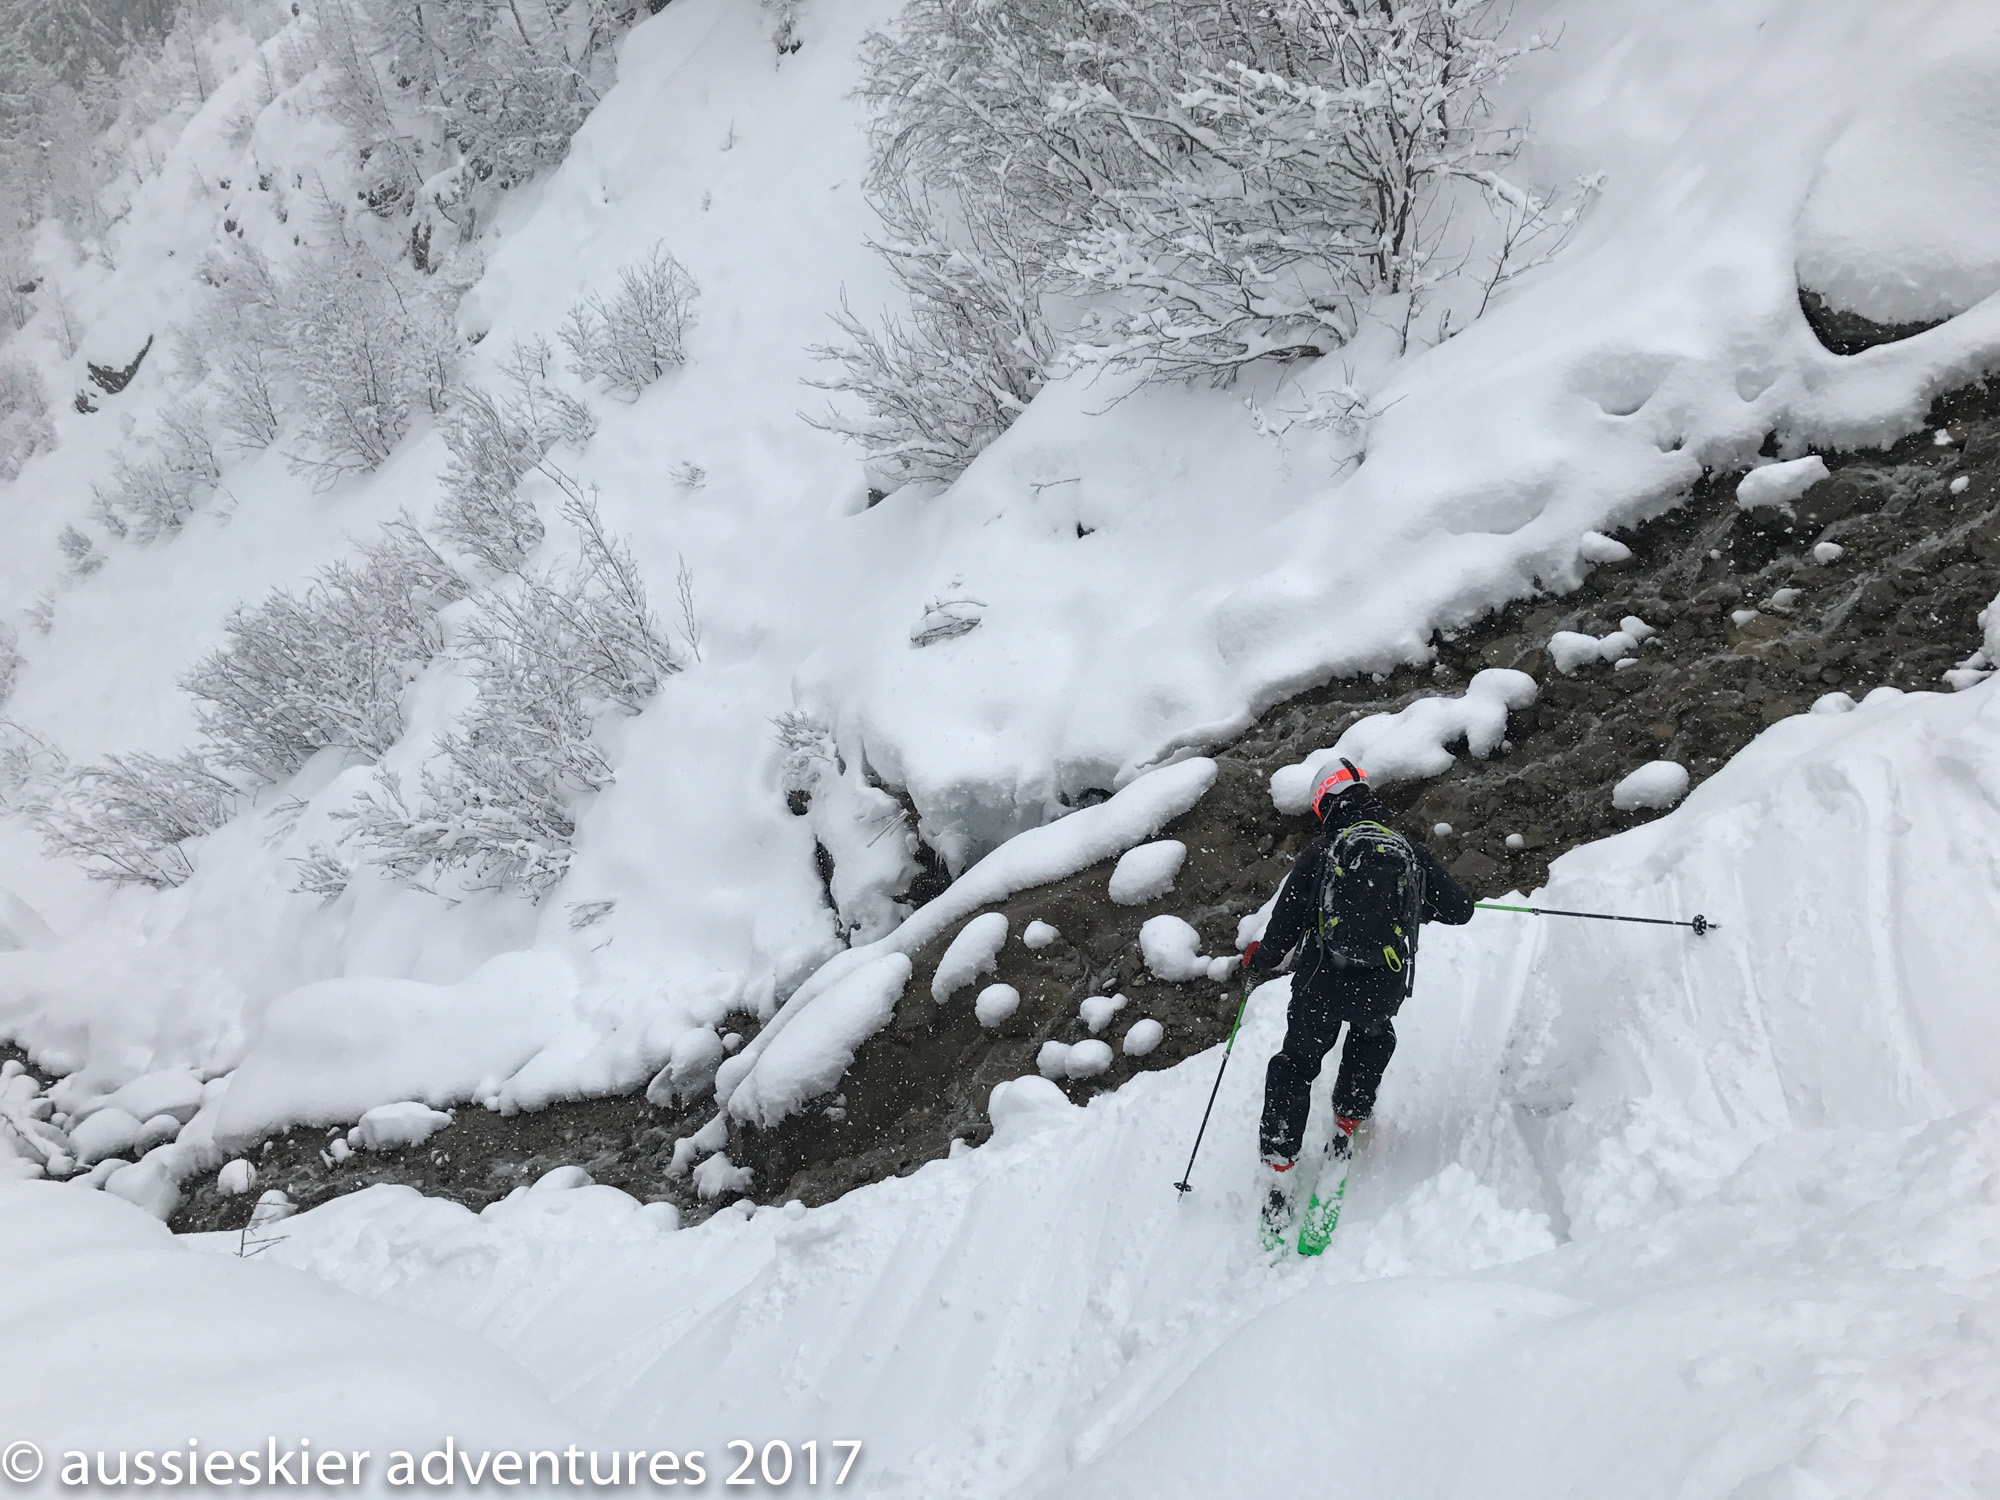
The Moyen Envers group rejoined the classic route and met up with the other group down on the flats of the Mer de Glace. Once you reach the Mer de Glace it is a long flat descent where you can relax a little and marvel at the scenery towering above. The forecasted foehn wind was definitely blowing down from the Italian side and led to an unusual situation where it was colder lower down than higher up.
After a few kilometres it was time to decide how to get back to Chamonix. Typically there are two options, you can ski down to the tongue of the glacier, make a short walk up the moraine wall then ski the ‘James Bond’ track to Chamonix – however this being a low snow year we thought that this might not be the best idea. The alternative is to climb up a set of steps that are bolted to the moraine wall, with another set or two being added each year as the glacier sadly recedes, until you reach a small lift that brings you up to the Montenvers train. However on this day the lift was not running so it was a pretty hefty walk all the way up to Montenvers, somewhere between 3-400m vertical we estimated. But we all made it up with a minimum of fuss and rode the train down to town for the obligatory end of day beer.
It’s a pretty substantial day for somebody who has never experienced it before and can be quite emotionally draining, as there are usually quite a lot of nerves leading up to it, and our crew did exceptionally well and completed the day without incident. A great achievement.
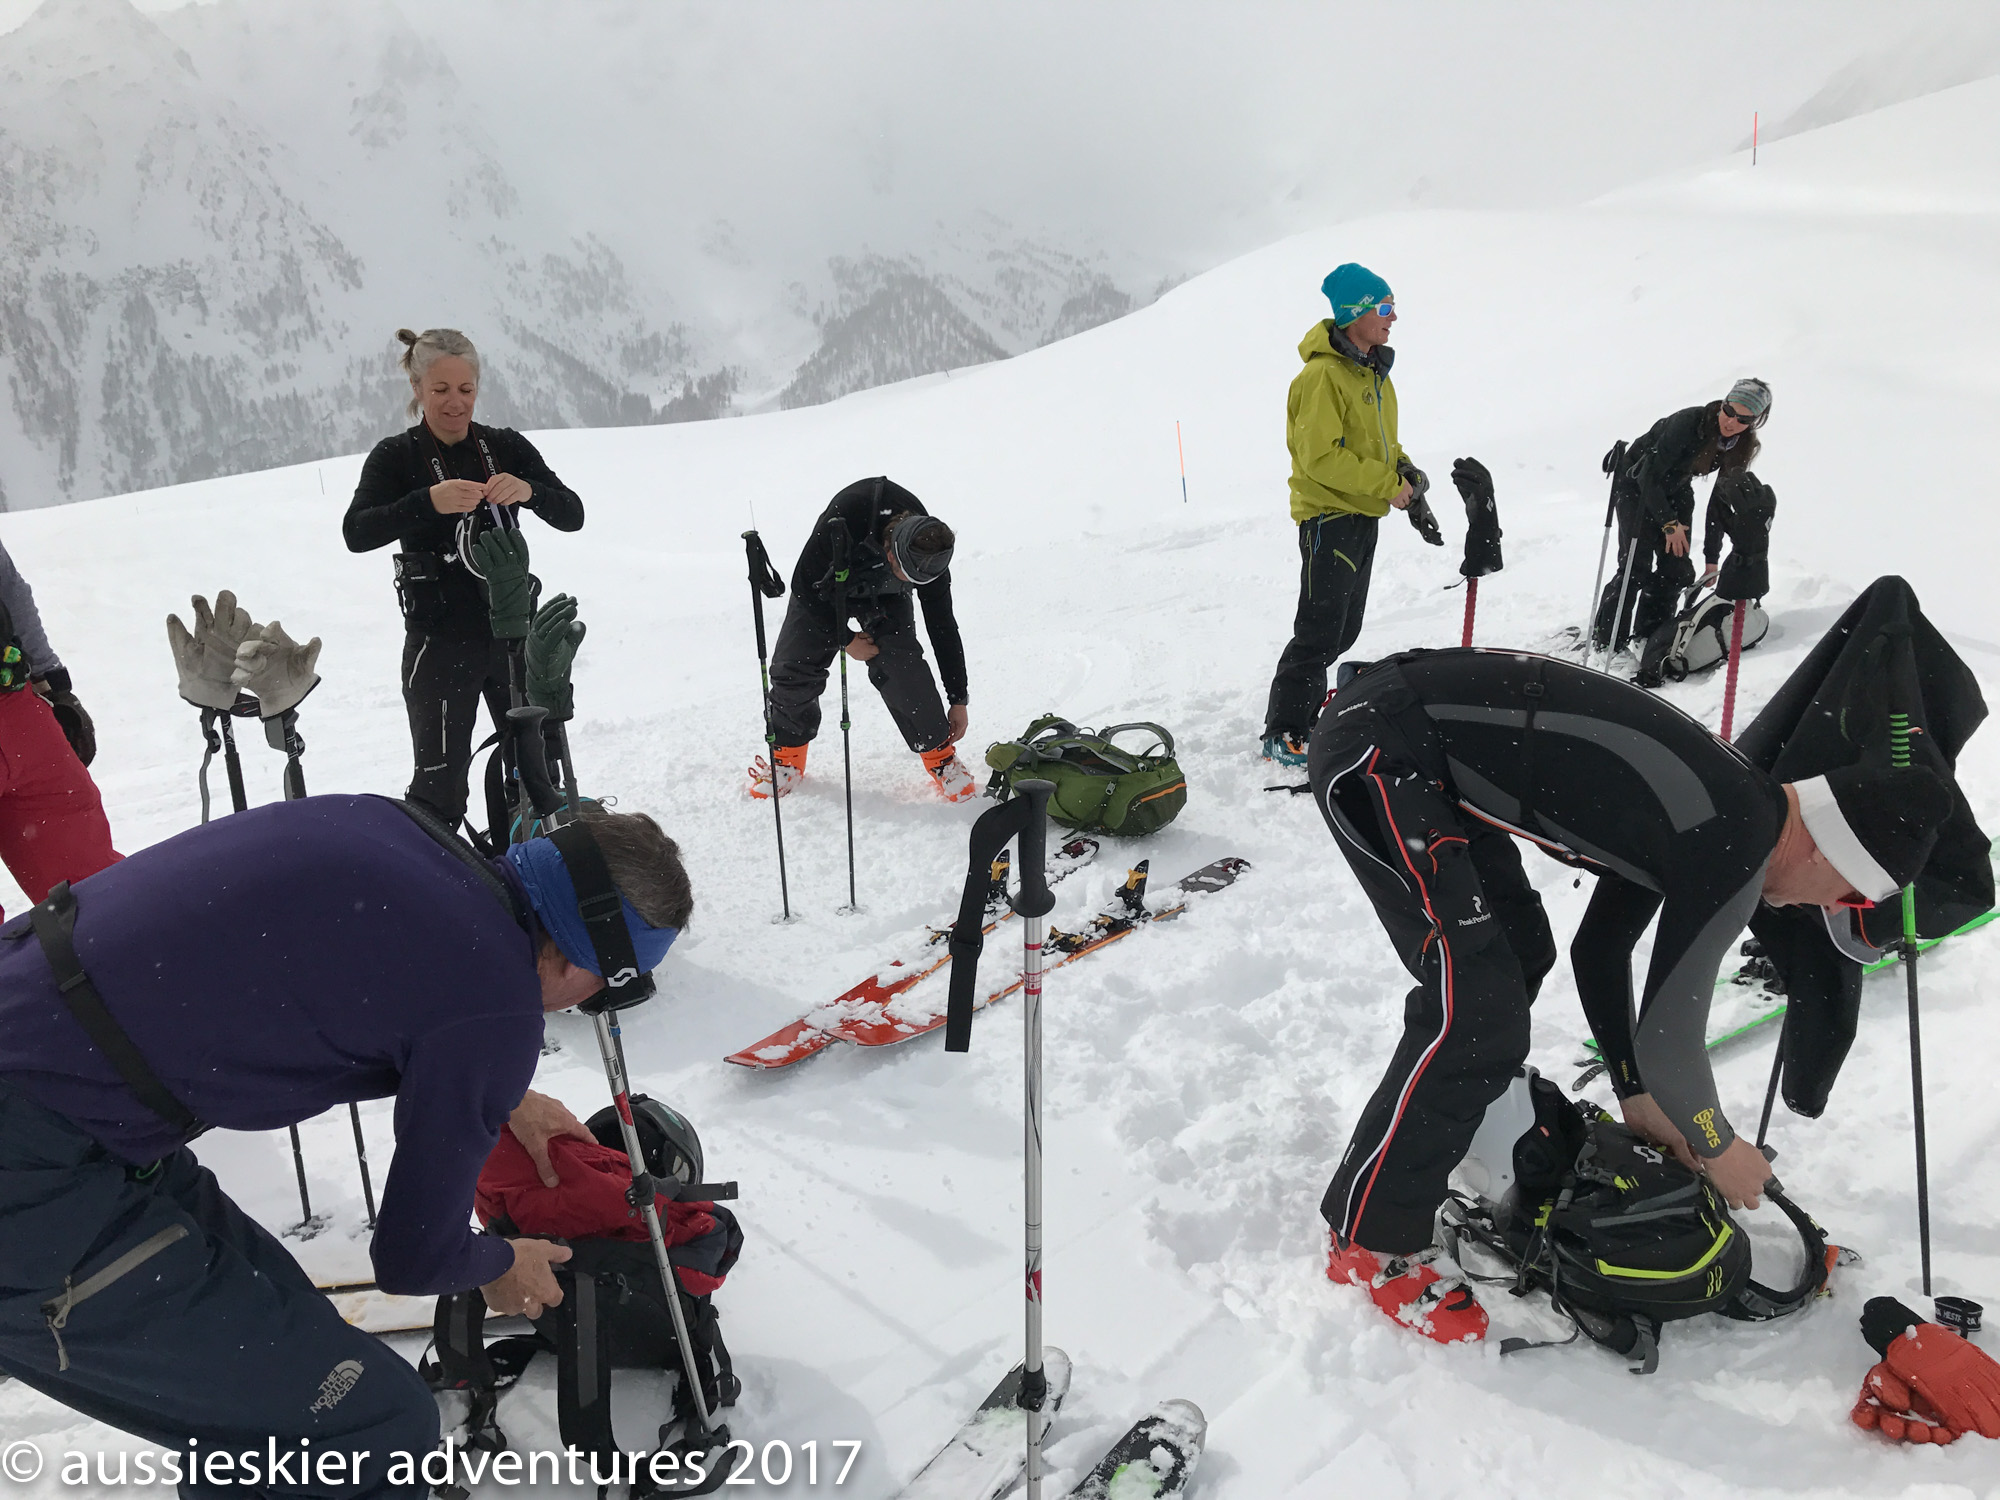
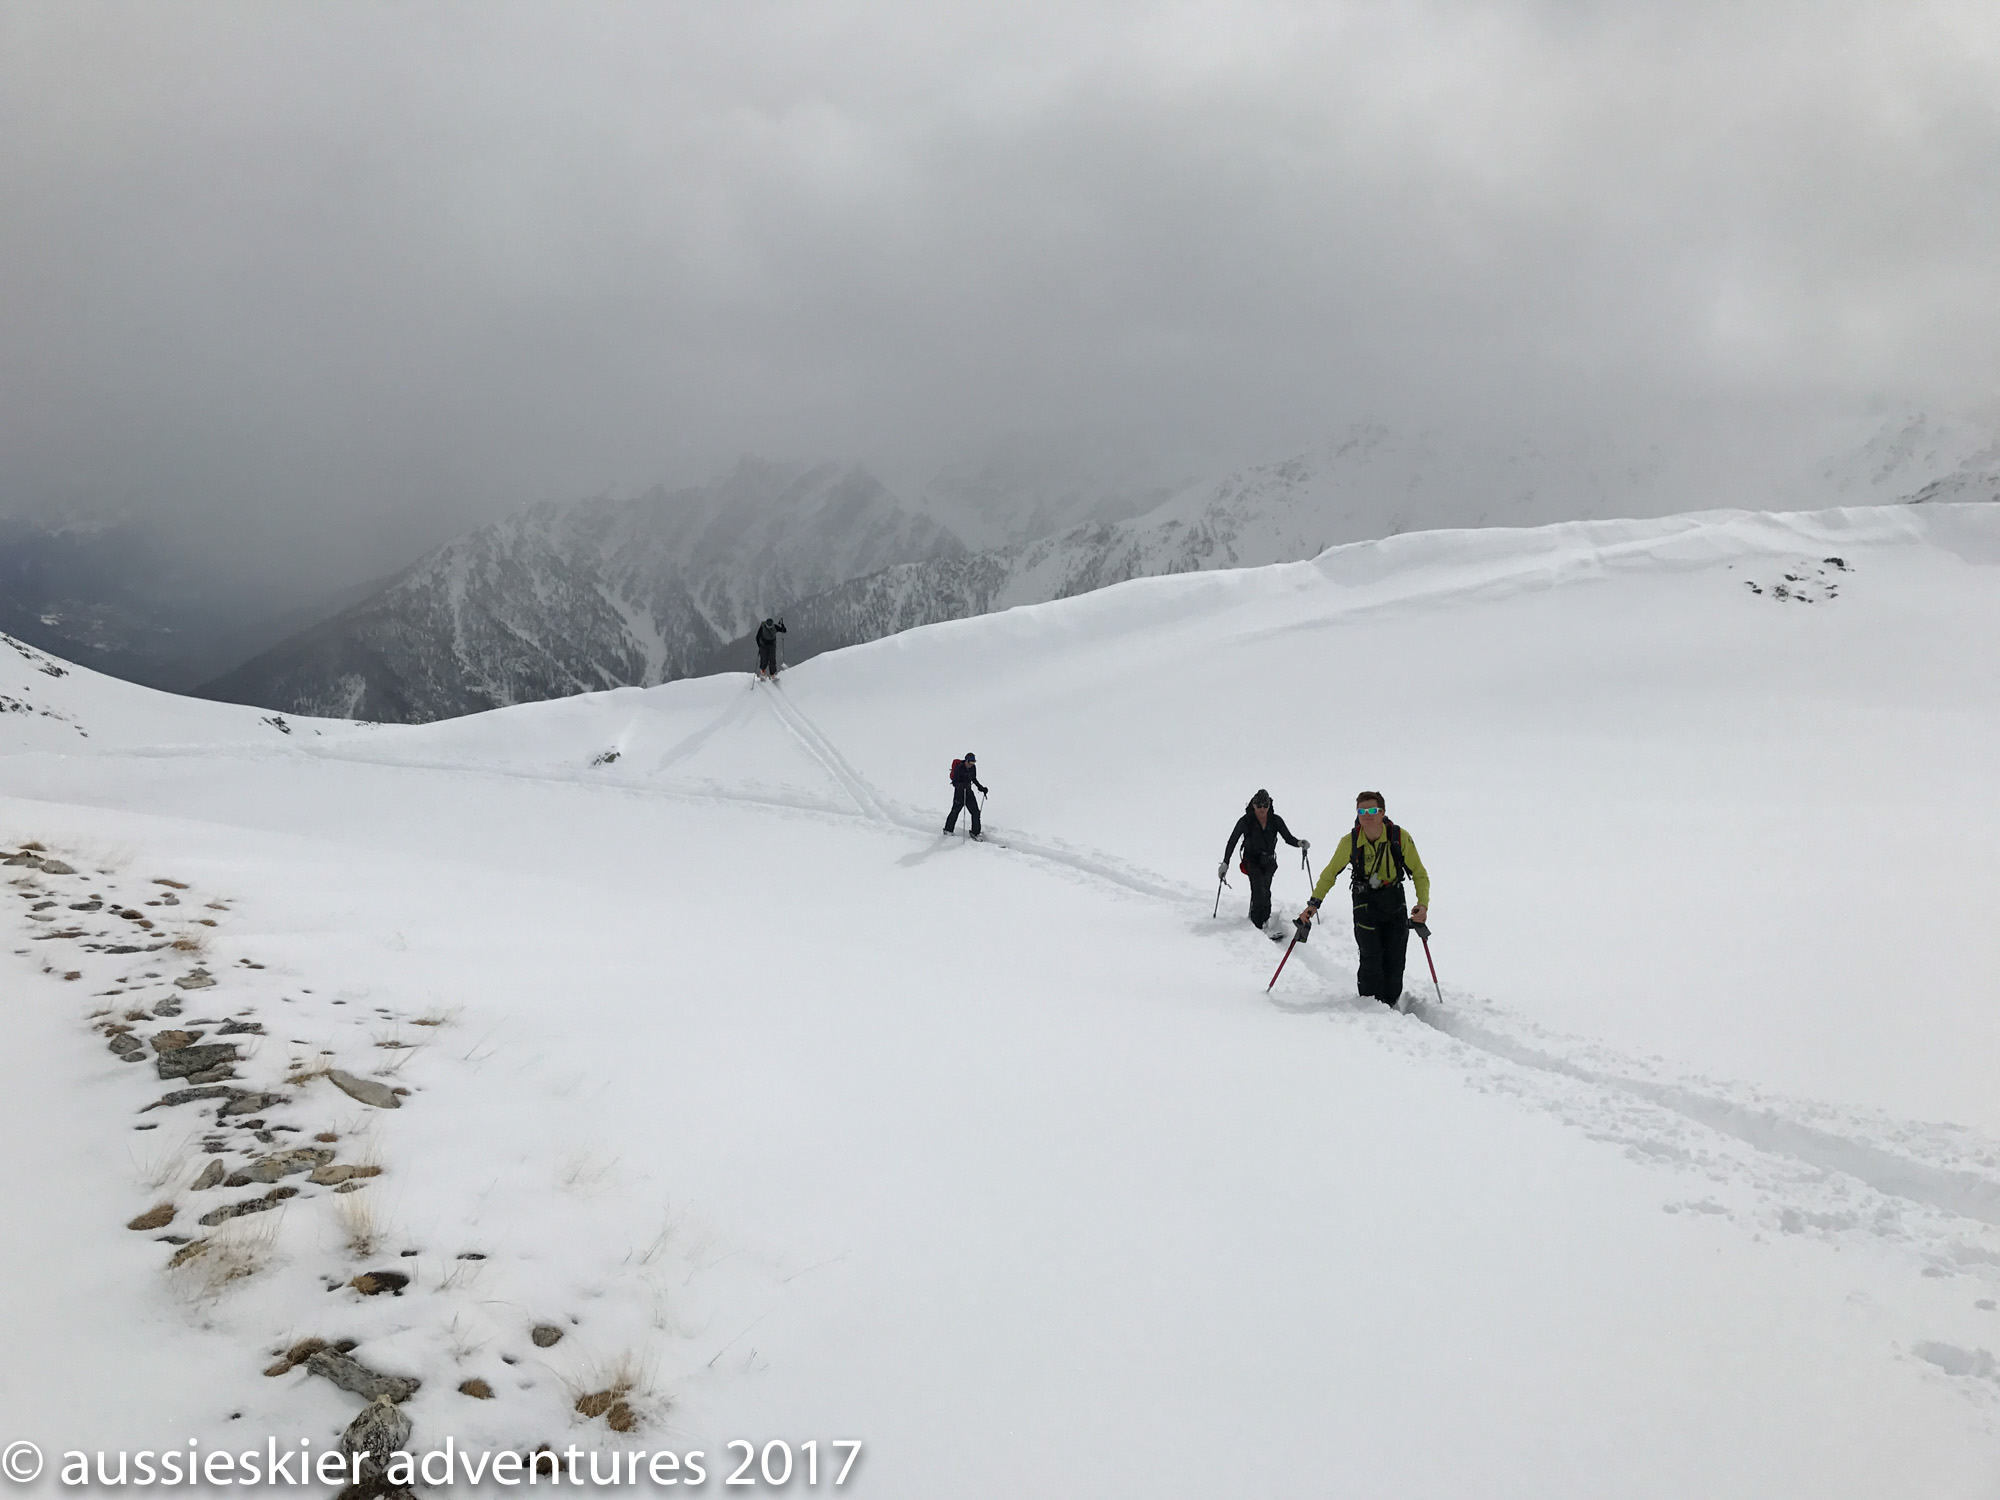
We woke to a similar situation as the previous day except that the snow line had dropped and it was dumping in Chamonix with an accumulation overnight at town level, but wind meant that many of the lifts were on hold either temporarily or for the day
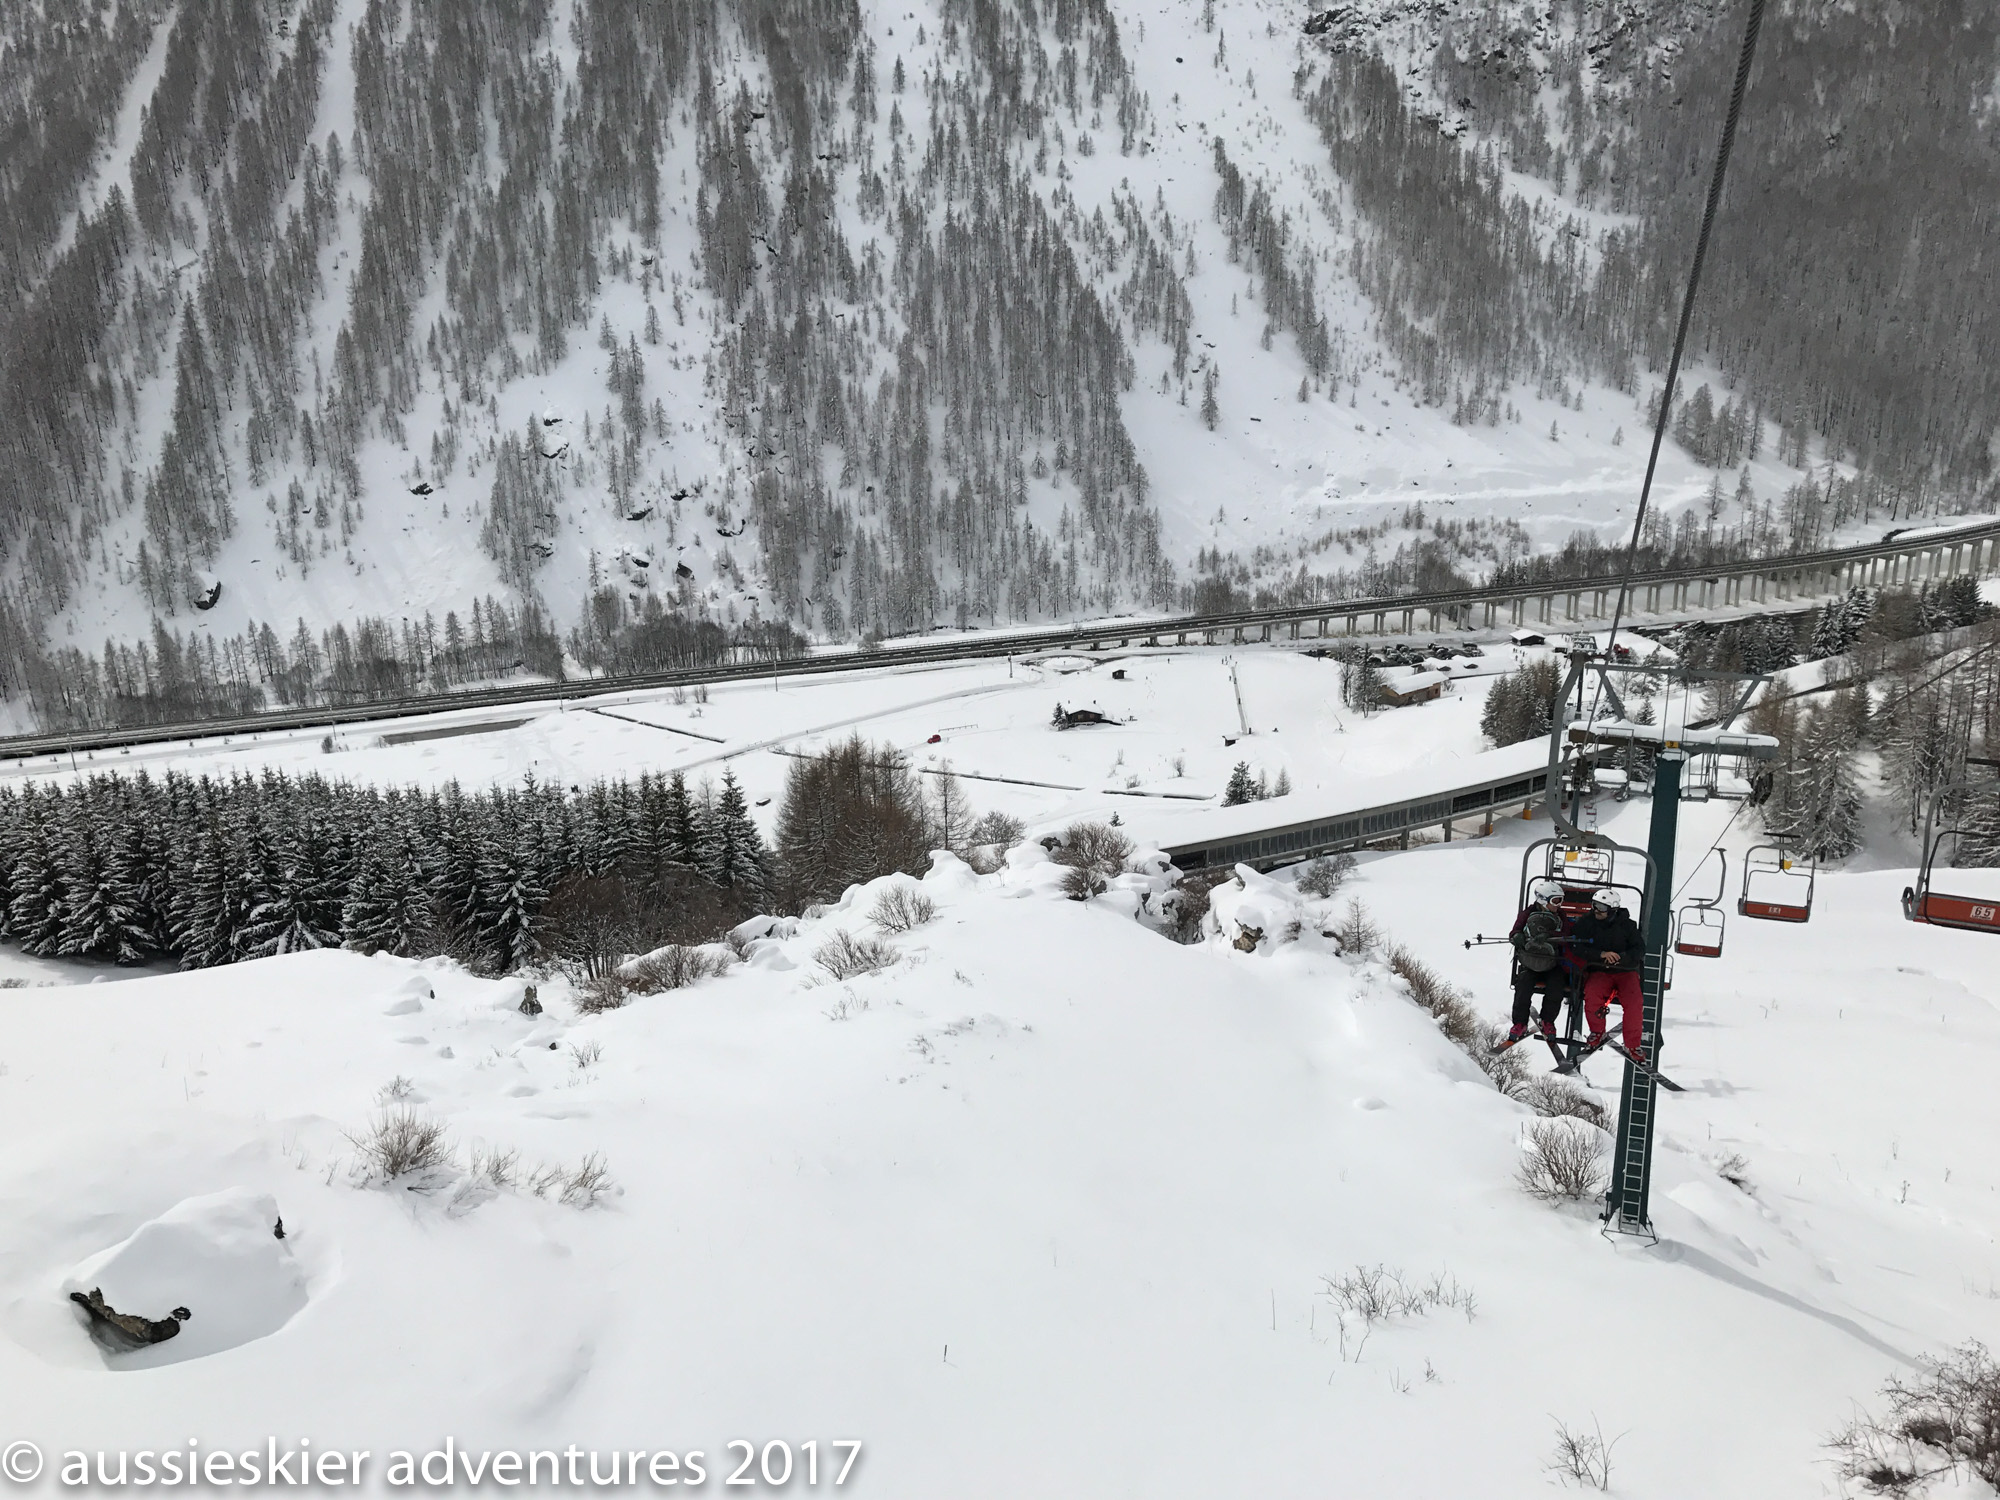
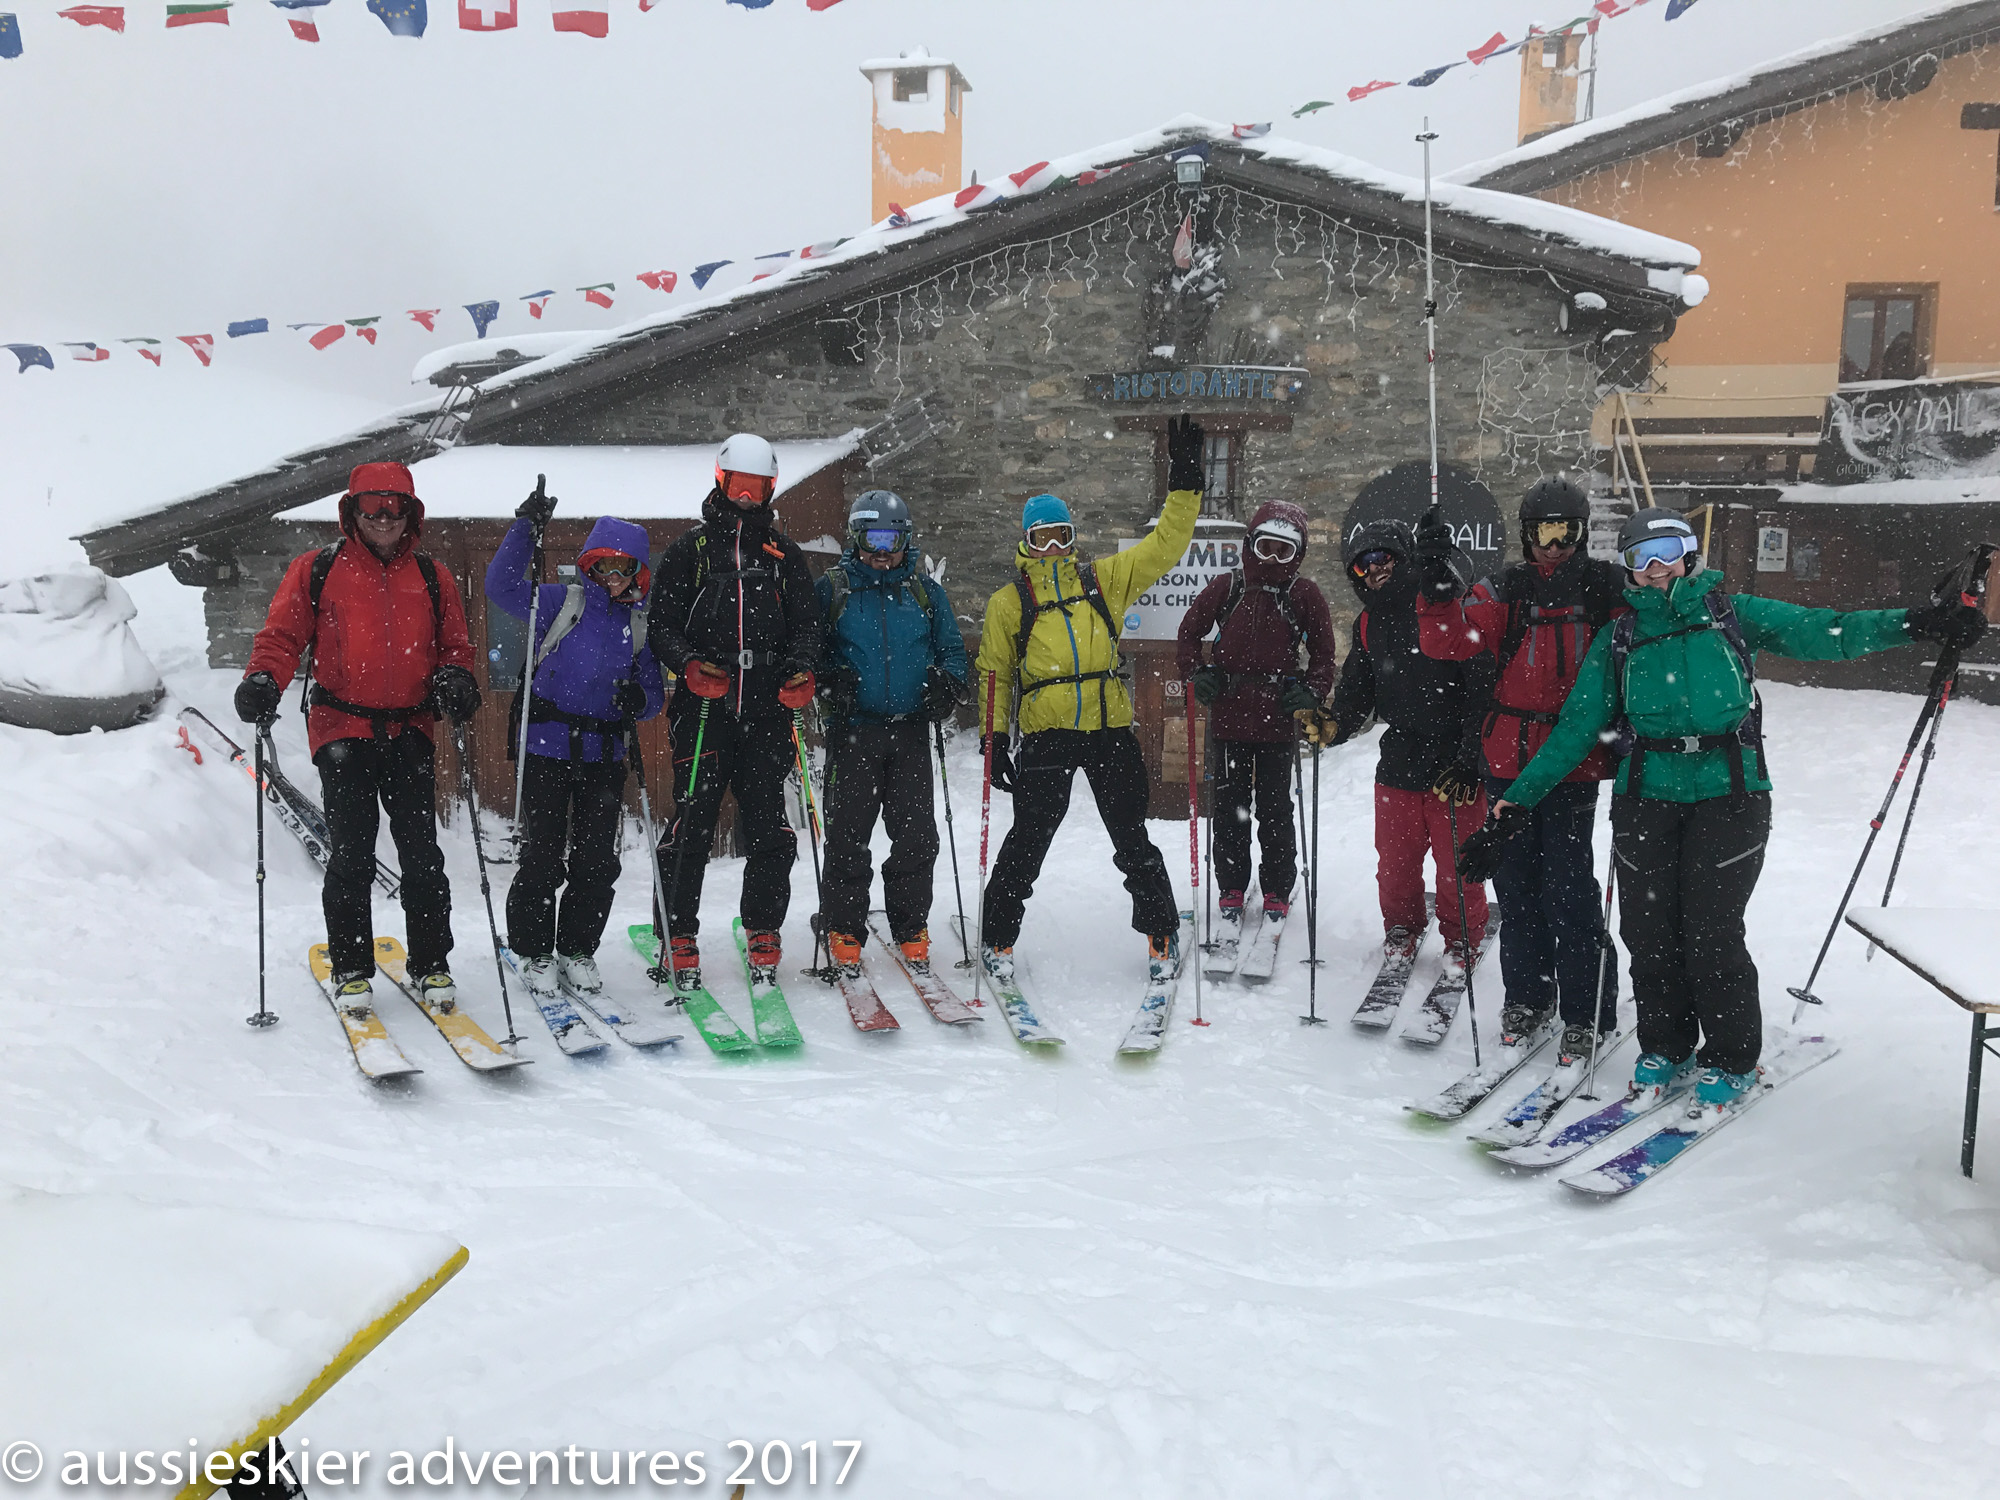
Chamonix 2017 – Crevacol
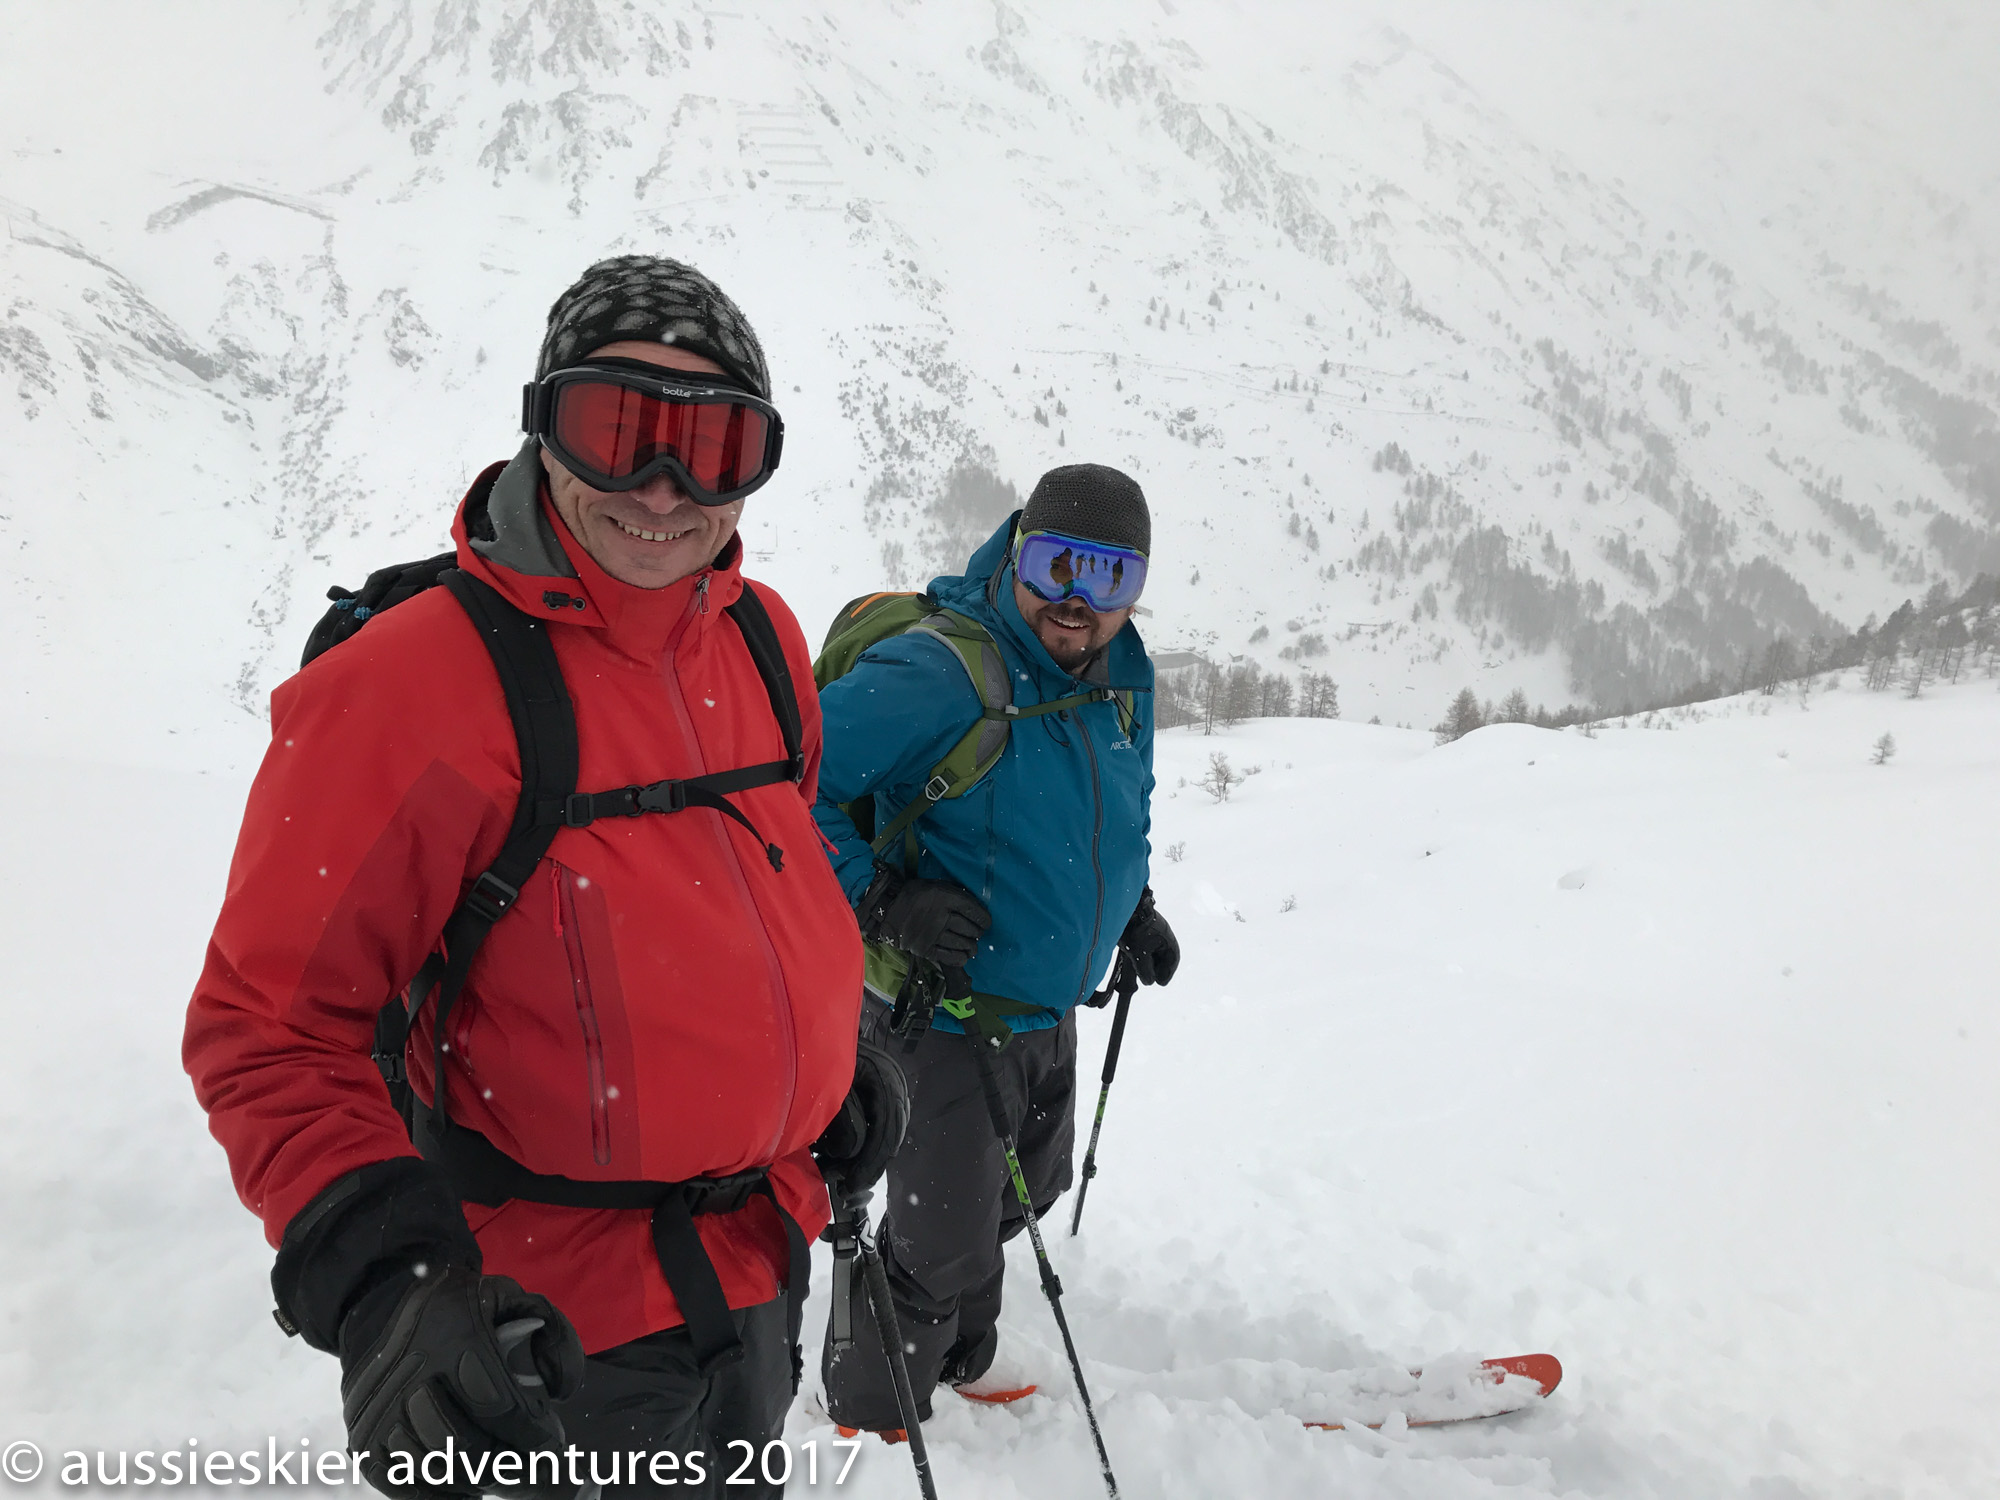
So we decided to head back in to Italy but a little further this time to a tiny resort called Crevacol. We had been there a couple of times before, each due to foul weather, and when we skied there it was apparent that it would be a ton of fun on a powder day. It is a classic little mum & dad resort with two chairlifts and a magic carpet, but most importantly nobody in the car park. It’s quite a drive from Cham, almost 1h40m but when the alternative is not appealing the travel is worth it.
The plan was to ride both the lifts, ski down a short distance then skin approx 300m vertical to the very top, at which point we would ski over the back of the resort down to where the Grand St Bernard tunnel goes underground. From there we could either push on the roof of the covered roadway back down to the resort or ski a little lower to a taxi pickup.
When we arrived at the top we were surprised by the almost complete absence of wind given the conditions in Chamonix, and it was also lightly snowing with visibility coming in and out. We donned our skins and began climbing towards the peak, Fanny breaking trail and the crew in tow. As we headed higher we were treated to views across the valley to the famous Grand St Bernard monastery.
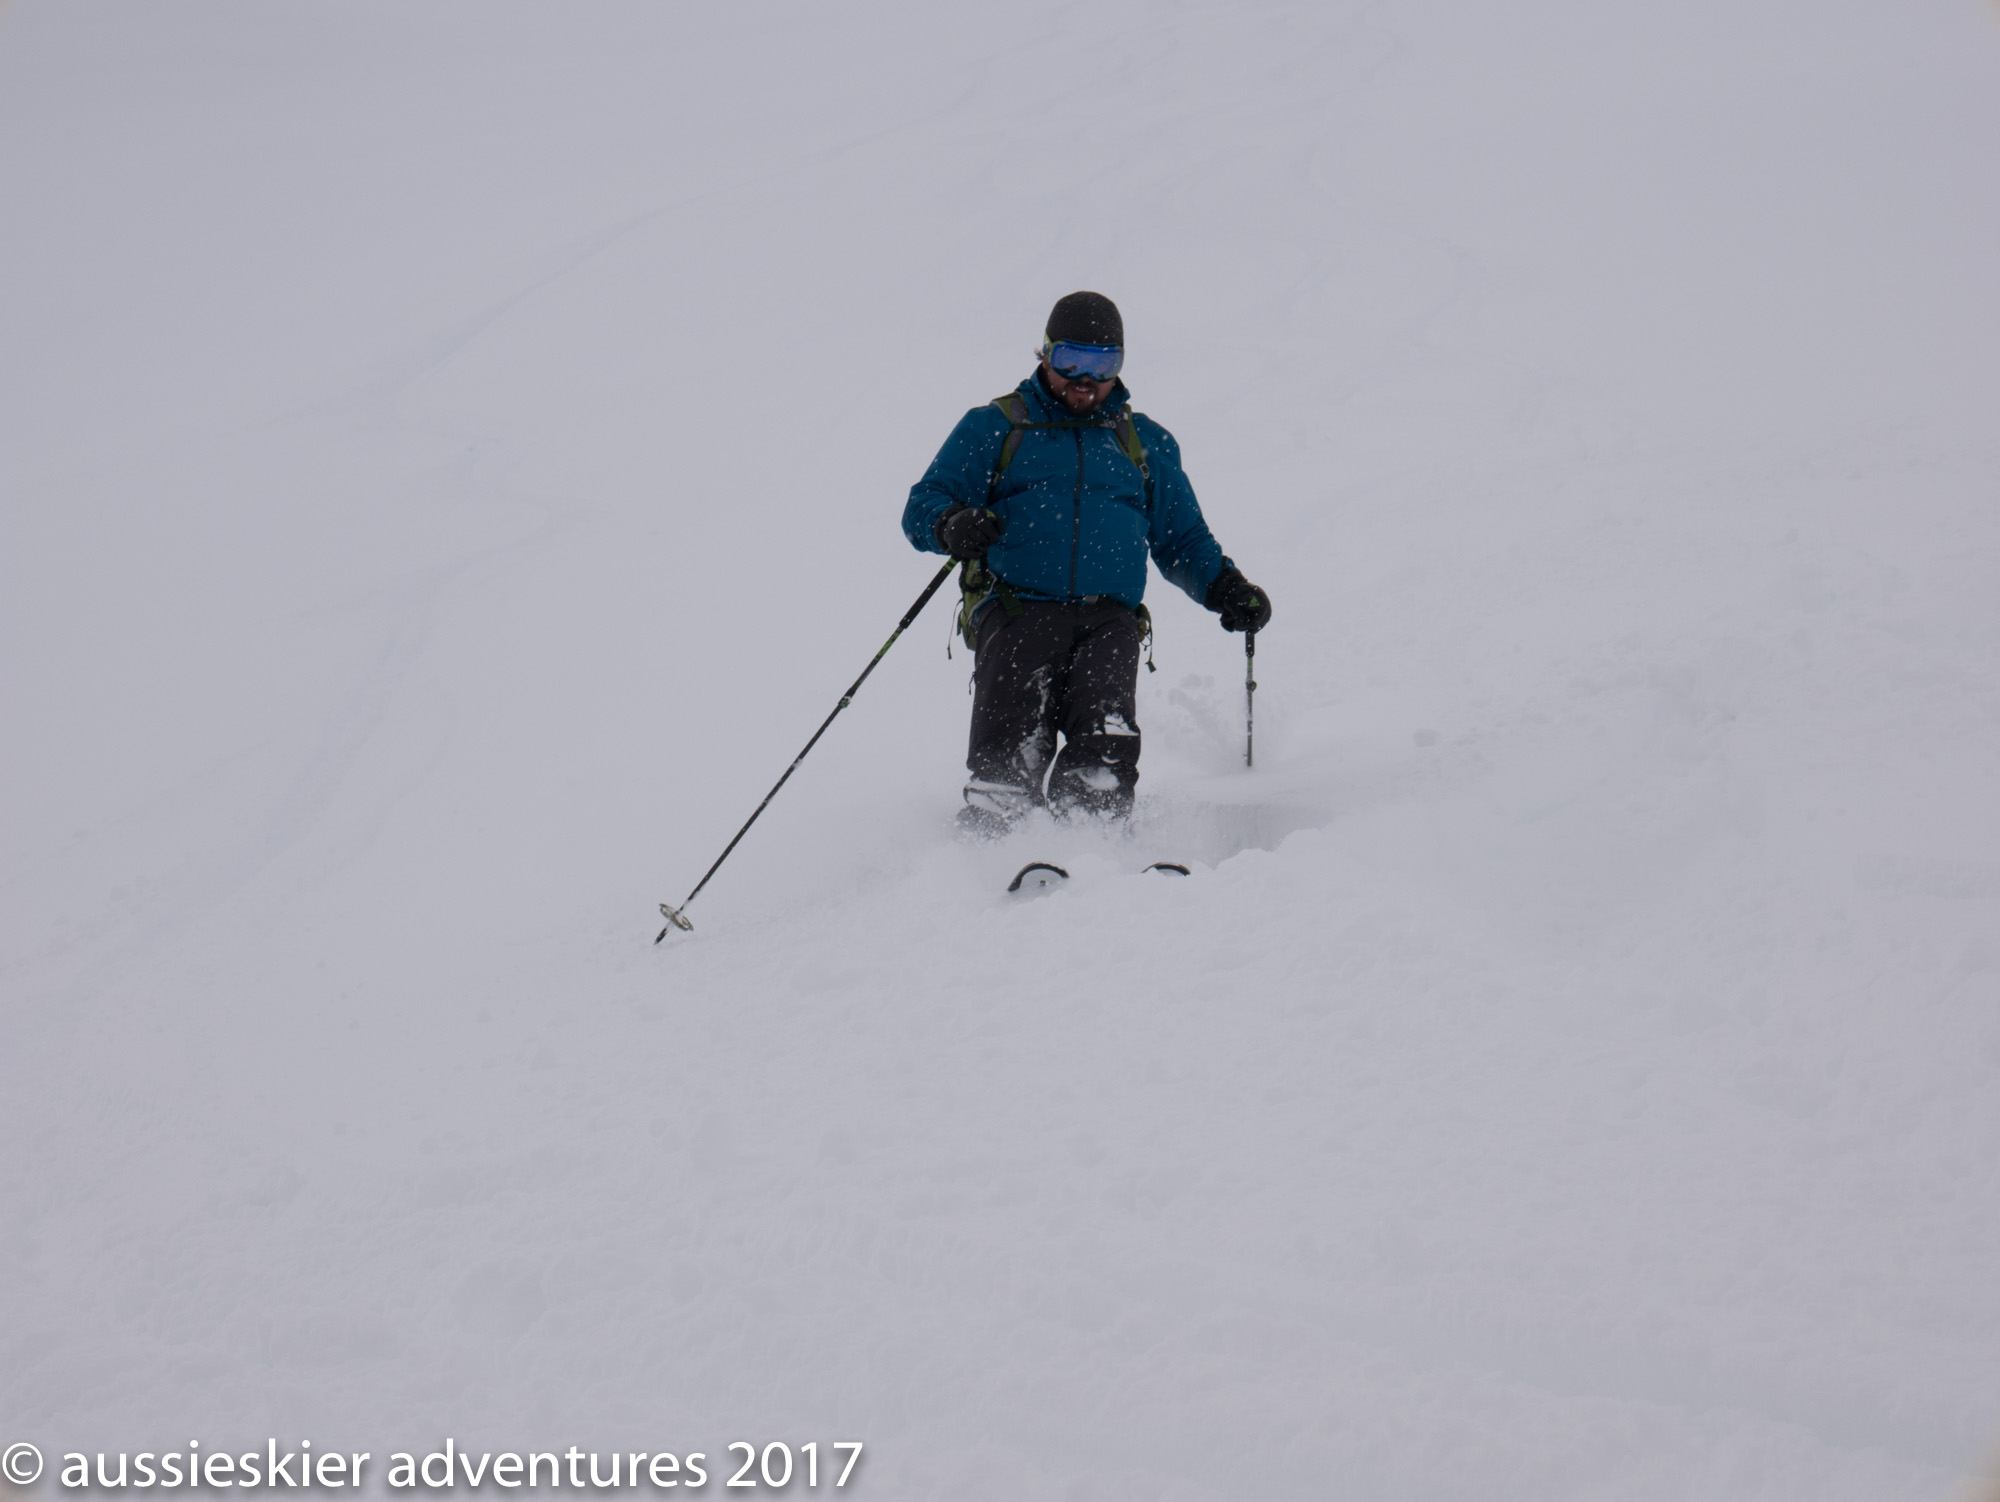
There was one other skinning party in the area but they headed for a lower col, and when we we reached the top after about an hour it was apparent that we would have an entire face to ourselves – 1000m vertical of completely untracked powder. Nice.
https://www.instagram.com/p/BRIJ1JJhgn1/
Everyone got their fill on the way down, plenty of envy-inducing videos were shot and after untracked turn after untracked turn we were in the valley. We skied down past the tunnel infrastructure and along a beautiful forest track, it was extremely peaceful and we then skied on to the snow-covered summer road up to the monastery. This was a bit of a push but we eventually made it to the road closure where Jerome had called a taxi to take us back to the resort, where we had time for one more run on the lifts, complete with freshies at the end of the day – an unheard of occurrence in a busy resort.
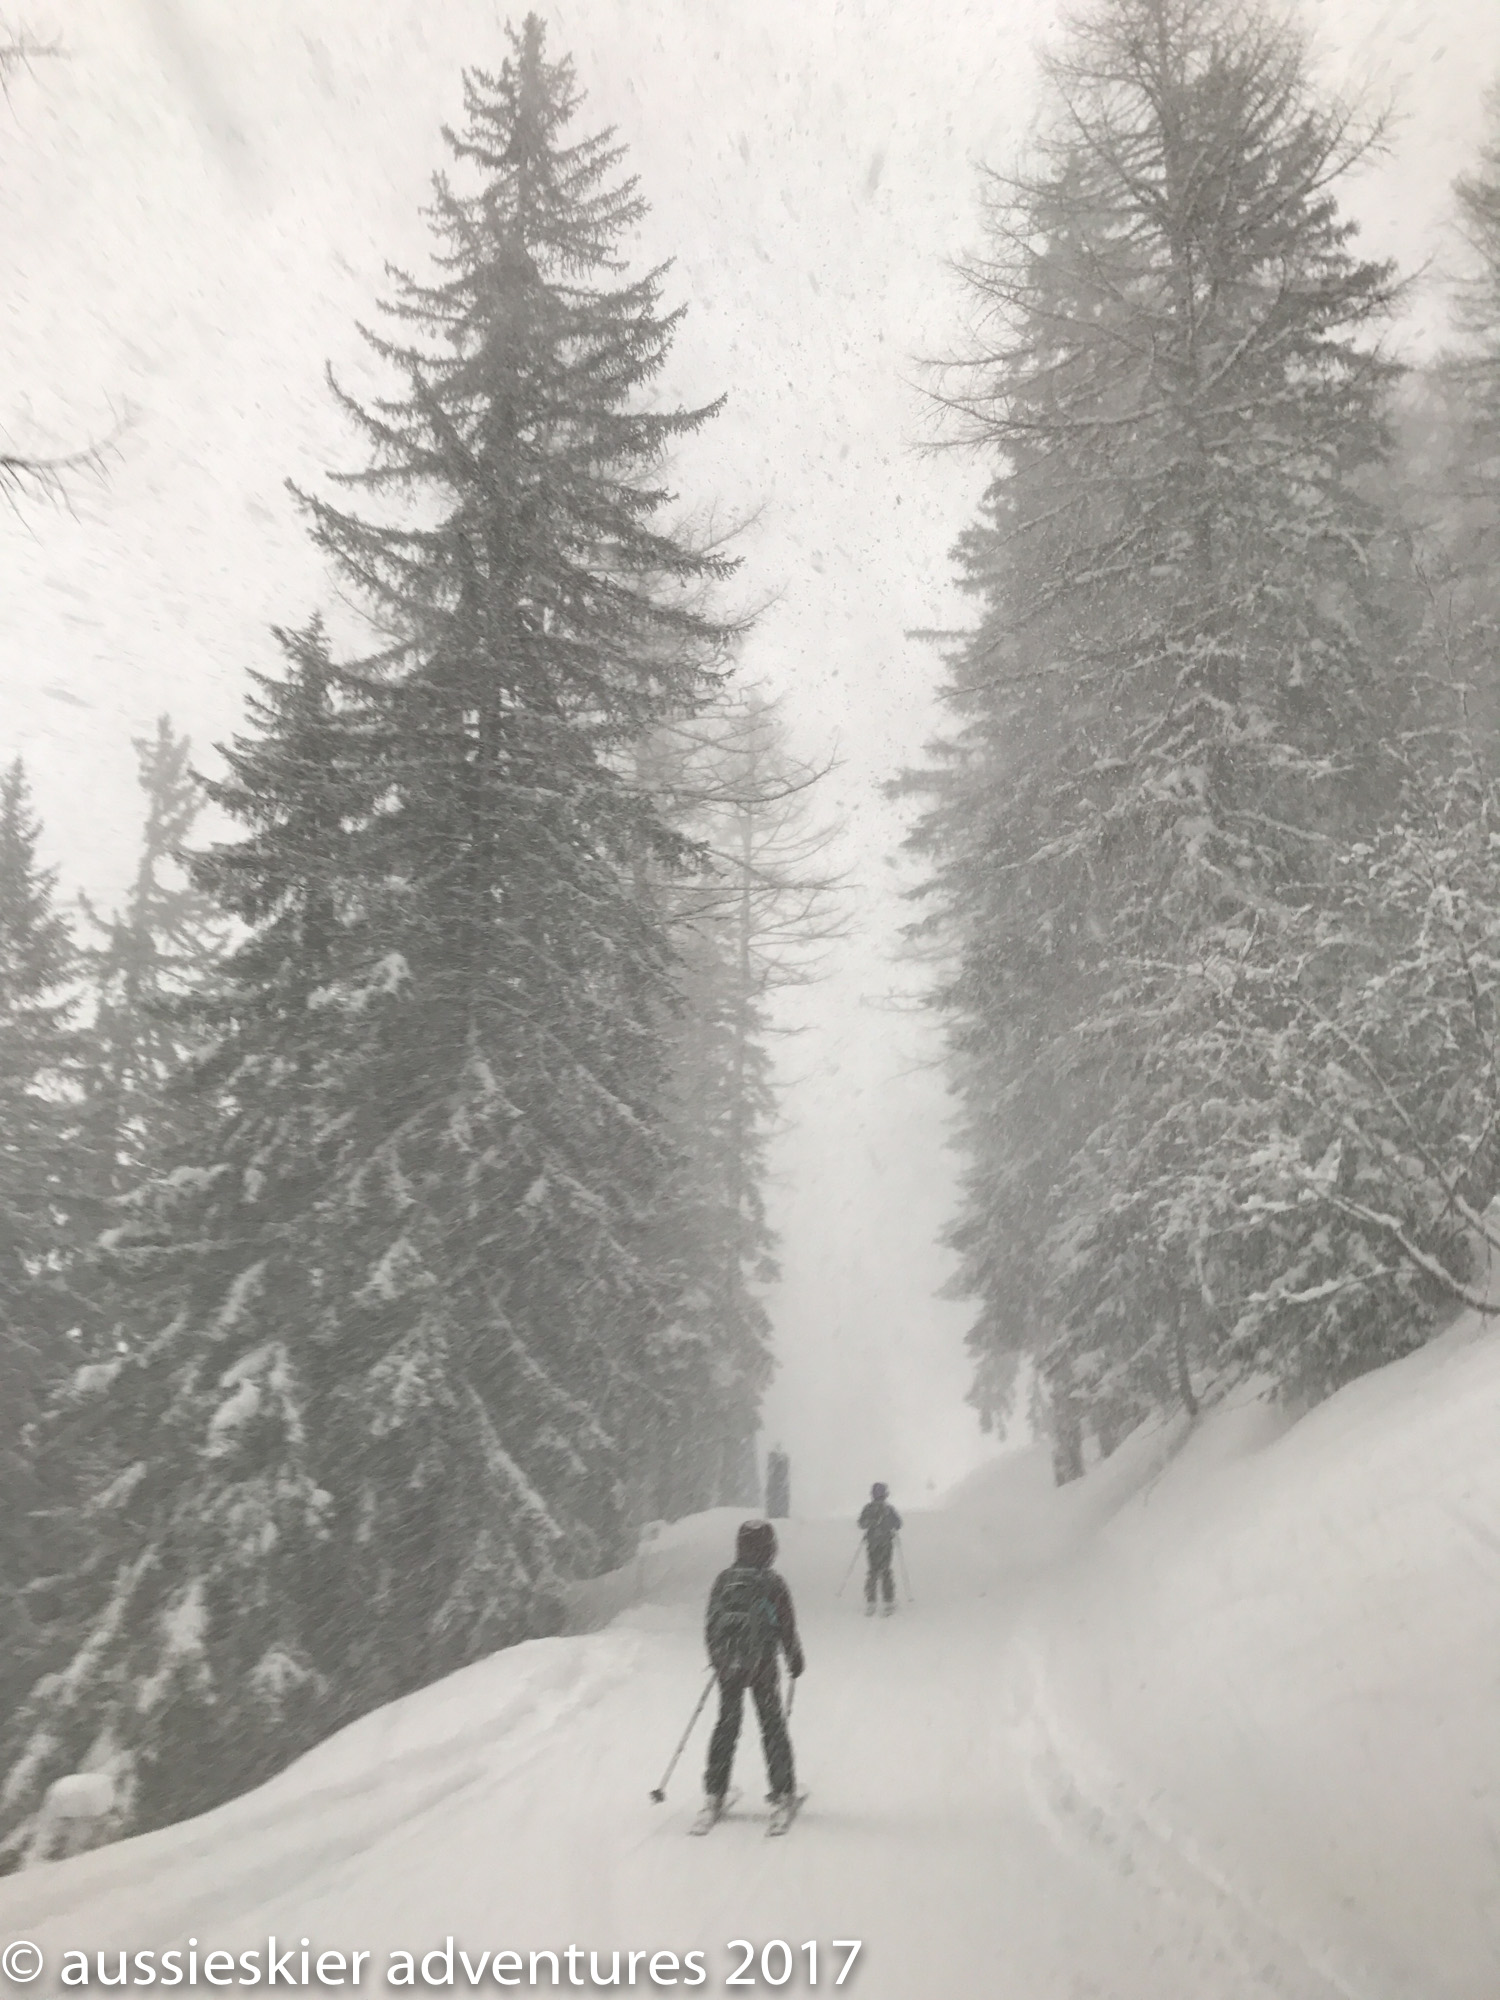
Despite going to bed with clear skies, and in spite of our disbelief that the forecasted snow would arrive, arrive it did and by morning we were woken to pretty steady rain and evidence of snow not too far overhead.
As is often the case in Chamonix the wind was keeping the top lifts closed so we made the call to head through the tunnel to Italy.
This is often a winning option – and this was reinforced when we exited the tunnel to see at least 20cm of fresh snow adorning the railings. There was talk of perhaps heading to La Thuile for some ski touring, but when we saw how much snow had fallen on the Italian side we pulled into the nearest carpark with a ski lift and decided to ski some pow. The top lifts weren’t open but Courmayeur has a good amount of sheltered tree skiing which is less in abundance on the Chamonix side. We split into a couple of groups and went powder hunting – once we got up the mountain at least 35cm had fallen and it snowed hard all day.
We kept the terrain pretty mellow due to avalanche possibilities and stuck pretty close to the lifts but in the afternoon we decided to check out one the lower half of the Dolonne area. It was whiteout visibility near the top, but when the pitch mellowed and the visibility improved we were treated to a lovely stretch of powder skiing with faceshots in abundance. We got some lovely video footage which definitely was received with envy by our friends at home!!
https://www.instagram.com/p/BREYwtmBVjR
However eventually it was time to pay the piper – the couloir narrows at the bottom and the exit follows a creek bed – this could well have been completely dry preceding this snowfall, so we definitely found some sharks under the snow and our skis were definitely worse for wear at the exit. Doesn’t matter skied powder.
The groups met at the Maison Vielle restaurant for a late lunch which became an italian extravaganza with all sorts of local delicacies and the quirky atmosphere it is famous for.
We rolled out of lunch and made our way back to the car, including a few freshies of course, after a fantastic powder day that nobody anticipated.
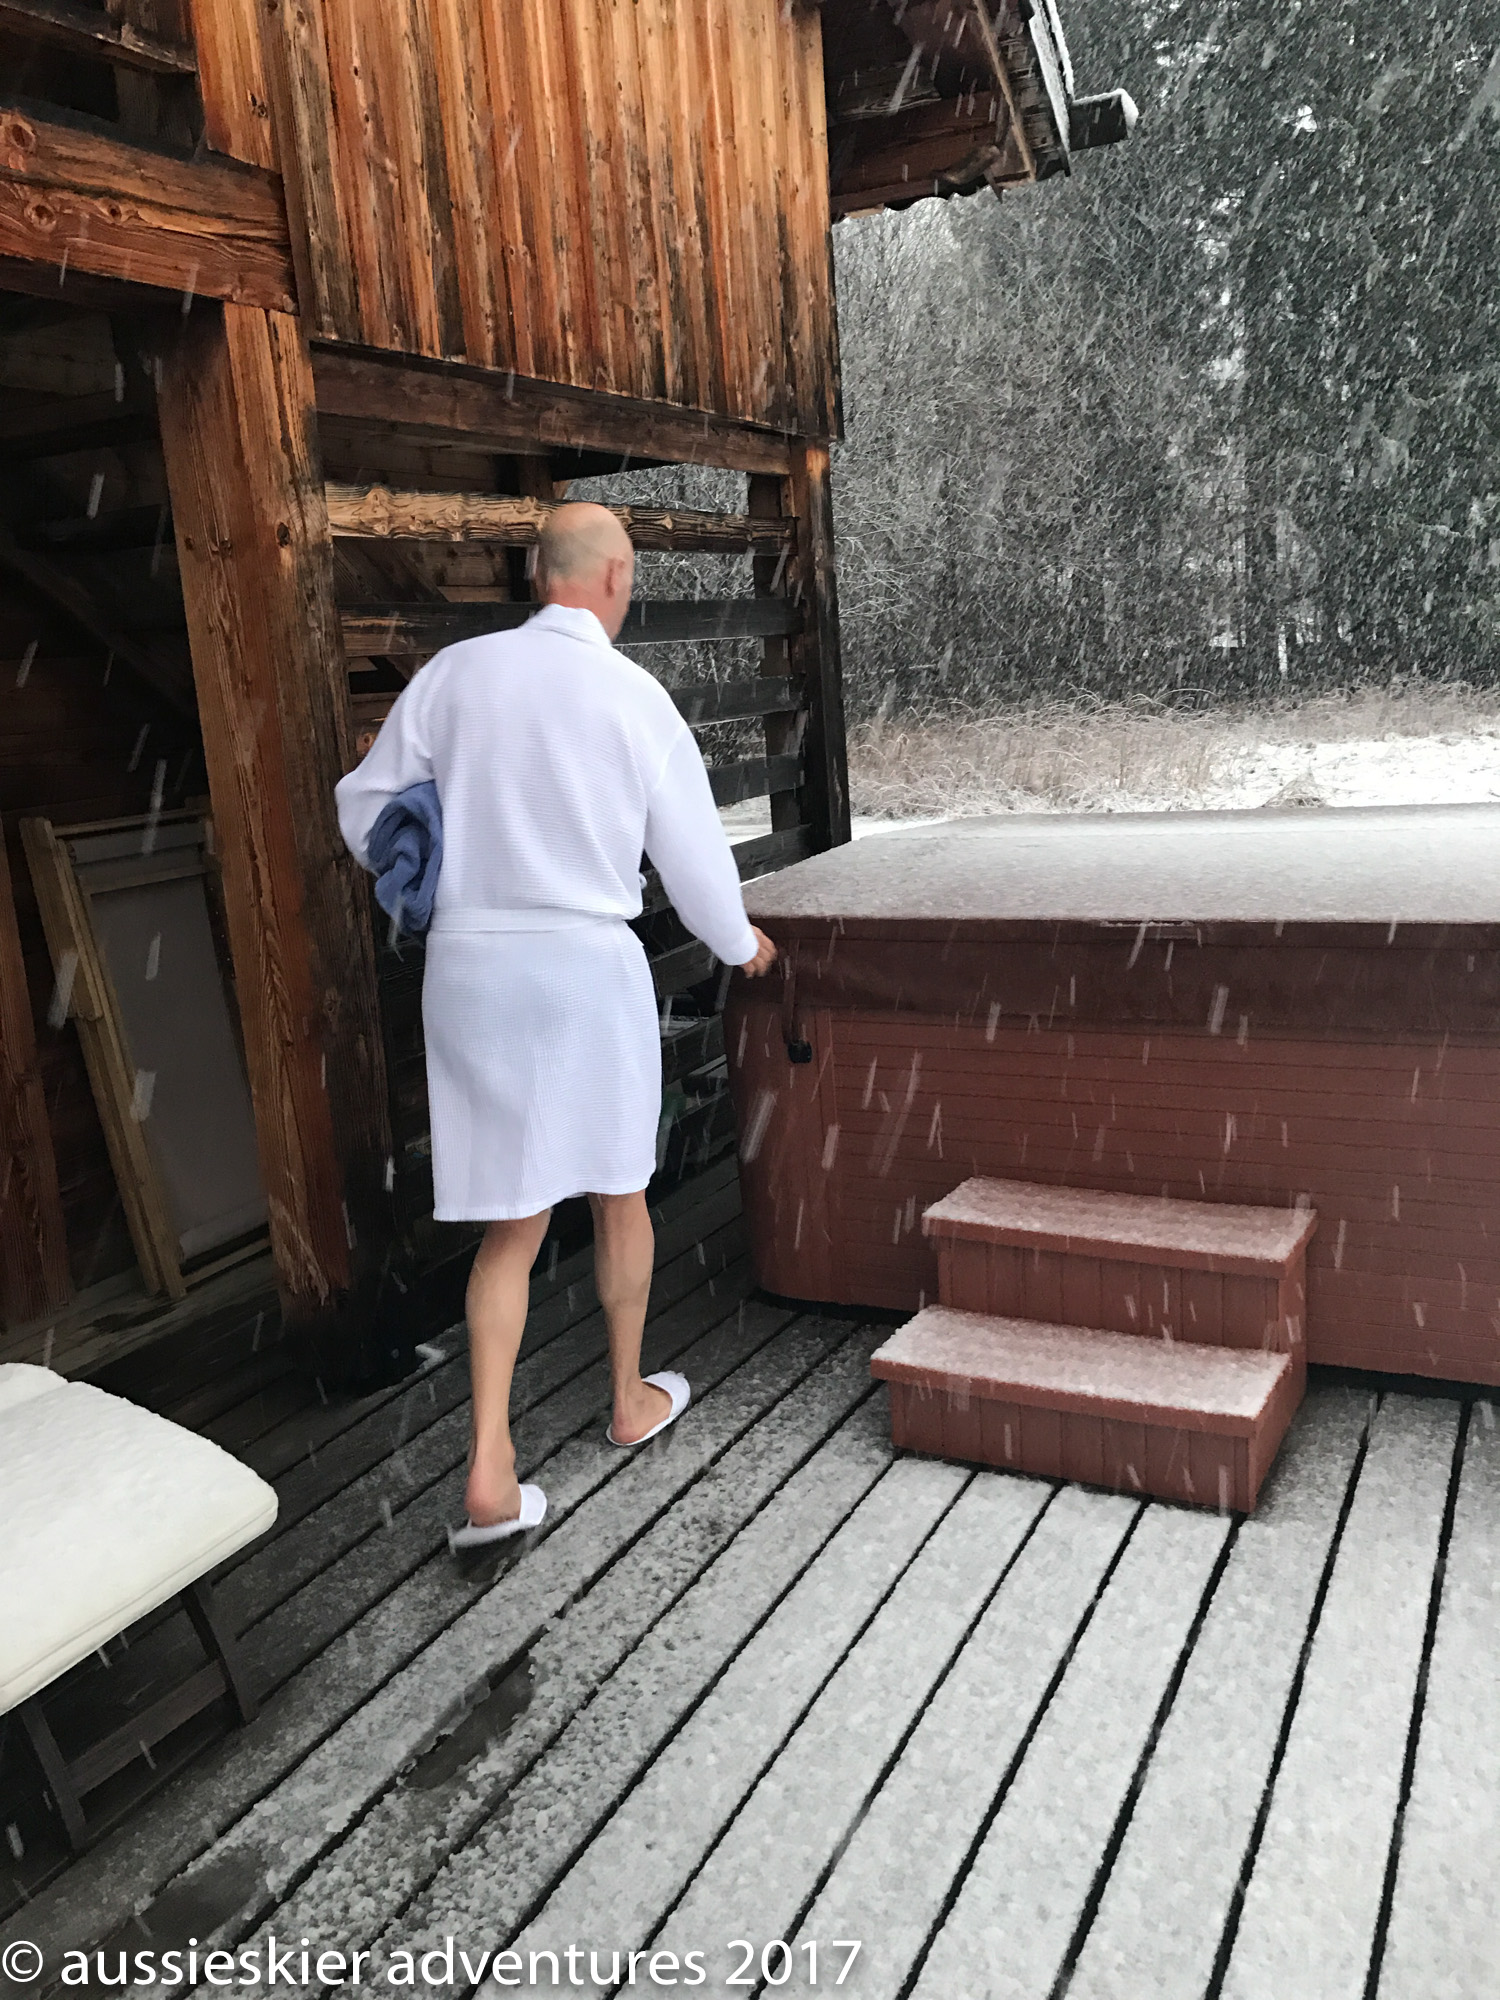
When we returned to Chamonix the snow line had dropped and it was dumping in town, it was time for a spa and a beer at the Chalet before another wonderful dinner & anticipation of the day ahead with the potential for freshies….
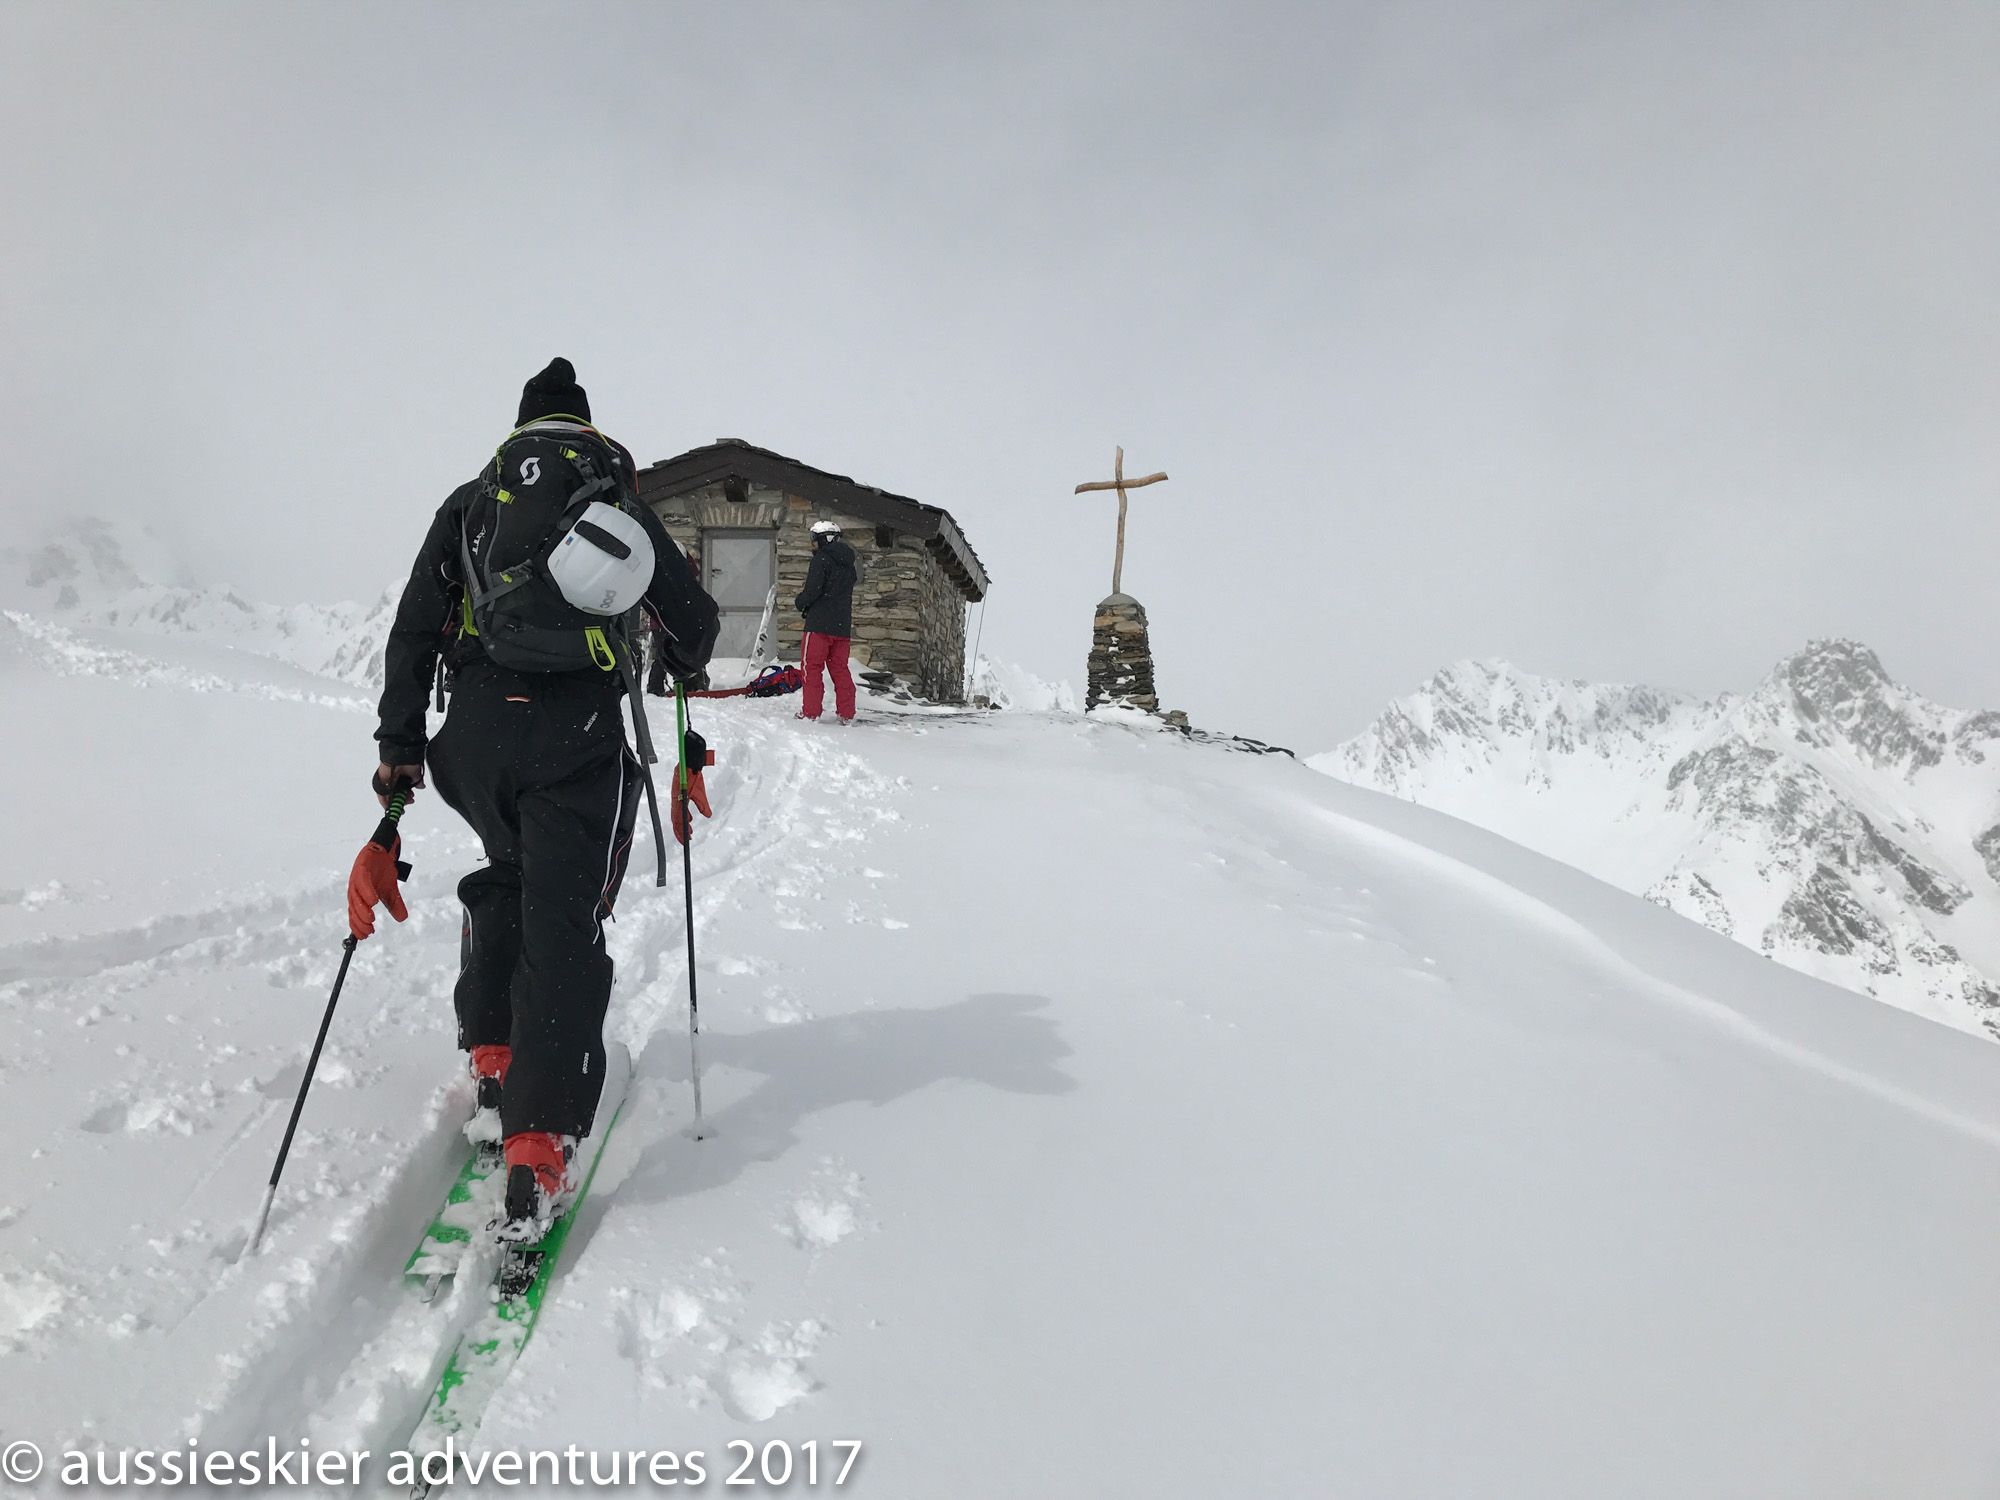
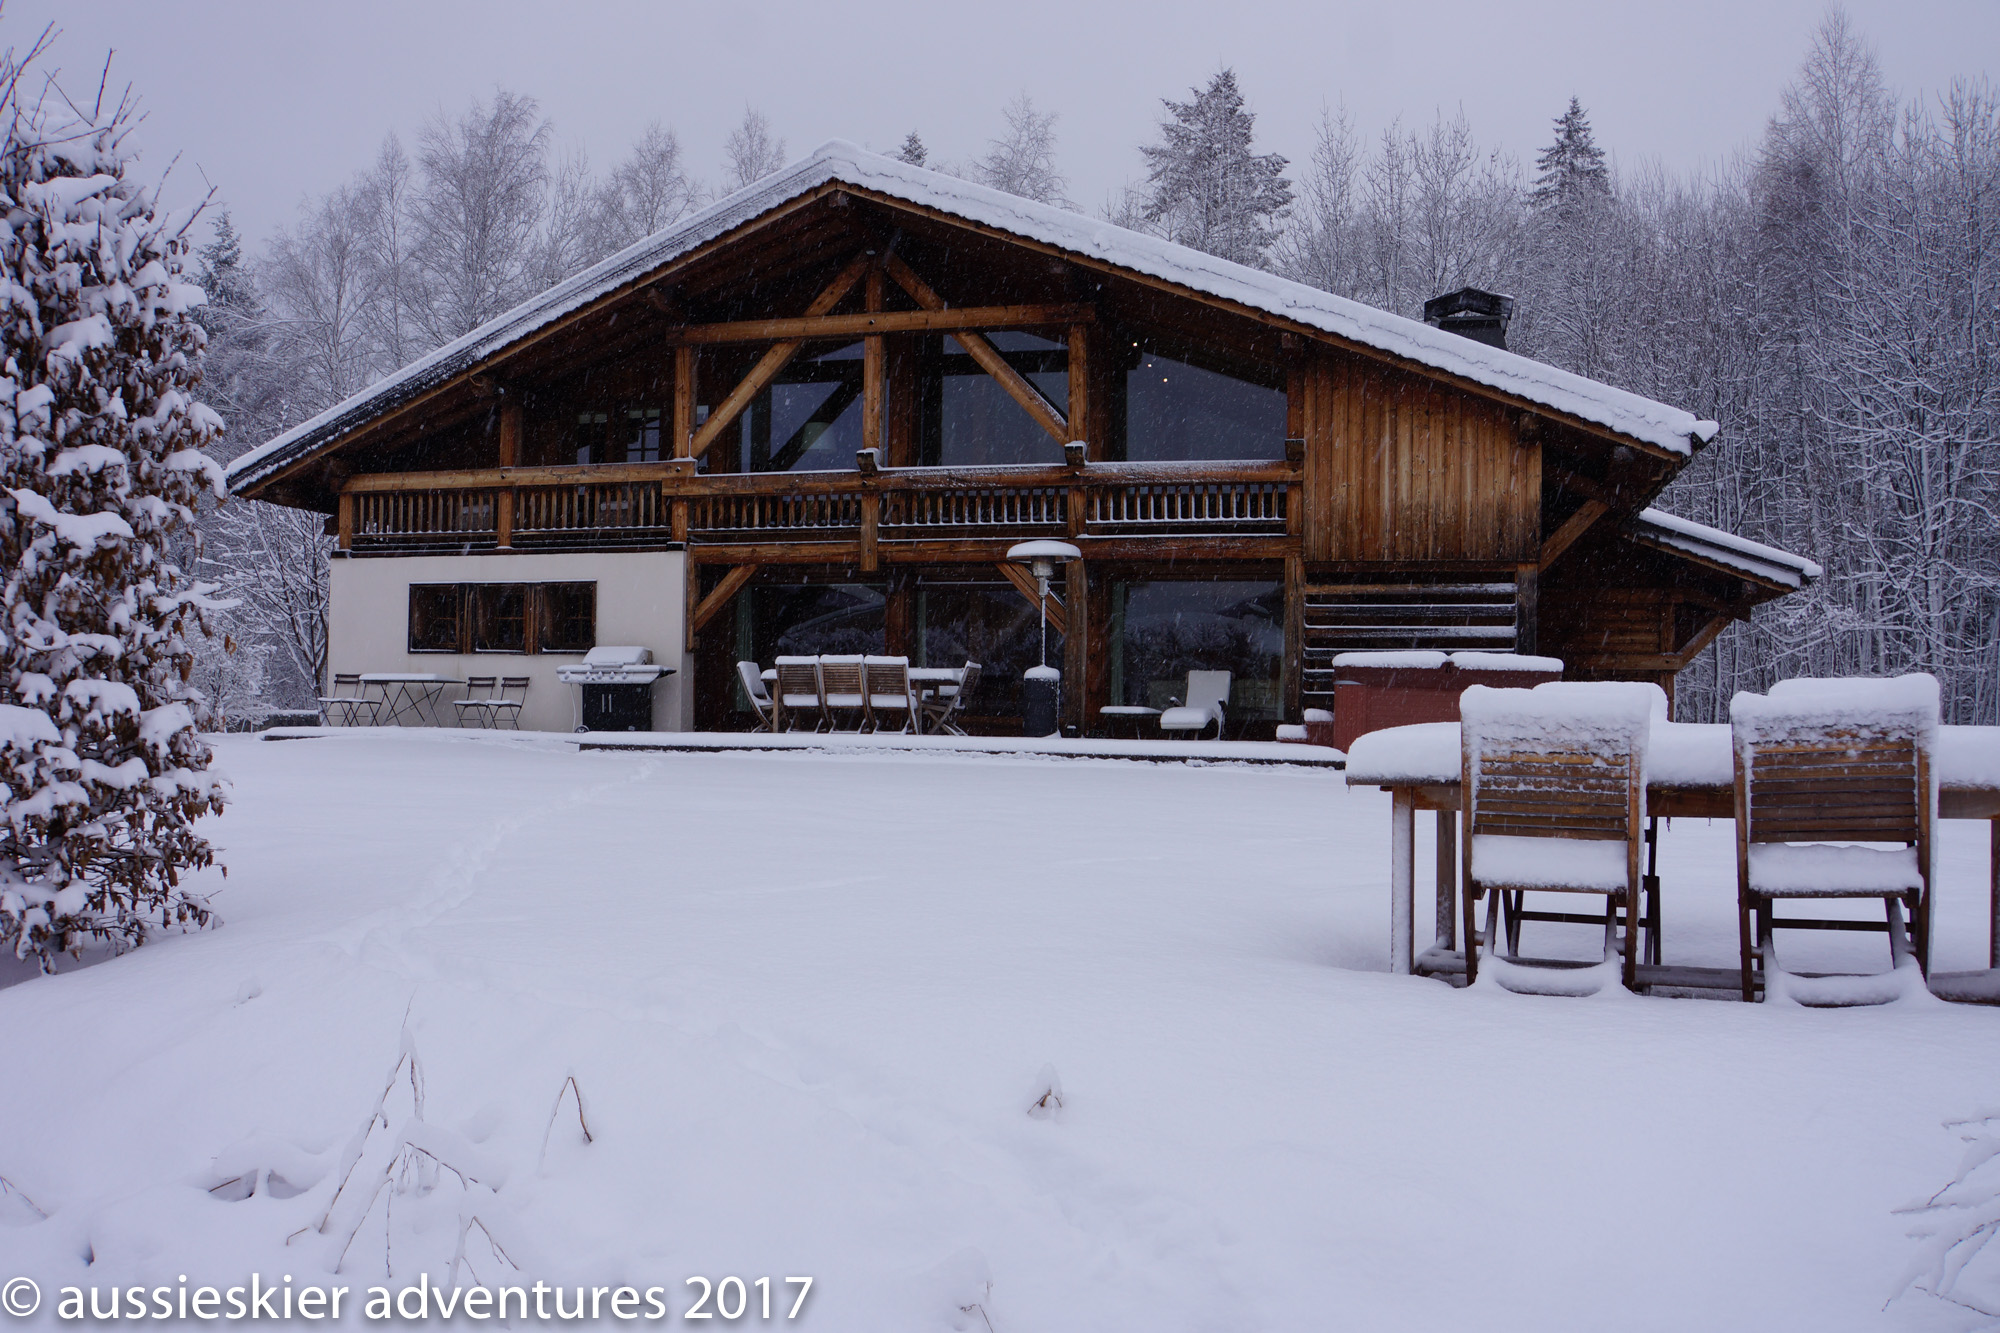
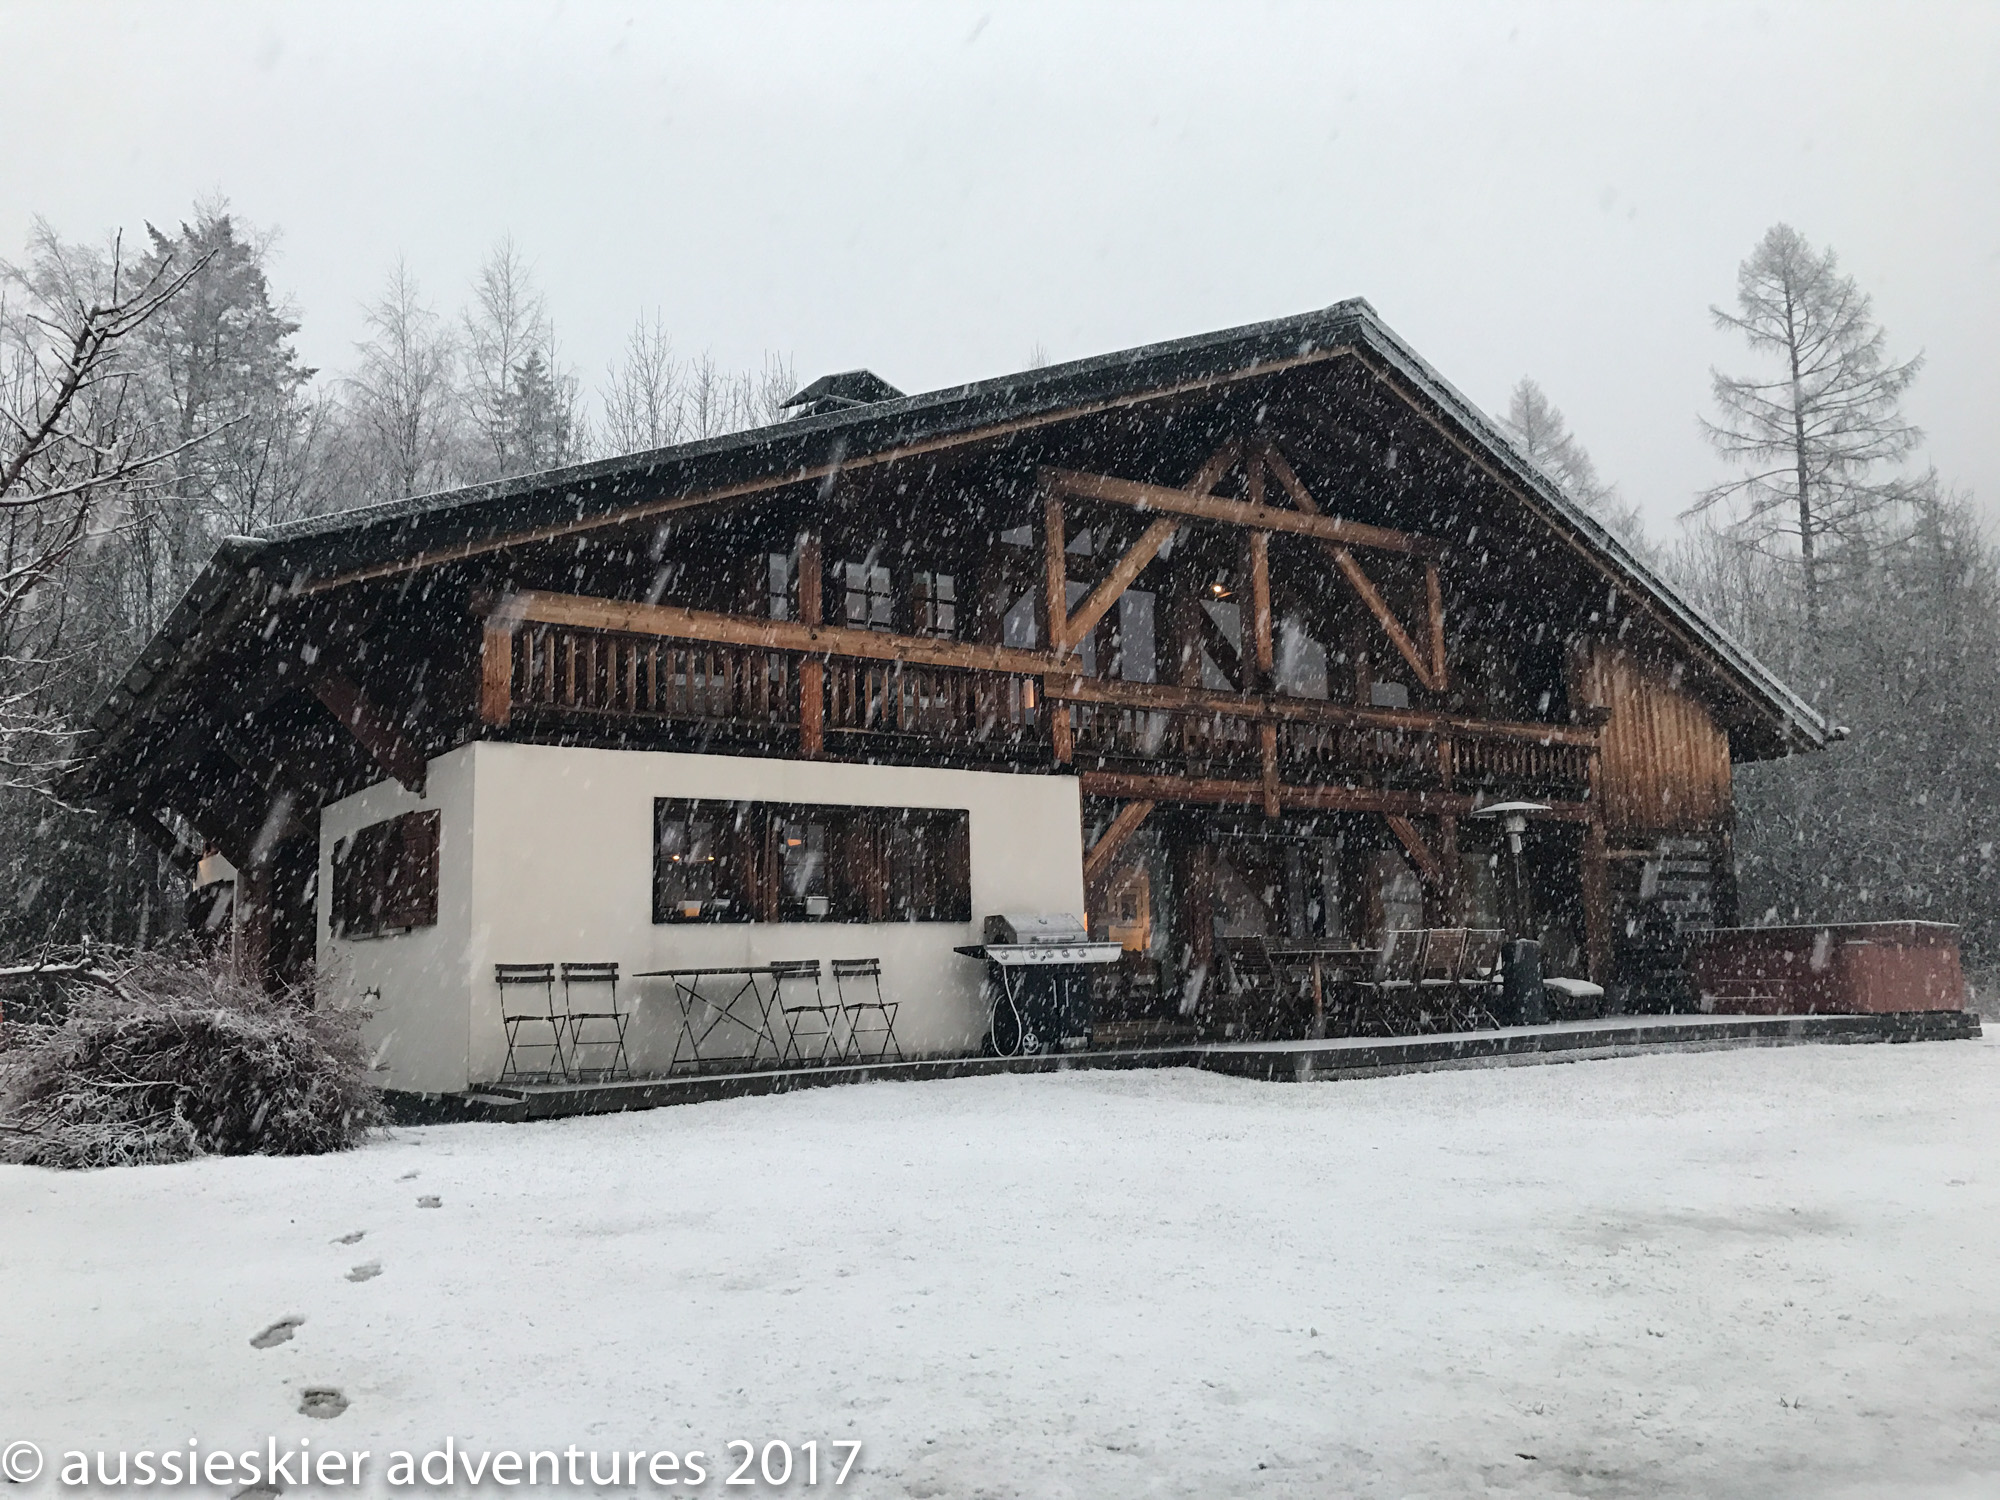
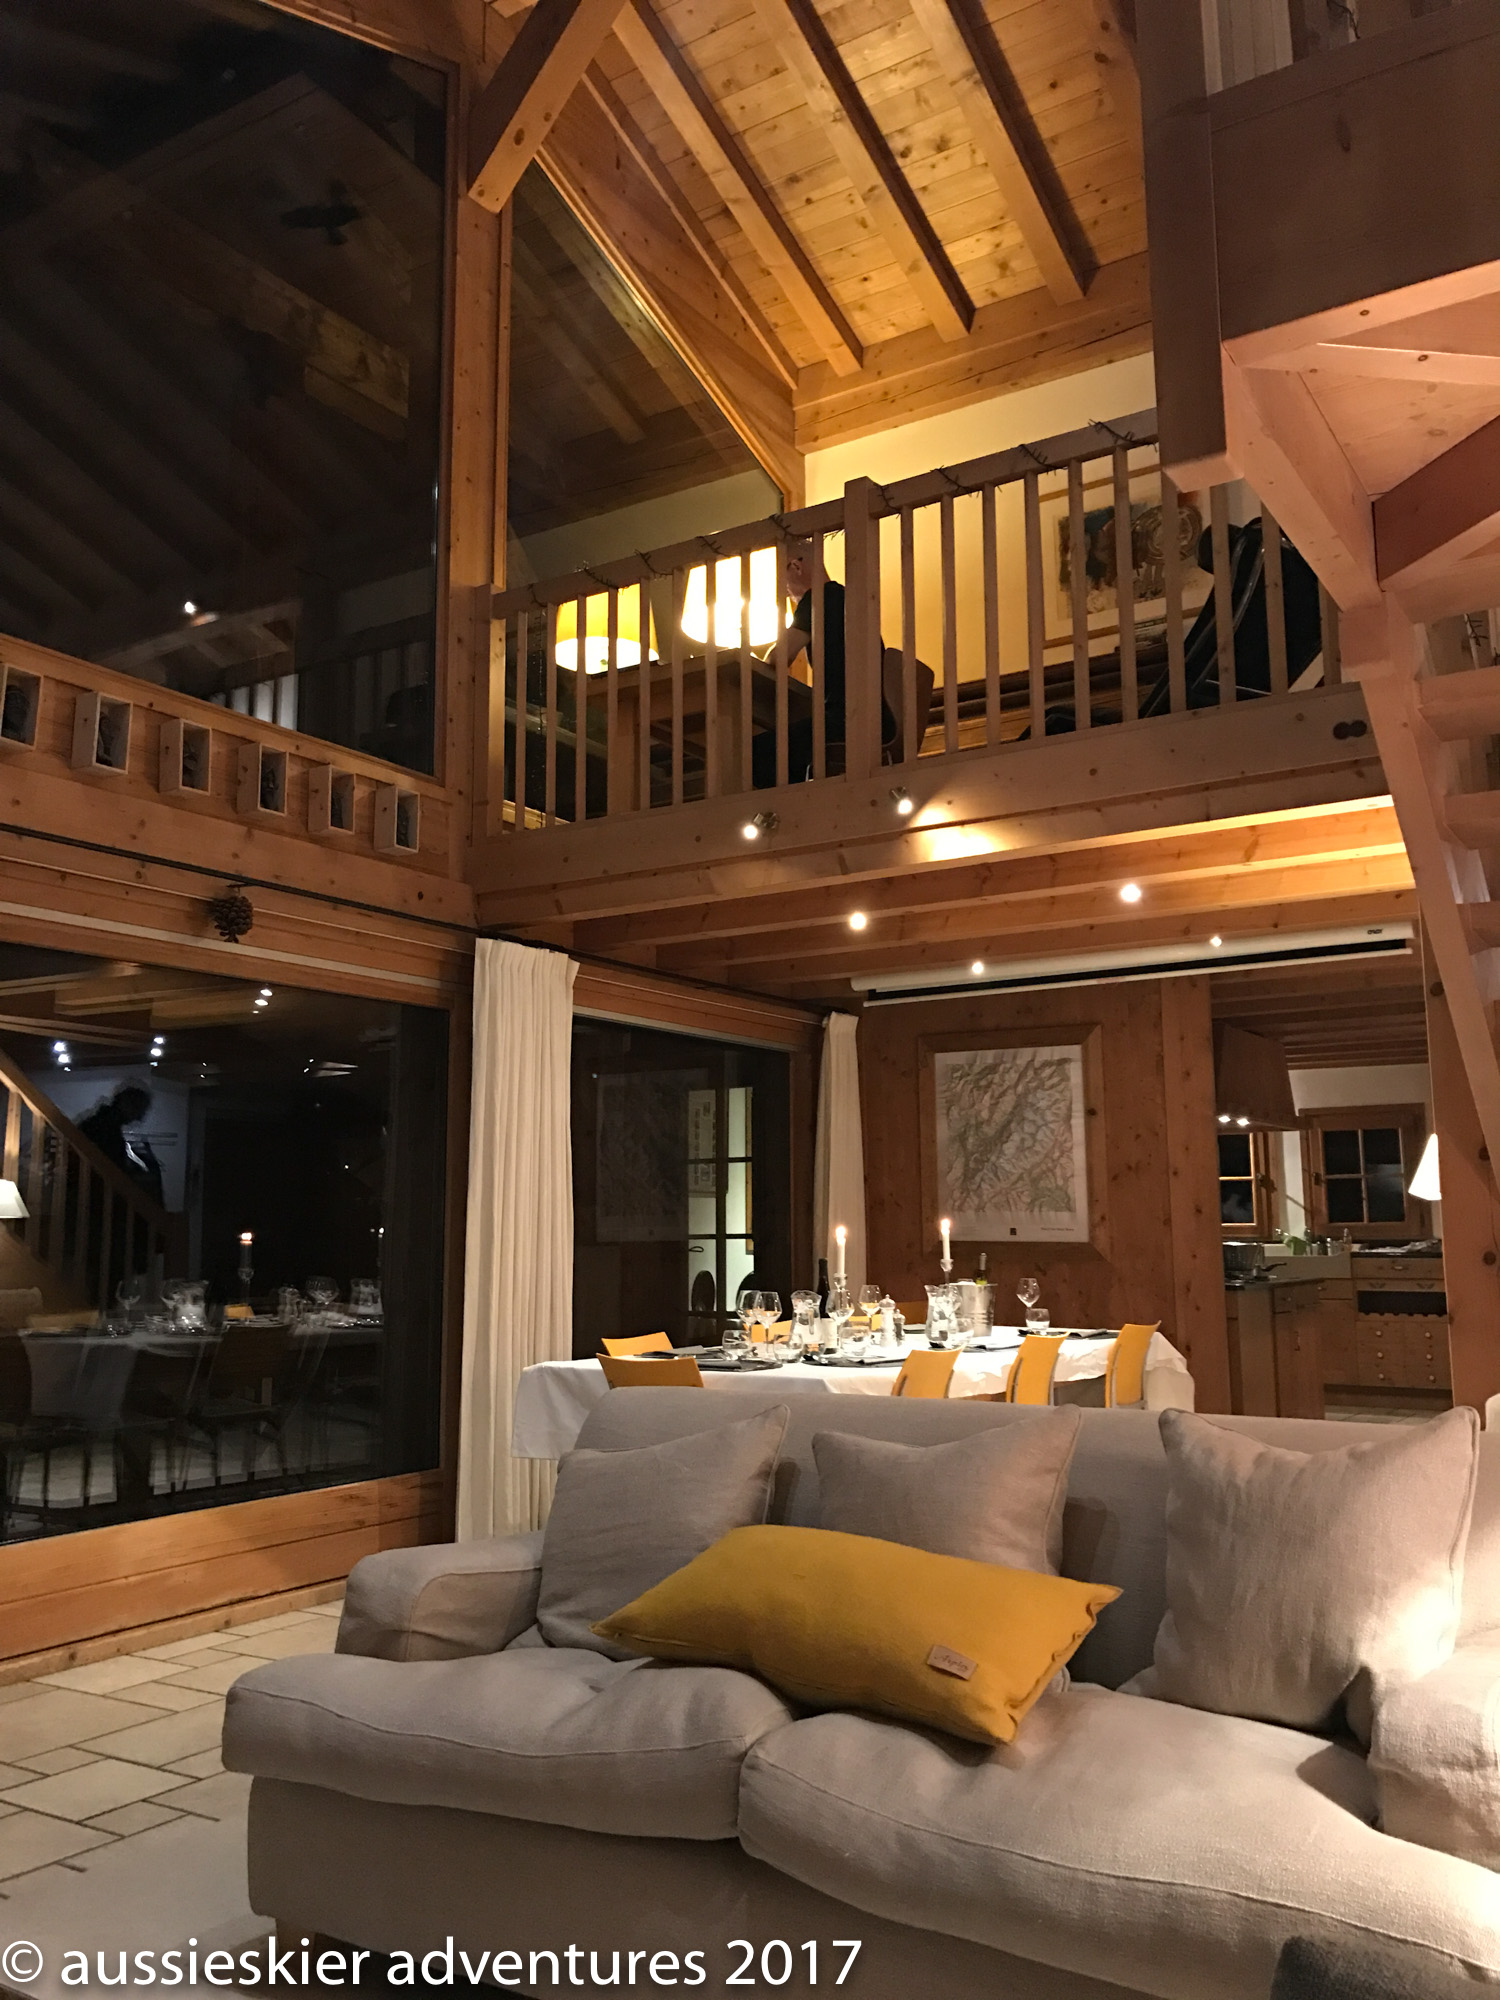
Our group assembled at the Chalet on Sunday afternoon – and we were greeted by a facility that greatly exceeded our expectations – a lovely large space, towering views of the peaks on both sides of the valley, a lovely deck with a spa & comfortable rooms. Jerome and our second guide Fanny came over for a meet & greet which was followed by a discussion on safety and group goals for the week.
Dinner was served & our Chalet chef Whitney soon became everyone’s favourite as each course proved a winner. To quote Pulp Fiction, which I had re-watched recently “this is some serious gourmet shit”. The amazement continued as we woke to a stunning breakfast spread which we devoured as we would need the energy for the day’s activities.
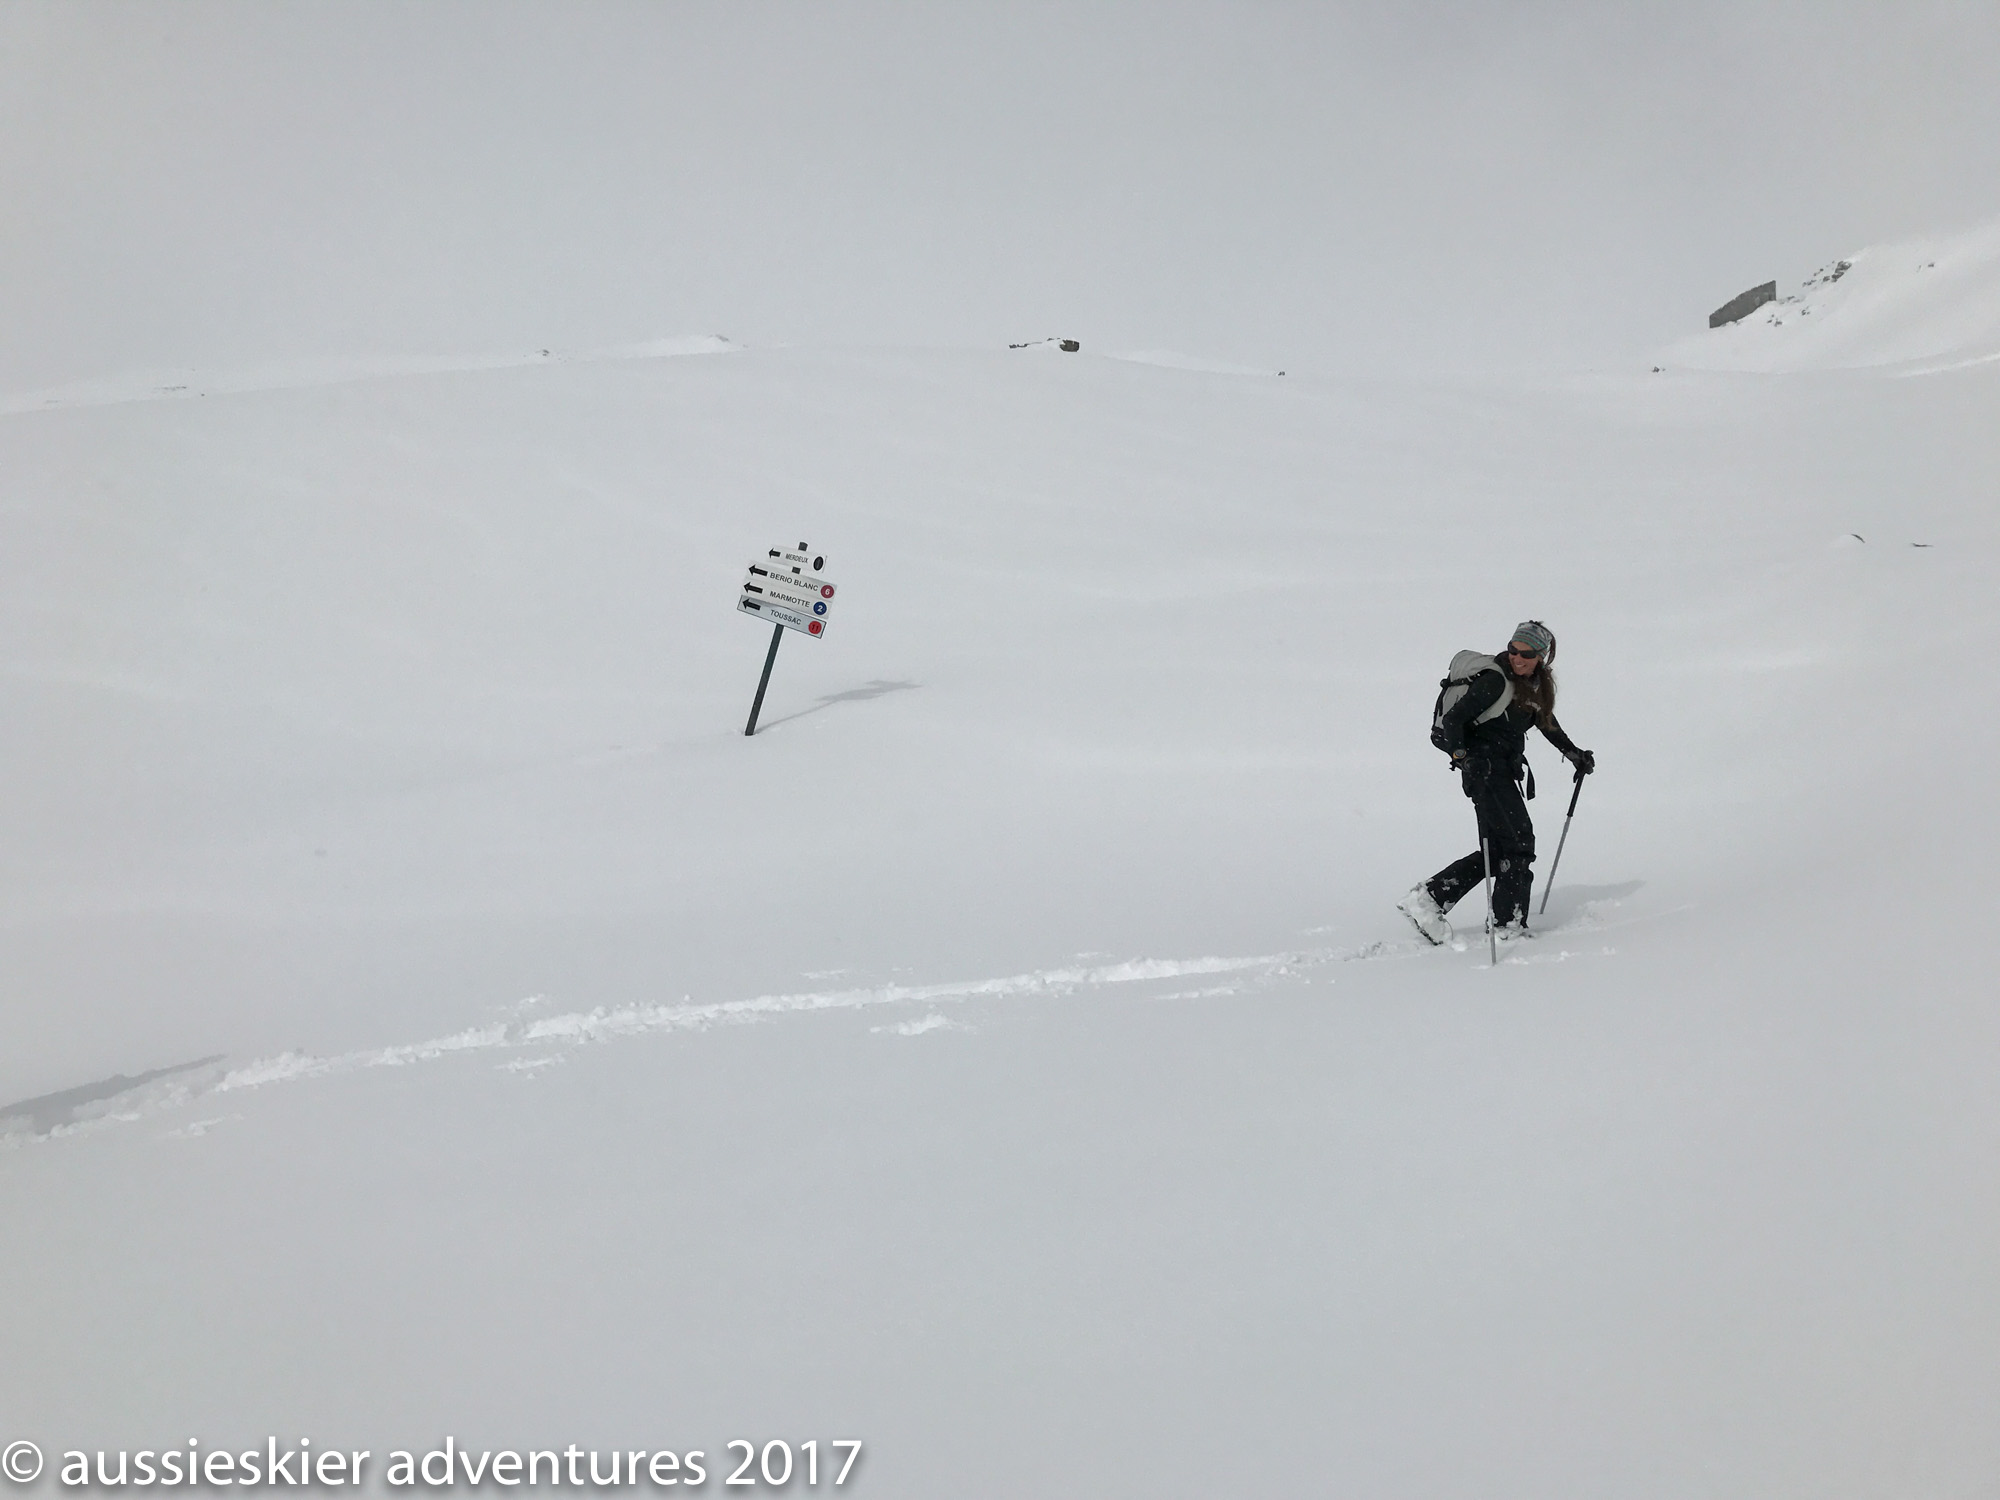
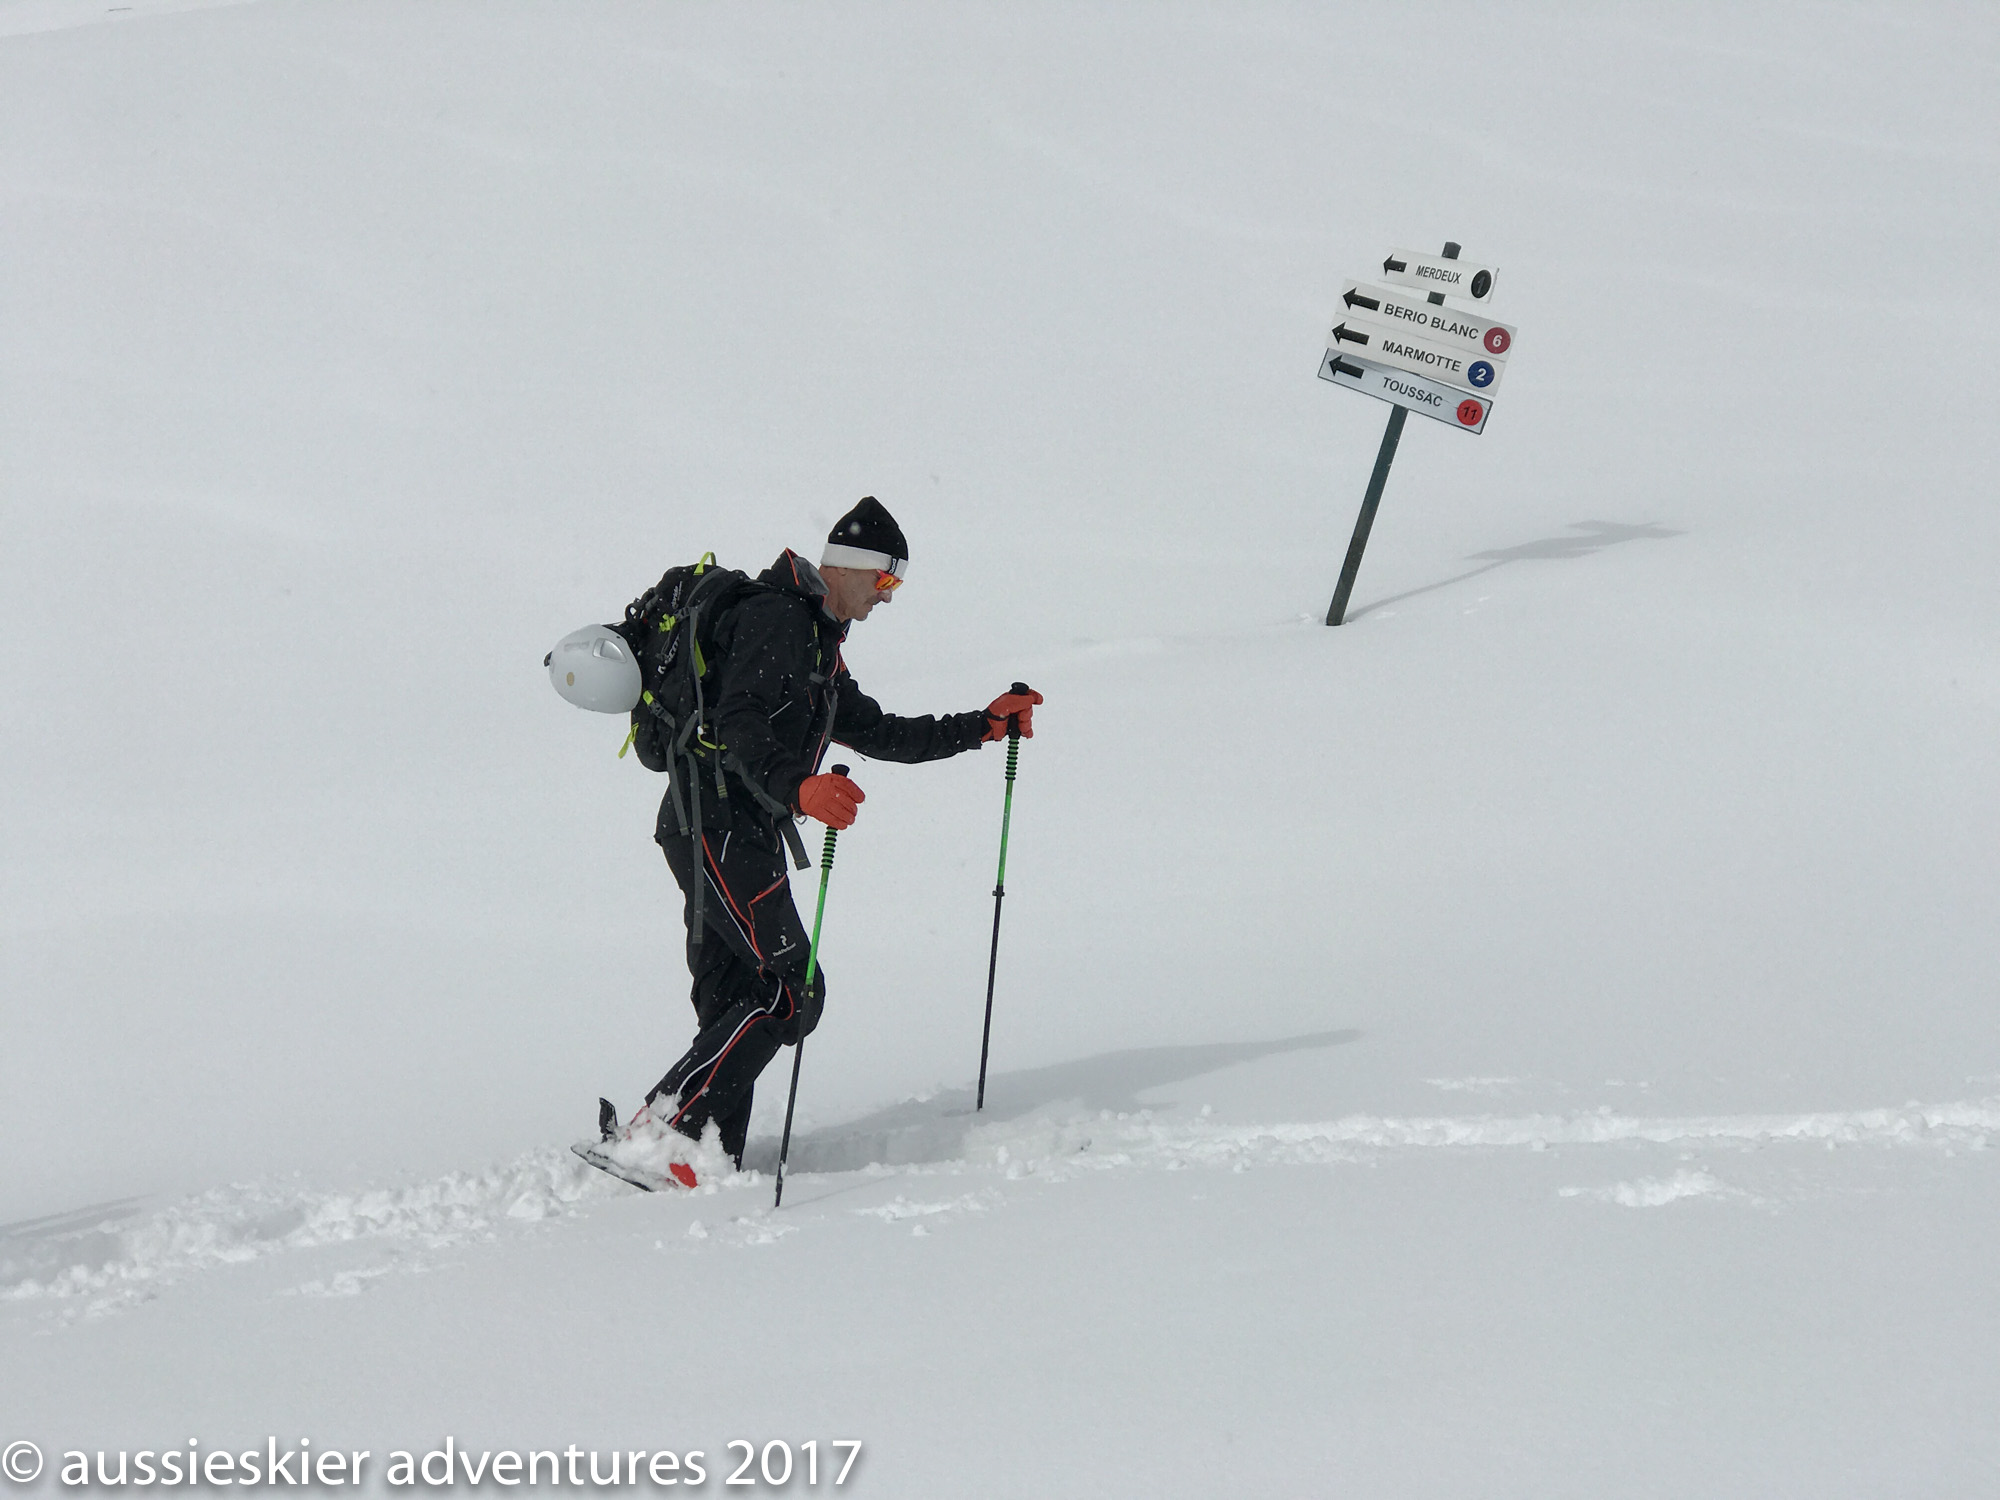
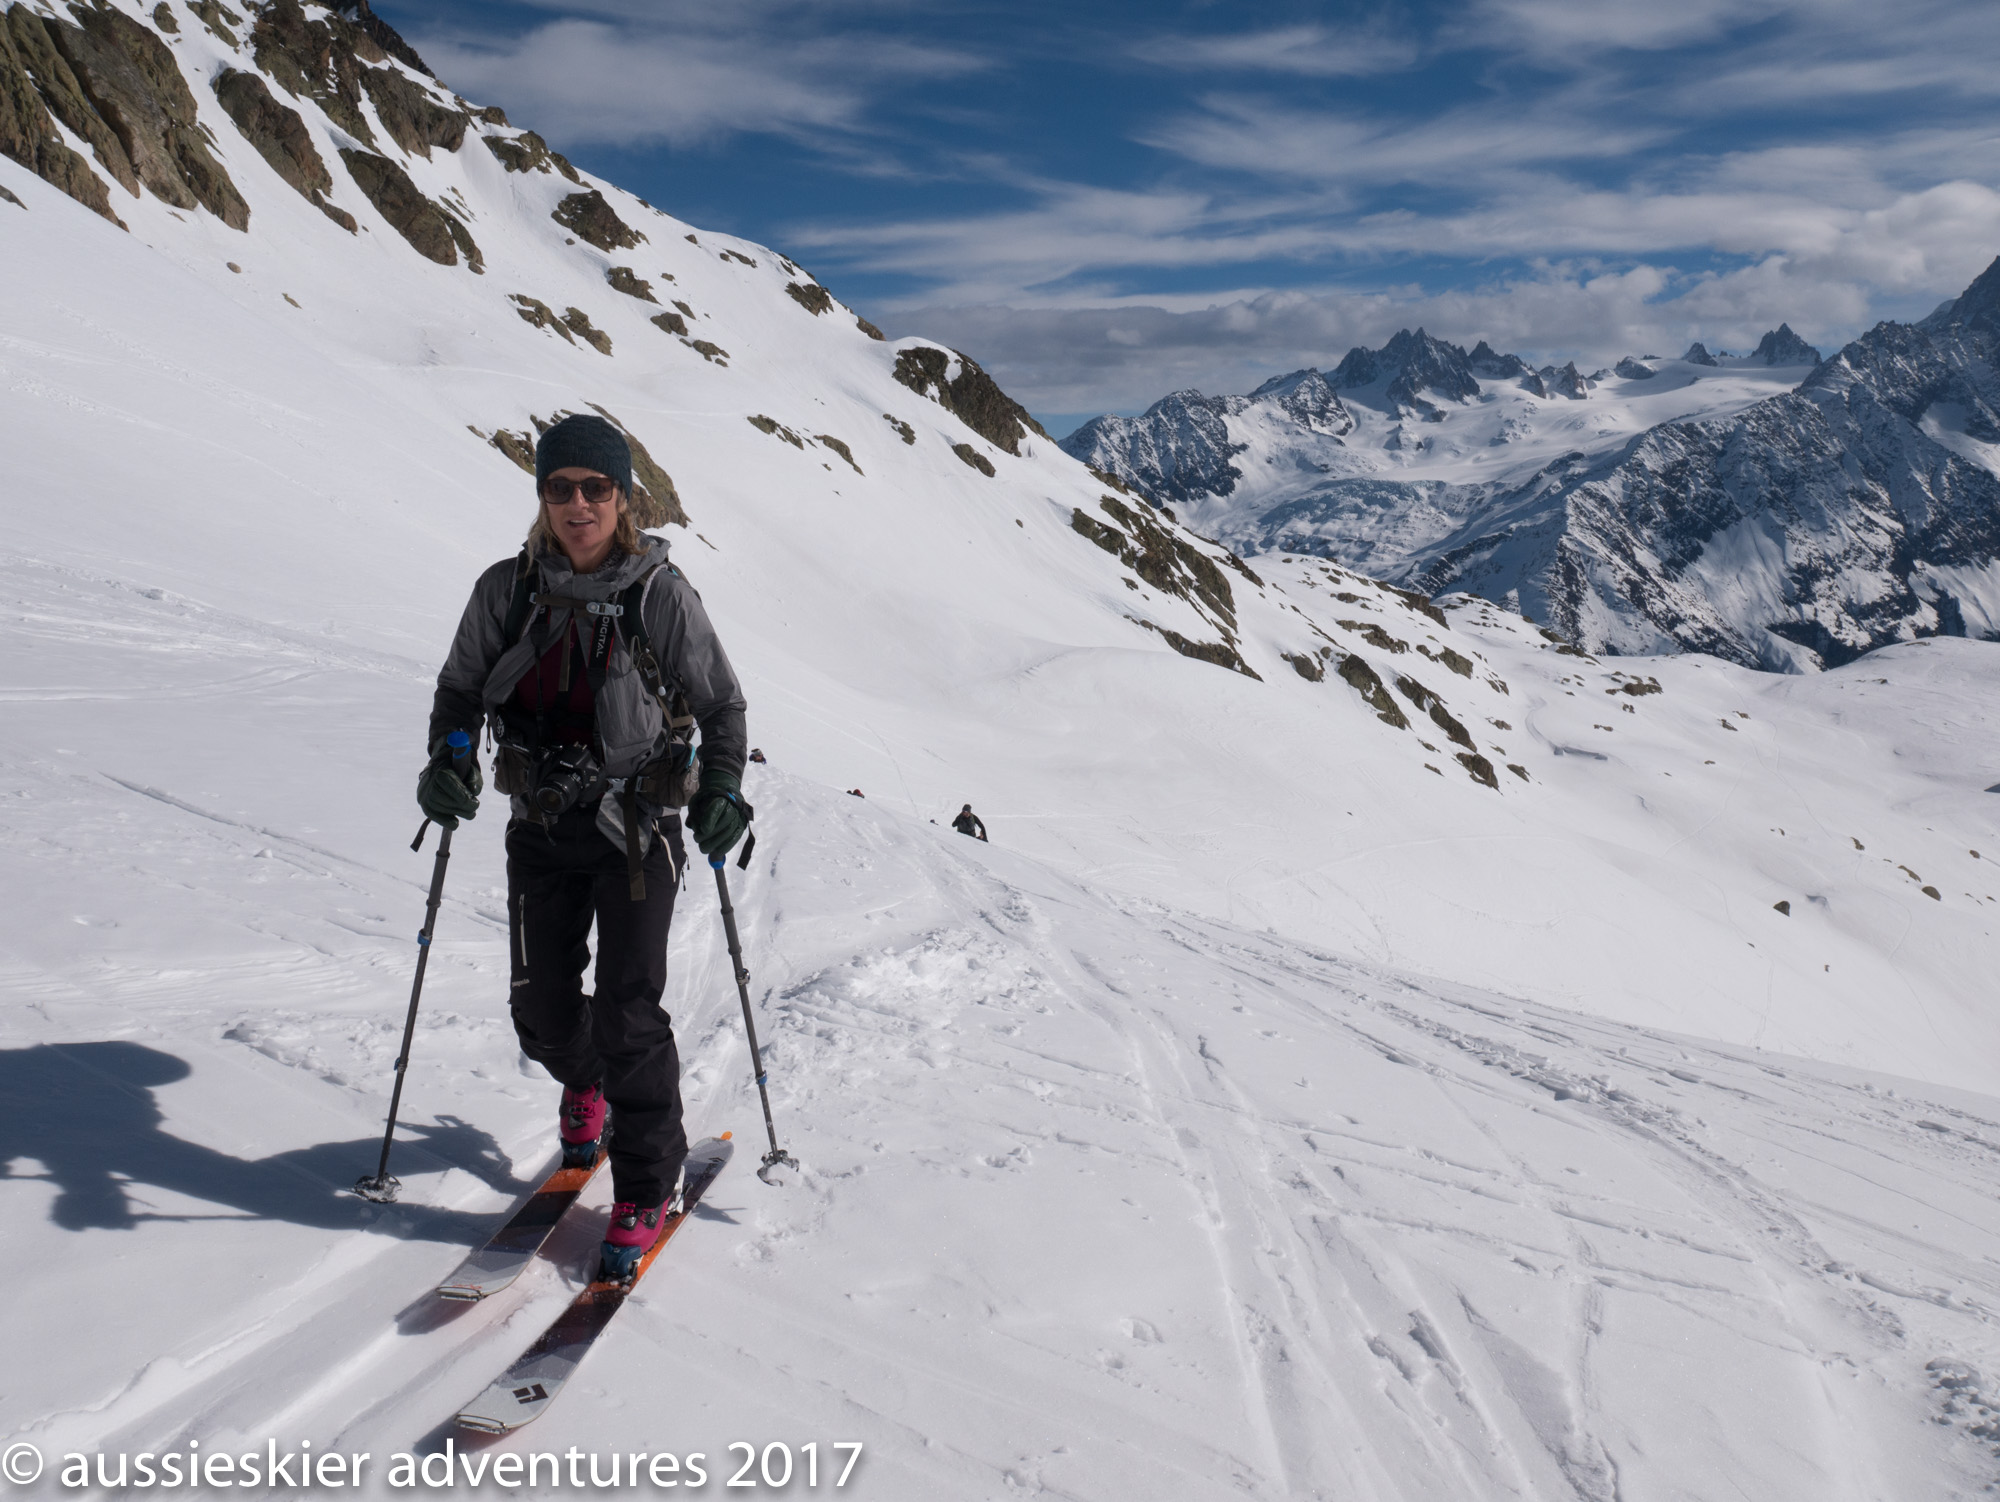
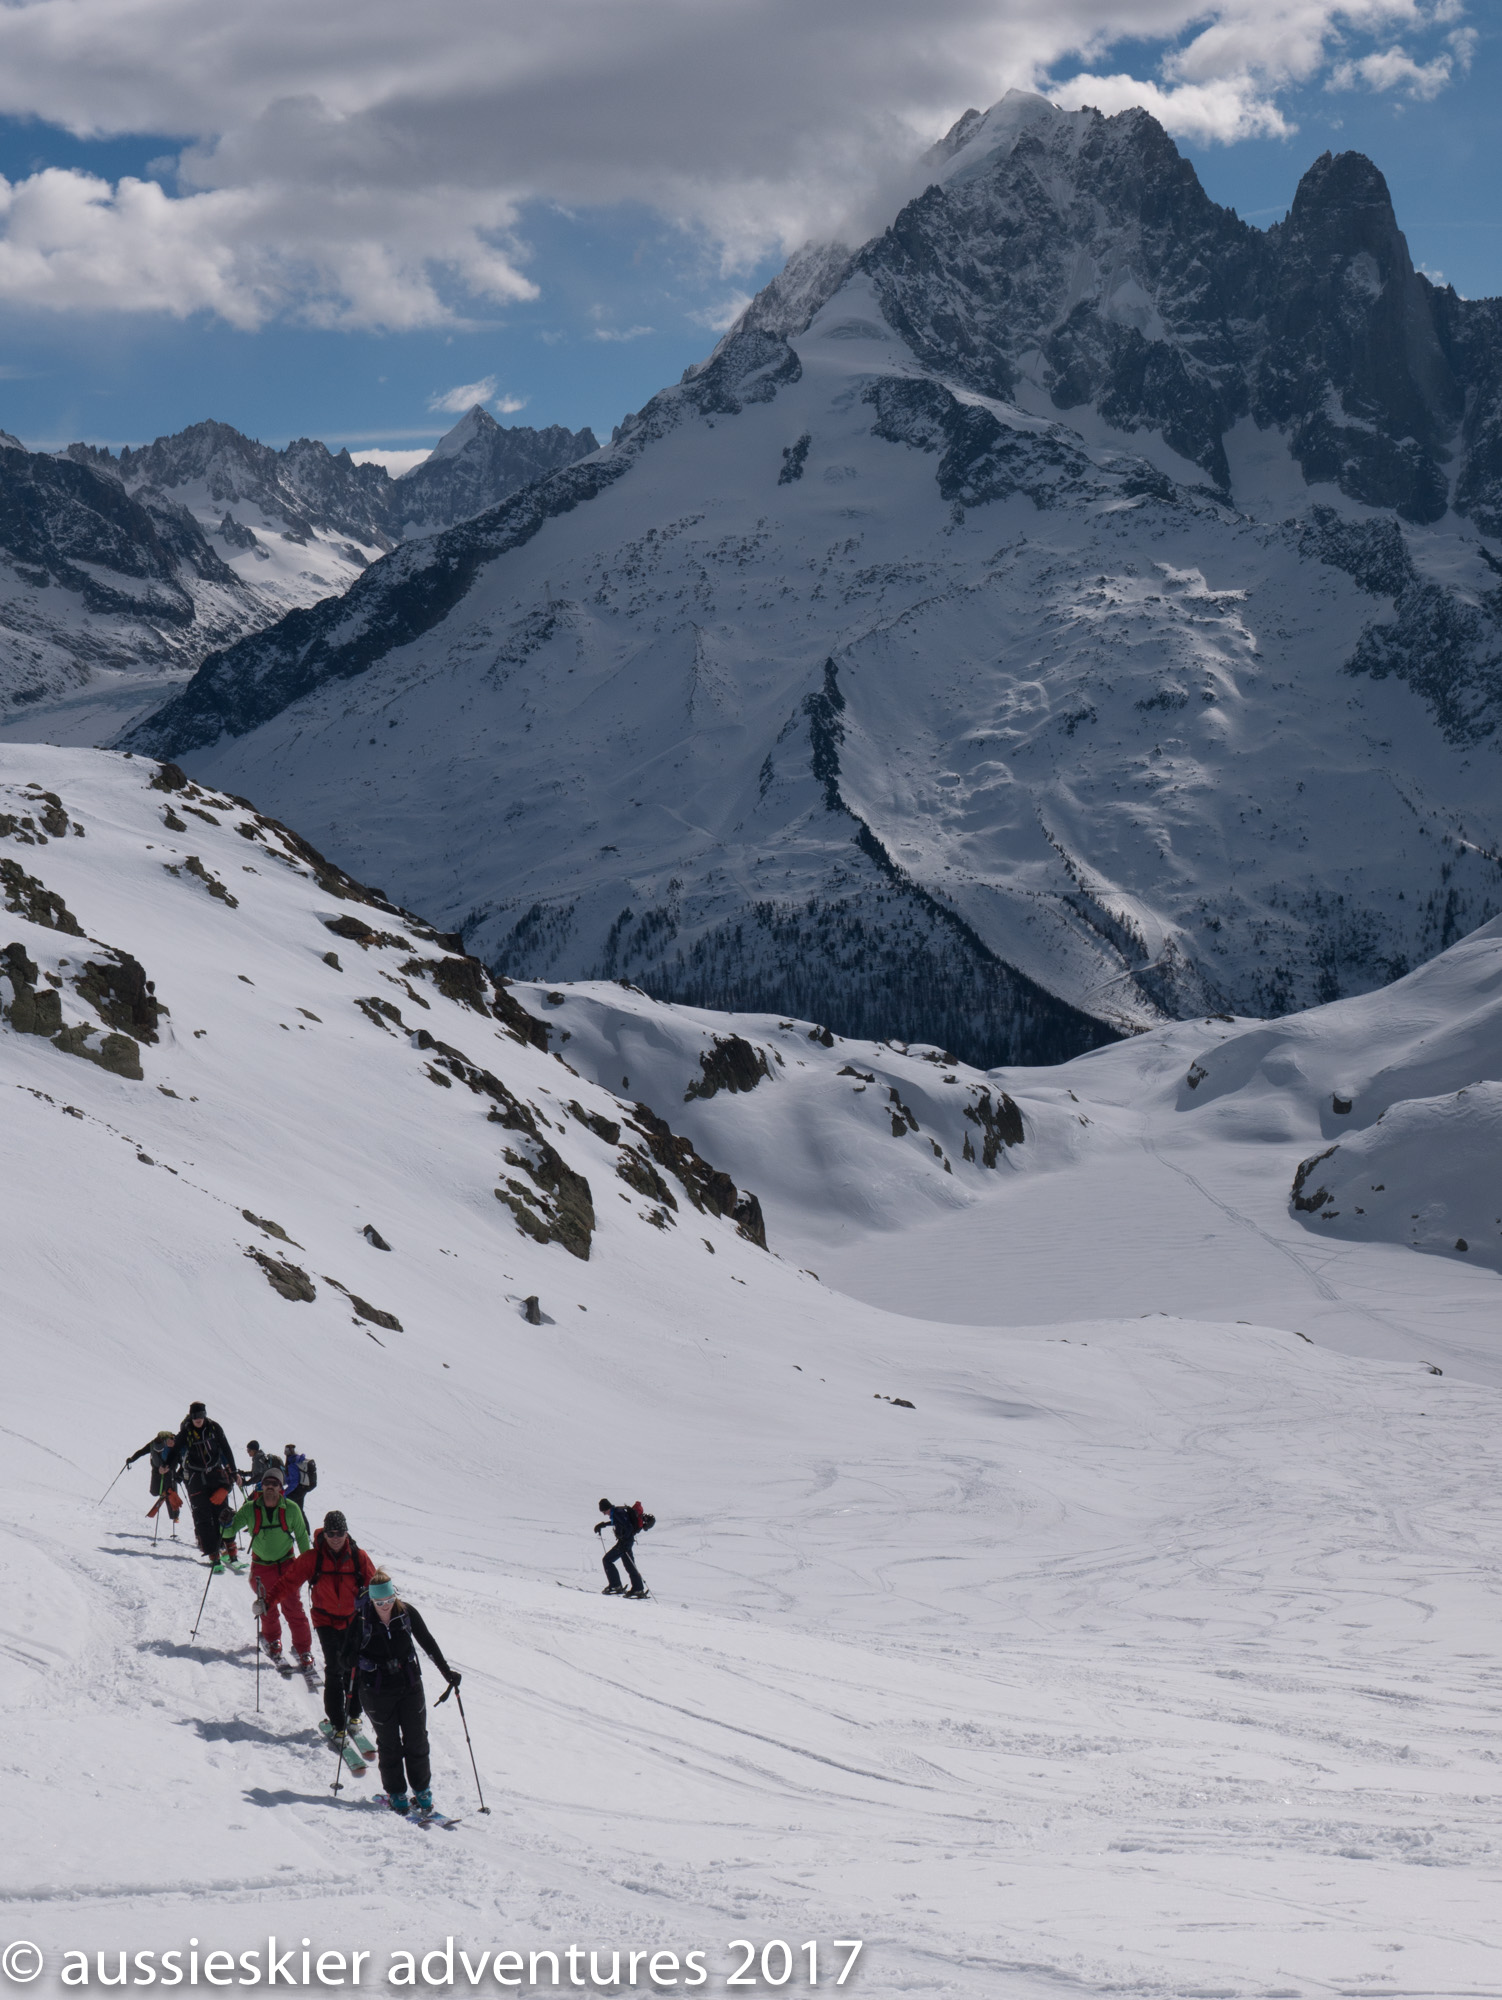
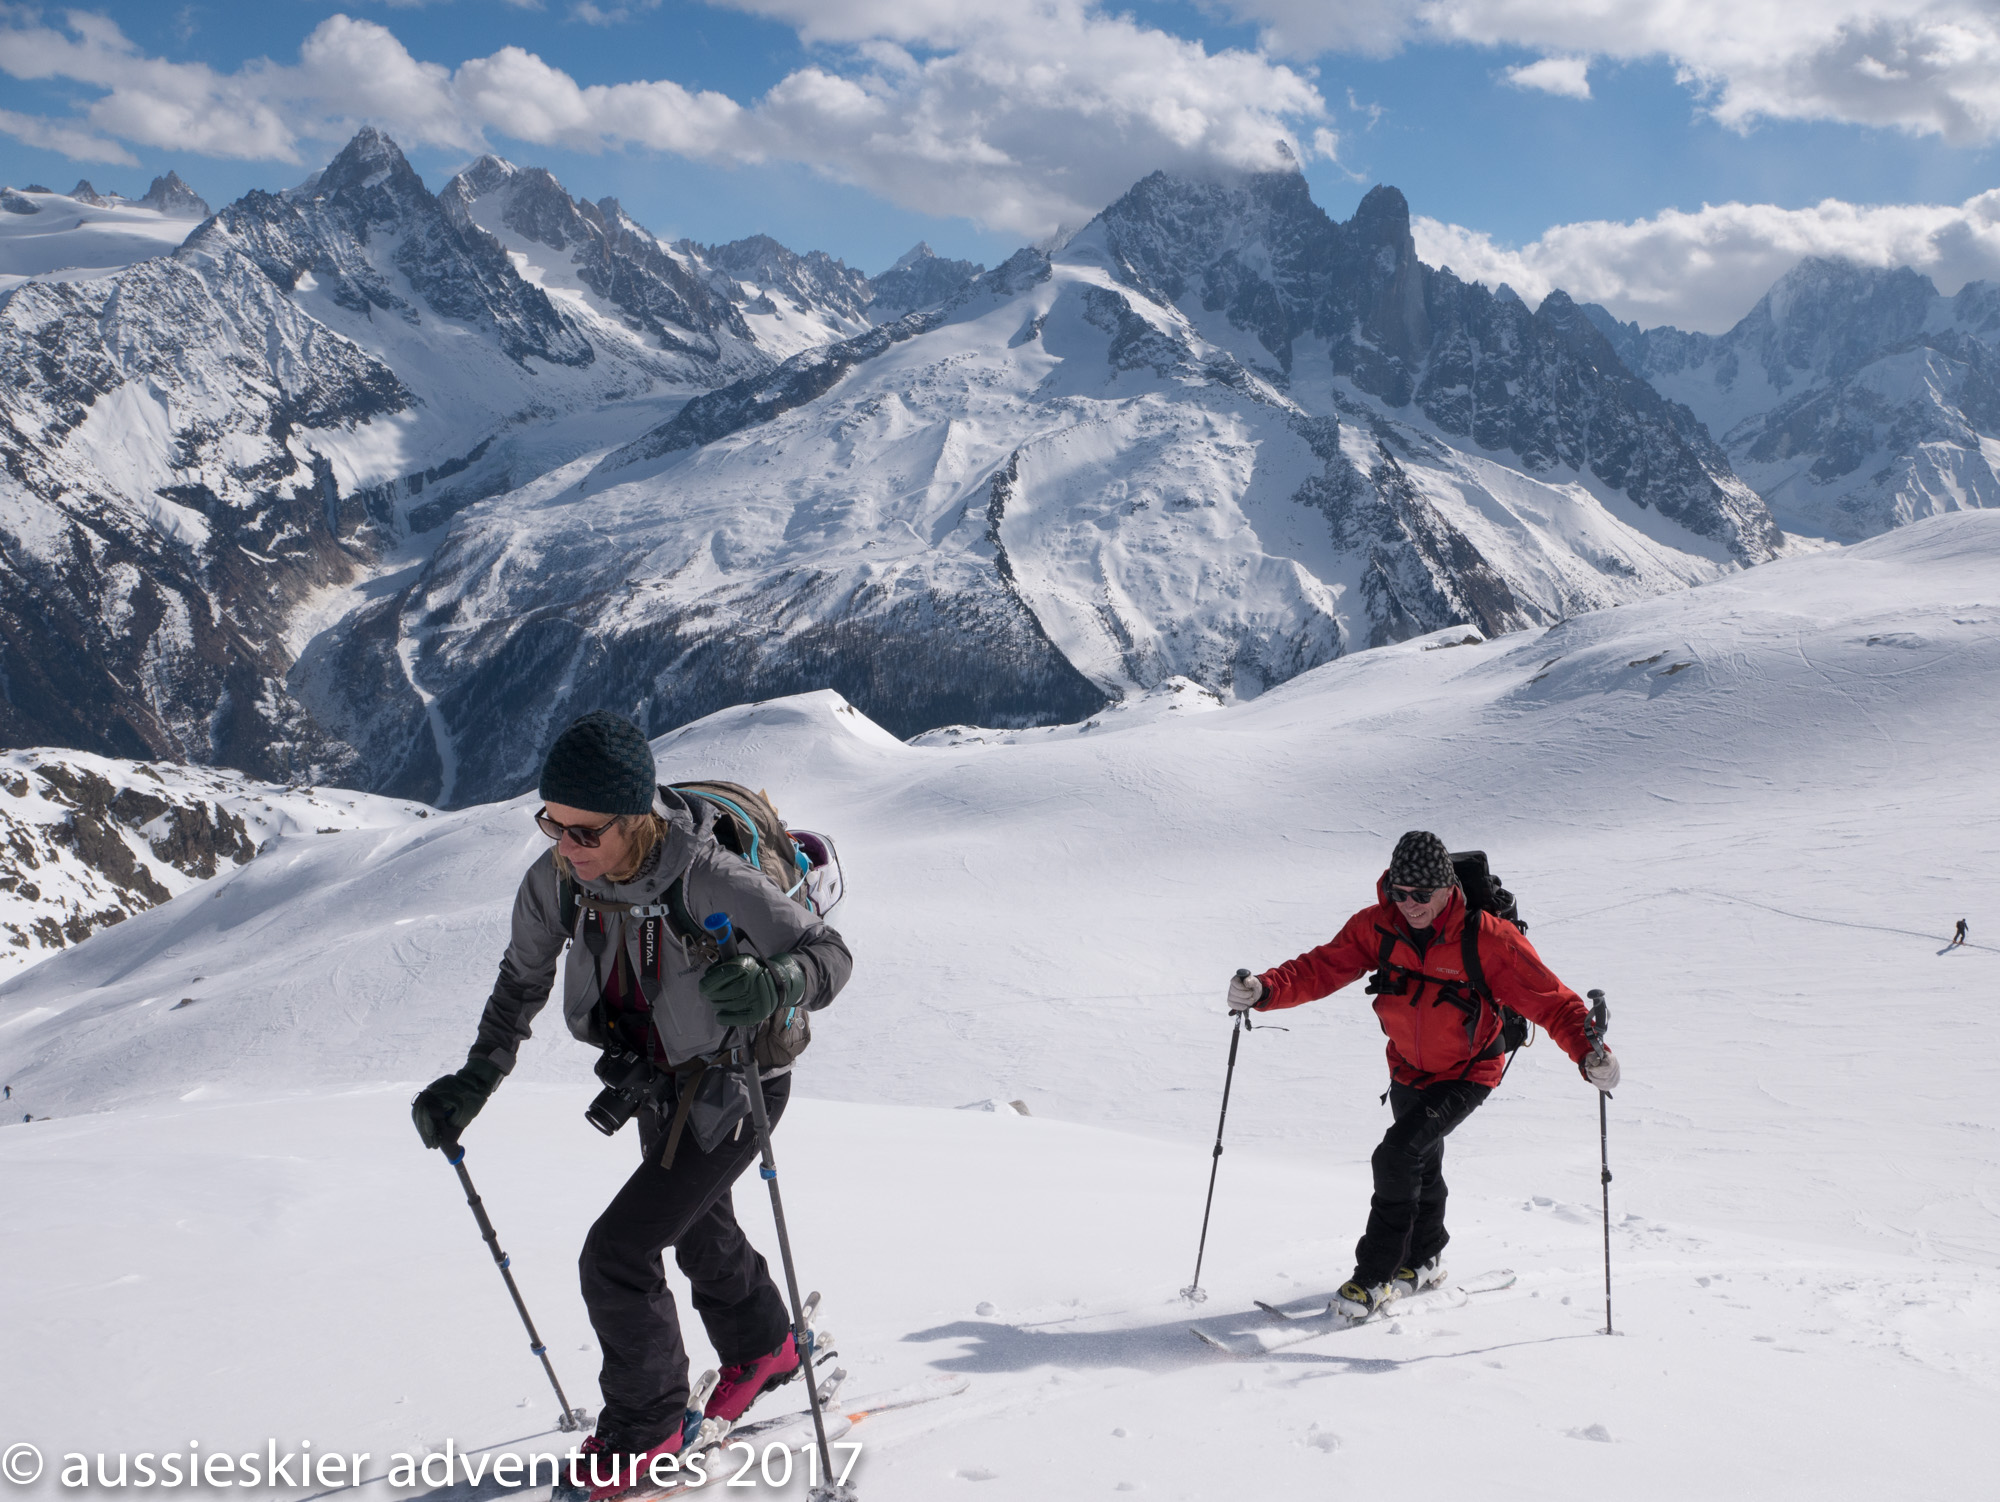
The weather was clear with blue skies but high winds aloft, so we chose to do a mid-altitude ski tour in the Aiguilles Rouges – Jerome and Fanny met us at the Chalet to discuss the days plans. This is always a great option as the terrain is excellent and the views across to the Mont Blanc massif are peerless. Plus we had a group member who had not used touring gear and skins before so this is an excellent location to start out – no crazy steep icy kick turns etc but enough to start acquiring skills.
We ascended the lifts at Flegere, and then completed a bone-rattling traverse to the point where we donned our skins and commenced climbing. After a few switchbacks we reached the beautiful Lac Blanc area, we crossed the frozen lake and continued upwards until a decision needed to be made whether we would climb to Col du Belvedere which was the obvious valley straight ahead, or up to the lookers right to Col des Dards which could hold better snow.
Chamonix 2017 – Ski Touring in the Aiguilles RougesChamonix 2017 – Ski Touring in the Aiguilles RougesChamonix 2017 – Ski Touring in the Aiguilles RougesChamonix 2017 – Ski Touring in the Aiguilles RougesChamonix 2017 – Ski Touring in the Aiguilles RougesChamonix 2017 – Ski Touring in the Aiguilles Rouges
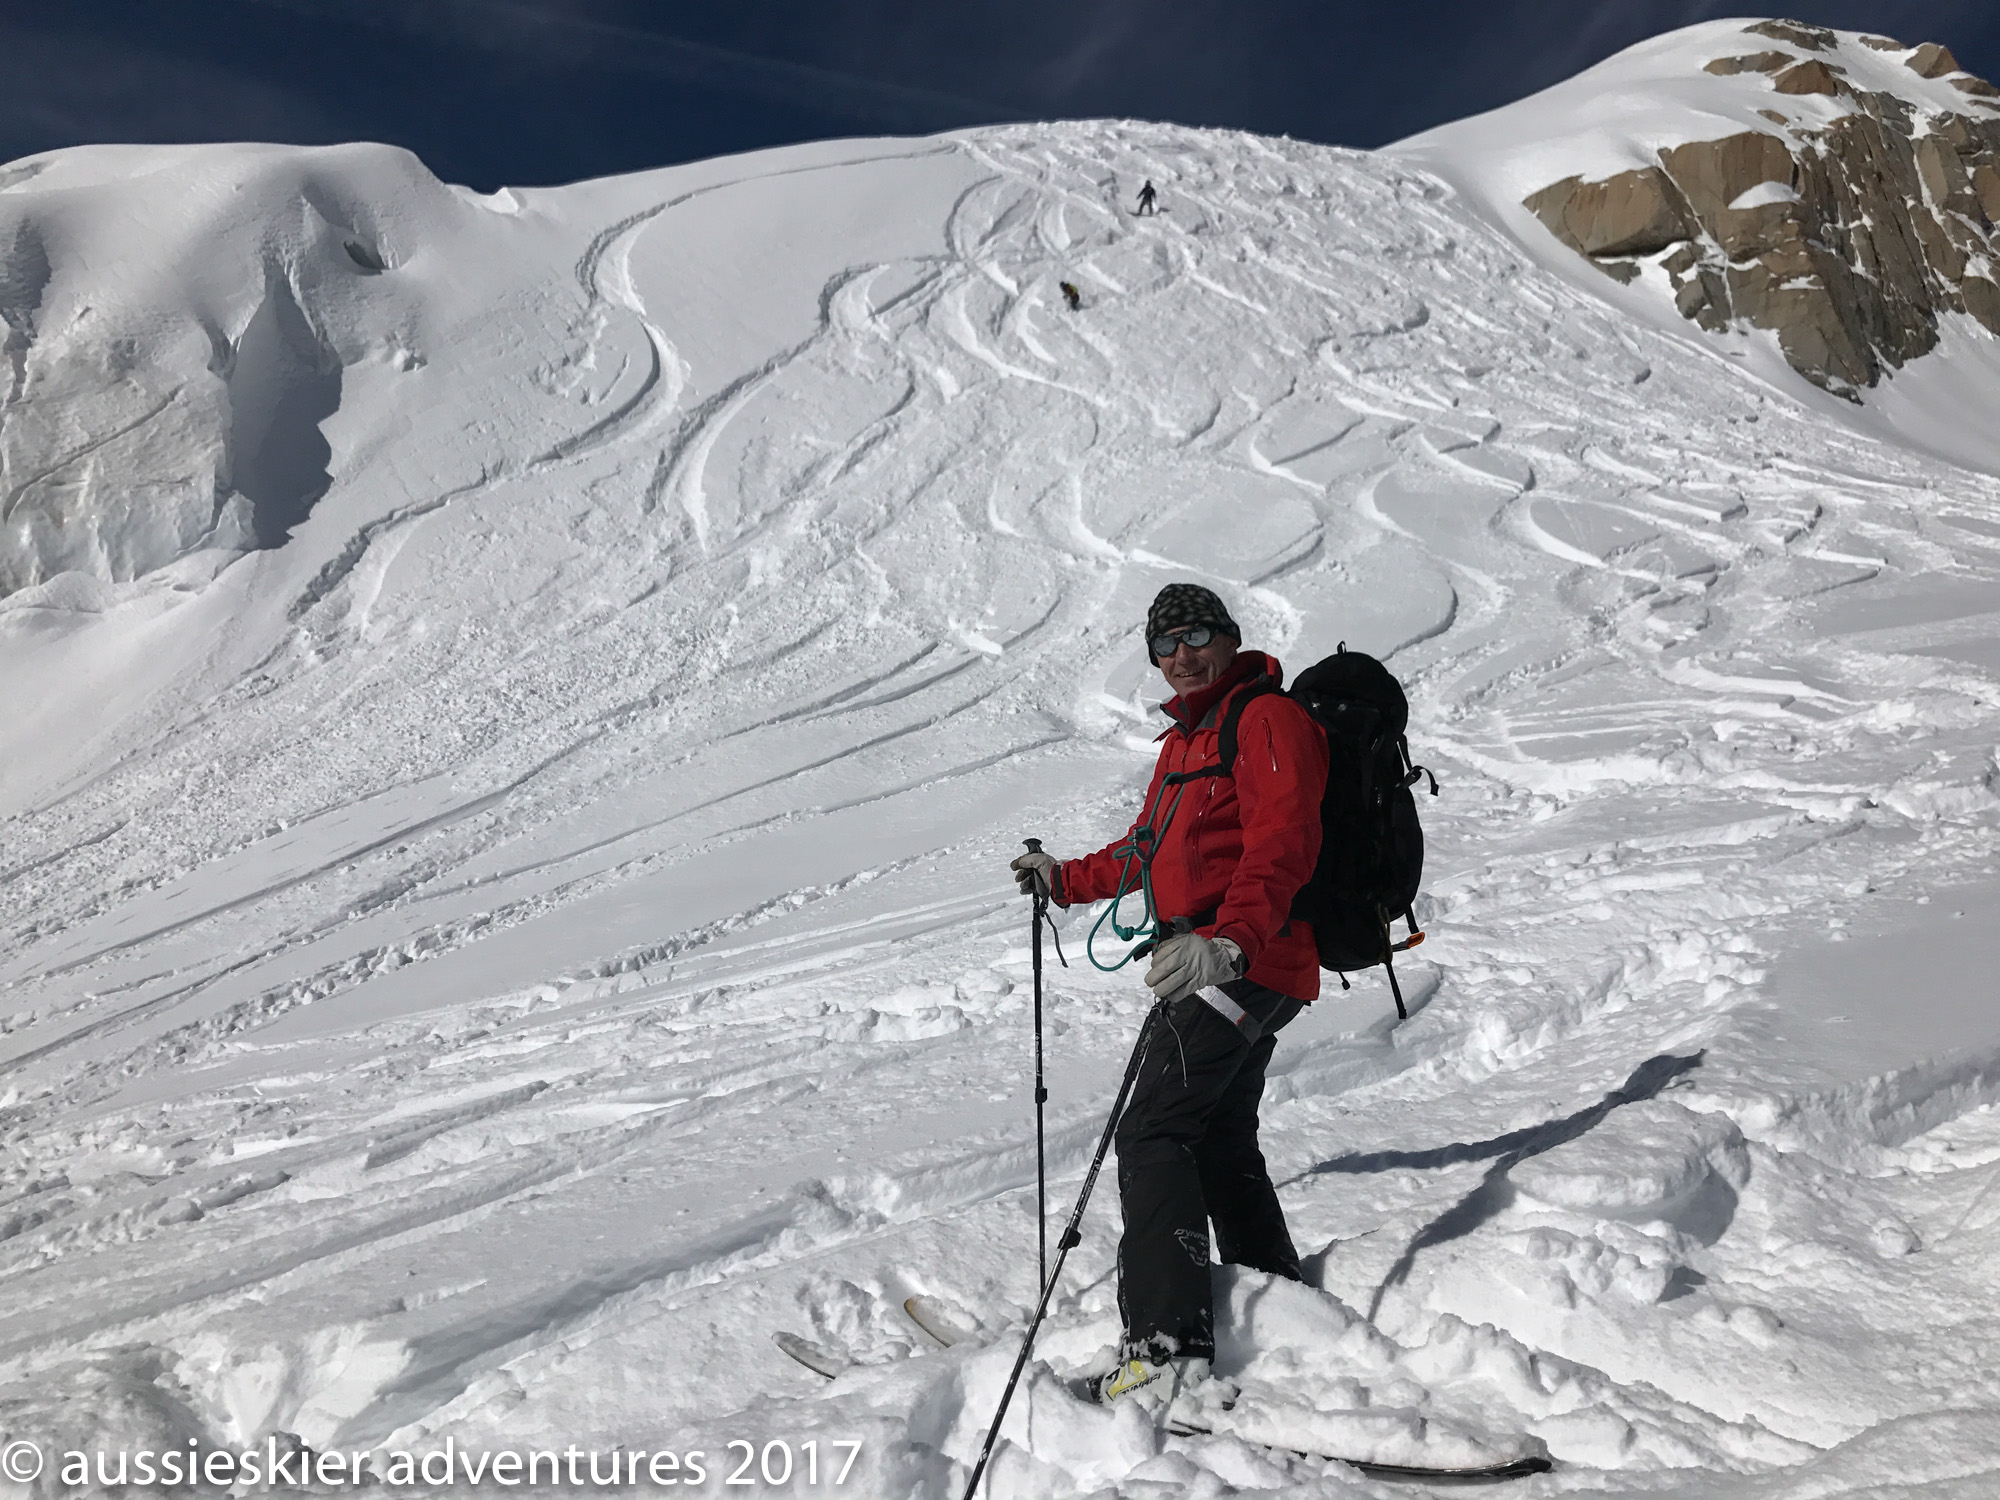
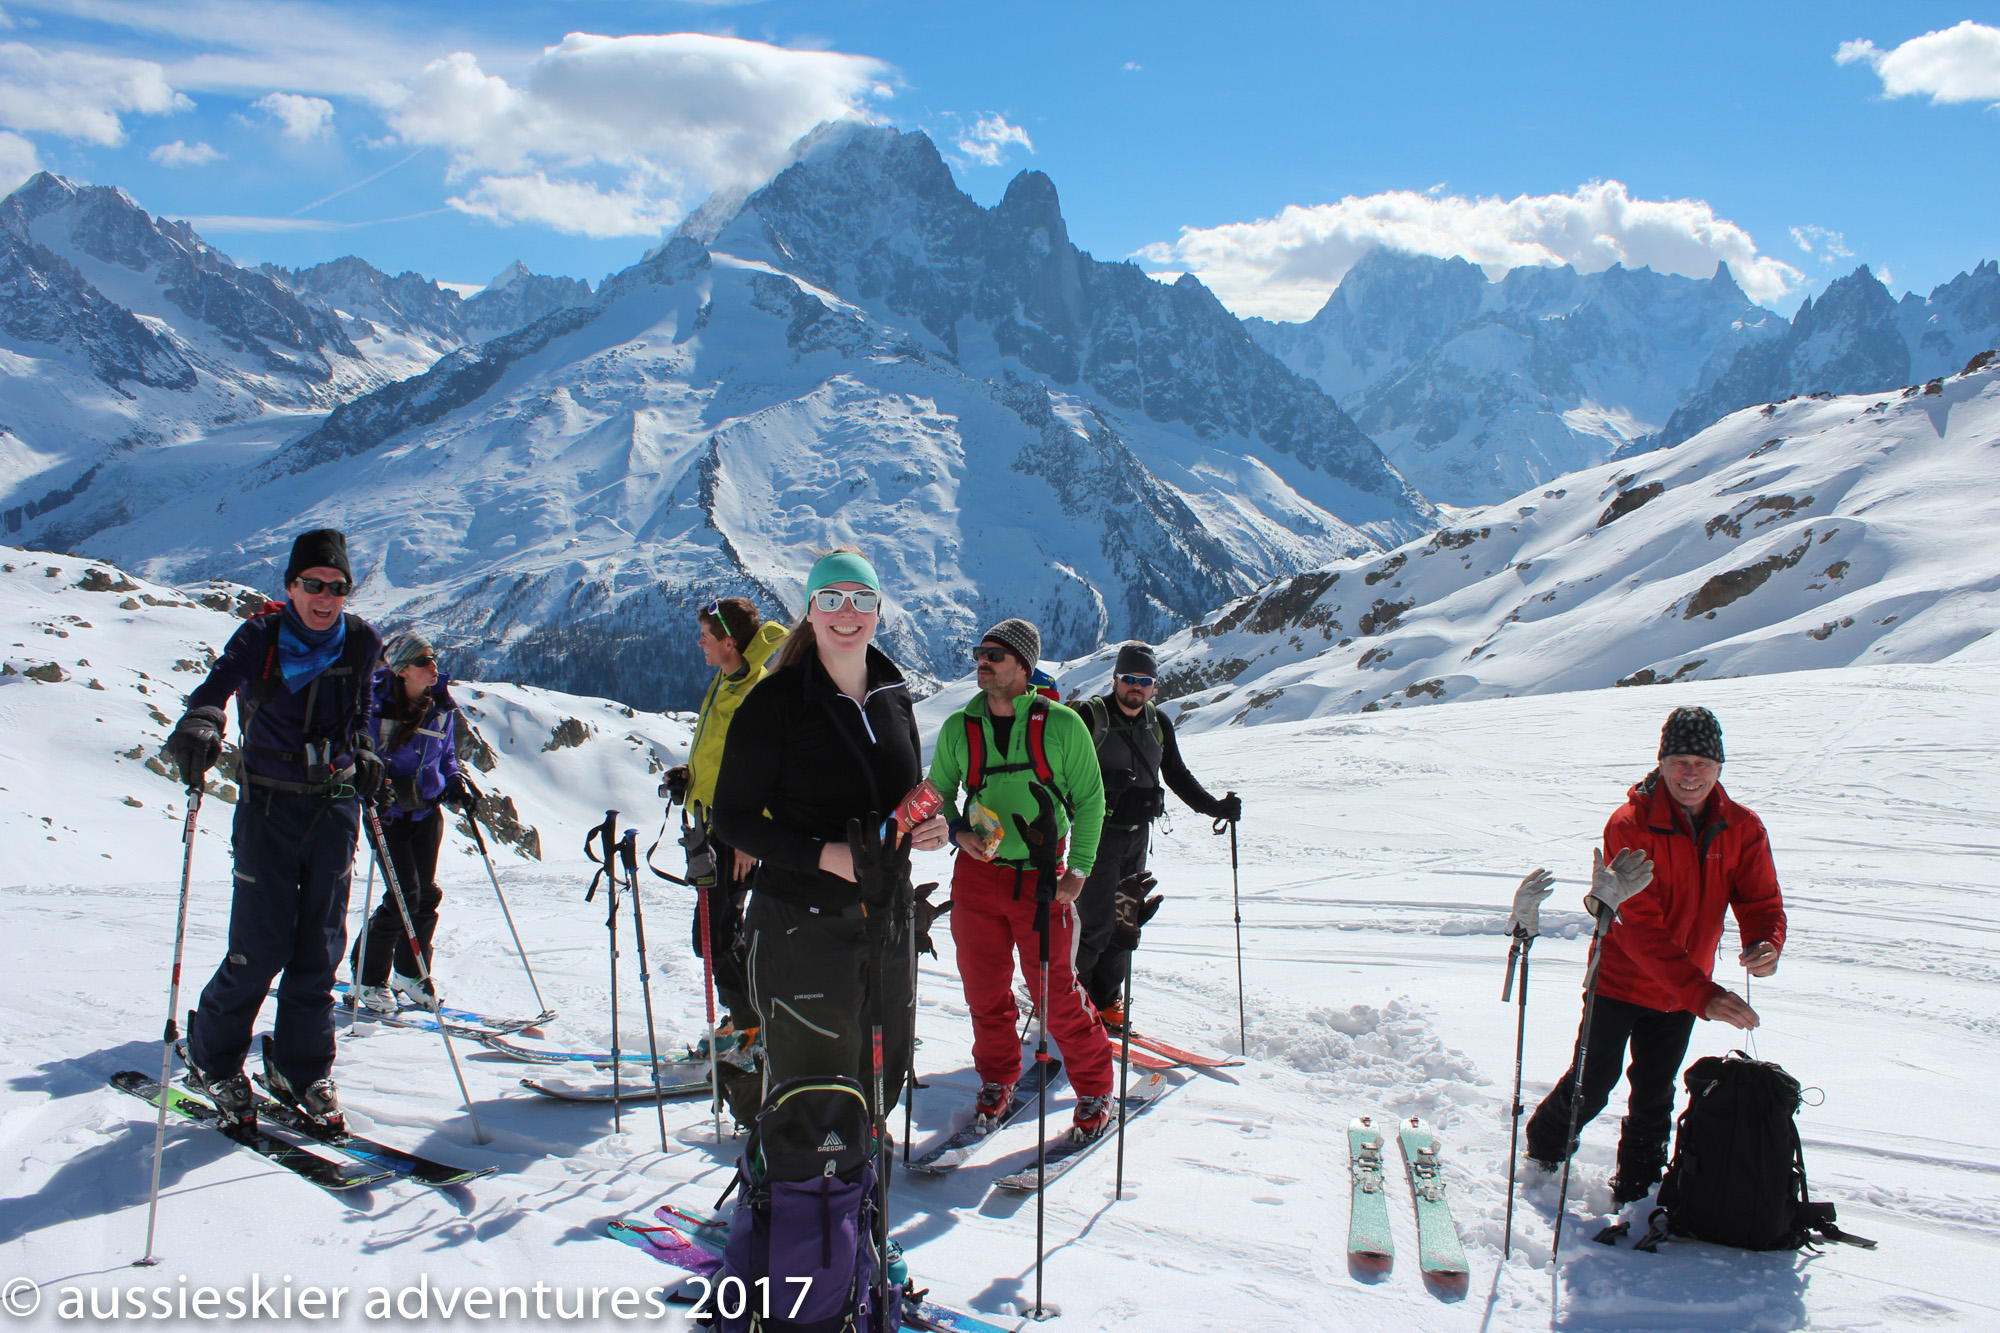
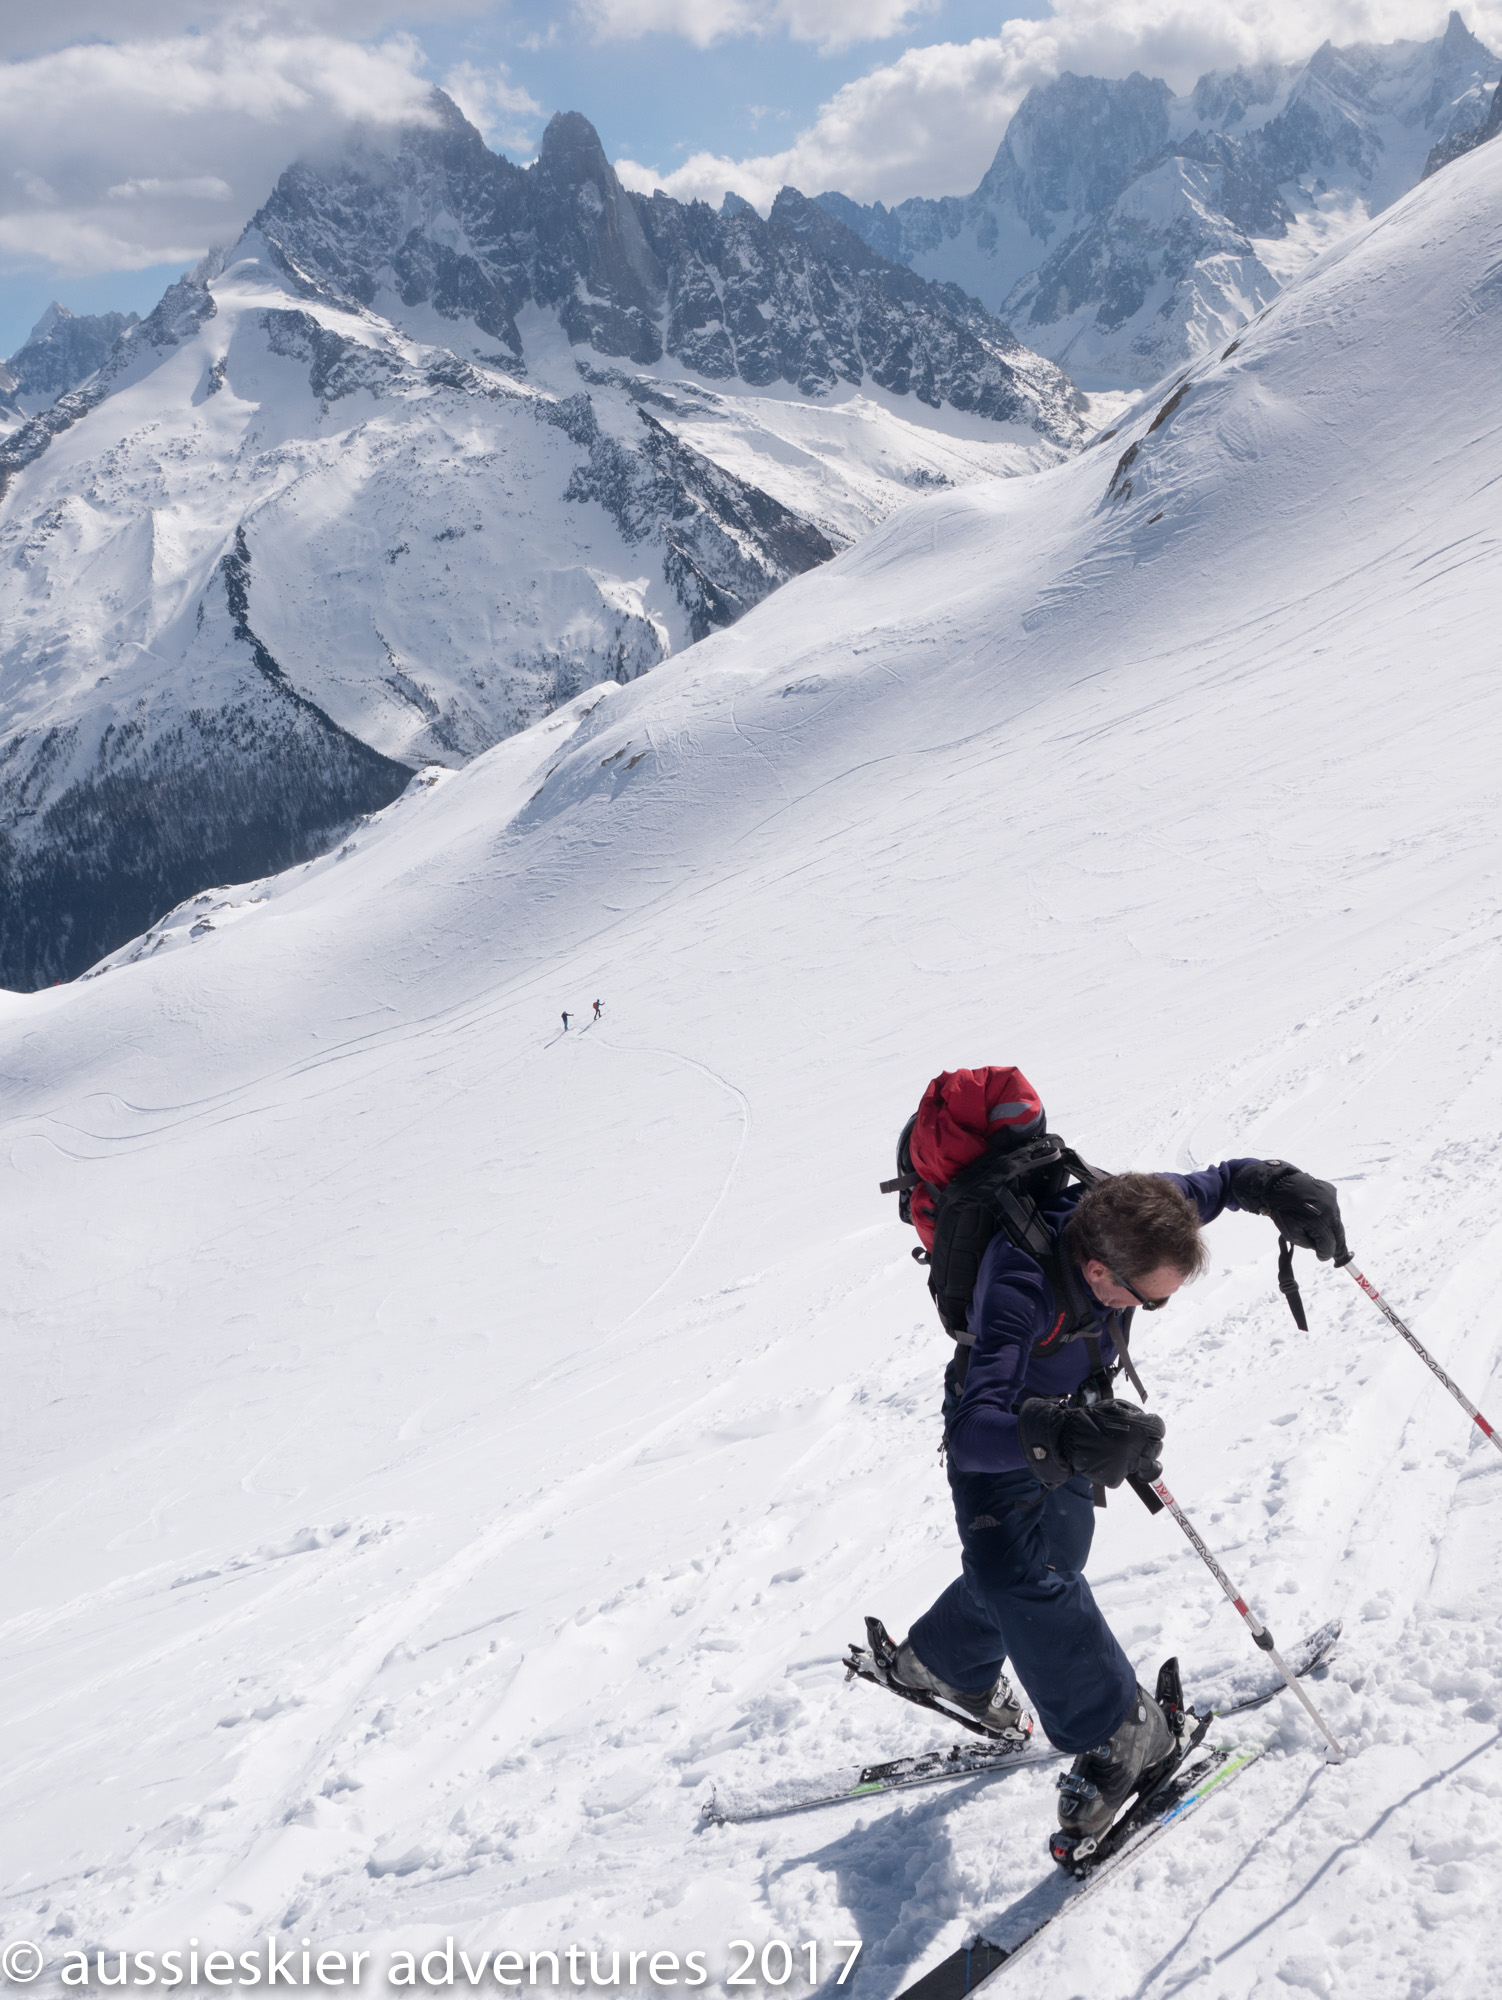
While we were climbing Jerome made a detour to check out the snow and decided that the second option would be the best so we diverted left and reached the col after about 500m vert of climbing. Spirits were high as we lunched at the col, admiring the spectacular views, and then we began our descent in some lovely windblown powder, the terrain in the Aiguilles Rouges is very playful and we descended through a couple of bowls and a couloir with plenty of terrain features to keep it interesting. As we descended further the fresh snow transitioned into corn snow which was equally superb.
Chamonix 2017 – Ski Touring in the Aiguilles RougesChamonix 2017 – Ski Touring in the Aiguilles RougesChamonix 2017 – Ski Touring in the Aiguilles RougesChamonix 2017 – Ski Touring in the Aiguilles RougesChamonix 2017 – Ski Touring in the Aiguilles RougesChamonix 2017 – Ski Touring in the Aiguilles RougesChamonix 2017 – Ski Touring in the Aiguilles RougesChamonix 2017 – Ski Touring in the Aiguilles RougesChamonix 2017 – Ski Touring in the Aiguilles RougesChamonix 2017 – Ski Touring in the Aiguilles RougesChamonix 2017 – Ski Touring in the Aiguilles RougesChamonix 2017 – Ski Touring in the Aiguilles Rouges
However this being a low snow year, and skiing on the sunny side of the valley we were soon made to pay for the lovely corn turns as we were not able to directly traverse back to the lift as a face had melted out, so we needed to bush bash a little to get back to the lifts. This was all in good humour and before long we were back at Flegere.
Chamonix 2017 – Ski Touring in the Aiguilles RougesChamonix 2017 – Ski Touring in the Aiguilles RougesChamonix 2017 – Ski Touring in the Aiguilles RougesChamonix 2017 – Ski Touring in the Aiguilles RougesChamonix 2017 – Ski Touring in the Aiguilles RougesChamonix 2017 – Ski Touring in the Aiguilles Rouges
We decided to use the last couple hours of daylight to listen to an avalanche briefing from Jerome and Fanny, and we each conducted a beacon search. It is something that a committed off-piste skier should do regularly and we all benefited from the practice. There was a storm forecast but the skies remained clear as we went to bed and we were a little uncertain if it would arrive….
Chamonix 2017 – Ski Touring in the Aiguilles Rouges
And so begins a new chapter of our aussieskier journey.
It has been apparent to us for a number of years that there would be an appetite for Australians to visit the Alps and experience the amazing off-piste skiing and ski touring that is on offer. Regular aussieskier readers will have observed our own personal journeys beginning in 2010, the year we first started making these sorts of trips. Richard had previously skied in Europe, but never to this extent.
We quickly realised that there were a few key elements to a successful adventure in the alps. First and foremost is guiding – the mountains here are wild and unforgiving. Incredible lifts whisk you to improbable locations within minutes, but with this incredible facility comes an element of danger – primarily avalanches and crevasses, but also local knowledge of snowpack, wind, aspects etc are required to safely navigate these areas. Especially for Australians who have grown up skiing locally, and typically visited resorts in North America and Japan, many of these concepts and skills are rather foreign, and most of us are extremely underequipped to safely ski off-piste in Europe.
Fortunately there are a legion of mountain guides available to safely shepherd you through these dangers and show you an amazing time in the alps. The IFMGA/UIAGM qualification is extremely comprehensive and difficult to obtain and our experiences with these guides has always been extremely positive. We have skied with Jérôme Para since 2010 and he has taken us all over the Chamonix & Aosta Valleys, plus on the Haute Route from Verbier to Zermatt, and also into the Ecrins and Queyras mountain ranges – keeping us safe and showing us a great time.
The second most important element of a successful adventure is transport. We are incredibly indebted to Jérôme and his willingness to travel, we have done thousands of kilometres over the years in his van chasing the snow. The mountains here are huge, and they funnel, magnify and block storms, so being able to drive to where the snow and good weather presents itself is absolutely vital – this might mean crossing through the Mont Blanc tunnel to Italy or over into Switzerland.
Also even within the Chamonix valley, the various resorts are spread out, so while there is a good bus system in town there’s nothing like being dropped off at the door. Without the ability to travel your Chamonix experience will be severely limited and compromised.
Finally there is the need for accommodation. In what is probably a foreign concept to Australian skiers, dotted through the Alps are fully catered chalets. A number of staff are on hand to provide hearty breakfasts and amazing dinners, with daily room service as well. Off-piste skiing and ski touring is an energetic affair and being able to return to a Chalet and relax by the fire or with a beer in the hot tub is just superb, knowing that a delicious dinner is being prepared.
Our first year of hosting tours in the Alps is upon us – due to work pressures we launched our venture a little too late in the year which meant that a lot of interested people were already committed to an overseas holiday but we are amazingly grateful to the small group of skiers who jumped on the opportunity to come along and experience a week of skiing like no other.
Day 0 – Col d’Argentiere
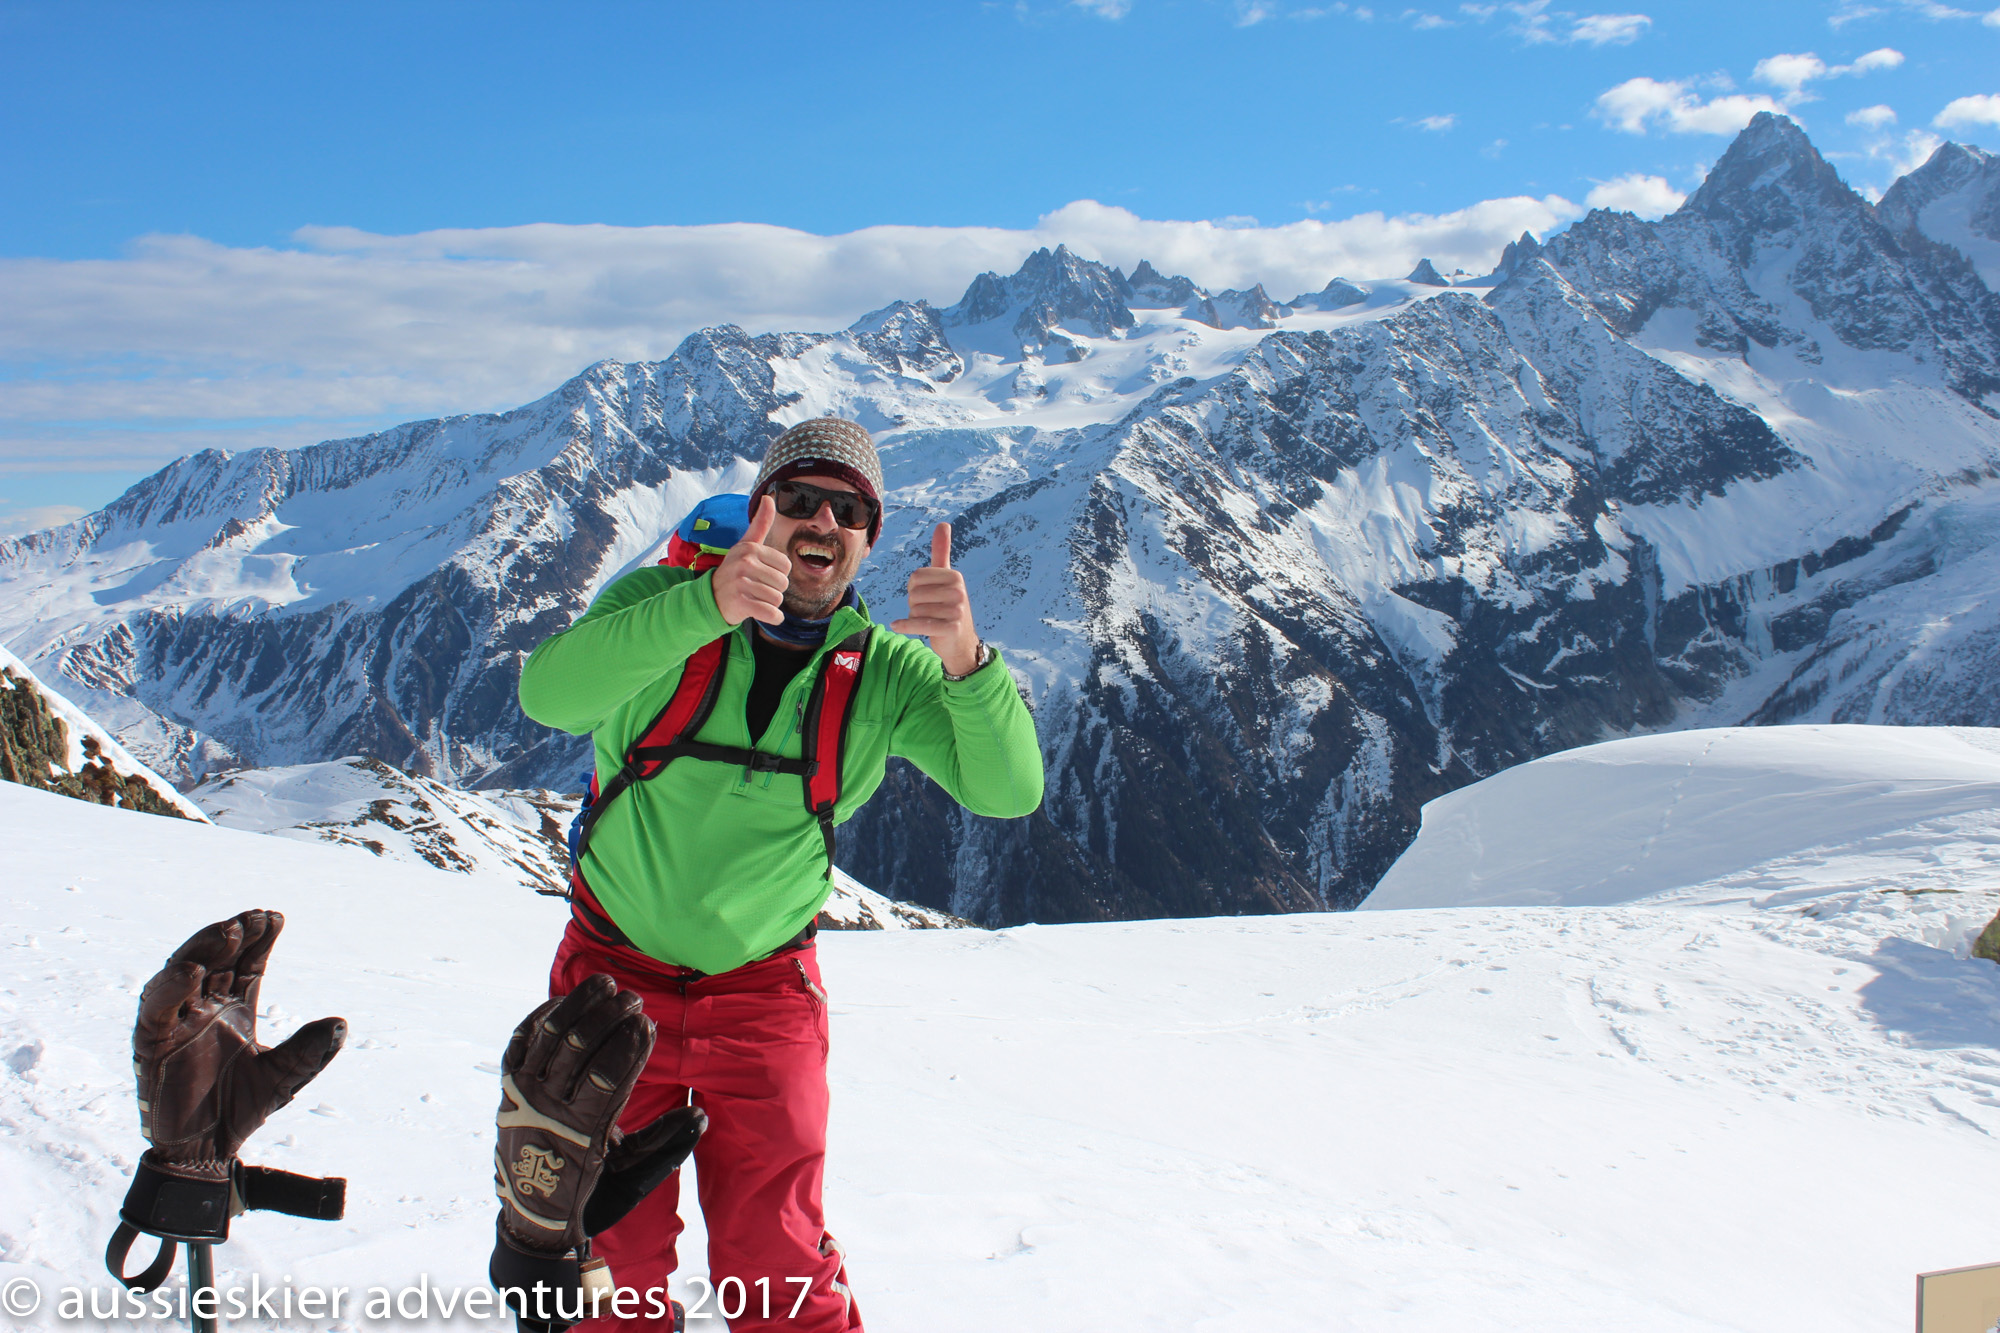
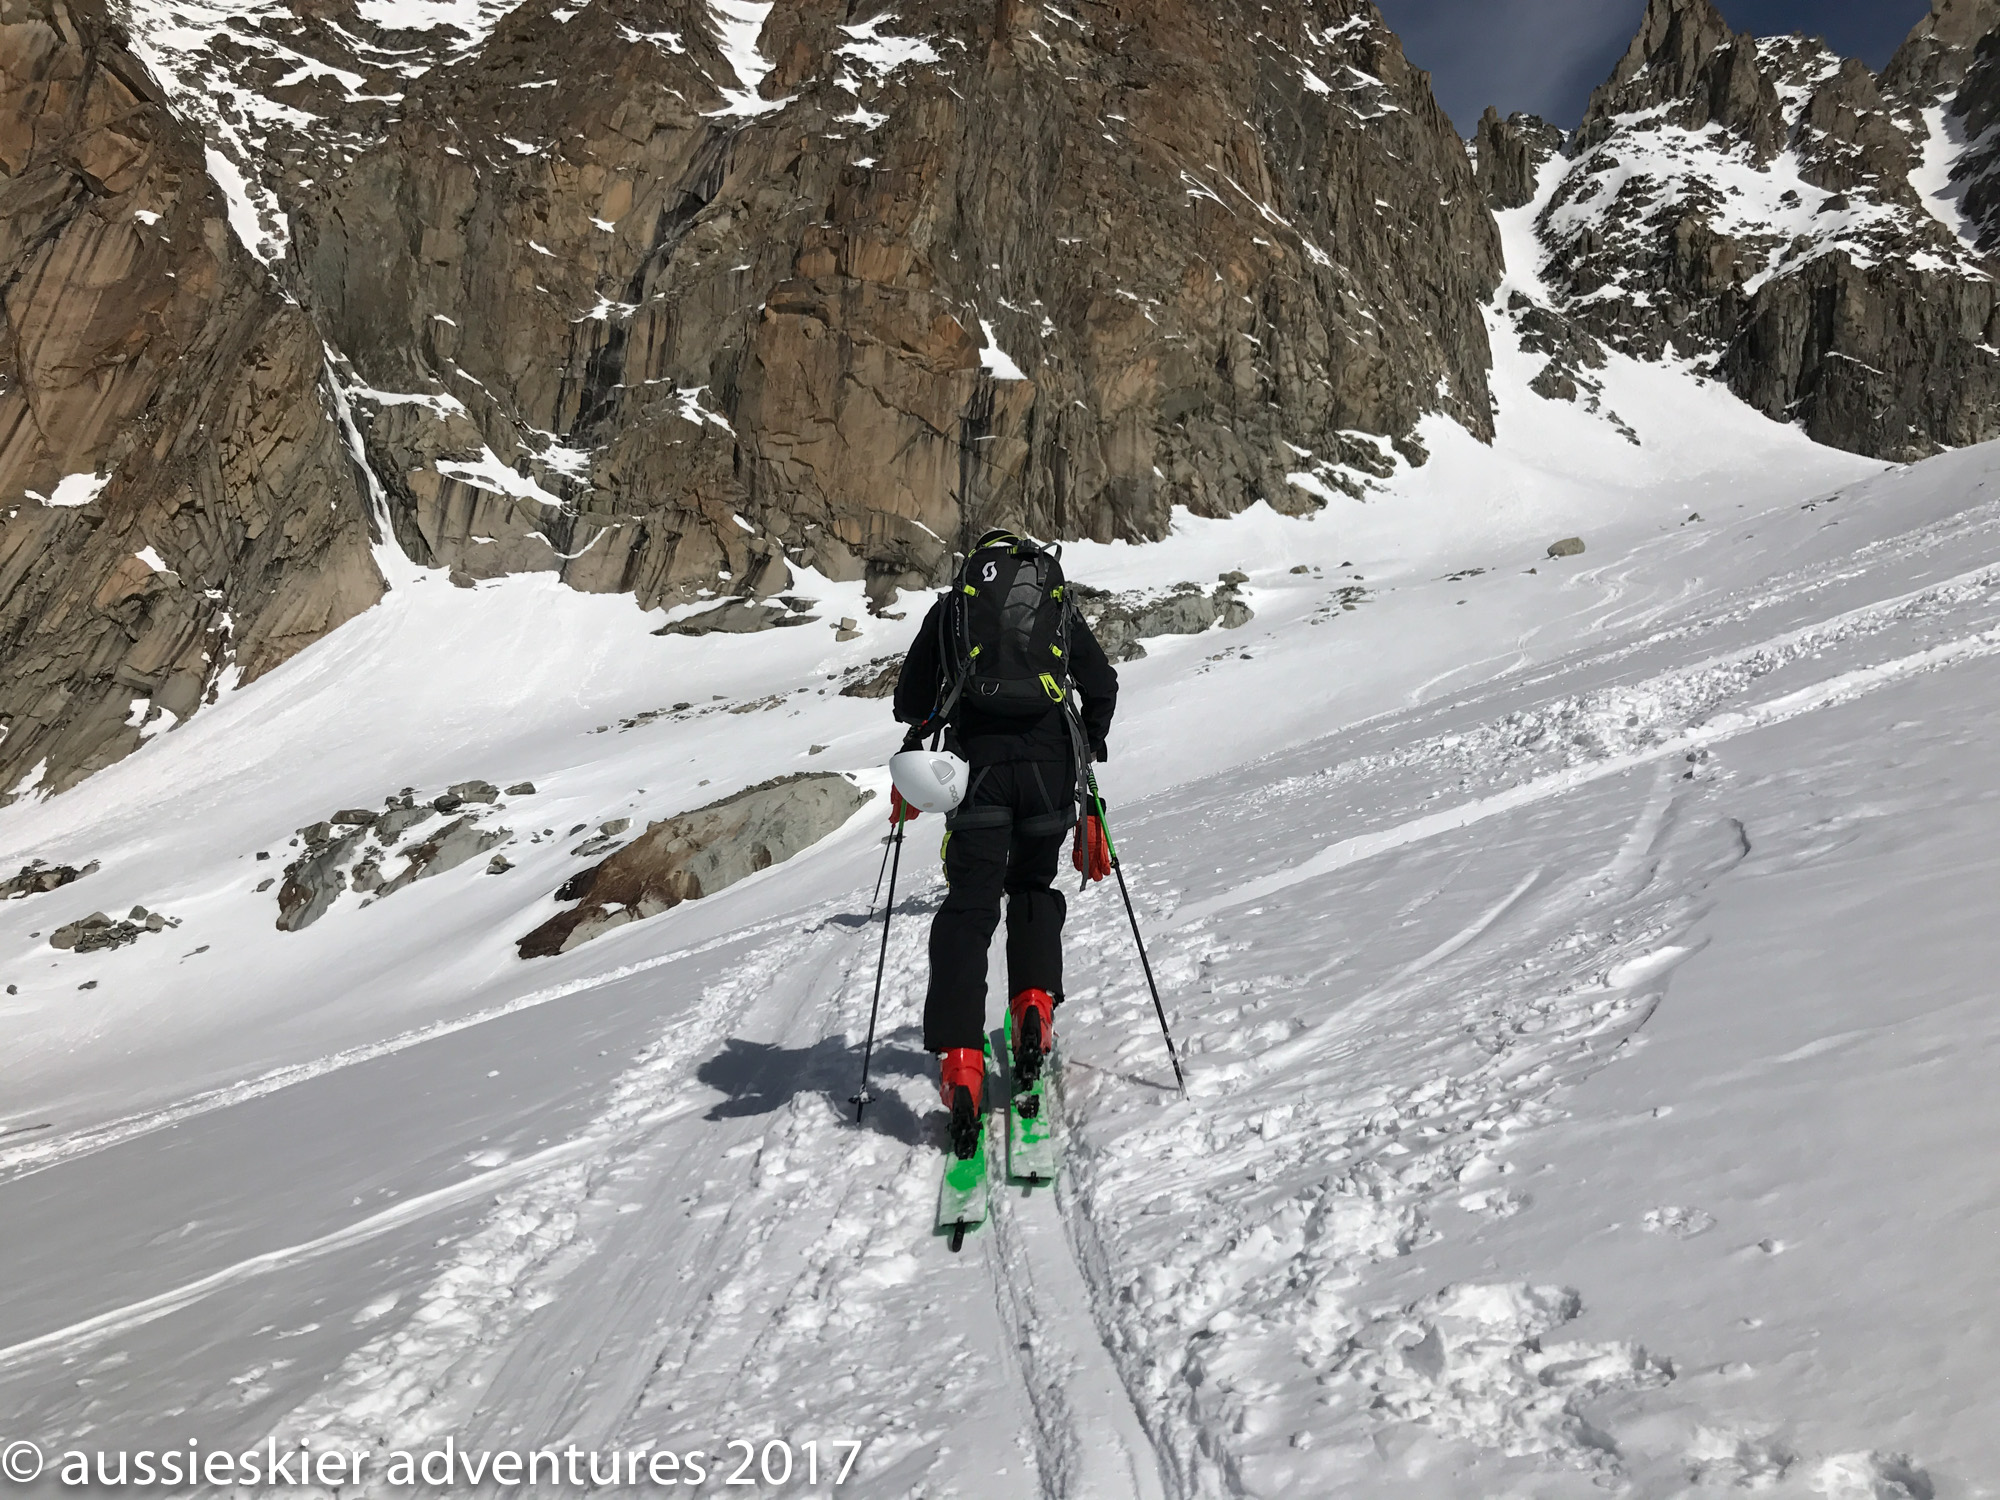
As Nicole and I were warming up in Chamonix and organising the tour, one of our guests Simon let us know that he would need to leave early for work reasons, but he was going to be in town the day before the tour started so I decided to book a guide and take him for a day out. Neither Jérôme or Fanny were available so they suggested their friend Julien and he was a fantastic choice. The weather was fine after a few cm of snow 2 days earlier, so after some decision making the night before Simon indicated that he would like to go touring so we chose a trip up the Glacier du Tour Noir towards the Col d’Argentiere. This is a particularly pretty ski tour that I have done a couple of times before, it’s great as a shakedown day as you can turn around whenever you like and head back down, and the scenery is off the charts. For both Simon and myself this was our first day touring so we were likely to feel the altitude.
We met early at Grands Montets and got the first tram to the top which is always special, we then headed down the Glacier des Rognons towards the Glacier d’Argentiere – this is always a great part of a ski tour from Grands Montets as you have a near 1000m descent often in great snow to warm up before you get going.
Chamonix 2017 – Glacier du Tour Noir
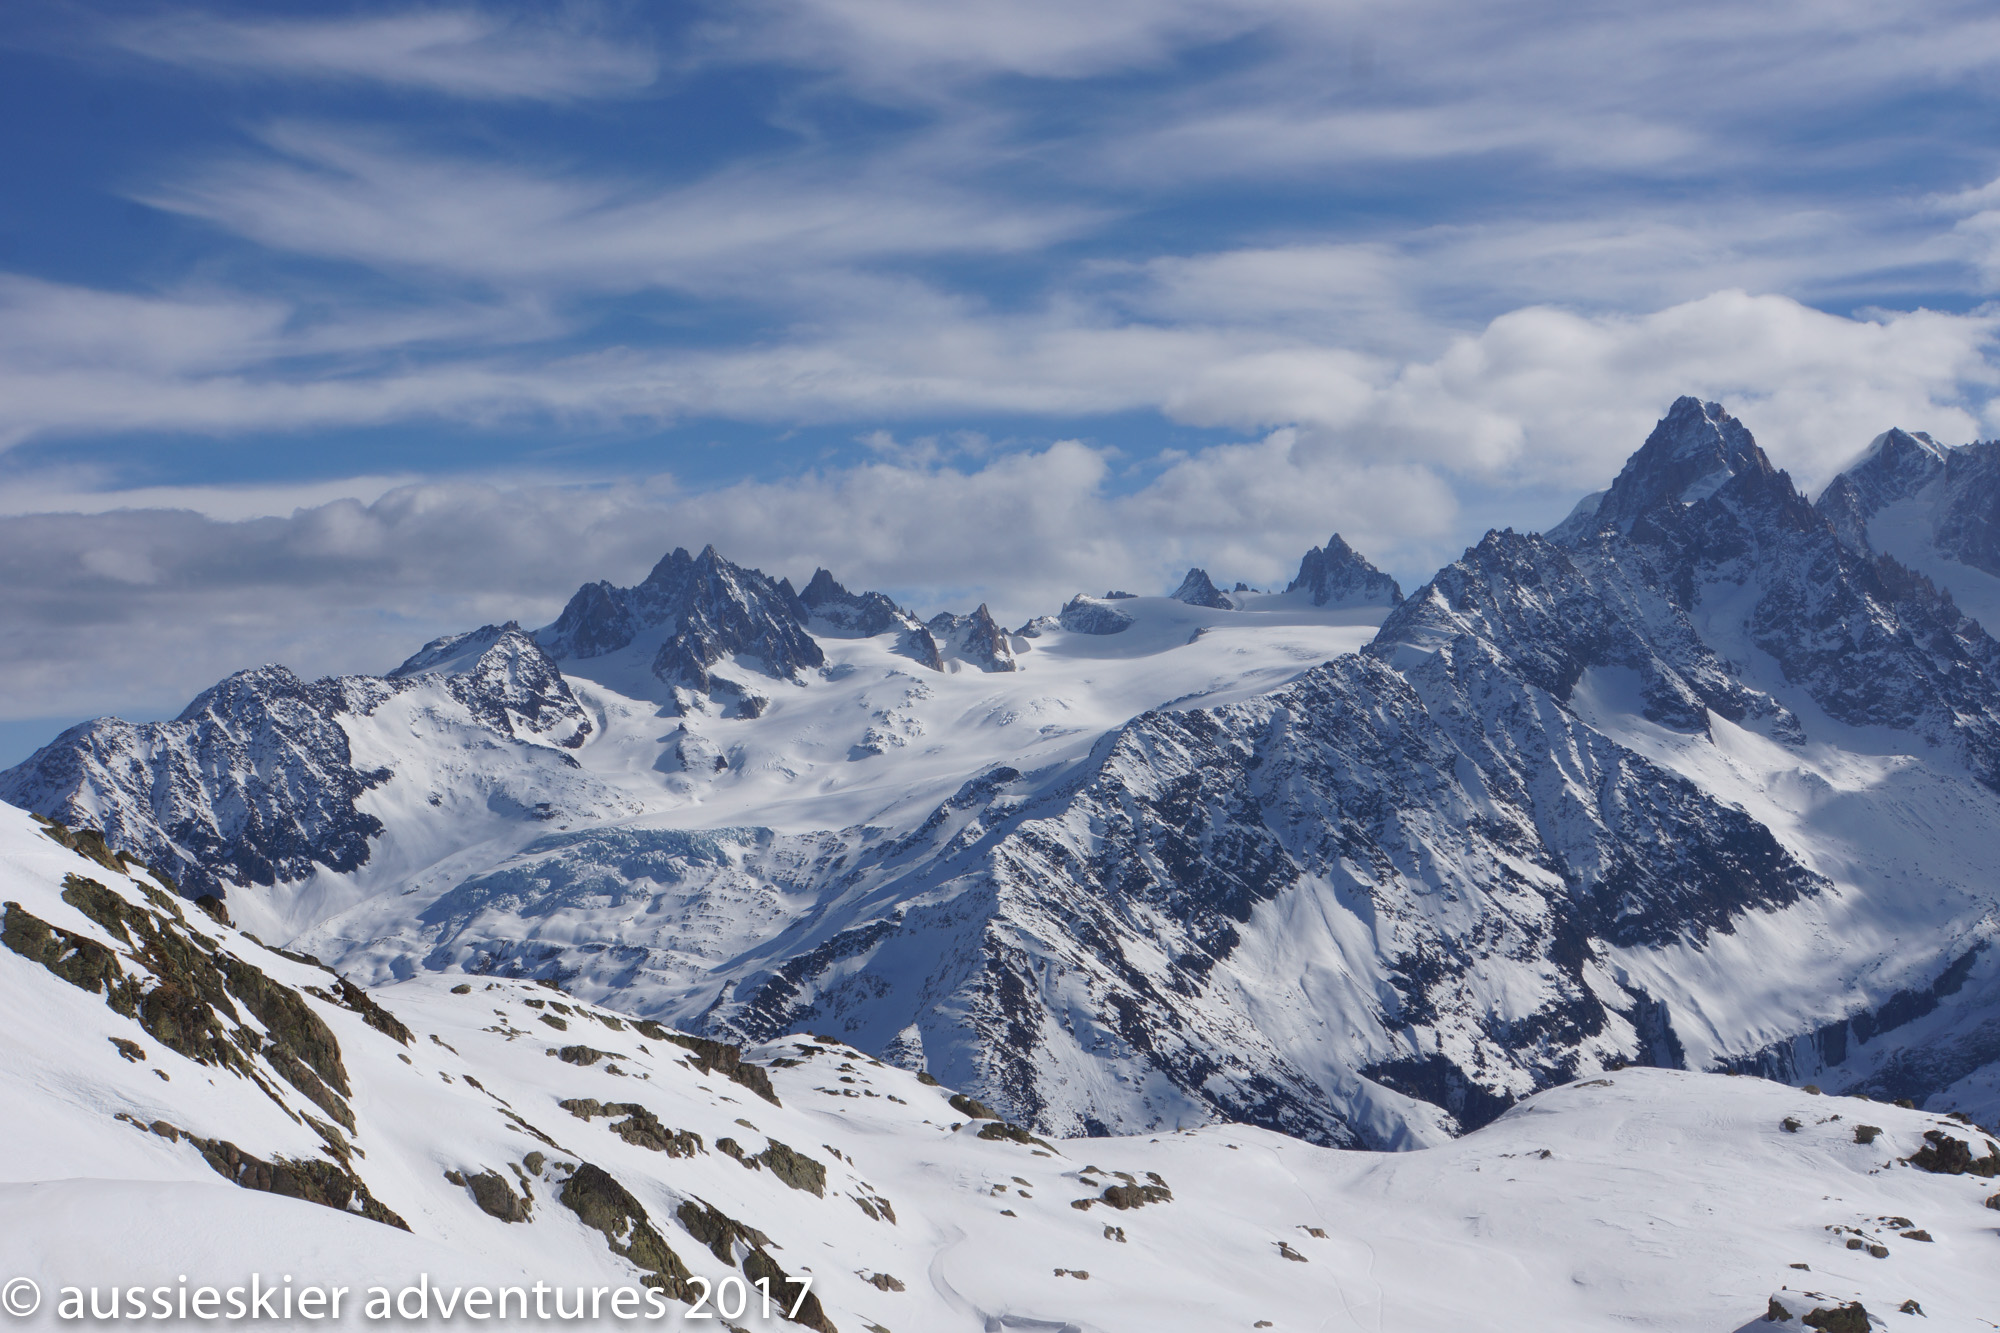
We skinned up once we had descended onto the Glacier and began our trip up the Bassin d’Argentiere – it is a pretty mellow skin with spectacular scenery as you are dwarfed by the enormous peaks that surround you on three sides.
You eventually head up to the left side of the glacier and then the pitch increases as you go on the Glacier du Tour Noir. It was a relatively popular tour that day with a number of parties out all enjoying the sunshine and fresh snow.
Chamonix 2017 – Glacier du Tour NoirChamonix 2017 – Glacier du Tour NoirChamonix 2017 – Glacier du Tour Noir
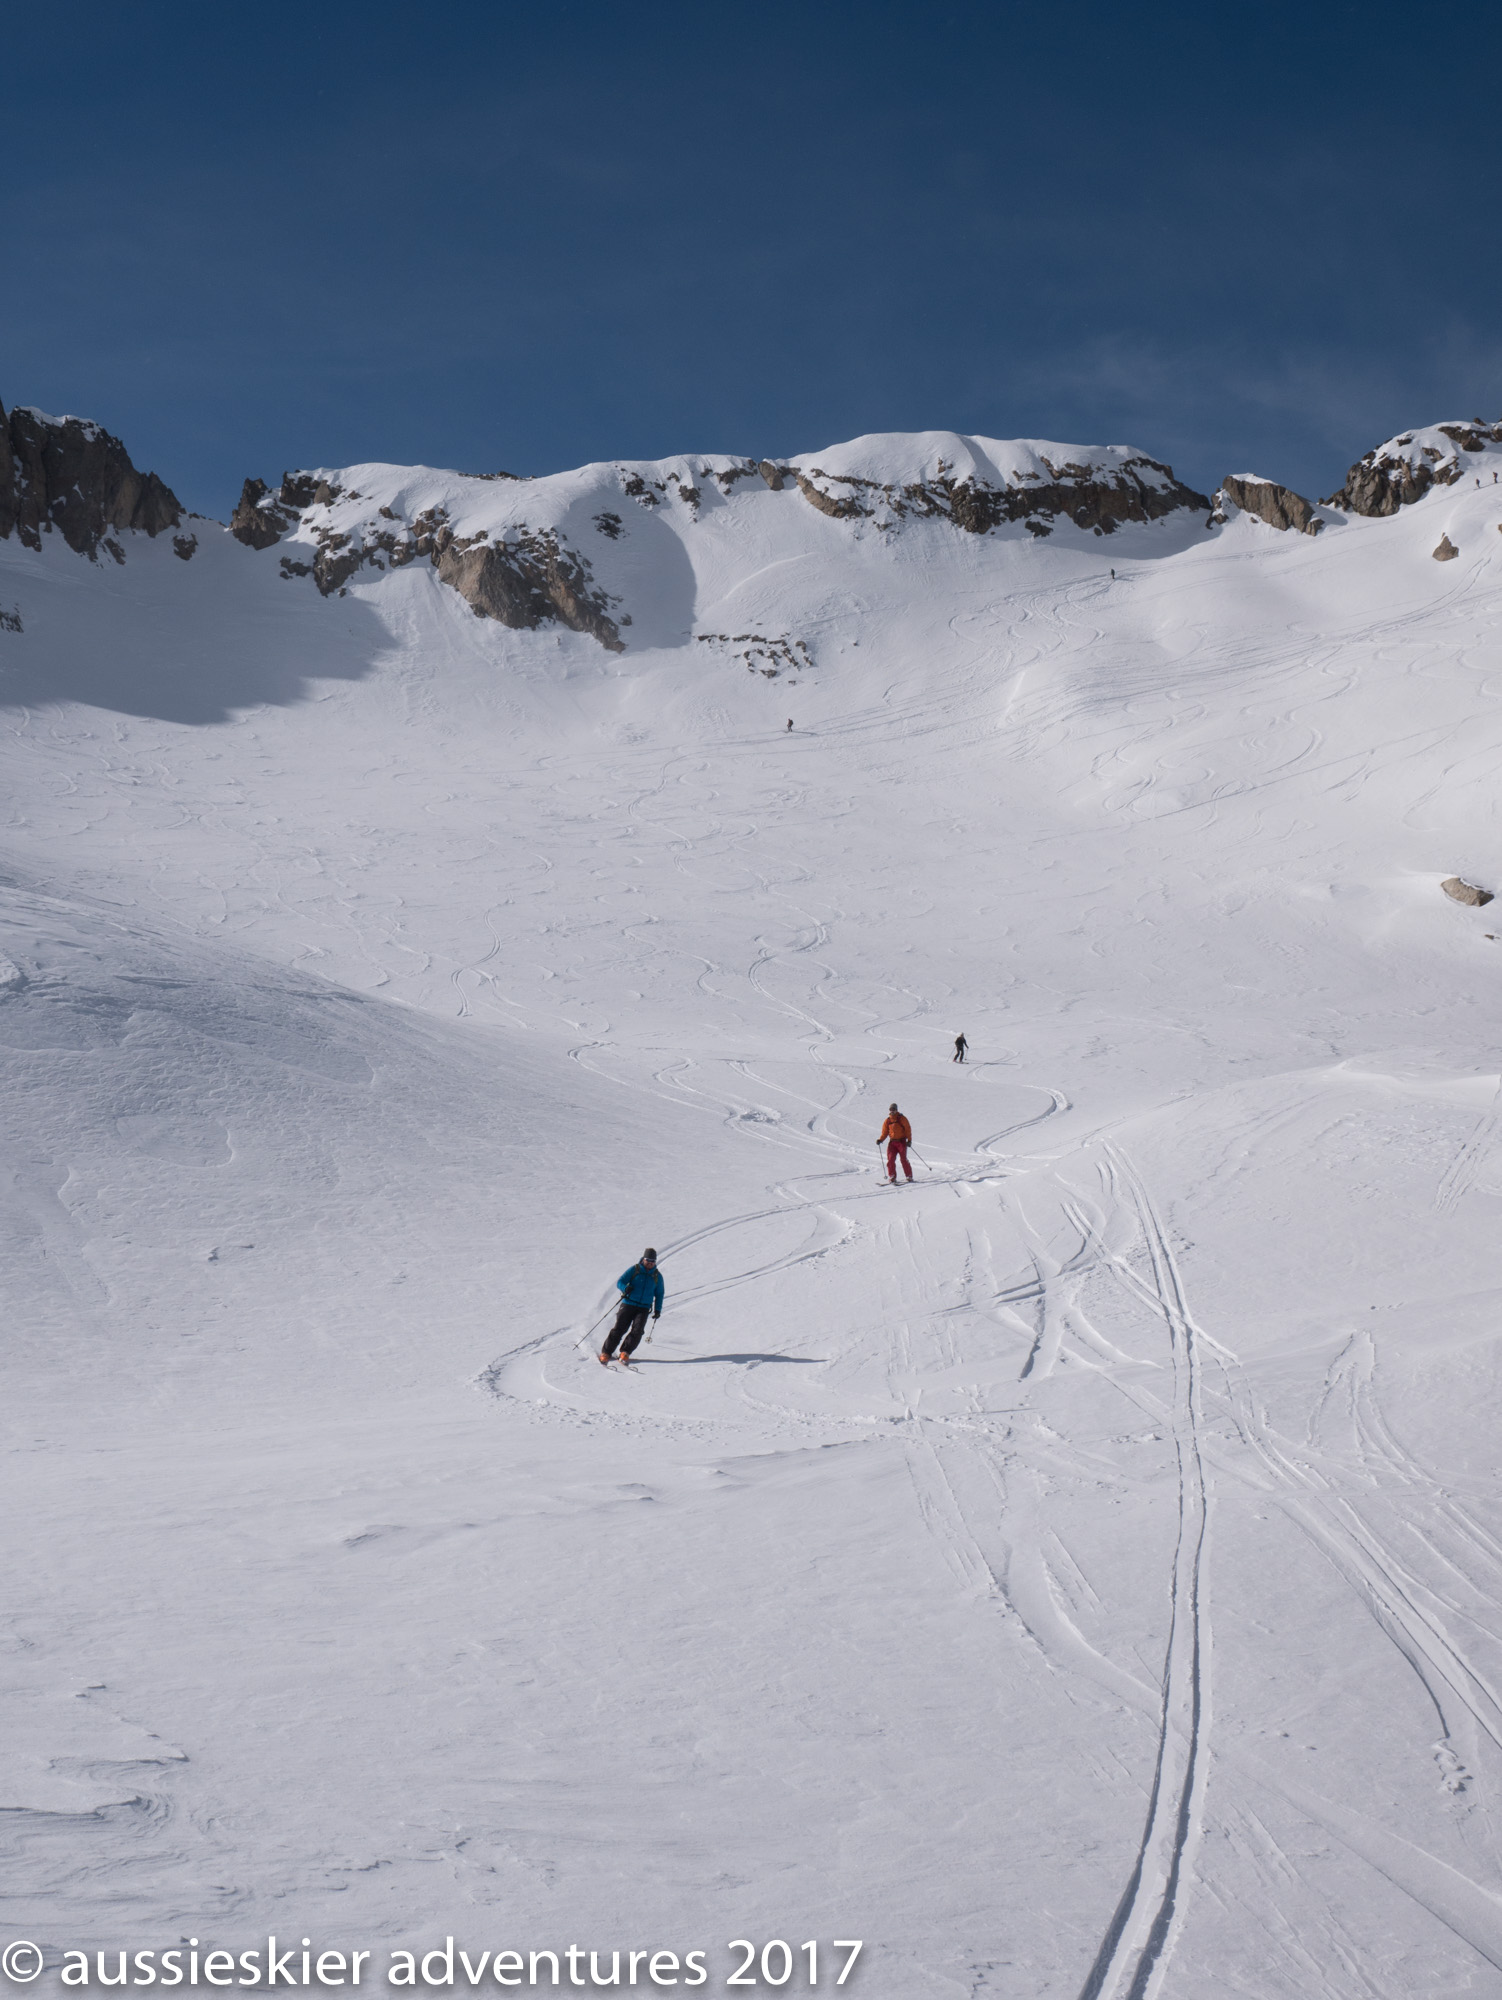
We climbed until we reached approx 600m of altitude gain, at which point there was a nice plateau to enjoy some lunch and the spectacular view, we were still a couple of hundred metres shy of the col, but based on our energy levels and how our legs felt we decided that was plenty for our first day of touring so we transitioned to ski mode and made our descent. We found some lovely fresh snow on the skiers left of the glacier and enjoyed the untracked all the way down to the flat.
Chamonix 2017 – Glacier du Tour NoirChamonix 2017 – Glacier du Tour NoirChamonix 2017 – Glacier du Tour NoirChamonix 2017 – Glacier du Tour NoirChamonix 2017 – Glacier du Tour NoirChamonix 2017 – Glacier du Tour Noir
I really enjoy the ski back from this area as you get a good powder descent, then a schuss along the flat glacier marvelling at the scenery, you then pick your way down alongside a couple of icefalls before you reach the piste at Grands Montets, and then you find yourself on the home trail with snow quality turning to slush at the base – depending on how high you have skinned this run will have descended approximately 2000m vertical and I really like the changing of the scenery and outlook as it progresses, not to mention the extra oxygen filling your lungs and powering your legs.
Chamonix 2017 – Glacier du Tour Noir
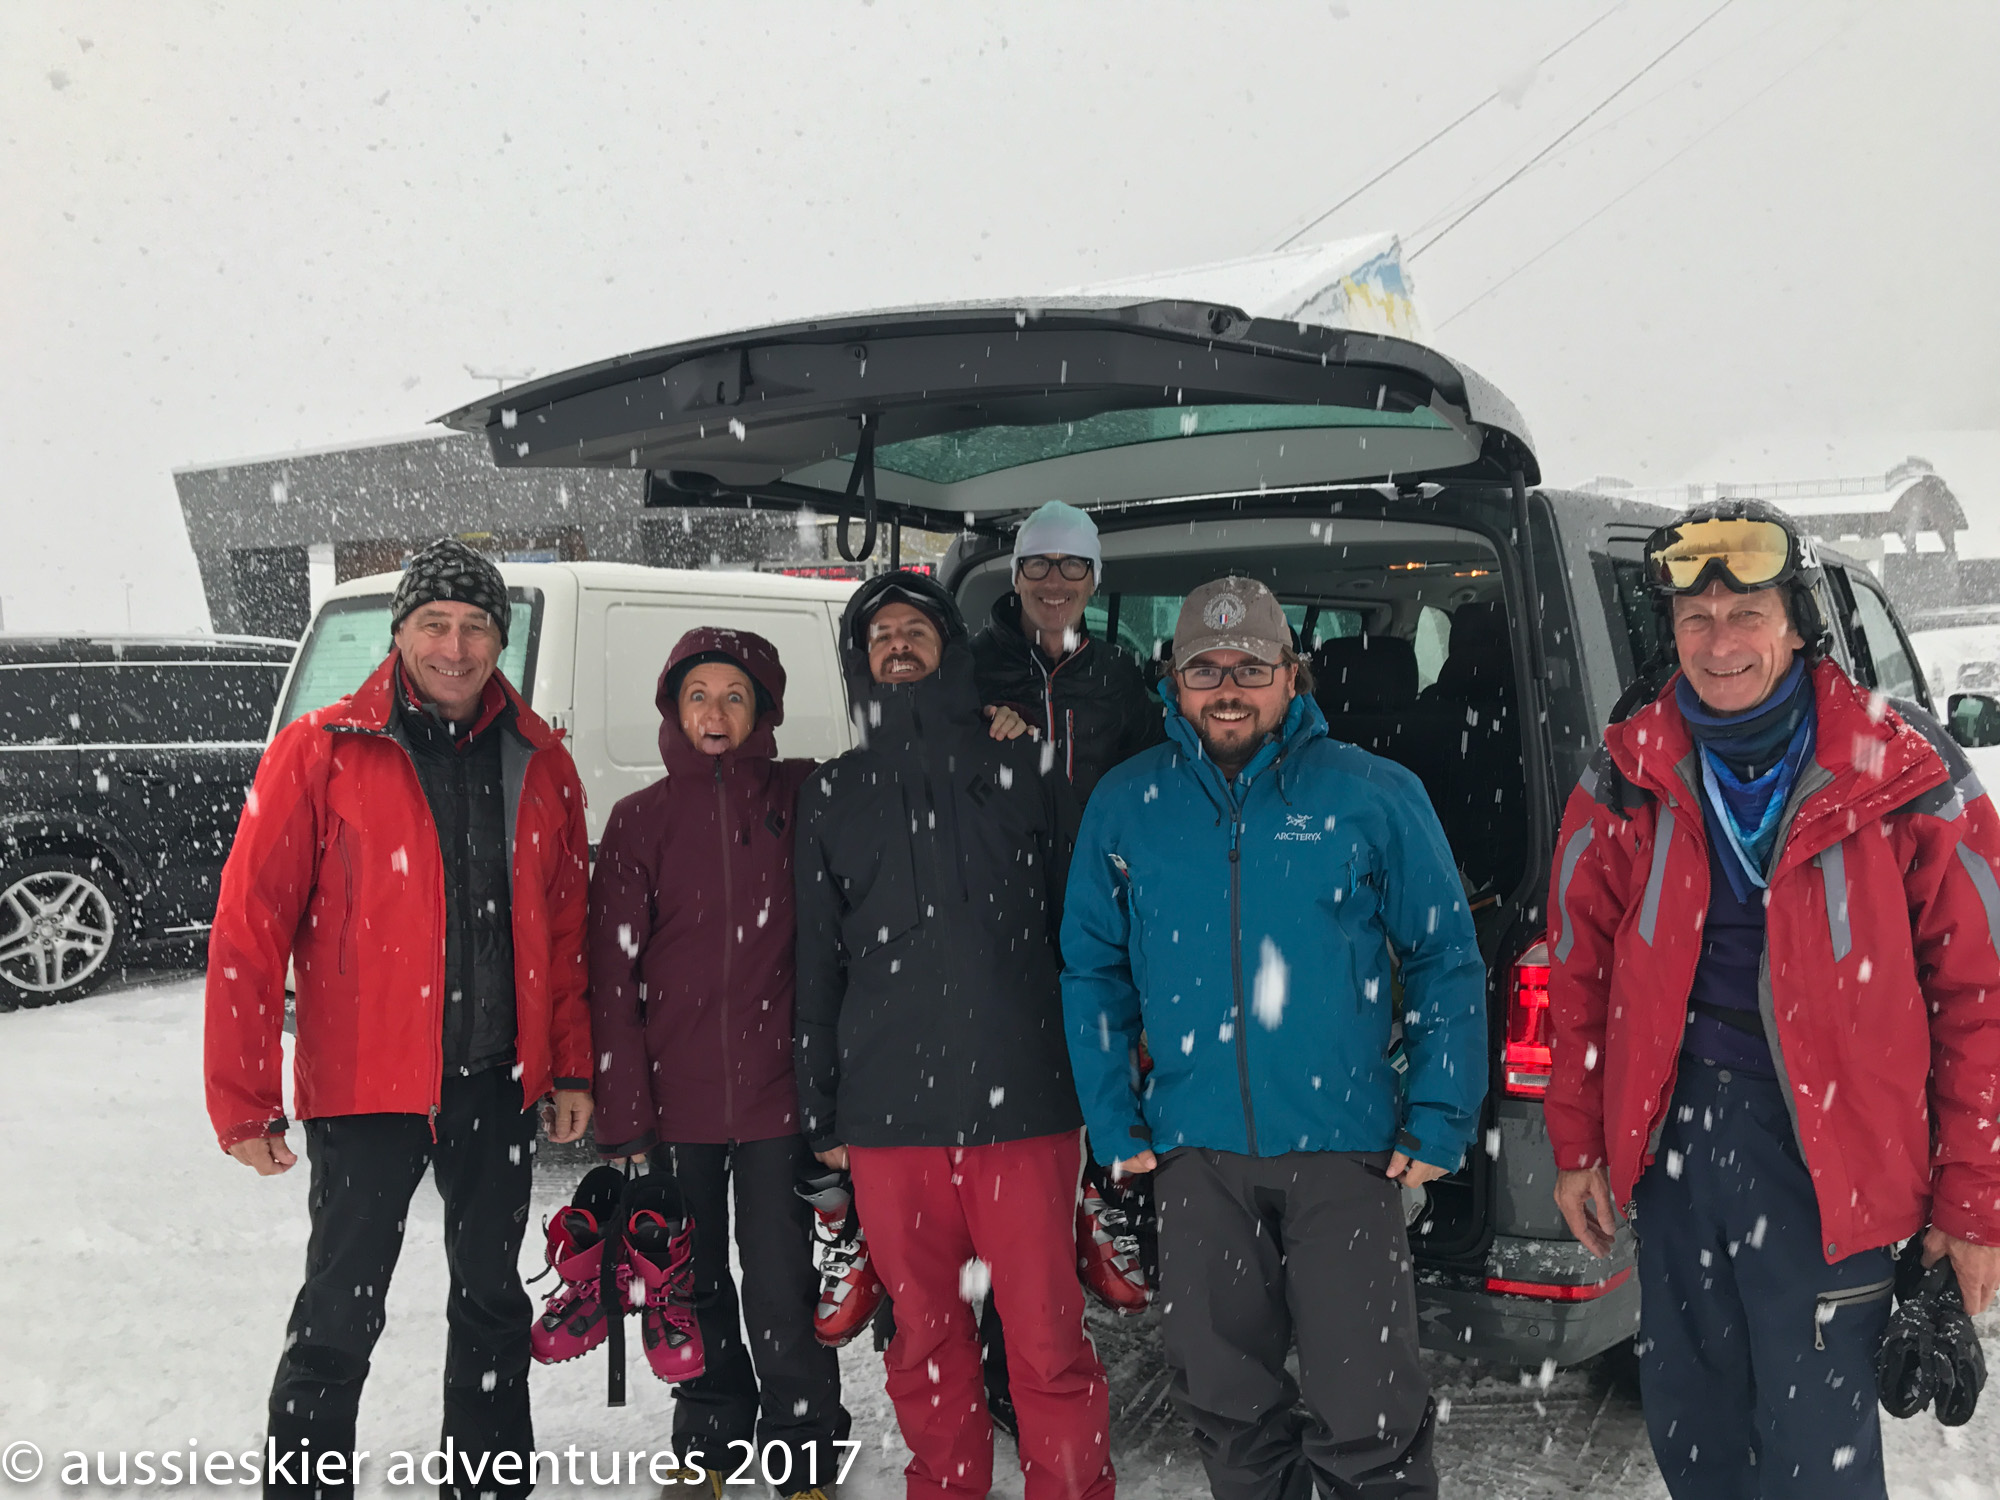
A well earned beer was had at the base, then we said our goodbyes to Julien and we headed back to the Chalet, during the day Nicole had been to Geneva and picked up our van and we grabbed the crew to move in to the chalet in anticipation of a wonderful week ahead.
Regular readers of aussieskier.com will know that over the last couple of years I’ve been doing more and more skiing in the backcountry. Rather than offering this from an expert’s perspective, which it most certainly isn’t, I’m writing a series of posts which are an account of my own personal transition to skiing in the BC. The aim of this series is to give never-evers an insight into the basics if they are considering a transition of their own.
Part 1 of this post focused on the motivation behind becoming a backcountry skier, Part 2 of this focused on Safety, and this section will focus on Equipment. I have already covered the Safety Equipment required in Avalanche zones so we will just be talking about the hardware for getting around in the BC.
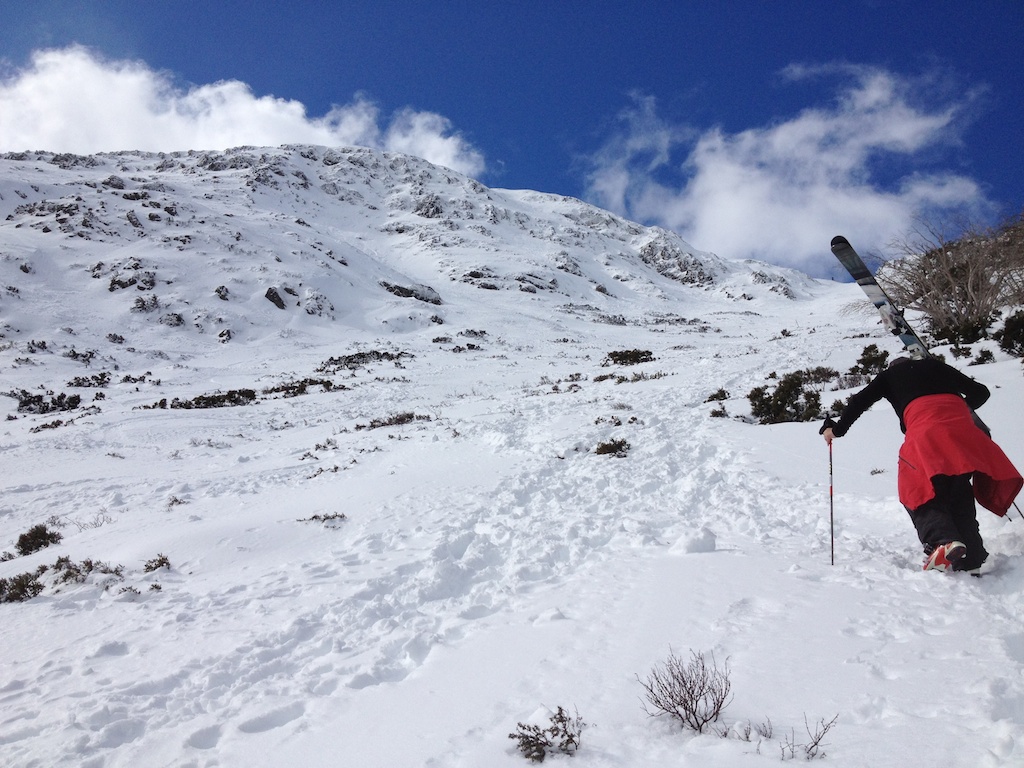
So – what equipment do you need to go backcountry skiing. Well the short answer is none! There’s absolutely nothing stopping you from slinging your skis over your shoulder and going for a walk to an untouched area. Plenty of top-notch skiing is accessed by a short bootpack from the top of a lift, however the further you intend to venture, the more this can be assisted by specialist equipment.
Hiking Up
Backcountry skiing is a world awash with equipment – obsessed with shaving grams with exotic materials. But in this article we will focus on the bare minimum equipment required for a hitherto Alpine Skier to venture into some slackcountry/backcountry lines.
Fundamentally the two most important items are Touring Bindings and Skins. There are devices called Alpine Trekkers that even remove the need for touring bindings, but having been on a long tour with a group member using trekkers, I cannot recommend them in any way shape or form.
Touring bindings accept either an Alpine or Touring Boot, and have two modes – one where the heel is locked down for skiing, and one where the boot is allowed to pivot at the toe permitting a walking stride. Skins are a strip of material, with nylon or mohair on one side, and sticky glue on the other. The material has a plush direction which means that when the skins are stuck on the ski, the plush allows them to glide forward but prevents them from sliding backwards. The combination of these two pieces of equipment means that you can walk up the hills, and then ski back down. We will talk about Touring boots a little later on, and while they are a very useful piece of equipment, they aren’t 100% necessary for an Alpine skier dipping their toes into the touring world.
Nicole Skinning
Touring Bindings
Touring Bindings have evolved from fairly flimsy arrangements that were quite unsuitable for vigorous downhill skiing, to modern day equipment which permits efficient uphill movement and uncompromised descents. Marker, with their introduction of the Duke/Baron range really blew this market wide open. While the weight of these bindings is generally considered too heavy for serious backcountry skiing, they have maximum DIN ratings of 16-13 respectively which cater for the most aggressive of skiers.
At the other end of the spectrum is Tech bindings, such as the G3 Ion – these are a super-minimal, lightweight touring binding designed to power skiers deep into the backcountry. Their secret is that they are suitable for some rather hardcore descents as well, which is belied by their mousetrap-like appearance. Most of the crazy ski touring/ski mountaineering exploits you see on the net are done on Tech bindings, but their design means that they are not much fun on firm snow due to the rigid ride created by their lack of elasticity provided by a conventional style bindings.
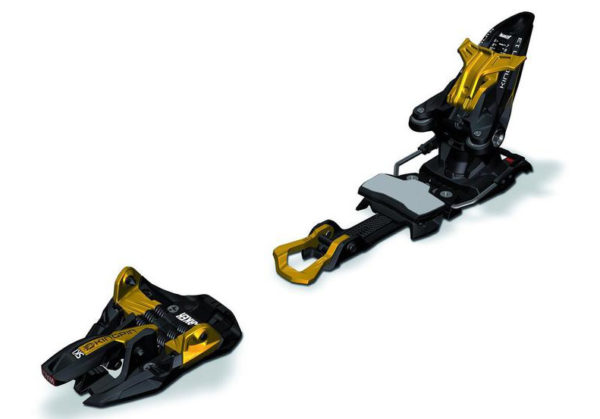
Marker have recently released a binding called the Kingpin that aims to address these shortcomings, combining a light weight traditional heel piece with a lightweight pin toe piece. Tech bindings require special inserts in the boot toe/heel – these are pretty commonplace amongst Touring boots but not generally available in Alpine boots.
So as with many aspects of backcountry equipment we are seeing a convergence of traditional Alpine companies heading towards BC gear, and traditional Backcountry companies beginning to cater for people that want to ski fast, on big skis, and hit jumps in the BC. However for somebody just starting out in the BC it would be better to opt for a binding such as the Baron or Marker Tour F10/F12, or the Salomon Guardian/Atomic Tracker. The reason I say this is that they have barely compromised ‘skiability’ and it also reduces the cost of entry as a ski mounted with these bindings can also be used in-resort whereas Tech options generally lend themselves to a touring specific rig.
Marker Kingpin Alpine Touring Bindings
Skins
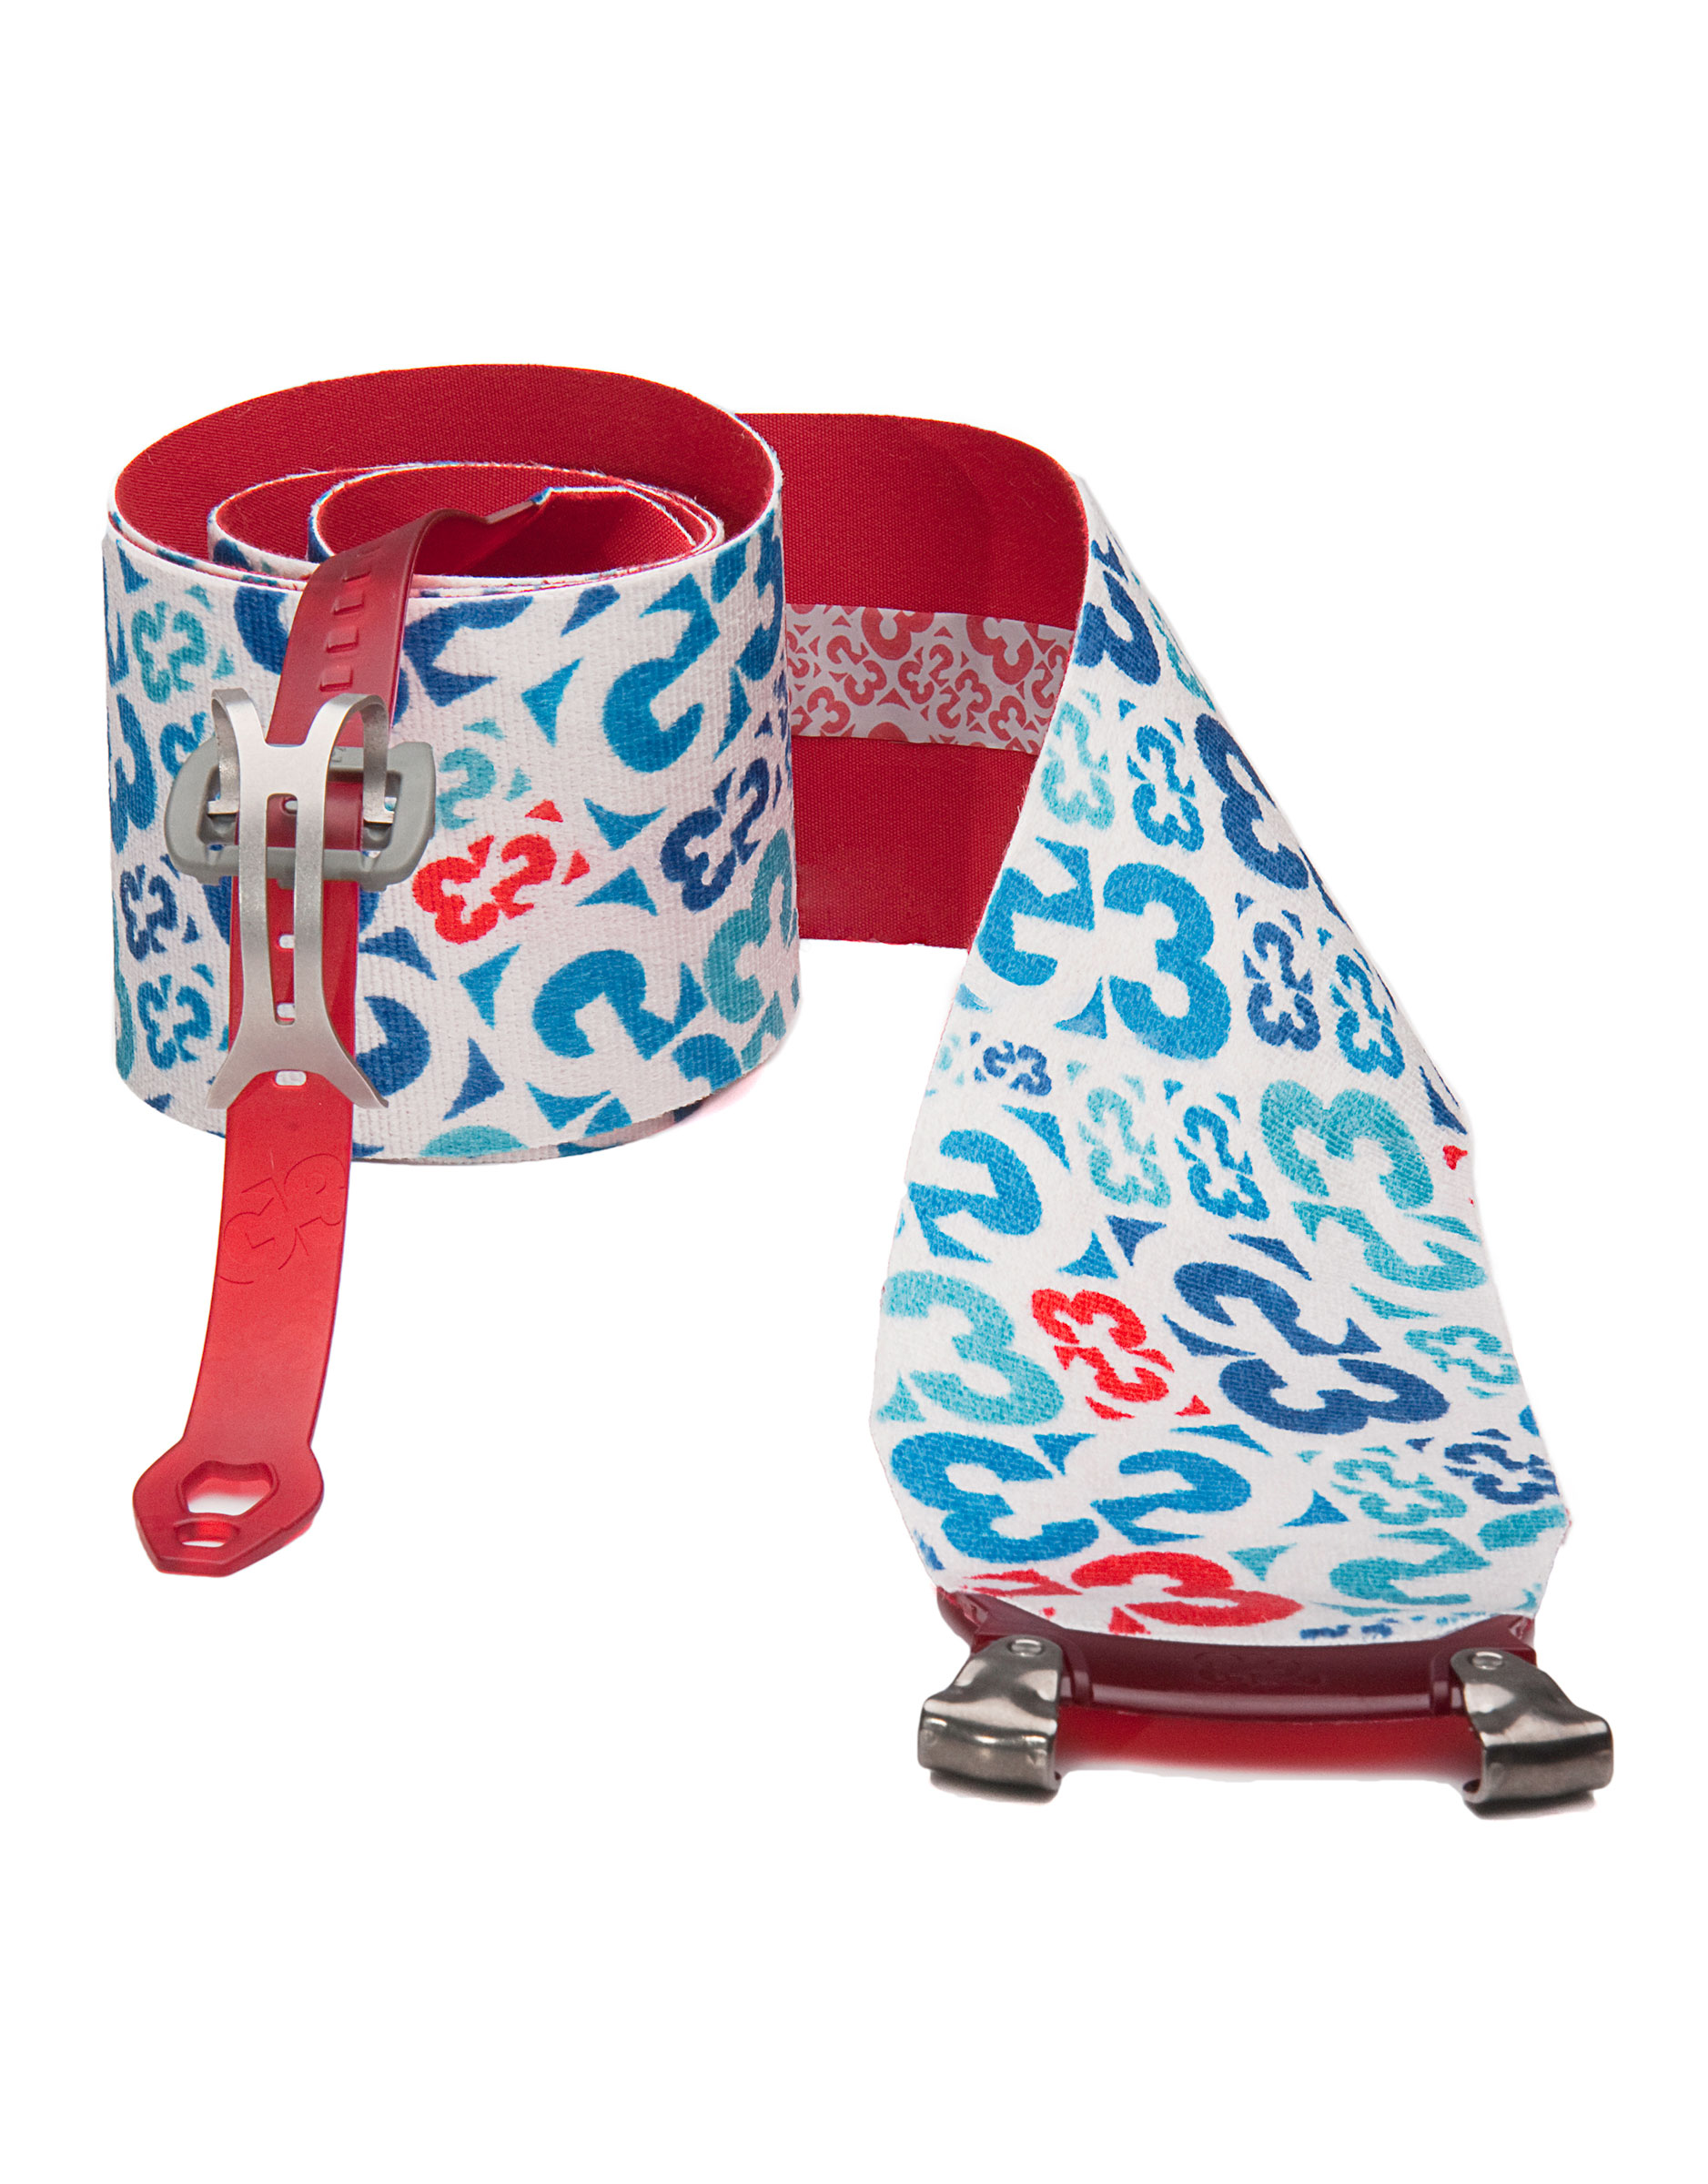
Skins are a pretty simple proposition – firstly find a skin that will cover most of the base of your ski – choose a skin width that matches or is slightly less than the width of your ski tip, and use the supplied cutting tool to trim them to shape. More experienced backcountry users opt for less skin coverage on their bases but for a beginner it is better to have full coverage to reduce backwards slipping on icy sidehills etc. It is very important to take good care of your skins, especially the glue. Always use the supplied ‘cheat sheets’ to cover the glue when packing skins away, and keep them stored in their bag so no debris can get stuck in the glue – once it’s in there, it will be there forever. When you are a long way from home, the most important thing in your backcountry kit is the glue on your skins, so take care of them. Some people even store their skins in the freezer over summer to keep the glue in prime shape. When going through changes of temperature it’s possible for ice to form on the skin plush which then collects large amounts of snow – you can rub some wax on the skins to alleviate this, or even chocolate works due to the fat content. I’ve got some funny looks rubbing chocolate onto my skins, but it was much better than persisting with 6″ of snow caked on the bottom.
It’s not necessary to have an Touring specific ski as any alpine ski will do, but there are a few characteristics that are useful. A waist width of 90-100mm is recommended unless you’re regularly touring in heavy snow areas like Utah or Japan. 90-100mm will allow you to deal with most conditions that the BC can present – not too wide for icy steeps, but enough girth to make the deeper snow enjoyable. Tip rocker is a fantastic feature, as you encounter all kinds of crusts in the BC, but a twin-tip can be very annoying. It’s very useful to be able to stick your ski tail deep into the snow, when fitting skins or even pegging a tent. Also twintips can get annoying & tangled when doing kick turns. Tail rocker is fine, but as long as it’s not accompanied by a noticeable twin.
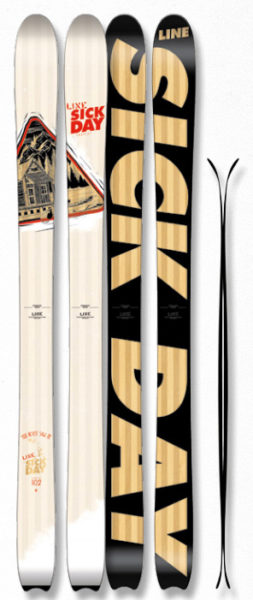
Once you decide to venture further into the BC then the weight of skis becomes a factor. Many companies have lighter weight versions of their skis like the Line Sick Day Tourist I took to France, which is a lighter weight version of the Sick Day, and then there are dedicated BC ski companies like Dynafit and Black Diamond. My first touring skis were a pair of Volkl Gotamas that were previously my alpine powder skis – they weren’t perfect but I had spent up big on the rest of my touring gear and remounted them & used them until they died. It was fine and they worked for a number of trips until I could replace them with something more suitable.
As mentioned earlier touring boots aren’t 100% necessary to begin ski touring, but if the bug hits you will want them before long. They are generally categorised by their lighter weight, switchable walk mode and a grippy sole, often made from Vibram. The walk mode allows the cuff to pivot well back beyond vertical and the grippy sole is a godsend when scrambling around. There are many other features of touring boots but these are the three which categorise them in comparison to Alpine boots. Many touring boots also feature the heel/toe fittings for Tech Bindings, and it’s worth noting that unless your Alpine binding has an adjustable toe height that a touring sole will not necessarily fit in the binding and release correctly.
As with the touring bindings, we are seeing a convergence of traditional Alpine companies like Atomic, Tecnica, Salomon etc producing backcountry oriented boots models, and traditional BC companies like Dynafit and Scarpa producing stiffer models for skiers who want to go faster and drive bigger skis in the BC.
As for specific models – well that’s up to your bootfitter. Every foot is different, and the various brands suit different shapes so consult a good quality local bootfitter for a recommendation. If you want to know more, have a chat with Tom, our bootfitter by phone, email or dropping past the shop!
Dynafit Vulcan Touring Boot
Other
You don’t need specialist poles to begin ski touring, but as with boots if you find you like it, you will want to get new poles. Good touring poles are lightweight, adjustable in length and have a foam or rubber grip that extends below the usual handle so you can keep your hands level on sidehills.
There are plenty of other ancillary items that you will use to make life easier & safer in the Backcountry, like a good quality Backpack, Ski Crampons plus a multitude of other items which go beyond the scope of this article as a guide for beginners. And that’s even before we get into the clothing!!!
Please don’t hesitate to contact us if you require any assistance with gear to get you going in the BC – we are stocking a small range of items which will continue to expand & reflect our on personal expansion into Backcountry skiing.
Regular readers of aussieskier.com will know that over the last couple of years I’ve been doing more and more skiing in the backcountry. Rather than offering this from an expert’s perspective, which it most certainly isn’t, I’m writing a series of posts which are an account of my own personal transition to skiing in the BC. The aim of this series is to give never-evers an insight into the basics if they are considering a transition of their own.
Part 1 of this post focused on the motivation behind becoming a backcountry skier, this part will focus on the safety aspects of skiing beyond the ropes as this is the least exciting therefore the most neglected aspect of a budding backcountry skier’s education. Part 3 goes onto to look at equipment that can aide your adventures out into the deep.
Safety
I apologise in advance for the preachy tone of this article, but it never ceases to amaze me just how clueless Australians are when it comes to this topic, and just how aggro they become when confronted with it. Don’t believe me? Head to the Peak at Niseko.
My intention in this segment on Safety is not to educate on the specifics of avalanche safety, as I am vastly unqualified to do this, but to emphasise that no matter how experienced a resort skier may be, they need to swallow their ego, remove their hubris and educate & equip themselves appropriately to ski out of bounds.
Alpine/resort skiers, particularly those who ski regularly in North America & Japan are coddled and clueless when it comes to safety.
How do I know this? Because it accurately describes me a few years ago.
On my trip to Europe in 2009/10, other skiers in our guided group did not believe that it was possible to become an accomplished off-piste skier with such little knowledge of snow safety. Given I had worked in the US for 9 full winters and also holidayed there for another couple of months of skiing, I could ski just about anything places like Jackson Hole and Snowbird could throw at me. I skied hundreds of days of powder, but due to the fact that it was all inside the ropes I was under the protection of the various Ski Patrols and skiing in areas that they had assessed, bombed and deemed safe for skiing by skiers with no need for avalanche knowledge or safety equipment.
Richard in Cortina Powder (c) Mark Virgin
However once you pass outside the ropes, or venture off the pistes in Europe, you are 100% on your own and responsible for your own safety.
If there is no ski patrol or avalanche control, avalanches can occur on any slope over 30degrees of steepness – unfortunately for skiers 30degrees is equivalent to a mild black run, and the angles we like to ski on most are the ones where avalanches are most frequent.
Avalanche deaths have occurred just beyond the ropes and in sight of lifts – one such example is in 2005 when I was skiing with a friend at The Canyons Resort in Utah – at the top of the 9990 lift is a BC gate and an inviting open bowl with fresh powder. My friend suggested that we ski there, despite us having no avalanche equipment and the danger being particularly high. I disagreed, and the next day there was an enormous avalanche in that area that killed a snowboarder. The most tragic element of this story is that this person did own the right gear – it was in his car.
Avalanche Education:
Beginning an education in avalanche safety is a two pronged approach: First, acquiring the knowledge required to understand why and how and where avalanches occur, and how to move in the mountains in a safe manner. Second is acquiring the basic safety equipment and being trained in its use.
The starting point for an education can be as simple as attending a free (or very cheap) avalanche awareness seminar – these are often held in resort bars and ski shops – I have been to such seminars in Salt Lake City, Val d’Isere and Chamonix. In addition there are some great written resources on the topic such as Bruce Tremper’s book ‘Staying Alive in Avalanche Terrain‘. And if you decide to formalise your education you can attend a course such as the 2 day Canadian AST Level 1 I participated in at Mt Hotham in August last year.
AST 1 Avalanche Course – Mt Hotham
A formalised curriculum will give you the basics you need in order to understand the formation of avalanches, the terrain and weather cues that tend to trigger them, how to evaluate the conditions, how to read and understand an avalanche report, and more recently how ‘human factors’ and group dynamics can lead to otherwise educated people into making bad decisions. They also tend to include a day in the field practicing rescues and moving around in uncontrolled terrain.
If you aren’t confident with your safety skills and still wish to ski/ride off piste then your best option is to engage the services of a professional, qualified guide.
Equipment:
The fundamental safety equipment required is a Beacon, Shovel and Probe. All of these are available on the aussieskier.com Gear Store
Beacon – An avalanche beacon (or transceiver) is a device that you wear around your upper body, inside your clothes strapped on your base/thermal layer but on under all other layers. When in ‘transmit’ mode it continuously sends out a signal on the 457Khz band, which is able to be detected by other beacons in case you are trapped in an avalanche. Put your beacon on, and turn it on when you are getting dressed at home, and don’t take it off or turn it off until you are at the safety of the carpark or bar. AAA batteries are cheap, don’t turn it off at lunch to save power, accidents have happened this way.
The best beacons are by far ‘Digital, 3 Antenna beacons’ such as the Pieps DSP Sport , BCA Tracker 2 or Tracker 3, Mammut Barryvox, Barryvox S and Ortovox S1. 2 Antenna or Analog beacons are still adequate but the raw speed in which a novice user can search with a 3 Antenna beacon is excellent.
Shovel – Shovel characteristics are important, and become quite apparent when participating in a simulated (or actual) rescue. Simply put, when you’re trying to dig out someone from under a couple of metres of snow you need a tool, not a toy. Don’t bother with plastic blades, these are for building jumps not digging out your mate. The pressure and friction of an avalanche compresses snow into concrete and a metal bladed shovel is necessary to chop this compacted material into blocks and remove it. Shovels with D-grip handles are also more efficient, and you should also look at the ease of assembly especially while under pressure when the clock is ticking. Shovel size is important – too small and you will never get through the volume of snow required, but too large means heavier loads which leads to inefficient technique – this is a personal preference based on your strength etc. We have two shovels available for sale, the G3 AviTECH is more suitable for a larger male with its generous blade and D-Grip, and the G3 SpadeTECH which is a more compact model suitable for females/teens
Probe – an avalanche probe looks like a collapsible tent-pole and is used to pinpoint a buried person in the snowpack after a transceiver search – this reduces the time and effort required to dig out. A good probe is at least 240cm long up to 320cm, typically made of aluminium or carbon, and in ideal cases has a fast internal draw wire and lock to assemble the pole in a rush. While unassembled probes can lead to Mr Bean-esque fumbling, given that skiing is often on a slope the best way to counter this is to toss the sections to your downhill side, pull on the wire and lock in to place. It’s also important to keep your probe in its protective case inside your pack when it’s not in use as any little dings on the end of the sections can prevent its assembly, rendering it useless. We stock the G3 SpeedTECH 320cm Probe and the Black Diamond Quickdraw Probe in two sizes, 240cm and 280cm.
Rather than fishing around different combinations of Beacon, Shovel and Probe, many companies offer a combination package. This gives you all three essentials often at a discounted price. The Pieps DPS Sport Set is an example we carry.
However – these three items are completely useless unless you are trained in their usage and practice regularly. Formal training is available from Avalanche Course providers and is included in courses such as the AST Level 1.
AST 1 Avalanche Course – Mt Hotham
Avalanche Airbags: While the Beacon/Shovel/Probe trinity are the absolute fundamental pieces of equipment, airbag packs are fast becoming a device recognised to mitigate avalanche burials. There are a number of models on the market from different manufacturers but they all have the same fundamentals of a trigger, a canister of compressed gas and an inflatable bag that expands to lower your overall density to either bring you to the top of an avalanche, or nearer the top allowing for easier rescue.
There is still some controversy about airbags as there is a feeling that they will lead to more risky behaviour but this seems to be countered by the positive statistics of successful rescues when a skier has triggered their airbag. I have been skiing with an ABS Vario 15 pack since 2010 and have stocked them since we opened our shop in December 2012. The gas bottle operation of this kind of pack, however, is limited by mobility between continents.
Products such as the Black Diamond Halo 28 Jetforce Backpack utilise a battery operated fan to inflate the bag. This new technology improves the ability for these bags to be transported across borders without the need for additional gas bottles.
Regular readers of aussieskier.com will know that over the last couple of years I’ve been doing more and more skiing in the backcountry. Rather than offering this from an expert’s perspective, which it most certainly isn’t, I’m writing a series of posts which are an account of my own personal transition to skiing in the BC. The aim of this series is to give never-evers an insight into the basics if they are considering a transition of their own.
Part 1 – Motivation
The first question people ask me is why it took so long? Why did I wait until my early 30’s to discover this latent passion for skiing beyond the ropes? Especially considering I spent 10 years skiing full time, back-to-back winters, with well over 2000 days on snow in this period.
The main answer is that I was busy. As you move up the ranks of instructing your time becomes more scarce – request private lessons, work with the APSI, training for exams etc quickly gobbles up whatever free time you may have to the point where a day out of boots is bliss and if you do ski on a day off the concept of walking up the hill is somewhat abhorrent to your battle-scarred body.
Add to that concept the notion of expert local knowledge which meant that you became very proficient at putting yourself in the right place at the right time to ski the best conditions that the local resorts had to offer.
Richard Skiing Powder at Snowbird
So even though I spent hundreds and hundreds of days in Utah’s Wasatch I was perfectly content with skiing the resorts, maybe heading out the gates to the very sidecountry, not feeling like I was missing out on very much at all. It’s hard to say whether I would change anything in hindsight. However there was always something nagging in the back of my mind about heading further afield. Part of this was due to reading the fantastic Utah Avalanche Report – these guys literally depended on the weather for their lives and I found that it was bar-none the best forecast at the time. So I read it religiously every day and at the same time absorbed quite a lot of knowledge about snow conditions and avalanche safety and a rudimentary notion of ski touring.
But it wasn’t until a ski trip to Europe in 2009/10 and a chance meeting with our now good friend and Chamonix guide Jerome Para that we realised the potential of human powered skiing. While the first week we spent with Jerome was all lifted with the odd bootpack/sidestep here and there, even though it was mindblowing there was the overwhelming feeling that we were missing out. We saw the lightweight Dynafit gear that he was skiing some pretty extreme terrain with which made us confident we could find gear that got us up the hill but didn’t noodle its way down.
Three tracks in the entire valley
But I must digress for a moment. Regardless of the time it took to make my transition to the BC, I’ve long been of the opinion that skiing on groomers isn’t really skiing. It serves a purpose to get the legs going in the early season, and for working on technique, but at the end of the day, it’s glorified rollerblading in a particularly artificial environment. Nicole and I would go for entire three week ski holidays and only ski groomers to get from A to B – they were a conveyance rather than a goal. So we always had the mindset that skiing on snow in its natural state was our primary objective.
So after our 09/10 trip to Europe (Verbier, Chamonix & Val d’Isere) we resolved to purchase ski touring gear over the following winter and then head back to Europe, based in Chamonix for 3 weeks in Feb/Mar 2011, with the express goal of spending the whole time off-piste and a number of days ski touring – you can see all our trip reports here: Chamonix 2011. This was a superb trip and we have since followed up with expeditions in Japan, another trip to Europe and also the Victorian Alps.
So it’s fair to say that we are sold on the concept, though not turning our backs on lifted skiing entirely. Our weekend trips to Buller are very much an important part of the yearly ski program – keeping the legs working and the technique sharp, though I’m looking to incorporate at least two BC trips to either the Vic or NSW Alps each Southern Winter on top of our overseas adventures.
Keep reading, Part 2 on Backcountry Safety and Part 3 on Backcountry Equipment are available now.