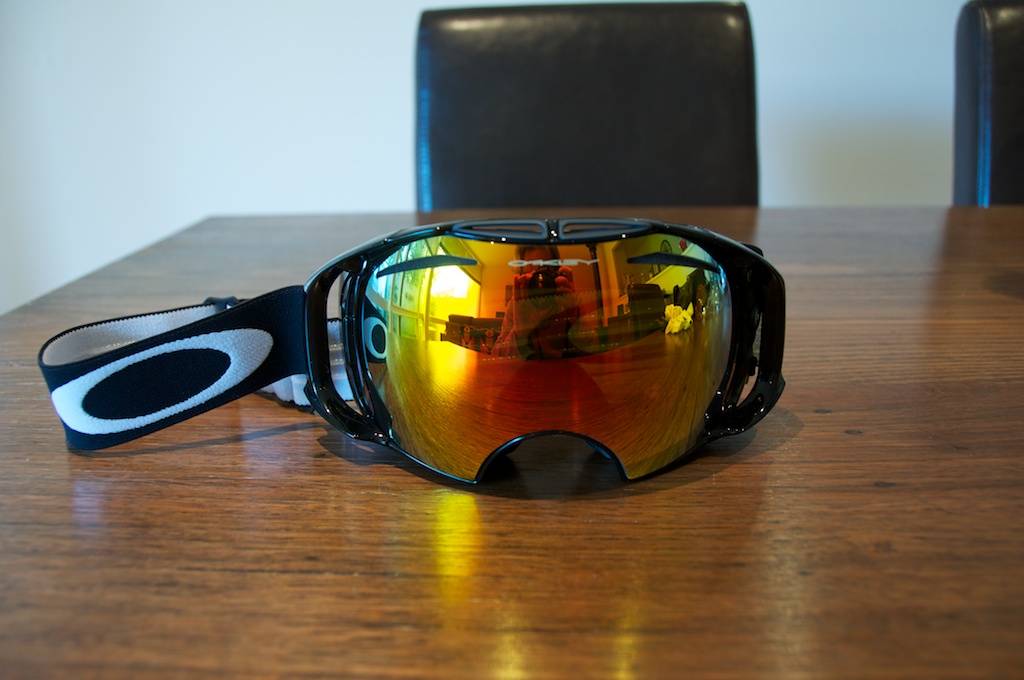
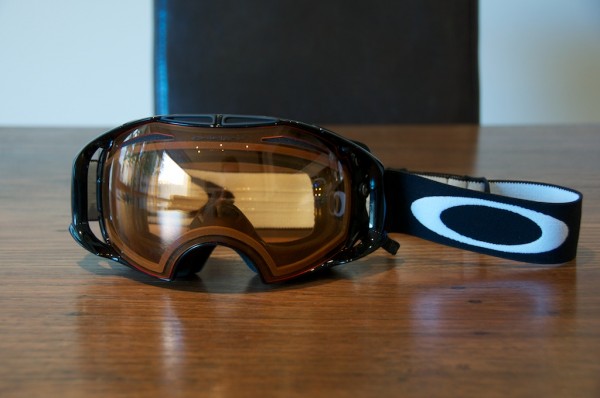
I was pretty stoked to find out that I was being sent a pair of the latest Oakley’s Airbrake Goggles for review.
I have long been a fan of their goggles, owning many pairs of their recent Crowbar and Splice goggles as you will no doubt have seen from my Trip Reports over the years. My face has been exclusively clad by Crowbars since about 2006 and I have become somewhat renowned for my signature white frames. I’ve had a few different lens tints over this time as well, and this year I decided to check out their new Splice goggles to replace an old pair that fell apart in Japan in February.
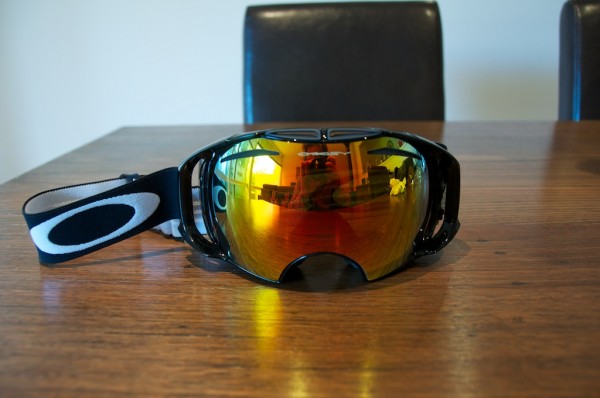
The Airbrake is one of the bigger innovations in the goggle world for some time. The essence of these models is a quick-release hinge feature that Oakley have called ‘Switchlock’ to allow swift and simple changes of lenses to suit a range of conditions.
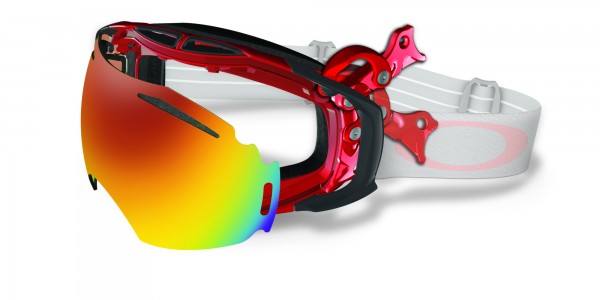
Changing goggle lenses is not a new concept – brands have been selling an extra lens or two with their frames for a number of years, but this has always been hampered by the act of changing the lenses, a process I always found most frustrating and never bothered with. Lining up the little catches inside the frame with the notches in the lens was fraught with danger, I could never get the nose to line up right, and often put fingerprints everywhere in the process. I still have a pair of goggles somewhere in my house where I never managed to get the nose snapped back in right and there’s a gap between the frame and the lens. Infuriating.
So I never bothered with changing lenses, my solution was always two pairs of goggles, one with a dark lens for good conditions, and one with a light lens for poor weather. This system worked well for me, and I even perpetuated it earlier this year buying my fourth pair of Crowbars with a Black Iridium lens for sunny days, and a pair of Splices with a Hi Intensity Yellow lens for the whiteouts. I don’t generally tend to wear sunglasses unless it is the height of spring, or if I’m ski-touring which is a much too hot & sweaty exercise for goggles, though I always have a low-light pair in the backpack.
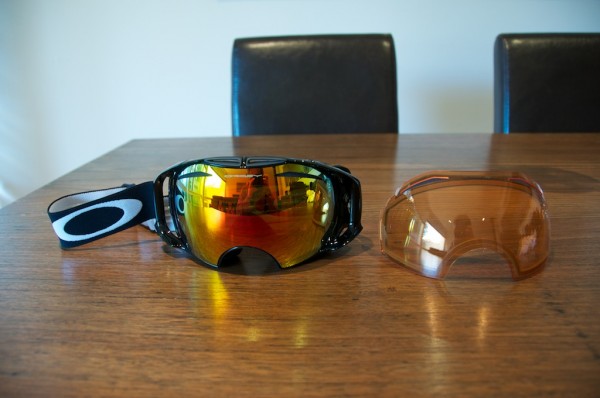
Enter the Airbrake. Oakley sent me a pair with a gloss black frame and two lenses – a darker Fire Iridium for sunny days and Persimmon for poor weather. Naturally the first thing I did when I opened the box was to go straight for the lens changing mechanism, which was a simple affair. Lift the hinge, angle the lens out, line up the LHS catch with the notch on the new lens, hinge it back in and snap the hinge closed.
Here’s the official Oakley video showing the Switchlock mechanism:
https://vimeo.com/27735791
It’s at this point that I need to disclose that I am totally anal about my goggles. Perfection best describes the state in which I attempt to keep them – I try to never touch the lens at all, and touching the inside lens is a massive no-no. I carry the bag to clear up the odd stray eyelash or ‘sleep’ from my eyes that finds its way in there, and my biggest pet hate is when a drip from a chairlift hits the top of my goggles, goes through the foam and hits the inside lens.
So while the Airbrake mechanism makes it insanely easy to change lenses it is a little tougher to do without leaving fingerprints on the lens, as you do need to apply some pressure to get the catch on the RHS to line up in order to snap down the locking hinge. This is easily done if you have the bag handy or use your sleeve.
Here’s some photos of the process:
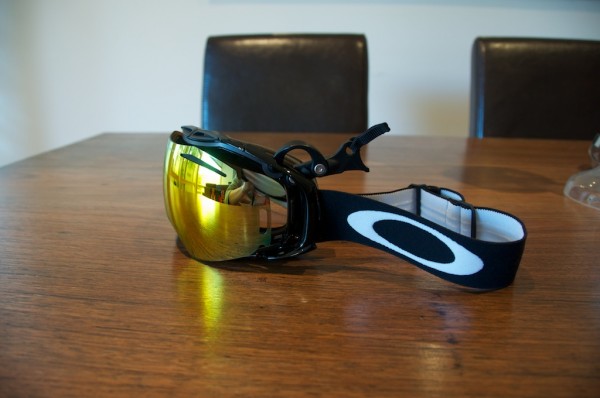
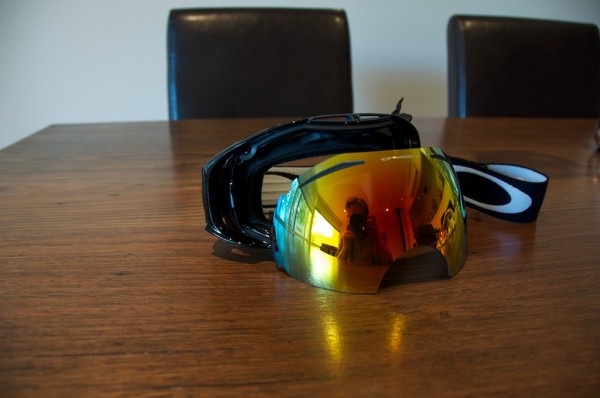
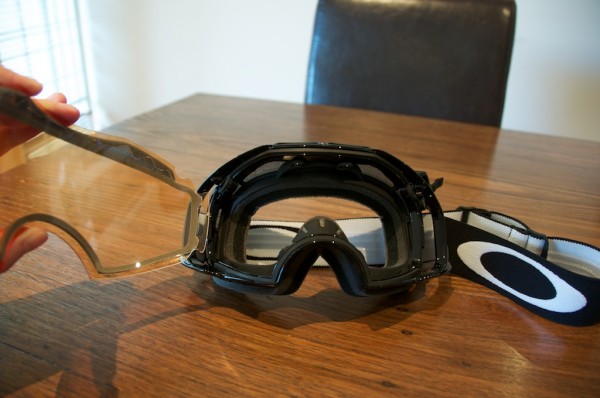
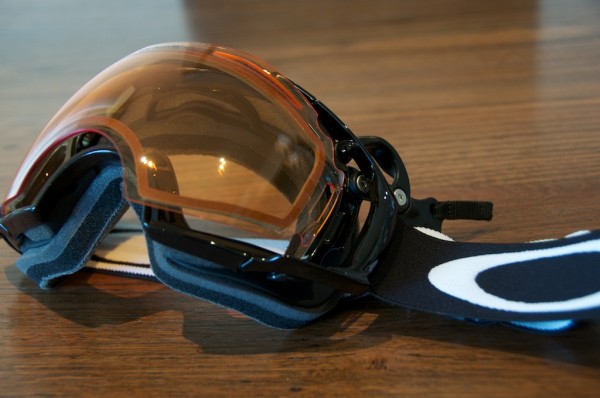
So that’s the lens changing mechanism covered, how were they to use?
Fit/Comfort: The first thing I noticed was that they were particularly comfortable – even though the foam composition looks the same as my new Crowbars/Splices it definitely felt softer – perhaps this could be due to the shape of the frame suiting my face even better? They also sealed well around my nose which is where many goggles fall short for me. I have a fairly round face and my cheekbones tend to push goggles forward leaving a gap around the nose. But the Airbrake fit is excellent.
Helmet Compatibility: They do tend to push down on my nose when wearing a helmet but this is the same for both Splices and Crowbars. Note that if you regularly wear a helmet it is an absolute must to test any new goggles you are considering with your helmet for fit. Exposed forehead makes baby jesus cry, though with a large chassis goggle like an Airbrake or a Splice this is unlikely unless your helmet is a very poor fit. The inside of the strap contains a rubberised compound to hold the goggles in place on the outside of your helmet.
Lens Tints: I was supplied Fire Iridium and Persimmon. These would not be my top choice of lens tints for Australian skiing, particularly Mt Buller – in both cases these are too dark. The weekend I tested was very sunny so I only tested the Fire lens – naturally in bright sunshine they are fantastic and allow your eyes to relax even in direct sun, but late each afternoon some cloud came over and when the light dropped the definition was not fantastic. Persimmon is a long-standing Oakley lens tint which I have used in the past, and it is just too dark for a true Buller whiteout.
My favourite lenses are Black Iridium for my ‘sun’ goggles and Hi Intensity Yellow for my fog goggles. On the Oakley Website you will see that Fire Iridium transmits 16% of light, whereas Black Iridium transmits 18%, not a massive difference but in my experience I’ve found that Black Iridium is a good choice as you can still see well if the light unexpectedly drops. Persimmon has a transmittance of 62% whereas HI Yellow has a massive 81% – in my opinion you need all the help you can get in a true whiteout
The Fire/Persimmon is probably an excellent choice combination for areas that do not experience the severe weather of Australia – back when I lived in Utah & fog was a distant memory they would have been perfect but this would not be my first choice combination of lenses. Of the combinations available on the Oakley Website I would probably choose the Dark Grey/HI Yellow combo.
Vision: Oakley goggles have been renowned for their optical clarity – their tagline for many years has been ‘High Definition Optics’ and they pride themselves on being able to curve lenses with no distortion. The Airbrake is no different, the only thing I noticed was a slight compromising on the peripheral vision of your left eye – you can clearly see the internal sealing between the inner and outer lens on your left eye only, this is unusual for Oakley goggles and on closer inspection you can see that this is due to the Switchlock mechanism being on the same side and impinging a little on the space available.
Ventilation: I wasn’t able to test this thoroughly as the terrain at Buller was limited to groomers, so nothing that got the blood pumping and the temperatures/sweat rising. Looking at the top down, there doesn’t seem to be as much area of venting as my Splices, but this is just speculation and I will report back
Durability: Again this is impossible to test in a short timeframe. It is worth noting that the new design means the lens sits proud on the outside of the frame, instead of the traditional style of bezel which added an element of protection from the frame. In the case of the Airbrake the lens will be more subject to scratches and knocks so extra care will need to be taken. It will take me a couple of years to figure this out, but all my Crowbars first failed when the top foam disintegrated due to UV, this then lets snow blow in, at which stage the goggles are cooked. So I will be keeping an eye out for this.
The other durability aspect which I have not yet tested is skiing/riding with the second, spare lens in your pocket. It is quite curved so doesn’t sit well naturally, and could easily be damaged by a fall. When skiing in-bounds I tent to be very minimalist, just carrying my wallet, phone & lift pass, but others tend to carry the kitchen sink and I guess for them a lens is not too much to add.
Appearance/Looks: Oakley are never shrinking violets when it comes to their design. The Airbrake is no exception – it is a very striking looking pair of goggles and I did catch quite a few people checking them out on the hill. Naturally skiers are pretty keen on new innovations so I had quite a few people ask me about them, so perhaps they aren’t the best choice if you don’t like the attention.
Value: This is the most interesting aspect of the concept behind the Airbrake. At AUD$279 RRP they are not a cheap pair of goggles. But are they just one pair of goggles? The other goggle in the range that is most similar is the Splice, if you buy a pair of them plus a spare lens you are up for approx $295, or if you buy two pairs for light & dark you are up for north of $400. Before you leave a comment that you can get 2 pairs of goggles for much less than $279 make sure the comparisons are apples for apples. So based on this info, I wouldn’t put the Airbrake at the value end of the market, but for a top notch goggle, a spare lens, and a bucketload of innovation my opinion is that the price is fair.
Other: So what do I get in the box? Inside the box you get the Airbrake goggles, two lenses, a Goggle Bag that includes a divider for carrying multiple lenses, and also a zip-up soft case.
Summary: These goggles are intended to be a statement, as the flagship of the Oakley range – this is clear by their incredibly striking styling. They are also a clear answer to the phenomenon of most core skiers/riders owning (at least) 2 pairs of goggles for different conditions. Changing lenses was a complete pain prior to this technology and I am sure many are similar to myself and never bothered, for the first time this is now a viable option.
Naturally you can’t test all aspects of a goggle in a single weekend so I will reprise this review later in the season when I have better ideas on the ventilation and durability aspects of the goggles, and also a comment on their practicality, whether I start skiing with a spare lens in the pocket, or do I just make a choice for the day in the lodge and go with it.
Got the Airbrake? Let us know below in the comments what your thoughts are. Got any questions? Ask one below and I will do my best to answer it.
Review Disclosure: These goggles were supplied at no cost by Oakley Australia for review purposes.


